

Welcome back, my fledgling hackers!
Nearly every commercial enterprise worth hacking has an intrusion detection system (IDS). These network intrusion detection systems are designed to detect any malicious activity on the network. That means you!
As the name implies, a network intrusion detection system (NIDS) is intended to alert the system administrator of network-based intrusions. As a hacker, the better we understand how these NIDS work, the better we can evade them and stealthily enter and exit a network without detection. In an attempt to train you to evade these systems, I am beginning new series on how NIDS work.
Introducing Snort: Our NIDS of Choice
Snort is an open-source NIDS that is the most widely used NIDS in the world. Some estimate its market share at over 60%. It's used by such large organizations as Verizon, AT&T, the U.S. State Department, most U.S. military bases, and millions of medium to large businesses around the globe. Last month (July 2013), Cisco announced that they would be acquiring the parent company of Snort, Sourcefire Inc. of Columbia, MD. This insures that Snort will remain the dominant NIDS on the planet for some time to come, making it increasingly important that we understand Snort—so we can evade it.

Fortunately, Snort is built into our BackTrack, so we don't need to install it. If you do need to download it, you can find it here.
Step 1: Fire Up Snort
Snort is basically a network traffic sniffer that can apply rules to the traffic it sees to determine whether it contains malicious traffic. We can start Snort in sniffer mode by opening any terminal in BackTrack and typing:
- snort -vde
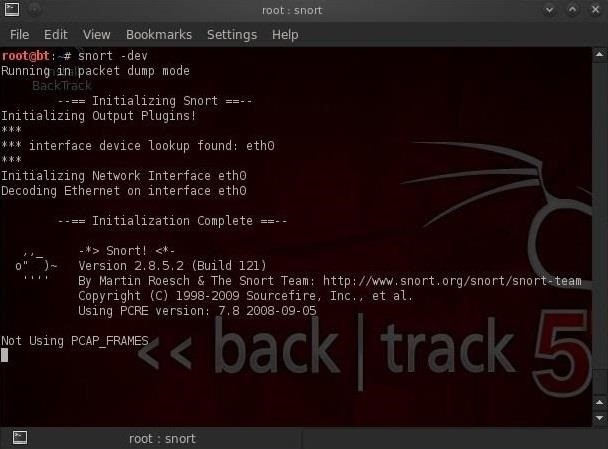
After we hit enter, we begin to see packets going past the screen in rapid succession. Snort is simply sniffing packets from the wire and displaying them to us.
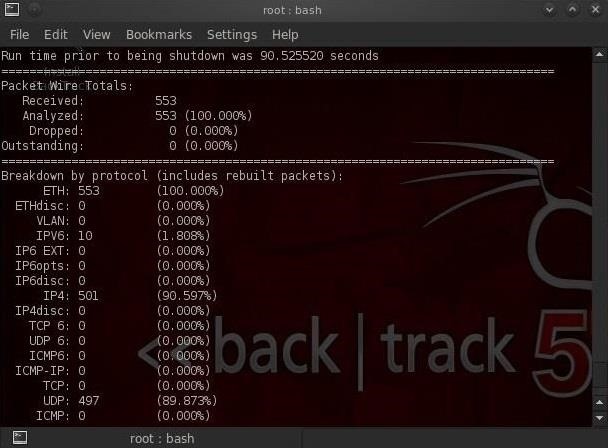
To stop Snort, hit the Control C. When we stop Snort, it displays our statistics on the packet capture.
Step 2: Intrusion Detection Mode
To get Snort to operate in Intrusion Detection (IDS) mode, we need to get Snort to use its configuration file. Nearly all applications in Linux are controlled by a configuration file that is a simple text file. This same applies to Snort. Snort's configuration file is named snort.conf and is usually found at /etc/snort/snort.conf. So, to get Snort to use its configuration file, we need to start it with:
- snort -vde -c /etc/snort/snort.conf
Where -c says use the configuration file, and /etc/snort/snort.conf is the location of the configuration file.
When Snort starts in IDS mode, we begin to see a screen similar to that below. Eventually, the screen will stop scrolling and Snort will begin to watch your network traffic.
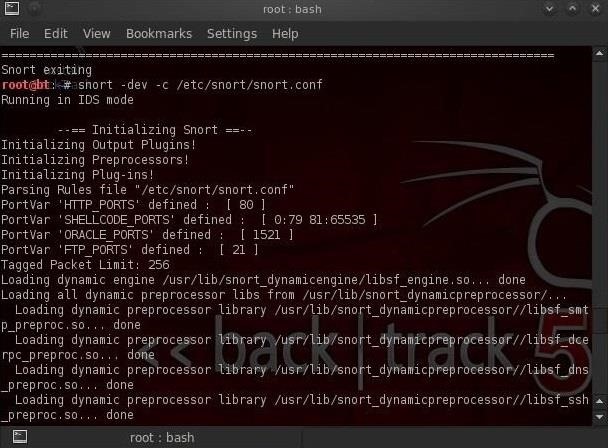
Now Snort is sniffing our wire and will alert when something malicious appears!
Step 3: Configuring Snort
Snort comes with a default configuration file that, for the most part, will work with little editing. The configuration has plenty of comments to explain what each line and section does, so you can figure it out with little outside assistance.
Their are at least 3 areas, though, that need some attention and configuring...
- The EXTERNAL_NET variable
- The HOME_NET variable
- The path to the Snort rules
Without the Snort rules, Snort is just a sniffer/packet logger, far from the powerful IDS it can be. That being said, let's get inside that Snort configuration file and make the minimum changes to get Snort to run as an effective IDS.
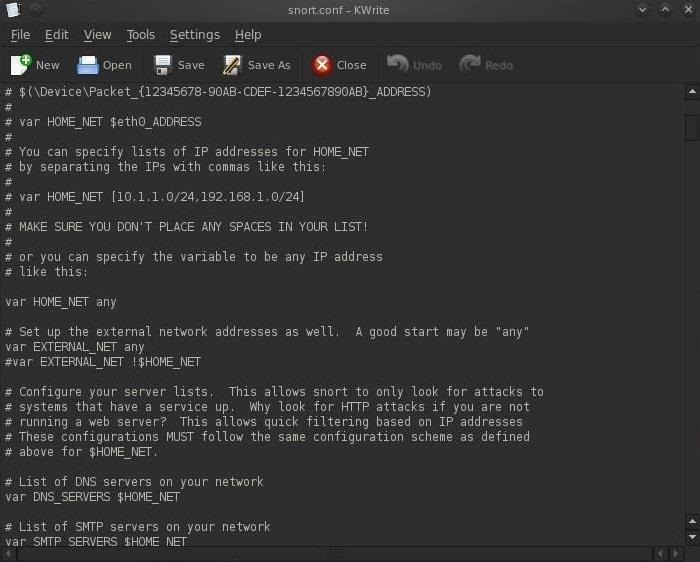
Let's open the snort configuration file with KWrite.
- kwrite /etc/snort/snort.conf
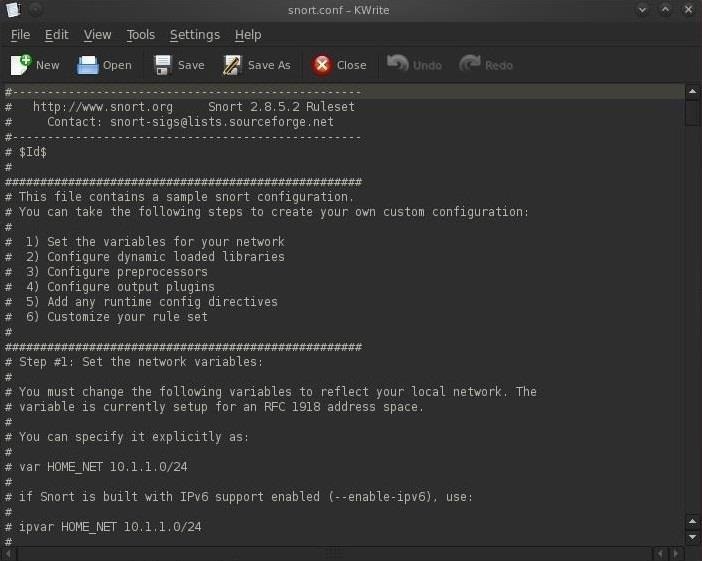
As you can see in the screenshot above, the configuration file is comprised of six (6) sections.
- Set the variables on your network
- Configure dynamic loaded libraries
- Configure preprocessors
- Configure output plugins
- Add any runtime config directives
- Customize your rule set
We need to first set the variables for our internal and external network. These are defined by the lines:
- var HOME_NET
- var EXTERNAL_NET
We can define our HOME_NET as the IP address or subnet we're trying to protect. You see in the screenshot that it's set as "any." This will work, but it's not optimal for detecting malicious activity. We should set the HOME_NET to our internal IP address, such as 192.168.1.1, or our internal subnet, such as 192.168.1.0/24.
In most cases, security admins will define their EXTERNAL_NET as everything that is NOT their HOME_NET. To accomplish this, we can simply negate (!) the HOME_NET or ! HOME_NET.
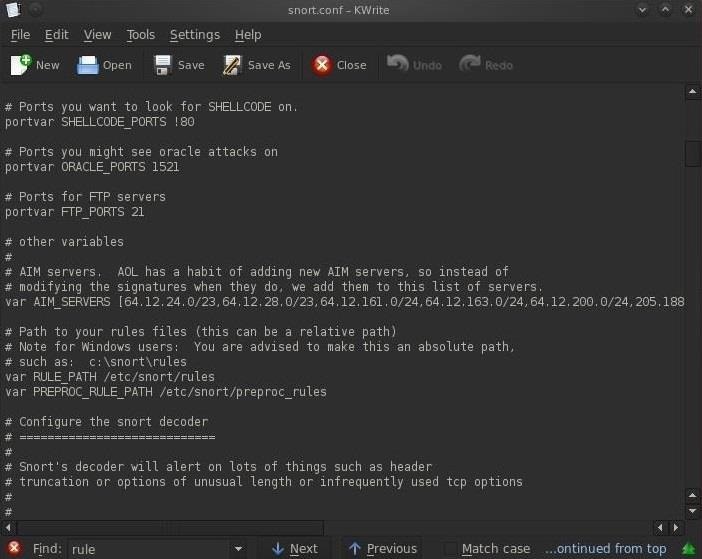
Next, we need to set our path to our rules. As we can see in the screenshot below, about two-thirds of the way down, there is:
- var RULE_PATH /etc/snort/rules
In most installations, this path will be correct (but does vary with different installations) and we can simply leave it as is, but make certain that your rules are in this path before assuming so. When you are done, simply save the snort.conf file.
Step 4: Checking the Snort Rules
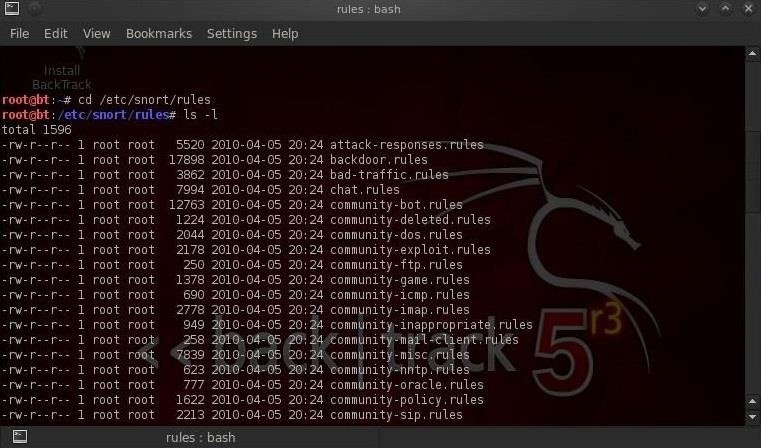
We can navigate to the rules directory by typing these two commands:
- cd /etc/snort/rules
- ls -l
In this way, we can see all of the files that comprise our Snort rules. It's these Snort rules that are designed to catch intrusions and alert the security admin.
In my next tutorial in this series, we will examine these rules and how they work to catch intrusions. The better we understand these Snort rules, the better we able to evade them!
If you have any questions or comments on Snort, please post them below. If you have questions on a different topic, visit the Null Byte forum for help.
Just updated your iPhone? You'll find new emoji, enhanced security, podcast transcripts, Apple Cash virtual numbers, and other useful features. There are even new additions hidden within Safari. Find out what's new and changed on your iPhone with the iOS 17.4 update.


17 Comments
hey mate every time i type in "snort -vde" it comes up with not using PCAPFRAMES do you no what this means
Daniel:
PCAP is the standard file format for capturing TCP/IP traffic. You should not be concerned with that message as we all get it. When Snort is in sniffer mode, it doesn't use pcap frames.
OTW
I cannot get this to work on my Kali LInux distro
Joshua:
I need more info to help you. What happened? What error messages?
OTW
Initializing rule chains...
Warning: /etc/snort/rules/dos.rules(42) => threshold (in rule) is deprecated; use detection_filter instead.
ERROR: /etc/snort/rules/community-smtp.rules(13) => !any is not allowed
Fatal Error, Quitting..
Am getting this error while using snort -vde -c /etc/snort/snort.config
Criss:
Go back and change the EXTERNAL_NET variable to "any" in the snort.conf. That should take care of it.
OTW
When I type in:
snort -vde
It says command not recognized. It's the same error that you get when you try to run a program that is not installed on the system.
Joshua:
I'm pretty sure Snort is installed on kali, but it is not in the PATH. You can either add snort to your path or navigate to snort's directory and run snort -vde from there.
OTW
it is 'any' without changing
Criss:
Your error message says:
ERROR: /etc/snort/rules/community-smtp.rules(13) => !any is not allowed
Fatal Error, Quitting..
Notice the "!" before "any" and the comment that it is not allowed. You must have put a ! before any. Take it out and Snort should run.
OTW
Thank You very Much Sir! It Worked i removed '!' from two files
Loading all dynamic detection libs from /usr/local/src/snort-2.9.6.0...
WARNING: No dynamic libraries found in directory /usr/local/src/snort-2.9.6.0.
Finished Loading all dynamic detection libs from /usr/local/src/snort-2.9.6.0
Loading all dynamic preprocessor libs from /usr/local/src/snort-2.9.6.0/src/dynamic-preprocessors...
WARNING: No dynamic libraries found in directory /usr/local/src/snort-2.9.6.0/src/dynamic-preprocessors.
Finished Loading all dynamic preprocessor libs from /usr/local/src/snort-2.9.6.0/src/dynamic-preprocessors
Log directory = /var/log/snort
WARNING: ip4 normalizations disabled because not inline.
WARNING: tcp normalizations disabled because not inline.
WARNING: icmp4 normalizations disabled because not inline.
WARNING: ip6 normalizations disabled because not inline.
WARNING: icmp6 normalizations disabled because not inline.
..
.
.
.
.
.
.
ERROR: snort.conf(427) Unknown preprocessor: "smtp".
Fatal Error, Quitting..
i got that error when i start snort as IDS mode..
anyonw know how to solve it?thankyou
Snort is included in kali? Cause i cant open it
http://tools.kali.org/tools-listing
i visite snort website.. and followed the steps to install it.
but when i type "make"
i get
#~make : * No targets specified and no makefile found. stop.
sorry but when i try to install snort, says that i didnt libpcap 1.0.0 (actual version is 1.8.0)
Is there a next part of the tutorial?
Share Your Thoughts