

Containers are isolated software instances representing applications, servers, and even operating systems—complete with all of their dependencies, libraries configuration files, etc.—and they're taking over the corporate world. The ephemeral, portable nature of containers help them stay current and speedy, and they can work on pretty much any computer, virtual machine, and cloud.
But corporations aren't the only ones that can take advantage of containers. They're particularly attractive to hackers since specialized containers can be created, used, and disposed of much like burner cell phones—without having to worry about a physical device that needs to be tossed out.
- Don't Miss: How to Create a Virtual Hacking Lab
In this guide, we're going to learn how to install and use Docker, which is self-proclaimed as "the world's leading software containerization platform."
Docker containers wrap a piece of software in a complete filesystem that contains everything needed to run: code, runtime, system tools, system libraries – anything that can be installed on a server. This guarantees that the software will always run the same, regardless of its environment.
We're going to use it to create and securely store our own optimized pen-testing OS container, which can then be easily pulled down whenever you want—on whatever system you've infiltrated—and quickly remove it from the machine with simple commands.
Note: This is the first of three parts on installing and learning about Docker and containers to make and securely store our own private pen-testing OS instance.
Step 1: Install Docker to Your Local Machine
Docker needs to run on your machine and not from a thumb drive, for example. Other than that, the only real prerequisite is a 64-bit machine running Ubuntu Linux 16.04 or equivalent (the latest Kali version falls under this umbrella). Slightly earlier Ubuntu or Kali versions can work with these instructions; ask me in the comments if you need any help.
To get started, let's first make sure your APT package system is up to date, as well as your Ubuntu version. Copy/paste the following initial commands and run them in order.
sudo apt-get update
sudo apt-get dist-upgrade
This next command is all three of these lines; just copy/paste all three at once into your terminal window and hit enter. This command will verify that you're going to get Docker from Docker directly, so that even if your DNS is spoofed on your network, or if there's some other MiTM attack, the key still needs to match or it won't work.
sudo apt-key adv \
--keyserver hkp://ha.pool.sks-keyservers.net:80 \
--recv-keys 58118E89F3A912897C070ADBF76221572C52609D
Now update your local "sources" list to accept the Docker install. The "xenial-main" portion is specific to Ubuntu 16.04—if you can match your Ubuntu, Debian, or Kali system to a recent Ubuntu release in that same language, the command should work.
echo deb https://apt.dockerproject.org/repo ubuntu-xenial main | sudo tee /etc/apt/sources.list.d/docker.listNow update APT again, and install Docker.
sudo apt-get update
sudo apt-get install docker-engine
And make sure that your user is among the docker group.
sudo usermod -aG docker $USERWe should be all set now to start downloading and installing containers.
Step 2: Verify That Docker Is Working
To make sure everything is working, let's start the Docker service, then pull down and run the "hello-world" container.
sudo service docker start
sudo docker run hello-world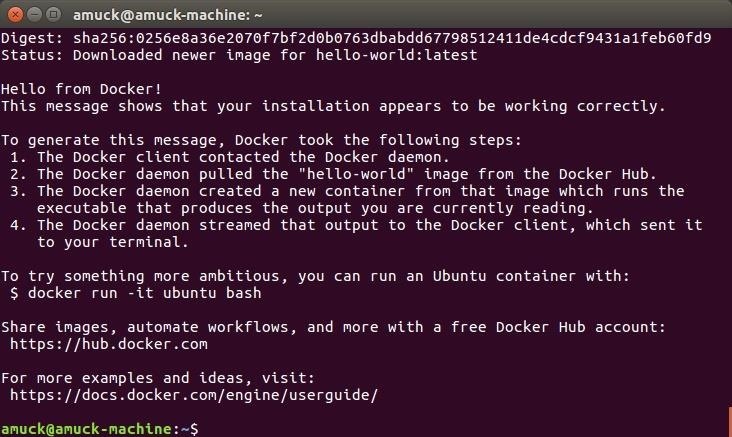
Do you see this? You've just installed Docker, then downloaded and run your first container. Nice work!
Step 3: Install the Ubuntu Linux Container
Now that we've got hello-world sorted out, let's dive a bit deeper into Docker. Instead of asking for hello-world again, we're going to ask for Ubuntu, and Docker will download just enough Ubuntu to run Ubuntu in a container on our machine.
docker run ubuntuThis command will take a bit longer to complete compared to the hello-world container, since it's a larger file, but soon enough you'll be back at your local machine prompt. So let's SSH into that new Ubuntu container and take a look around with the listing command.
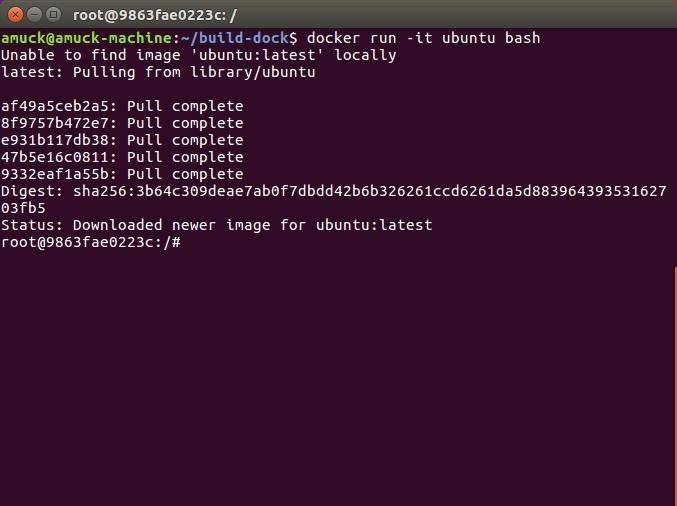
docker run -it ubuntu bashUnlike the hello-world container, which can only produce a message and some other text, the Ubuntu container is pretty much a basic Ubuntu install. Notice that after Docker pulls everything it needs down to your machine, you're already in the new container? You are. The run -it portion managed that.
lsCool, huh? This isn't your Ubuntu or Kali machine—this is Ubuntu running in a container on your machine. When you're done taking a look around that minimal Ubuntu installation, you can exit it.
exitAnd now you're back to your machine, not in the Docker container you pulled down.
Step 4: Find Your Images & Activity
But where is all that stuff now? The following command will list all of your Docker images.
docker images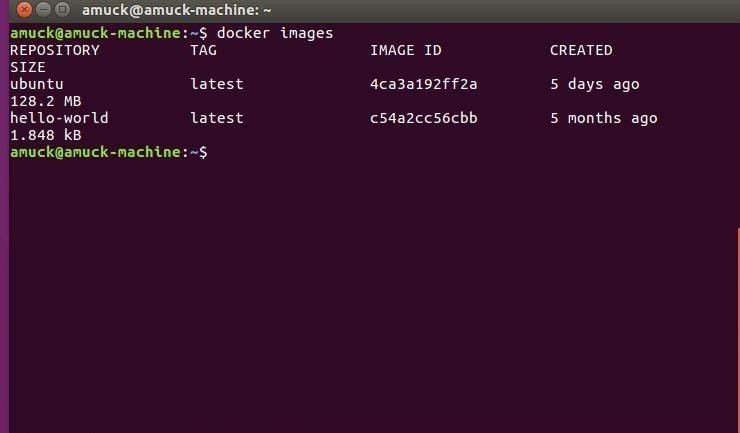
They are, "hello-world" and "ubuntu," the two containers we asked for. But that's not all that Docker has created—it also spawns containers that essentially represent the container activity on your machine. Those other containers are visible with the following command.
docker ps -a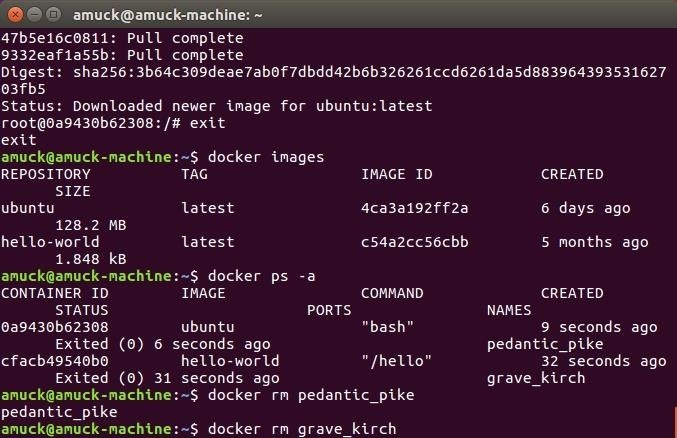
See those nonsensical names after the docker ps -a command... the pedantic_pike and the grave_kirsch names? Those represent the activity in the two containers that were downloaded.
Step 5: Delete Your Containers & Activity
So let's say you want to delete all of the activity from the containers we downloaded. First, and you may have to run this a few times, where crazy_name is your nonsensical name visible with docker ps -a:
docker rm crazy_nameThen, delete your "hello-world" and "ubuntu" containers:
docker rmi $(docker images -q)Now let's list the Docker images we have again to verify that they were removed:
docker imagesAll gone! Not to worry, though, Docker itself is still installed, and you can grab "hello-world" and Ubuntu again if you want.
Step 6: Install Software into an Ubuntu Container
Now we want to try and install some software inside of our OS container, so let's grab Ubuntu again with the same run -it command we used earlier in Step 3. Make sure to get rid of everything we've done so far according to the directions above in Step 5, then ask Docker for Ubuntu:
docker run -it ubuntu bashYou should automatically be in your Ubuntu container once it's done, just like before.
Now let's install something in our Ubuntu container. We'll pick John the Ripper, a free, open-source password cracking tool. It's apt-based, so that works, but a little differently:
apt-get update
apt-get install -y johnYes, you have to use apt-get, not simply apt, and you don't need to have root to install anything, because you are already root in the containers that you create. And you have to pass -y to keep acknowledging everything during the install.
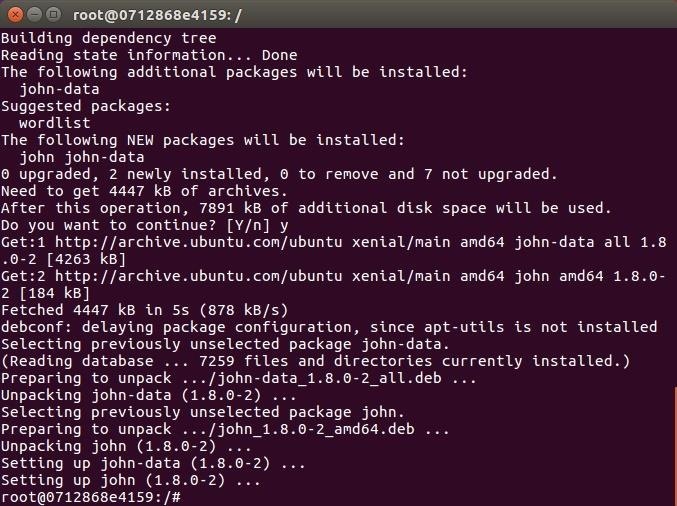
But you updated, and were then able to install software just like on a regular Ubuntu install. This will surely come in handy, won't it?
That's it for this part in my container series. We have Docker installed, we can pull down and run Docker containers, and we now know a few different commands to manage what Docker is doing. Next time, we'll build on these skills by automating software installs into an Ubuntu container, so hit up the link below to see how that's done.
Just updated your iPhone? You'll find new emoji, enhanced security, podcast transcripts, Apple Cash virtual numbers, and other useful features. There are even new additions hidden within Safari. Find out what's new and changed on your iPhone with the iOS 17.4 update.


3 Comments
awesome explanation you have given..
but i have apply sudo before running the docker
Where do I find the signed repo for Ubuntu 18.04 (Bionic Beaver)?
I changed the original command to reflect the most current Ubuntu LTS release (18.04), but I get a 'forbidden' error when attempting to update my sources.
Looks like the source was added successfully, but here is the error:
I know I can create an exception to allow unsigned repos, but I'd rather not if I can avoid it.
To install docker on Ubuntu 18.04, first add these repos to help facilitate APT over HTTPS:
Add the gpg key:
Then add the repo:
That will get docker going on Bionic Beaver
Share Your Thoughts