
Welcome back, my hacker novitiates!
In the previous two posts in this series, we looked at the basics of buffer overflows. In this post, we will look at one technique for finding buffer overflows. We will try to send random, oversized, and invalid data at a variable to see whether we can make it crash or overflow. This process is known as fuzzing. It is often the first step to developing an exploit, as we need to find some variable that is susceptible to overflowing.
There are a number of commercial fuzzing tools, most notably Peach, which I hope to do a tutorial on soon. It is an excellent fuzzing tool, but it is not free. On the other hand, Kali has a number of fuzzing tools built in, including Bed, Sfuzz, and Powerfuzzer, among others.
Fuzzing with Spike
Among these free fuzzers, Spike is maybe the best. Spike is poorly documented and less than intuitive, but is powerful and adaptable once you become familiar with it. In fact, adaptability is probably Spike's strongest feature, while its ease of use is probably its weakest.
In this tutorial, I hope to show you the basics of using Spike to lift the veil on its seemingly bewildering inner workings so that you can take what you learn here and run with this powerful tool to find your very own buffer overflow.
Essentially, Spike is an API that enables us to quickly develop stress tests of the protocol or application of our choice. Since many of the protocols use similar data primitives, Spike gives us the capability too create these primitives and then vary them in ways they may be able to break the protocol or application.
Step 1: Download & Install Vulnserver
To learn and practice our fuzzing with Spike, let's download and install a purposely Vulnerable server for a Windows system. This server, known as vulnserver, can be downloaded from here. Download it and install it on a Windows system.
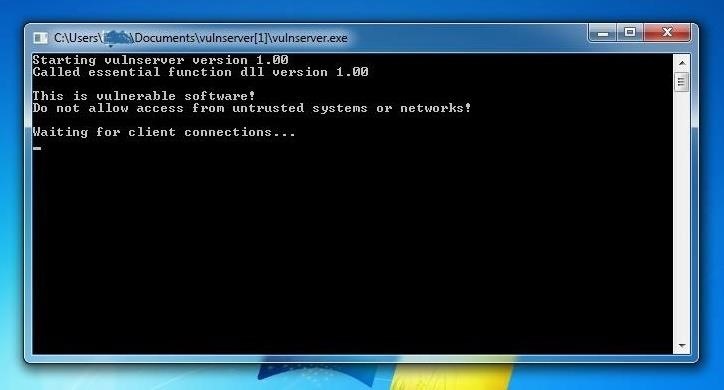
To start Vulnserver, simply click on the .exe file or type vulnserver on the command line followed by the port you want Vulnserver to listen on. Vulnserver server listens on port 9999 by default, so if you simply execute the Vulnserver, it will listen for connections on port 9999. If you want Vulnserver to listen on a different port, simply run the executable followed by the port number such as:
C:\vulnserver 2015
This will create a vulnerable server listening on port 2015. In this lab, I will be using the default port 9999, but you can use whatever port you prefer.
Now, let's try to connect to the Vulnserver with Netcat from our Kali attack system.
kali > nc 192.168.181.129 9999
As you can see below, Vulnserver displays its welcome banner and informs us that we can type HELP to get more information on the Vulnserver. Let's type HELP.
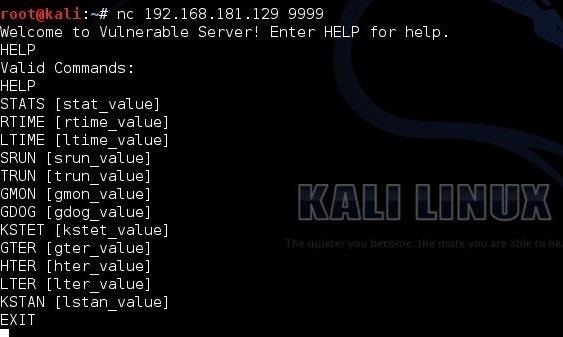
Vulnserver responds with its valid commands.
Step 2: Fuzzing with Spike
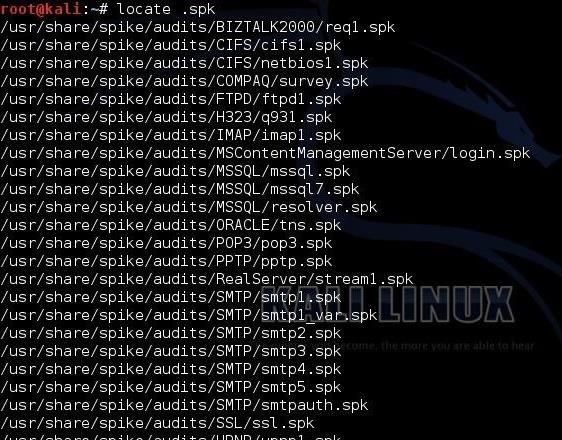
Spike has the capability of generating custom scripts to test the various protocols and applications. These custom scripts are really the strength of Spike. When a script is created in Spike, it is appended with the .spk extension. Therefore, if we want to find ready-made Spike scripts before we advance to writing our own, we can find them by typing:
kali >locate .spk
This will locate any file with .spk in it. When we do so in Kali, we get the output seen below.
Each of these scripts is designed to "audit" various protocols and attempt to "break" them. They are organized into directories based upon the protocol they are designed to "break." We can find them all at:
/usr/share/spike/audits
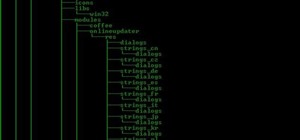
When we navigate to that directory and do a long listing (ls -l), we can see all of the sub-directories with scripts for auditing various protocols.
kali cd /usr/share/spike/audits
kali ls -l
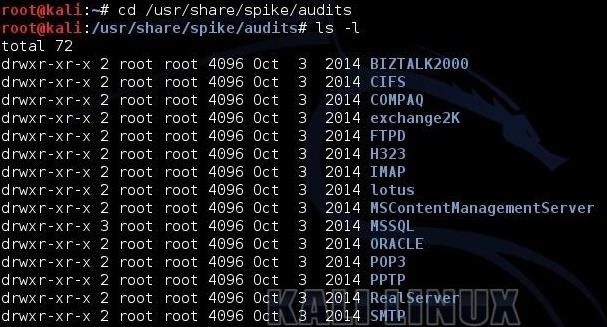
As you can see in the screenshot above, there are many ready built "spikes" that you can use to audit protocols such as:
- Compaq
- MS Exchange 2000
- IMAP
- Oracle
- MS SQL Server
- SMTP
- FTP
- POP3
- And many others
Each directory then includes numerous scripts that can used to test and audit the given protocol.
Step 3: Fuzzing TCP Applications
In this tutorial, we will be fuzzing a server, so we will probably want to use either TCP or UDP. Spike has a built-in script interpreter for each, namely generic_send_tcp and generic_send_udp, respectively. These interpreters are capable of sending data (in our case, fuzzed data) to the respective protocols when we supply an IP address and port number.
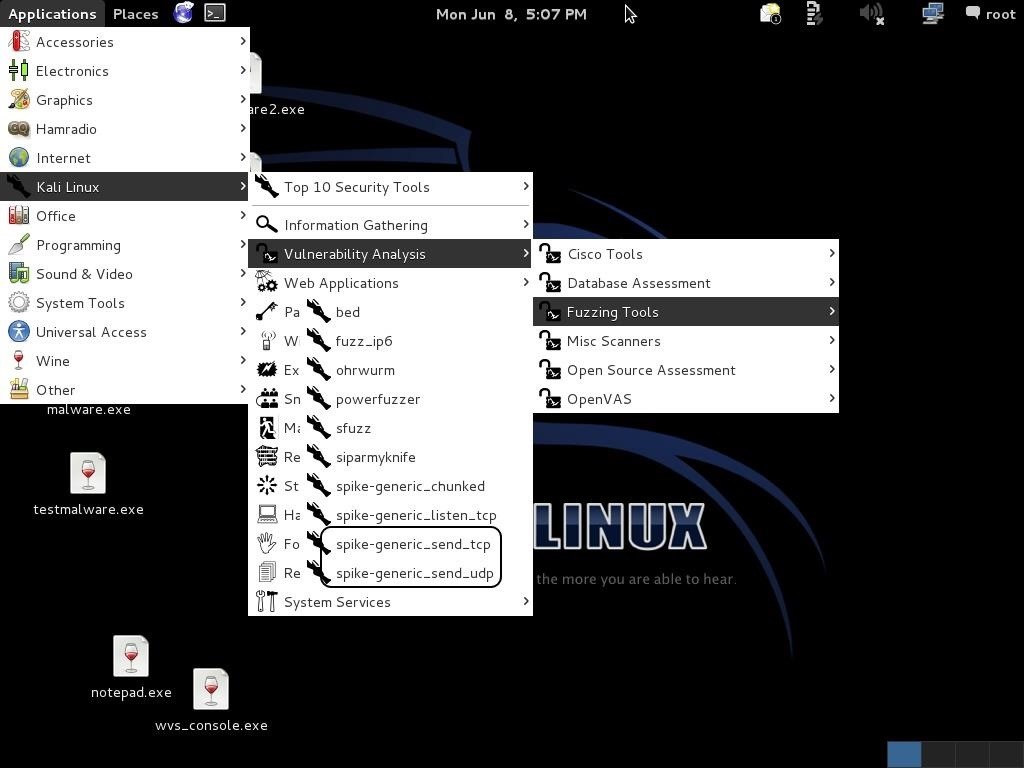
In Kali, these commands can be found at /usr/bin, meaning that we can run them from any directory. In addition, we can access them through the GUI at Applications -> Kali Linux -> Vulnerability Analysis -> Fuzzing Tools.
Let's try typing generic_send_tcp and see whether we can pull a help screen to give us some idea of how to use this command.
kali > generic_send_tcp

As you can see above, when we run this command, it returns a basic help screen. Note that to run this command, we simply need to supply:
- Target IP address
- Port number
- A spike script an
- SKIPVAR and SKIPSTR
A typical command might look something like this:
kali > ./generic_send_tcp 192.168.1.101 80 somespikescript.spk somevariable somestring
All of the parameters here, I think, are self-explanatory with the exception of the last two, SKIPVAR and SKIPSTR. These two variables enable us to move to the middle of a fuzzing session defined by a Spike script. In other words, we can start a script, stop it, and then return to it at a later time. In our case, we will keep things simple and set these variables to 0.
Let's try using one of the built-in scripts against our Vulnserver to start. Let's try fuzzing the SMTP protocol of our Vulnserver.
kali > generic_send_tcp 192.168.181.129 9999 /usr/share/spike/audits/SMTP/smtp1.spk 0 0
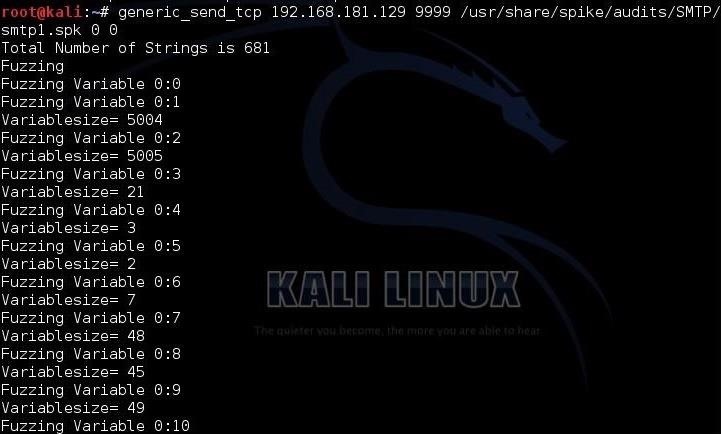
As you can see in the screenshot above, this command starts Spike sending random, oversized, and invalid input to the SMTP server to test whether it can "handle" these inputs. If we go back to our Vulnserver on our Windows system, we can see that the Vulnserver handled this onslaught of irregular data without skipping a beat!
Step 4: Creating Our Own Fuzzing Script
The beauty of Spike is that we can create our own script to fuzz a particular protocol or application. Remember, when we connected to the Vulnserver with Netcat above, Vulnserver responded with its banner, and when we typed HELP, it responded with its commands. Let's try creating a script that will test the TRUN command in Vulnserver.
We need to open a text editor to create our script. Any text editor will do, but I will be using Leafpad for this tutorial. Our script will:
- Read the banner that the server sends;
- Simulate that the user sending the TRUN command;
- Randomize the user input with the TRUN command.
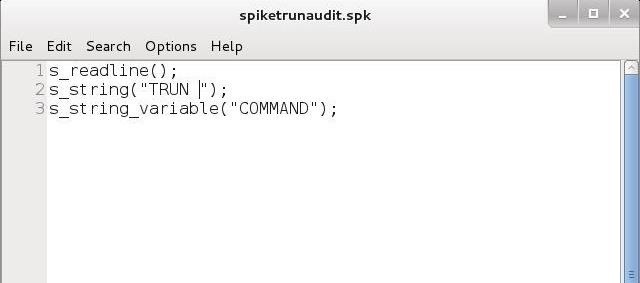
Your simple script should look like that below. It reads the banner (line 1), send the TRUN command (line 2), and sends randomized input with the TRUN command (line 3).
When you completed the script, save it as spiketrunaudit.spk in the /usr/share/spike/audits directory. Once we have completed our simple script, we need to send it to our Vulnserver. We can do this by typing:
kali > generic_send_tcp 192.168.181.129 9999 /usr/share/spike/audits/spiketrunaudit.spk 0 0
Where:
- 192.168.181.129 is the target IP
- 9999 is the target port number
- /usr/share/spike/audit/spiketrunaudit.spk is the absolute path to our audit script
- 0 is the SPKVAR value
- 0 is the SPKSTR value

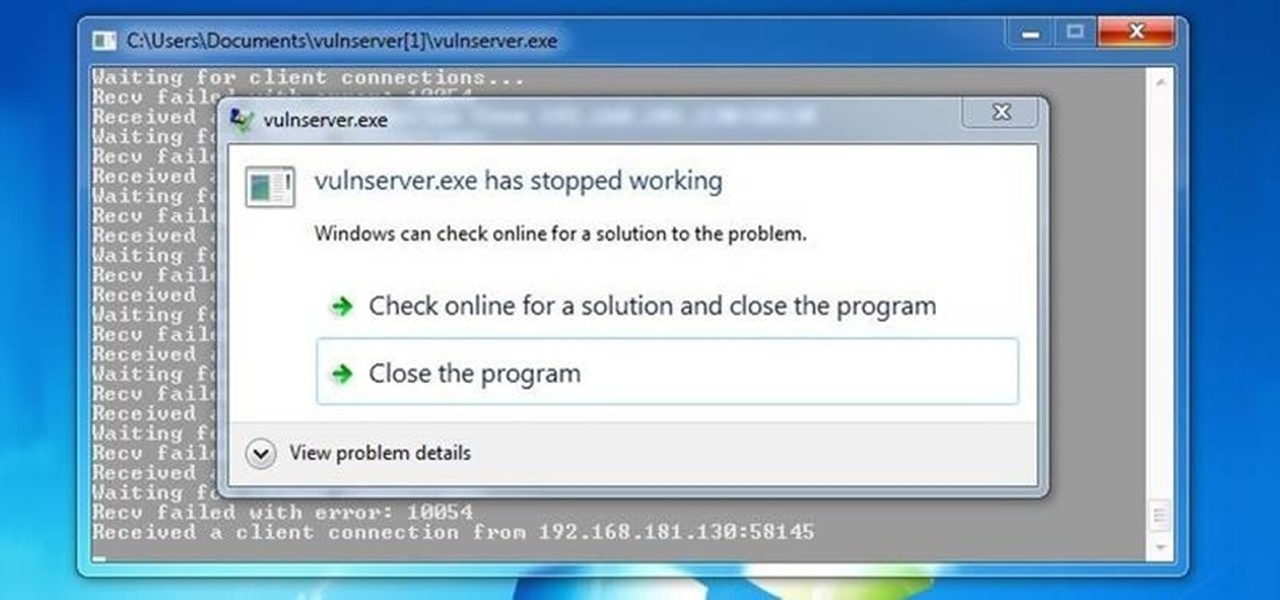
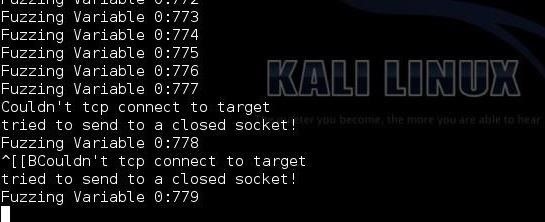
When we hit Enter, Spike will begin to send the randomized and invalid data with the TRUN command to our server, as seen below. Eventually, we will see the following message: "Couldn't tcp connect to target tried to send to a closed socket!" Something has obviously gone wrong with our Vulnserver!
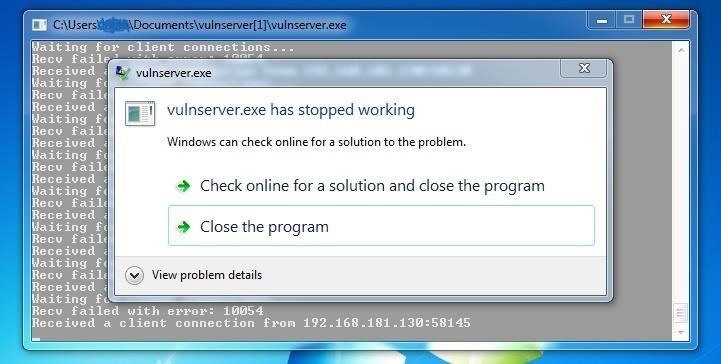
Now, let's go back to our Windows machine and check on our Vulnserver. As you can see below, the Vulnserver has stopped! Our fuzzing with randomized and invalid inputs to the TRUN command has caused the server to crash. That's why we received the message in Spike on our Kali system that we could no longer connect. We now know that the TRUN command on this server is vulnerable!
Fuzzing is the process of sending unexpected data at an application or protocol usually in the form of randomized, oversized, and invalid input to see whether we can create a buffer overflow or otherwise cause a fault in the system. This is a key step in finding a vulnerable buffer that we can then later develop an exploit for.
Spike is an excellent, if under-documented, fuzzing framework for creating your own unique fuzzers. Its flexibility and adaptability are its strength and to find unknown buffer overflows, you are likely going to need to generate your own unique fuzzer.
Just updated your iPhone? You'll find new emoji, enhanced security, podcast transcripts, Apple Cash virtual numbers, and other useful features. There are even new additions hidden within Safari. Find out what's new and changed on your iPhone with the iOS 17.4 update.


19 Comments
Brilliant and Informative Tutorial ! Kudo +1
I get the tutorial... but I dont get its use... how is it a vulnerability? ? And if it is a vulnerability. .. how do we exploit it??
And yea im really looking forward to more posts in this section... please complete this series!!! THANK U!!
Great tutorial :) Thanks for giving us a way to safely practice this tutorial.
I understand this in the context of the tutorial. However, I am under the impression that most servers will not have a 'HELP' command in netcat that tells you all of the available commands to test. Correct me if I am wrong.
Hello. I came to ask if any more tutorials will be posted for Exploit Development. I believe that Peach Fuzzer is now free, and also, would like to ask: is there a way to find an exploit with a fuzzer like this, for, say, a prison, or other Non-Usable OS? Like in Mr.Robot, Elliot mentioned finding an exploit in Vera's prison in the latest episode. The reason that would differ from your tutorial on spike, Is the problem that you may not install the Prison's OS, for example, to test on.
Crackthecode:
Yes, more are coming. Peach is not free, but they do have a trial version that is free.
As for the rest of your question, I don't understand what you are asking. The prison is not using a separate OS. It is likely using an application running on a standard OS.
OTW
Really, In a simple context, what I mean is Can you fuzz an OS that is not released to the public/is not for download? EDIT: Okay, Guess i'll have to pay for peach.
I think you are confusing OS with an application.
Most often, you can scan an application for known vulnerabilities. You fuzz to find your own unknown vulnerabilities. That is a much longer term project. Usually, weeks, if not months.
?
No, What I mean is This: Let's say,as an example, the Chinese government has designed a completely new Operating System, and You are Hired by the US Gov to hack it. How do you find an exploit, In the OS, Like that one in System32 (I forgot what it was called) When not up for Release? I understand Fuzzing an application would work, but what if all were Hand-Written, and unreleased?
Crack Code: I have an idea! the only way to solve that is when you go through the Hand-Written or Documentation of the OS and possible create a clone of the OS and use it as a testing, but you not sure if the OS are rely same, but you might be lucky to get it! this method works only when it's an organization authority, which means they will provide you an OS programmer to build a clone for you.
Hey OTW, I love all your how-to's but i'm wondering when this series is going to continue?, I would love to know how to fuzz local applications and exploit the vuln. Thank you :)
Good tutorial,
Maybe show a little bit more about the script,
what each command does and how to write one in different
scenarios.
link for vulnserver is missing an 'r', updated download link below
http://sites.google.com/site/lupingreycorner/vulnserver.zip
Great tutorial. When is the next one in the series ?
Would be great to learn how to use this info to actually create and use local/remote exploits for a shell ;)
Could you please continue this series I think it's really great for a newbie like me.
Great tutorial OTW I hope to see more of this particular series or anything like it.
Thanks Judas!
Stick around. I'll get back to it soon.
Where are the rest of the series? found only part 1, 2 and 3
Share Your Thoughts