
Welcome back, my budding hackers!
As I have mentioned many times throughout this series, knowing a bit of digital forensics might keep you out of a lot of trouble. In addition, digital forensics is a burgeoning and high paying career. Some knowledge and certifications in this field will likely help you land a Security Engineer position or put you on the Incident Response Team at your employer.
Throughout the Hack Like a Pro series, we have launched numerous attacks against our targets. In the coming articles in our Digital Forensics series, I'd like to show you what some of those attacks look like from the victim's perspective and how as a digital forensic investigator you would identify them.
Why Wireshark Is a Good Forensics Tool
Although Wireshark is largely used a network analysis tool, it is also an excellent network forensics tool. If we can capture the packets with Wireshark while being attacked, or if we can work while the attack is in progress (such as in an Incident Response Team), we can learn a lot about the attack and the attacker.
Step 1: Get the Basic Knowledge
There are numerous tutorials on how to use Wireshark on the web and even a few in Null Byte (including an earlier guide in this series on network forensics), so before we begin, I'd ask you to spend a few moments with those tutorials to familiarize yourself with this essential tool.
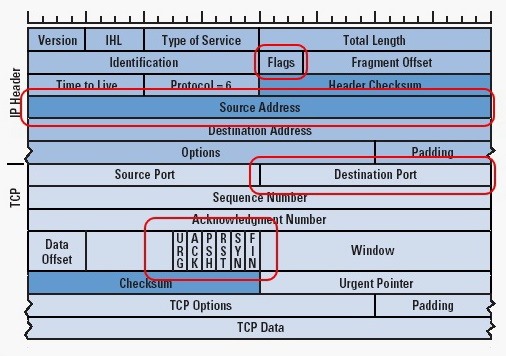
In addition, if you are not familiar with the structure of TCP/IP packets, please read up on that. I have circled the fields of the TCP/IP that we will playing close attention to here. If you aren't familiar with those fields in the IP and the TCP header, you will need to study up on those as well.
Step 2: Open Wireshark in Kali
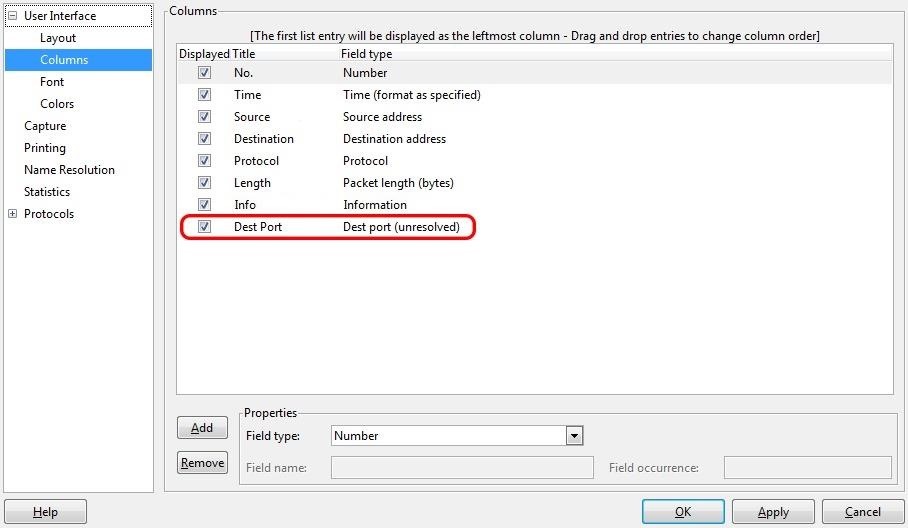
Before we start, I want you to customize Wireshark to show the destination port in the output. So open up Wireshark in Kali and go to Preferences -> Columns, then add a "Dest Port (unresolved)" column with the title "Dest Port." Click on Apply, then OK.
Step 3: Nmap Scan Signature
Let's start by doing an Nmap scan on the target. Nearly every hacker/attacker does an Nmap scan on their target before attacking. In this way, they can gather information regarding services, ports, OS, and applications running on the target system. Major corporations, government agencies, and other large websites receive thousands of scans per day. Let's see what that would look like from the target's perspective using Wireshark.
In this case, let's assume the attacker is being a bit cautious in their scanning. Instead of using a TCP scan that would log their IP address, they are being a bit stealthy by using a SYN scan that will not automatically log their IP as no TCP connection is made (these are often referred to stealth or half-open scans). Such a scan command from the attacker's perspective might look like this:
kali > nmap -sS -P0 192.168.1.103 -p0-1521
When this scan arrives at the destination, it will likely look something like this in Wireshark:
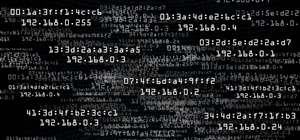
Notice that we have repeated packets coming and going from the attacker's IP of 192.168.1.123 to our target system at 192.168.1.103. Also note that each scan is hitting a different port, but not serially. Nmap is designed to scan the ports in pseudo-random order.
If we wanted to see only the traffic coming from the attacker's system, we can build a filter that will show only the packets coming from the potential attacker.
ip.src ==192.168.1.123
We can place this filter in the "Filter" box in Wireshark, as seen below, then click Apply.
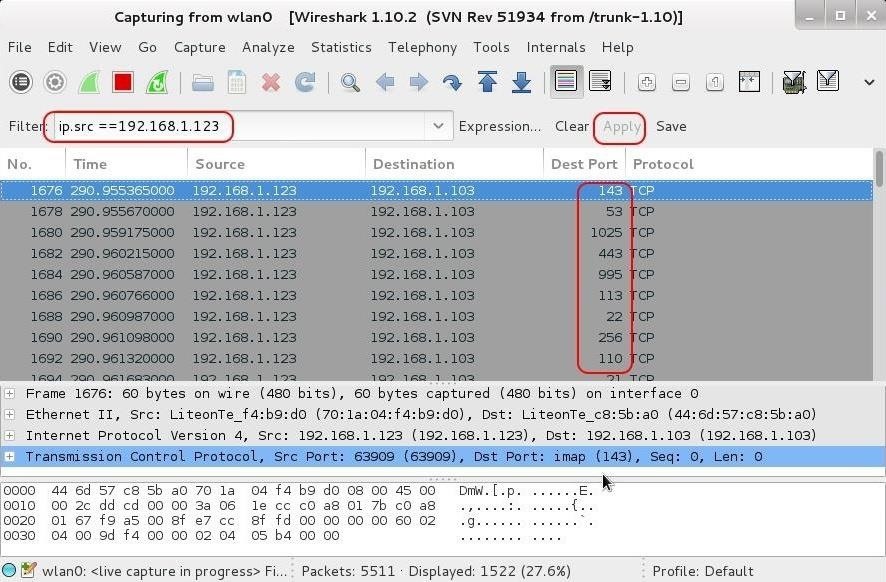
Now we see only the traffic coming from the scanner. Note that each packet is targeting a different port.
If we navigate to the middle pane and expand the TCP header, we will notice that they all have the SYN flag set. Packets with the SYN flag set all coming from the same IP in rapid succession to different ports is the telltale signature of a port scan. Save that IP address, as it is likely to be the IP of your soon-to-be attacker!
Step 4: DoS Syn Flood Signature
Next, let's attempt a DoS attack against the target. In this case, we will use our Hping3 tool to flood it with SYN packets. Since we don't need a TCP connection to DoS, we can spoof our IP address making it very difficult for an investigator to trace the source of the attack.
In addition, many firewalls, intrusion detection systems, and other security devices are designed to blacklist IP addresses that send too many packets within a slice of time. By randomly changing our IP addresses for each packet, it will largely defeat such a security measure.
The SYN flood is used to create many uncompleted half connections to the server. The idea here is to use up all the connections in the connection queue so that other legitimate users can't connect to the server. Hping3 does this task admirably.
The command the attacker might use looks something like this:
kali > hping3 --rand-source -f -S 192.168.1.103 -p80 --flood
Let's break this command down a bit:
- --rand-source sends random source IP addresses to the target.
- -f fragments the packets making it more likely to get past security devices.
- -S sends SYN packets to create half-open connections.
- 192.168.1.103 is the target IP address.
- --flood sends packets as fast as possible.
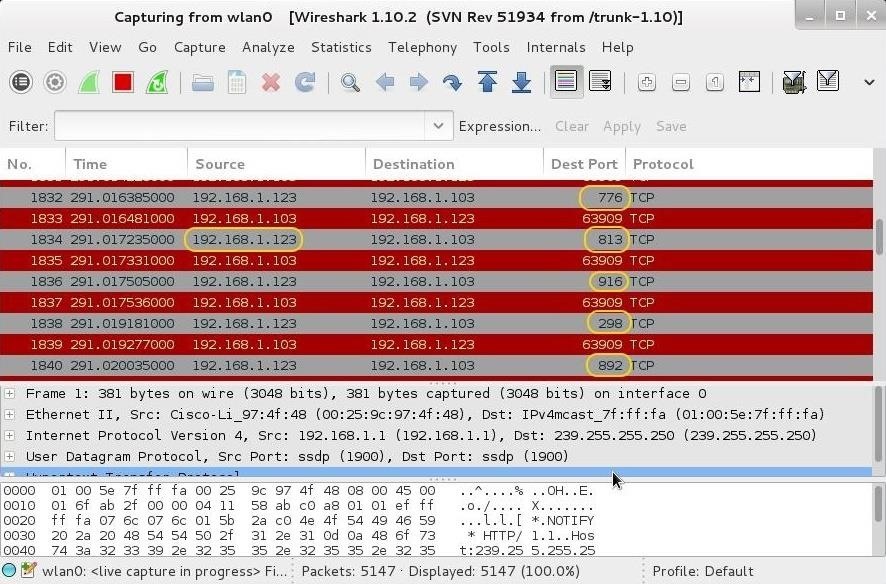
When those packets arrive at the target, they will look like this in Wireshark.
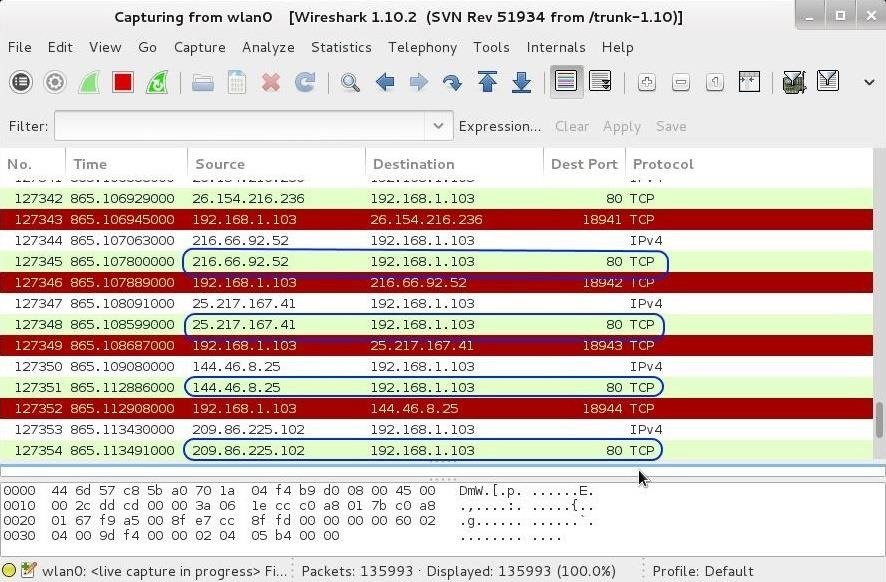
As you can see in the screenshot above, each packet is coming from a different IP address and all targeting port 80. This is typical DoS attack against a website.
Also, take a look at the "Time" column. Notice how little time elapses between each packet—just thousands of a second. This is another signature of a DoS attack and one that many security devices monitor when alerting or acting upon a suspected DoS attack.
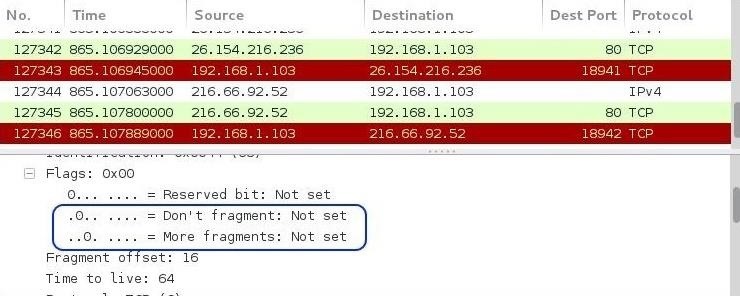
When you navigate to the middle pane, we can dissect the packet headers. Let's first expand the IP header by clicking on the plus sign next to the IP. When we scroll down a bit, we will see the flags. These are not the flags of the TCP header (S, T, U, P, F, R), but rather the fragment or don't fragment flag. This flag tells the receiving system whether the packet is fragmented or not. It is normally set to "Don't fragment," except when a packet is fragmented (then it is set to "More fragments"). In our case, neither flag is set. This is a telltale sign of malicious traffic, as normal traffic would have either of these flags set, but never neither.
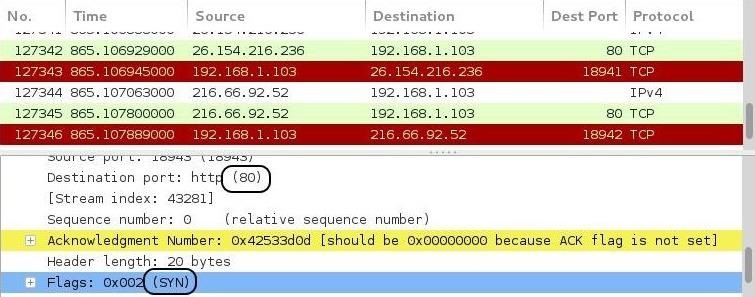
Once again, in the middle pane of Wireshark, we can dissect the TCP header and see the destination port is 80 and the TCP flag for all the packets is set to SYN. No ACKs, no RSTs, no FINs, which would be normal, but just all SYNs.
Wireshark is an excellent tool for doing network digital forensics if we have the captured packets or the attack is ongoing. Here we have examined and identified signatures of two simple attacks, the port scan and the DoS attack.
In future network forensic tutorials, we will examine more complex attacks in order for you to identify them, so keep coming back, by budding hackers!
Just updated your iPhone? You'll find new emoji, enhanced security, podcast transcripts, Apple Cash virtual numbers, and other useful features. There are even new additions hidden within Safari. Find out what's new and changed on your iPhone with the iOS 17.4 update.


5 Comments
what can i do whit this tutorial what can you get
Informing post as always Sir,
Do scanners like nmap send a FIN or RST packet at the end or just abandon the connection after receiving SYN-ACK from the target?
Depends on type of scan, normally they abandon the connection (Stealth scan).
it sends a rst packet to prevent a syn food.
thanks for this great post otw.
i enjoyed it a lot.
kali > hping3 --rand-source -f -S 192.168.1.103 -p80 --flood
should read= kali > hping3 --rand-source -f -S 192.168.1.103 -p 80 --flood
Space missing after -p
I was wondering why I was getting errors, then I had to check out hping3 help to see what was going on.
Share Your Thoughts