
Welcome back, my greenhorn hackers!
Digital forensics and hacking are complementary disciplines. The better you are at digital forensics, the better hacker you are, and the better hacker you are, the better you are digital forensics. Unfortunately, few people in either profession cross these discipline lines.
No tool embodies this complementary relationship better than IDA Pro. It is an excellent tool for malware forensics and an excellent tool for malware re-engineering.
IDA Pro is designed to debug and disassemble software that can be critical for reverse engineering malware and doing malware forensics. These are some of the most valuable and most sought after skills in the digital forensic industry. Becoming familiar with IDA Pro and other reverse-engineering tools is a prerequisite to working in this industry.
Reverse Engineering
Reverse engineering is the discipline of studying how a piece of code works and then building something that does the same thing, but differently. In hacking, this would enable us to use a successful piece of malware that has a known signature by antivirus software and intrusion detection systems and build a new piece of malware that does the same thing with an unknown signature.
Malware Forensics
Malware forensics is the discipline of disassembling malware to determine the origin of the malware. Since hackers often use the same code modules as other malware and other clues are left in the code, often times malware analysts can attribute the malware to a particular hacker, group, or country by doing this type of analysis. Remember, the FBI used this type of analysis to attribute the Sony hack to North Korea.
Using the Free IDA Demo
In this tutorial, I will start you along the path to using and understanding this powerful and widely used piece of software. Although IDA Pro is a commercial software package (the professional version sells for over $1,100), we will initially use the demo version so that everyone can use it and become familiar with it.
The demo version can only disassemble x86 Windows PE files, so that's what I'll be using here. The professional version is able to disassemble and analyze just about any type of software on any architecture. Eventually, we will progress to the commercial version in later tutorials.
Step 1: Download the IDA Demo
You can download the demo version of IDA here. After downloading IDA and installing it, it should be in your programs at the Start button in Windows. Locate it and click on the icon. When you do so, IDA will start up with a screen like below.
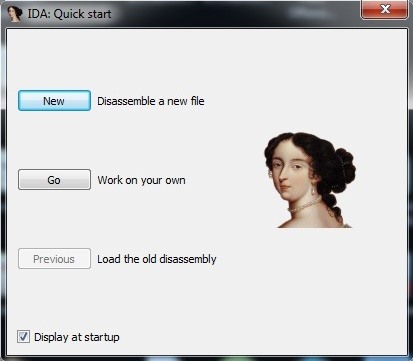
Go ahead and click on the "Disassemble a new file" button.
Step 2: Load a File
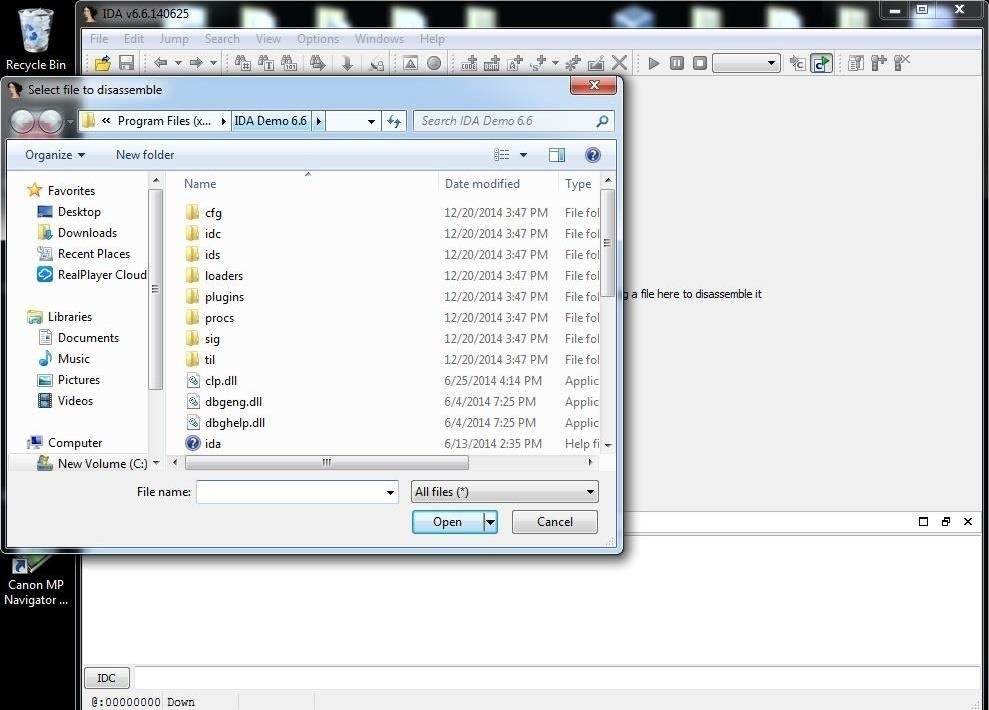
We can now drag and drop a file into the working center window or click on File -> Open.
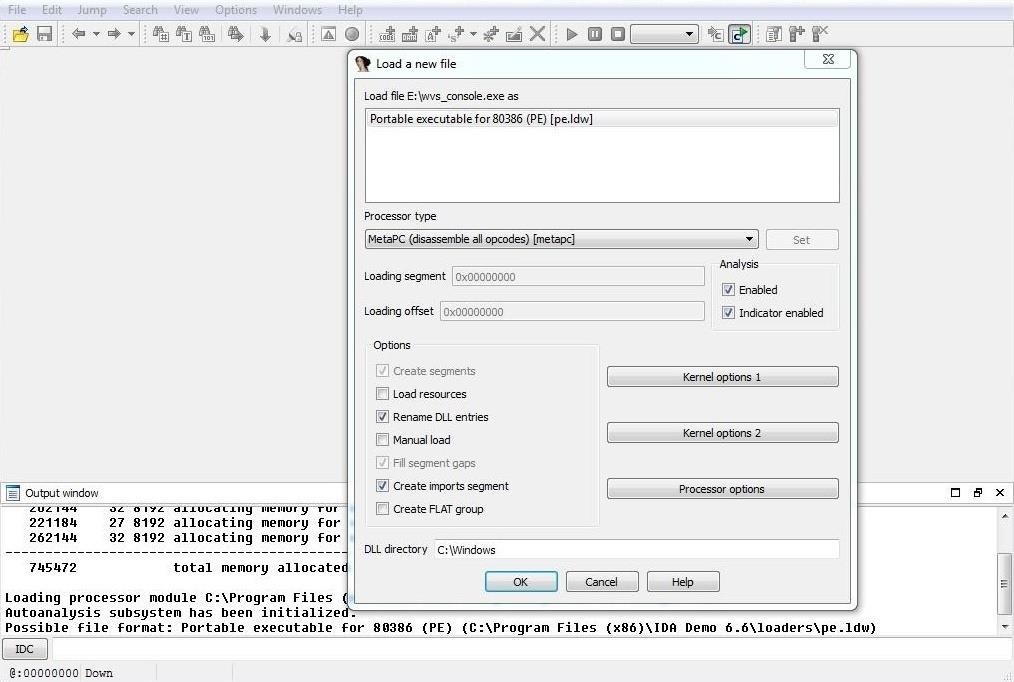
After selecting a file to disassemble and analyze, the window below will pop up. As you can see, IDA was able to automatically determine the type of file (portable executable) and processor type (x86). Click on "OK."
When IDA begins its disassembly and analysis, it analyzes the entire file and places the information into a database. This database has four files:
- name.id0 – contains contents of B-tree-style database
- name.id1 – contains flags that describe each program byte
- name.nam – contains index information related to named program locations
- name.til – contains information about local type definitions
Whenever you go to close IDA, it will ask you whether you want to save these database files. If you do, these files will be saved and available to you at any time. You will see these files saved in the same directory as the file you are analyzing.
Step 3: Start the Disassembly
In this example, I will be using small .exe file that is part of the Acunetix Web Vulnerability scanner. It's a portable .exe (PE) and is 32-bit, so the demo version of IDA can disassemble it. When we open it, IDA begins its disassembly process and displays the information like in the screenshot below.

As you can see above, IDA provides us with some basic info in the IDA View tab. If we scroll down the IDA View, we can see every line of code.
The colorful bar above this view represents the memory that the file is occupying. It color codes for the different parts of the program that are stored in each part of memory. If we right-click any part of the memory bar, we can zoom in to that segment of the code stored in memory. We are capable of zooming in right down to the single byte level.
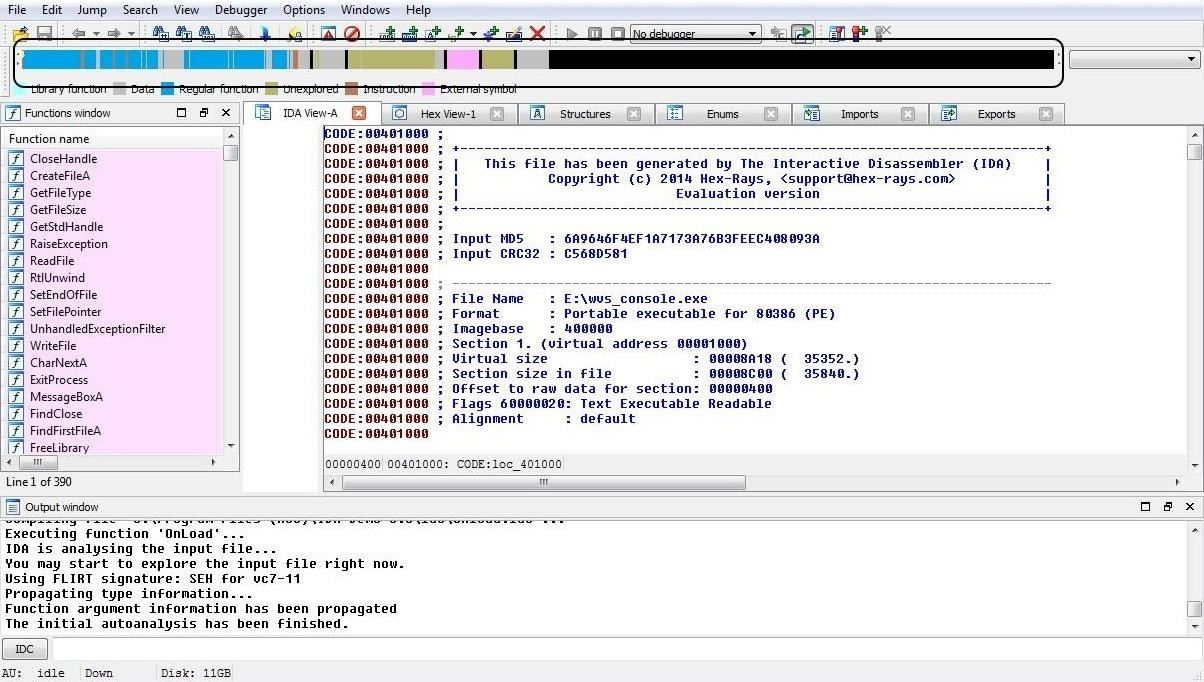
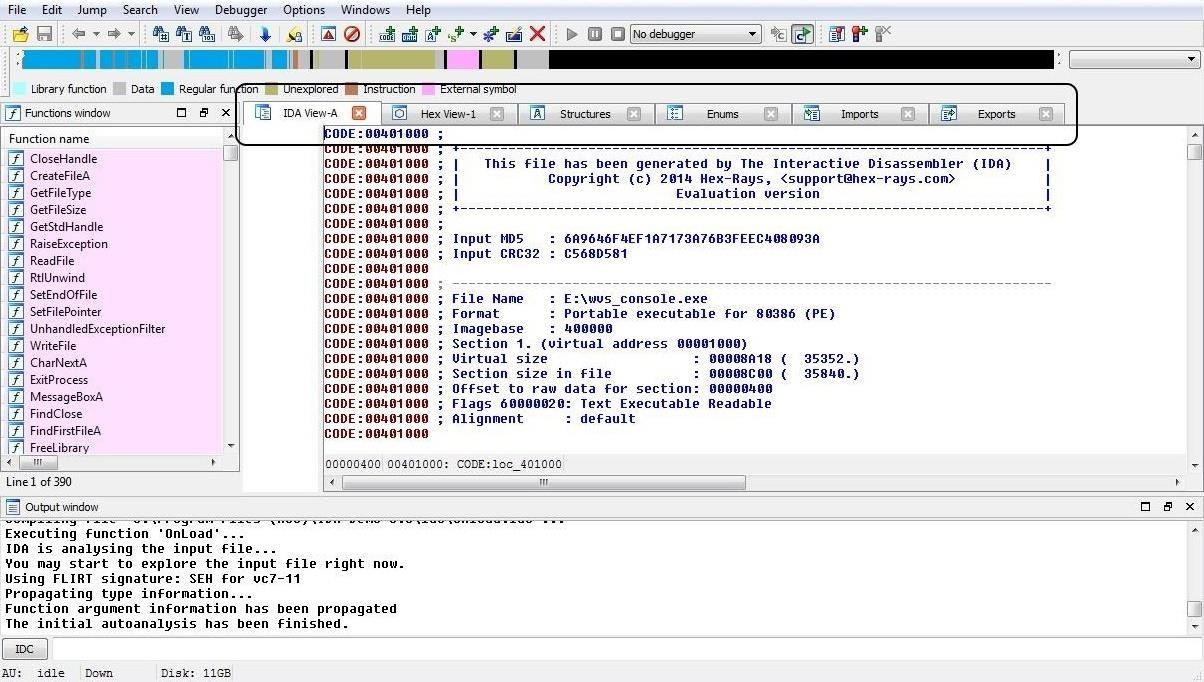
We can view the file from many different perspectives by selecting any of these views available. These include the IDA View (as seen here), Hex View, Structures, Enums, Imports, and finally, Exports. By clicking on any one of those tabs, it will give us that particular view of the code (see Import in Step 5 below).
Step 4: View a Flow Chart
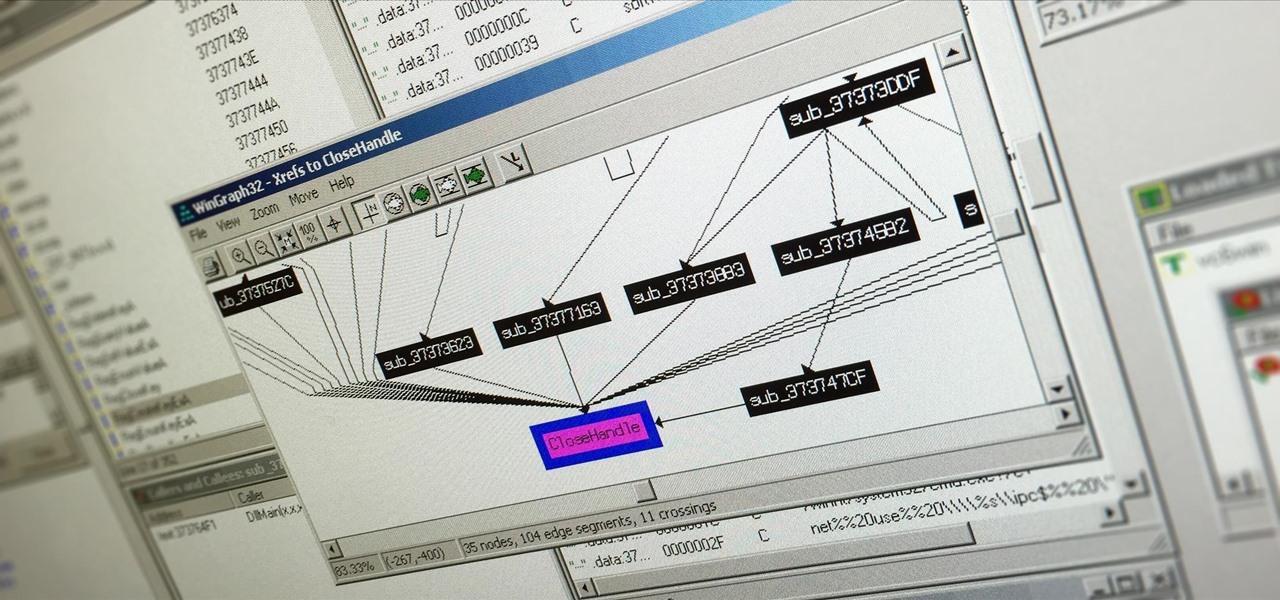
One of the most interesting and enlightening views that IDA can provide us is the flow chart. The flow chart graphically displays the flow of the execution of the file, making it easier to understand. We can open it by going to the top menu bar and clicking on View -> Graphs -> Flow Chart. It will open a Flow Chart of the code similar to that below.
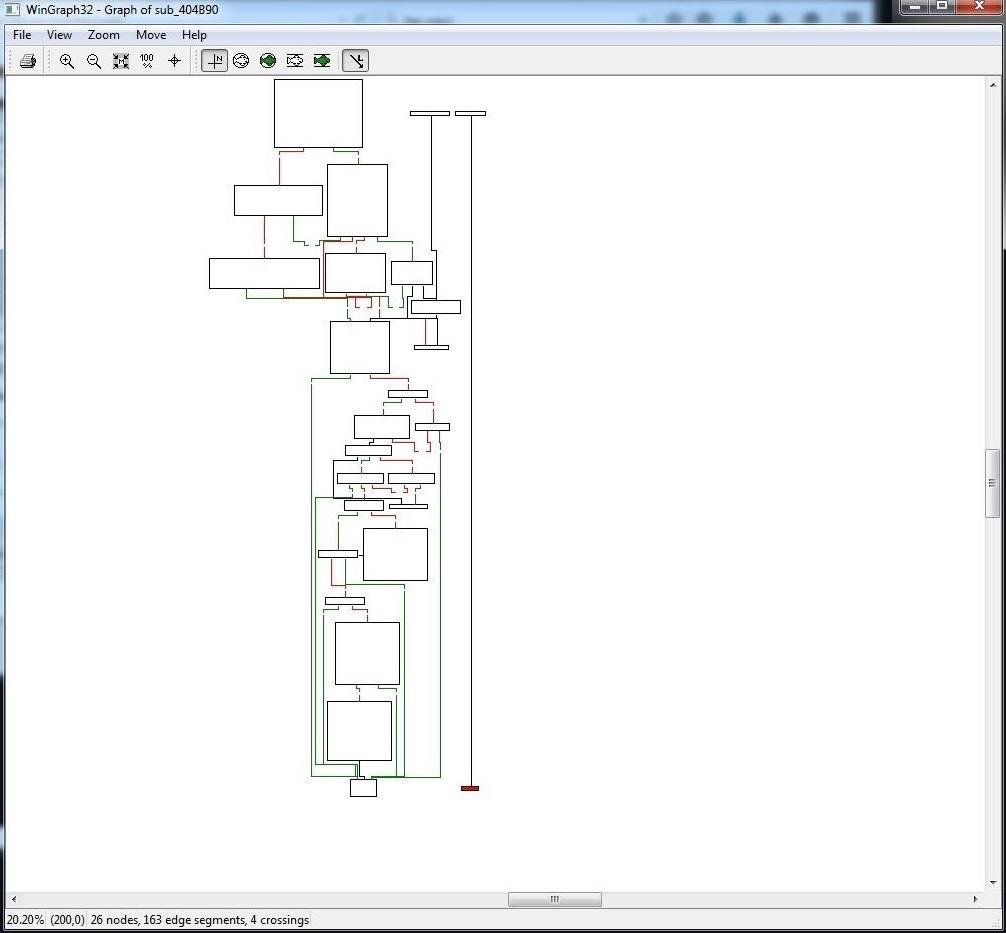
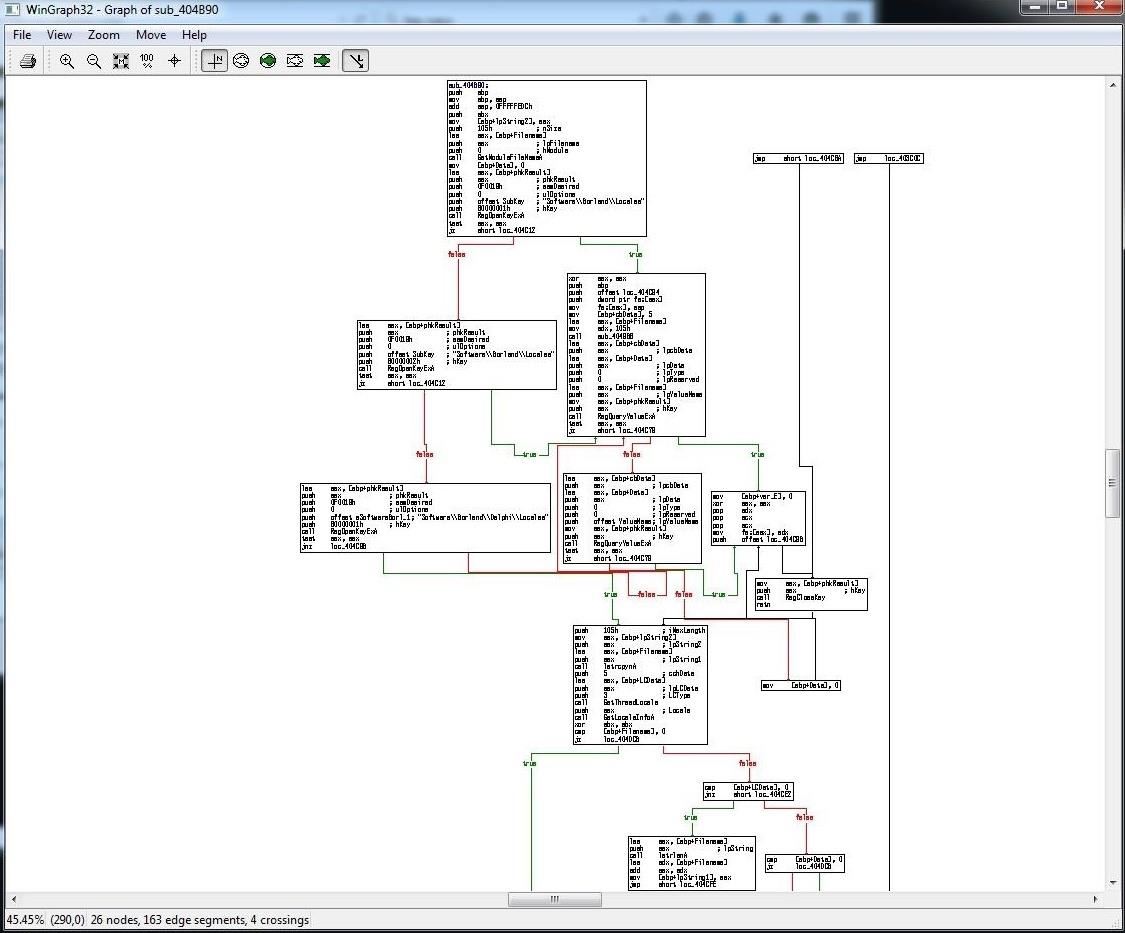
We can zoom in by going to the View menu at the top of the flow chart to get greater detail. In this way, we can view the program flow from each register, subroutine, and function.
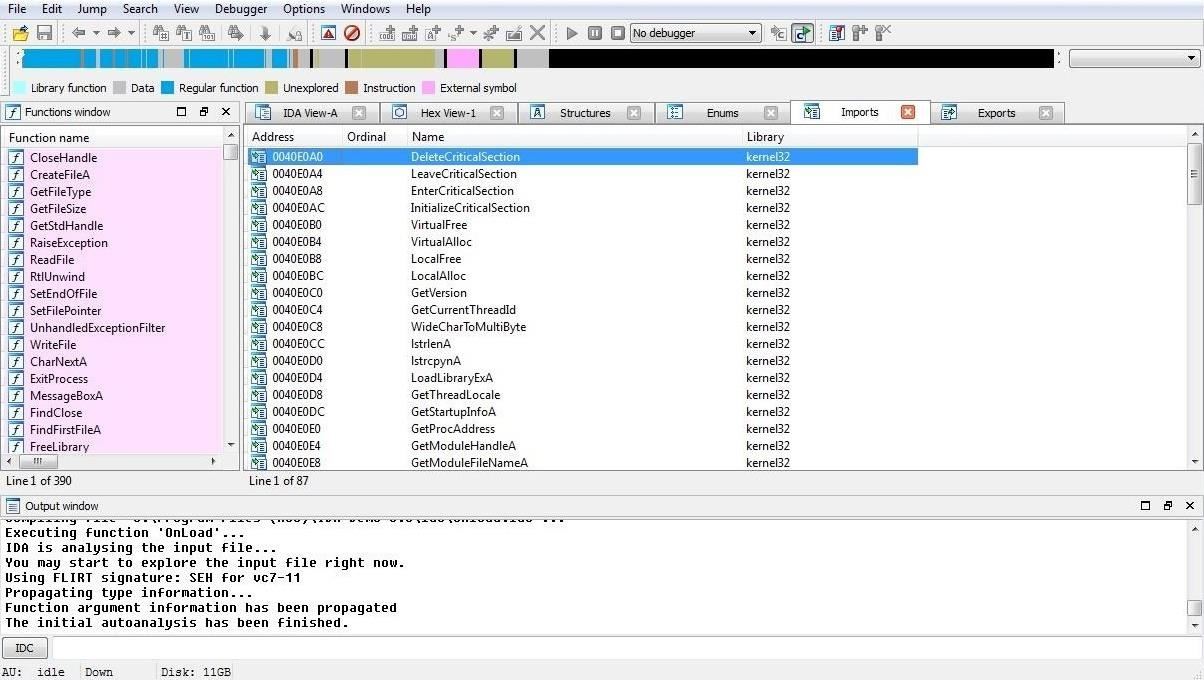
Step 5: Show Imports
When we select the Imports view, IDA will show us all the modules that that the .exe imported.
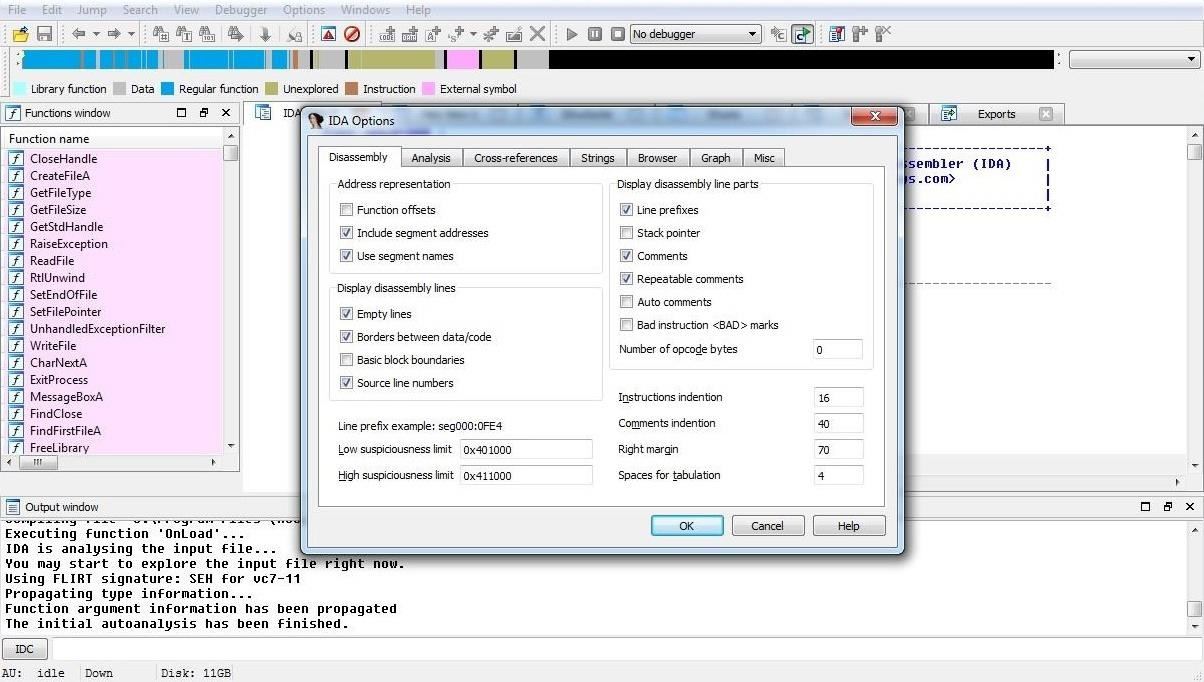
Step 6: Customize the Analysis
Finally, we can begin to customize what and how IDA displays the code to by going to Options -> General. A window like that shown in the screenshot below will enable us to customize our analysis.
Now that you are familiar with the basic structure, function, and operation of IDA, you are ready to begin analyzing the code. In a future tutorial, I will show you how to use this impressive tool to fingerprint the malware and potentially re-engineer it to make it unique and undetectable. So keep coming back, my greenhorn hackers!
Just updated your iPhone? You'll find new emoji, enhanced security, podcast transcripts, Apple Cash virtual numbers, and other useful features. There are even new additions hidden within Safari. Find out what's new and changed on your iPhone with the iOS 17.4 update.


7 Comments
It's amazing how much information you can get from simple stuff like this.
OTW:
Are there any advanced DIY malware builder kits that would let me build an advanced custom virus? That are compatible with Kali?
S_R
There are numerous virus making tools. What precisely do you want to make?
OTW:
I was hoping to make a Trojan that would swap and merge RAM data with data stored in the memory card .Which would create a large amount of useless corrupted files. Essentially making bad sectors destroying the ability to properly operate the computer.
S_R
Good luck with that!
I suggest you start studying assembly.
OTW:
Forgive me if my questions are pestering you but would you happen to know a master article if you will on assembly?
S_R
Oh. This is about to get fun, Linux. Think you and I ,kali, are going to spend some time together this summer.
Share Your Thoughts