

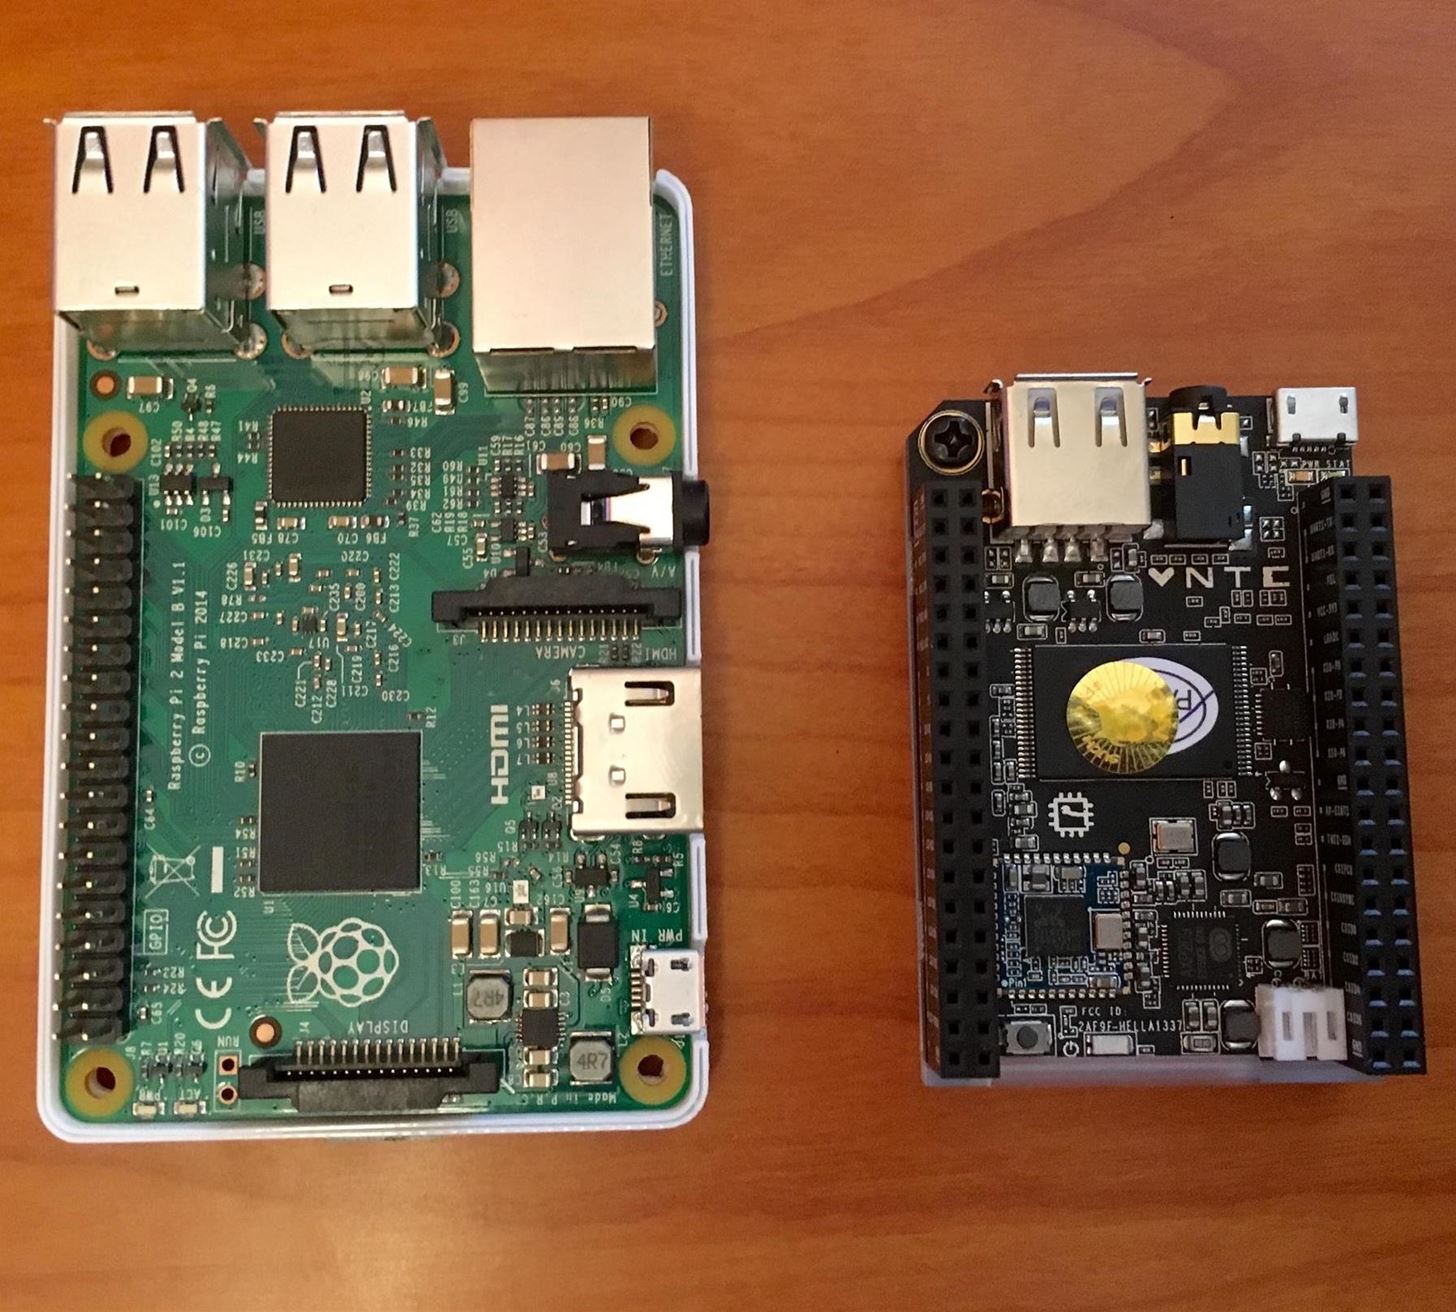
Hello NullByte, it's mkilic! This time I'm here with the C.H.I.P from NTC. Although it is not too popular, the C.H.I.P is a brand new micro computer. It is very similar to the Raspberry Pi or Beaglebone Black. The key difference with this particular board is its cost and size. The C.H.I.P only costs $9 and measures 2.5 x 1.5 inches. In addition to this, the C.H.I.P has built in 802.11 b/g/n Wifi and Bluetooth 4.0. Considering these great specs, what could a Hacker use this for?
Step 1: The Internet of Things and C.H.I.P
The first project I had in mind once I got my hands on this device was related to IoT. IoT (Internet of Things) is a big field of technology. By the looks of it, it is the next big thing that soon, everyone will be talking about. For hackers, IoT adds nearly every thing in your house to the network and makes it accesible. Whether it is a lightbulb, as will be demonstrated in this post, a garage door, a refrigerator, anything that we use in our houses or anywhere, could become network accessible. With this in mind, I thought of a simple way to get started with the C.H.I.P and test out its powers, was to make a Internet Accessible LED Switch. Essentially, this means making a web server, putting two simple C programs on the server and making them executable from the URL of any browser. The URL can either turn on or turn off the LED on the C.H.I.P. This simple project demonstrates the power of IoT and how anyone, anywhere can turn on a light and turn it off. Imagine scaling this project to the power system in your house and being able to "turn off" your house from 100 miles away! So let's jump right in!
Step 2: Making the C.H.I.P Secure
Bulleted List in Order of the Best Commands to Run Upon Opening the C.H.I.P. So Open Up a Terminal and Type in These Lines. This list updates the C.H.I.P, sets the time zone and locale etc, and also removes the default passwords from the initial setup.
- sudo apt-get update
- sudo apt-get upgrade
- passwd //Change the Chip's Default Password of "Chip"
4. sudo passwd -l root
- sudo sed -i.old /etc/sshd_config -e '/PermitRootLogin/s/yes/no/''
- sudo Service Ssh Restart
Step 3: Download and Install the Apache Webserver and a C Compiler
To get the LED to turn on or off we need to have a home for the code to run. To install the webserver simply run these lines of code:
- sudo apt-get install apache2
2. sudo ln -s ../mods-available/cgi.load //This line enables cgi-bin which lets you run the C programs we will write in the next step.
- sudo service restart apache2 //Simple restart to ensure changes are applied
- sudo apt-get install gcc make //To get the C compiler
Once you have all these steps completed move onto writing the code.
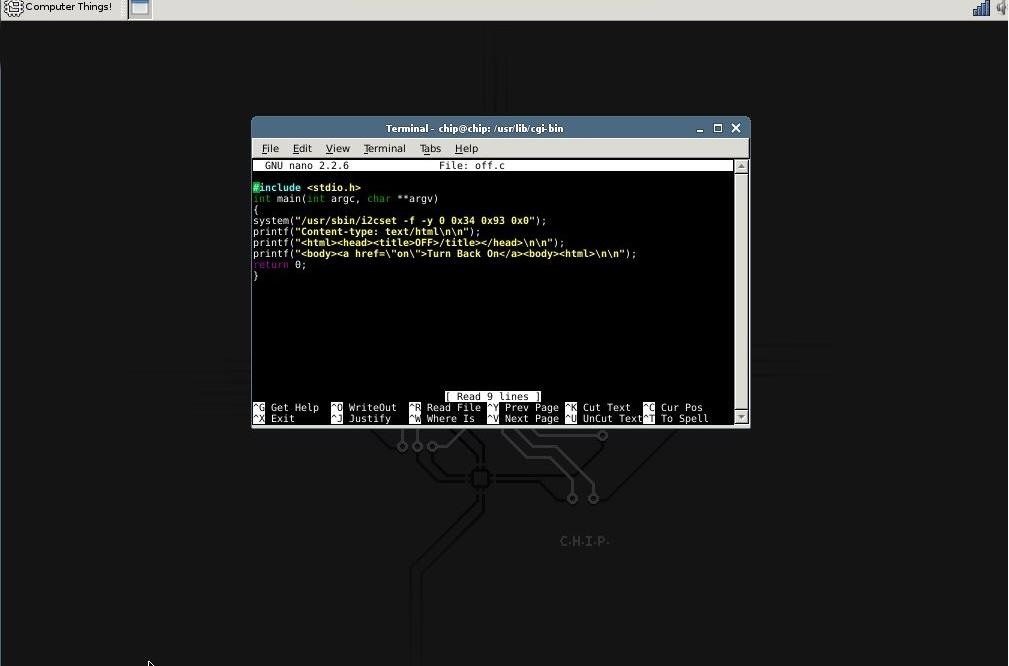
Step 4: Writing the C Programs for the LED.
To successfully write the programs for turning the LED on the C.H.I.P on or off, we need to open up a terminal and your favorite text editor. I like to go with nano as it is simple and straightforward. As far as I know, the text editor you use does not matter as long as you write good code.
Pictured below is the code:
The ON.C program

The OFF.C program
Essentially the main part of the program lies in the lines
"system("/usr/sbin/i2cset -f -y 0 0x34 0x93 0x1");"
"system("/usr/sbin/i2cset -f -y 0 0x34 0x93 0x0");"
as it points to the correct LED on the C.H.I.P/
The following lines are just for the html code.
The code pictured above is just what I have on my personal setup for the project. However, this can be changed to your preference entirely. I do not have the most experience with C in general, therefore I couldn't think of a much better program. If you do come up with a nicer code please let me know in the comments or message me directly! It would be very beneficial to my learning!
Step 5: Make the on.c and off.c Programs Executable
The next step involves getting the 2 programs we just wrote to the server and make them executable. This means we need to run three simple lines on the terminal, they are:
1.sudo gcc -o /usr/lib/cgi-bin/on on.c //Turns the on.c into a executable file
- sudo gcc -o /usr/lib/cgi-bin/off off.c //Turns the off.c into a executable file
- sudo chmod +s /usr/lib/cgi-bin/o* //This allows executables to run with root privilege.
Step 6: Test It Out
Once your done moving the programs to the cgi-bin folder and making them executable, it's time to test it out. To do this simply check your C.H.I.P's internal IP using ifconfig. Note the IP and go to another computer, phone, tablet, etc. Open up a web browser and type in the IP followed by the line:
/cgi-bin/off
/cgi-bin/on
For Example it should look like this: 192.168.0.10/cgi-bin/off
If all goes well it should turn off the LED on the C.H.I.P. Of course the IP should be the IP of your device in particular.
And then it should turn back on when you visit
192.168.0.10/cgi-bin/on
Step 7: Conclusion
If everything worked then you are done! Congrats you built your first IoT enabled device. Don't worry if you don't have a C.H.I.P. This tutorial can be applied to Raspberry Pi's, Arduino's, even regular laptops. Of course the coding changes and you might need more parts. But the idea and result are almost exactly the same. The purpose of this project really isn't to go over a new exploit or hack. Rather it is to introduce the C.H.I.P and the idea of using IoT. As mentioned earlier, IoT will most probably become the biggest field of tech. Therefore learning how it works, how to mess with it, and how to secure it, is essential to becoming leaders in that field.
Once again, Thank you for taking the time to read my long post. I hope you learned somethings and hopefully I will learn from your feedback as well. Have a wonderful day and stay curious!
Just updated your iPhone? You'll find new emoji, enhanced security, podcast transcripts, Apple Cash virtual numbers, and other useful features. There are even new additions hidden within Safari. Find out what's new and changed on your iPhone with the iOS 17.4 update.


5 Comments
So, you had already got one! Congratulations.
I'd just recommend using a lighter HTTP server. The processor on the C.H.I.P. seems very capable to deal with apache, but you can probably get the same result with lighttpd and it is way smaller.
Good post.
Thank You for your feedback! I'll look into lighttpd to make this project better!
Hey Mkilic!
Your post is good. Apache is perfectly fine. Just pointing out another alternative. Nice post
The CHIP is a really great device. Thanks for sharing. Kudos for a nice post.
Thank You! I agree CHIP looks and works great!
Share Your Thoughts