

I was on our new #nullbyte IRC channel when someone told me how tedious it is to install an OSX Virtual Machine on Virtual Box (I think it was wawa). We all know Linux rocks (gets acknowledgement from the crowd), but there are morons out there, multiplying at a never before seen rate, who use OSX. We at nullbyte should be prepared for anything and everything. So, in this guide I take you step by step to creating your OSX Yogemite VM.
note: I have been warned that the images available for download are almost always malware infested, so I would suggest keeping your VM in a virtual Lan network only, no shared folders or anything with your host OS. I hope that keeps the malware within the virtual environment. I am not an expert in malware so better be safe than sorry.
Step 1: Setting Up VM
I assume if you are using this guide you already have Virtual Box up and running. If not, download it using the link below and just install. As easy as that.
#It's free
https://www.virtualbox.org/
Step 2: Get the Copy of Hackintosh Zone
Download the Yosemite image from the following link.
#torrent available
http://hackintosh.zone/hackintosh-downloads/file/545-hackintosh-yosemite-zone-on-pc-with-amd-and-intel-support/
Step 3: Create a New Virtual Machine.
To create a virtual machine, open up Virtualbox and click "New" on the upper left. Give your new virtual machine a name, and choose "Mac OS X" for the OS Type.
If your version of Virtualbox asks you to choose between 64-bit and 32-bit, be sure to choose 64-bit. Choosing 32-bit will result in a critical "Guru Meditation" error later on.
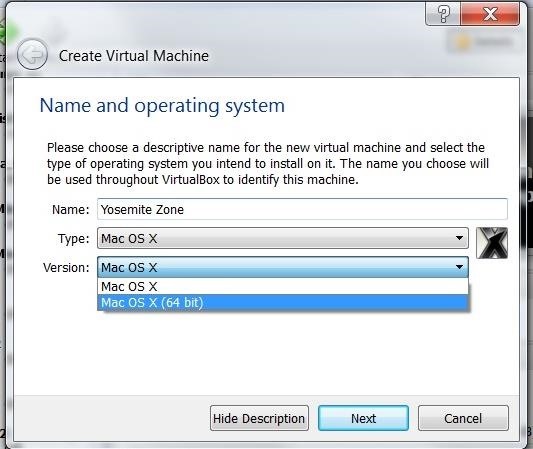
On, the next page, you will be asked to assign memory to it. Choose at least 2GB, I recommend 4 GB. (Don't listen to me I have lots of it to spare). Click next. Now, you will have to create a virtual hard drive for the OS. Choose the option to create a new virtual hard drive and the kind of drive you want to create here depends on you. If you don't know what you are doing, choose VDI and dynamically allocated (on next page). For disk size, let it be atleast 20GB. You won't need more than that. You just want to test some exploits or the malware you wrote in python.
Note: python comes installed by default on OSX so writing a malware in python DOES make sense. #for those who said "who writes malware in python anyway?"
Step 4: Changing the Settings Before You Start the VM
Now that you have created the VM , it should appear in the list on the left. Before you run it, we need to change a few settings.
Choose the VM (using the left click, you silly) and click Setting on the top panel.
1) In the 'System' tab> Motherboard tab> uncheck the 'Enable EFI' box .
(Note: you might want to select a different motherboard chipset, in my case to PIIX3, if the system hangs during the loading stage. )
2) In the 'System' tab> Processor tab> you will want to devote as many processors as you can to make the installation not a pain in the butt.
2) in the 'Storage' tab>click the round disk which looks like a cd under the controller IDE section/ControllerSATA section.
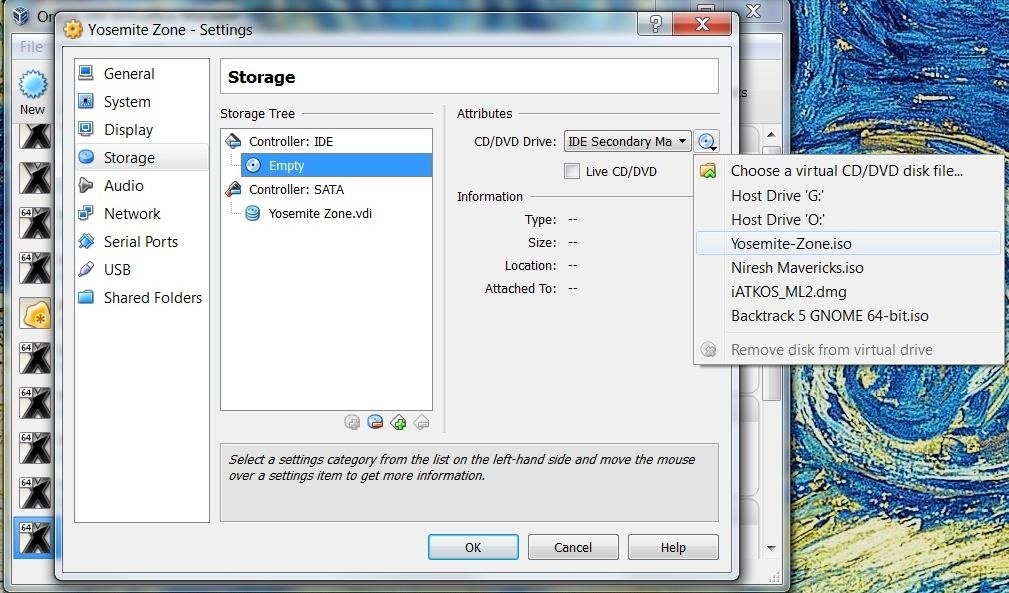
Then in the CD/DVD Drive as shown above, select the .iso file you downloaded before. (Name of the iso file would be Yosemite-Zone.iso)
And you are done with the settings.
Click OK and start the VM using the start button (on the top bar, you cutie 'hacker').
Step 5: Installation
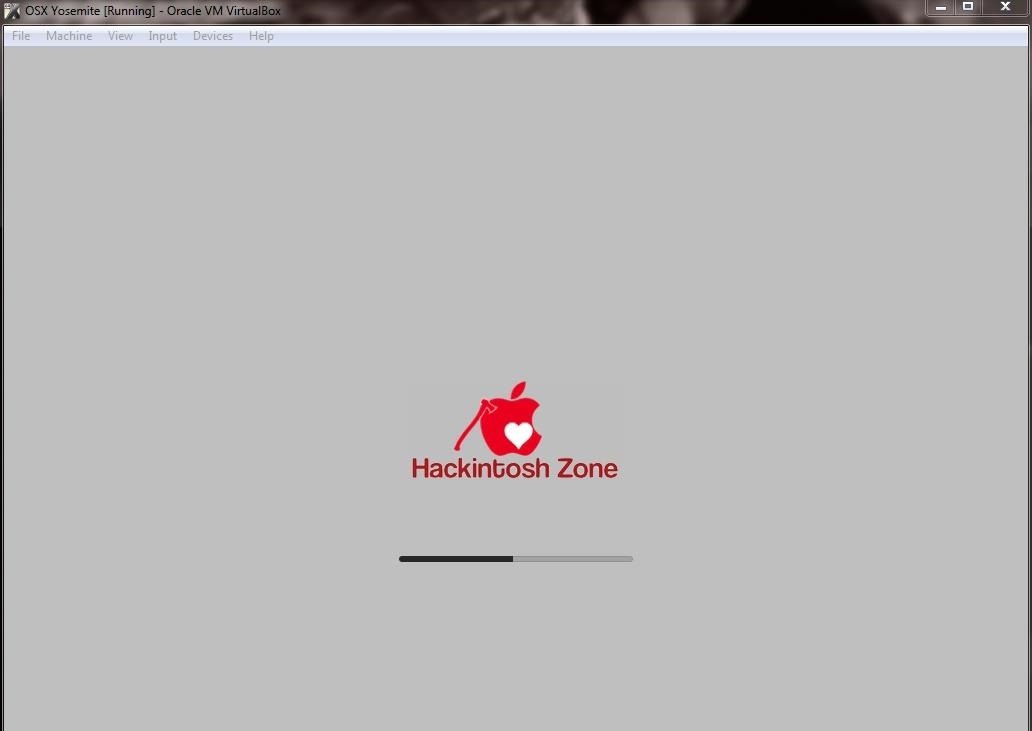
The OS will start to load the installer, this might take a while (at max of 15 minutes, for me it took 2 minutes)
You will then be asked to choose the language and then a few next nexe next, continue etc.. you'll know what to do.
Remember: in the disclaimer it says: the username is 'root' and password is 'niresh'.
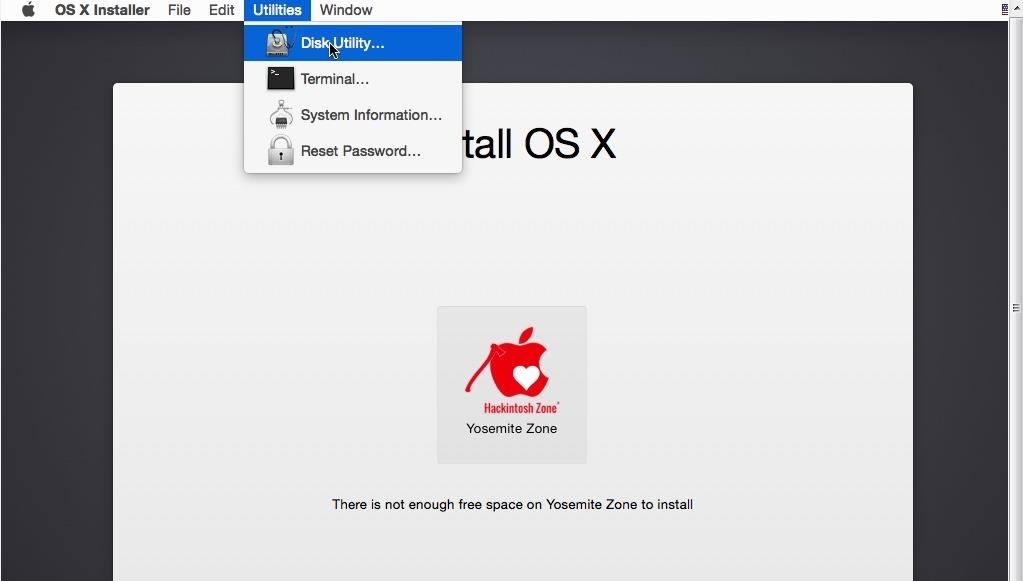
You will now have to select a disk to install the OS. It doesn't show the Virtual hard disk which we created. So, we do this:
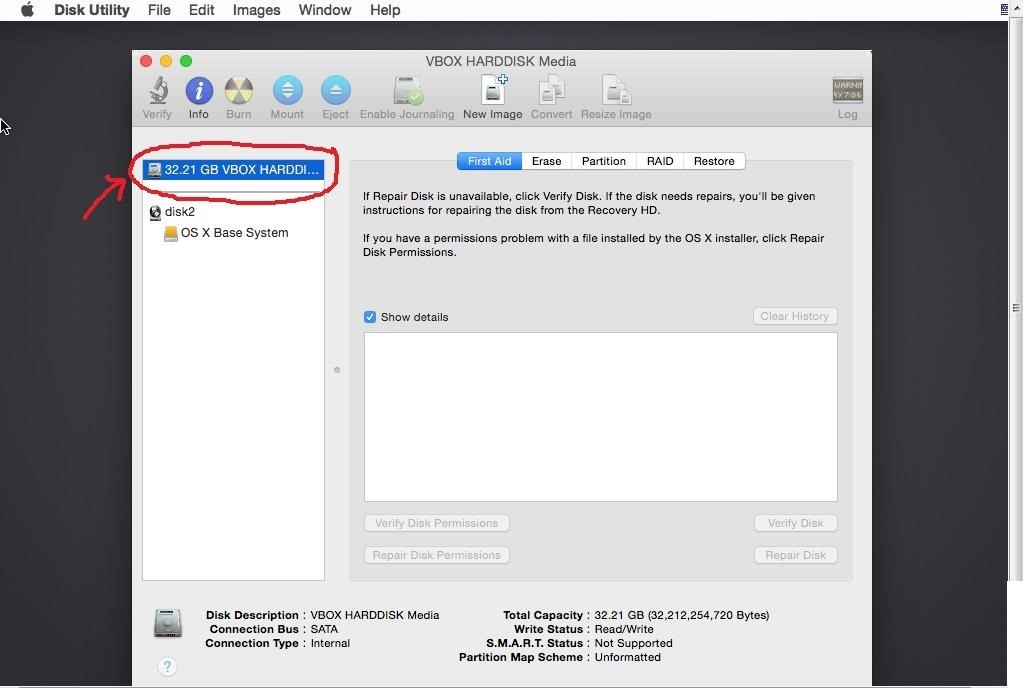
click on the Utilities button on the top and select Disk Utility in it.
It shows the virtual disk we created in the left panel, select that (highlighted in the image below)
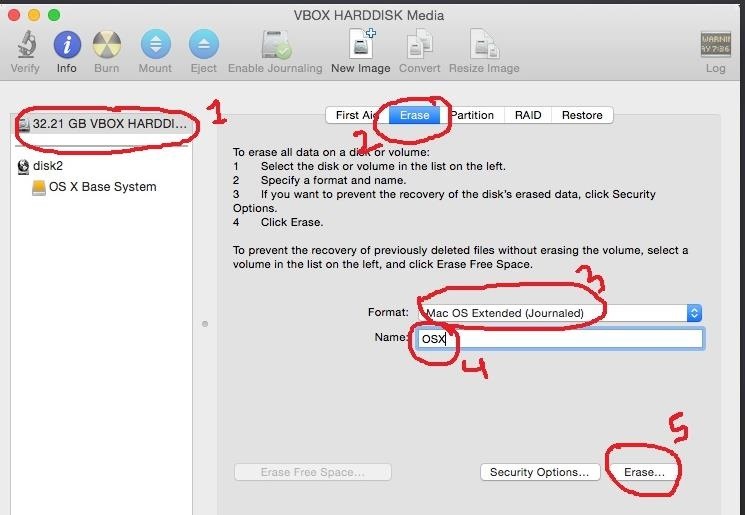
Select the Erase tab> In the Format column choose Mac OS extended (Journaled)> In the name option choose whatever name you want to give to your disk> click Erase> choose Erase. (shown in the image as 1,2,3,4,5)
close the disk utility tool. It should now show the drive you created on the install page like below.
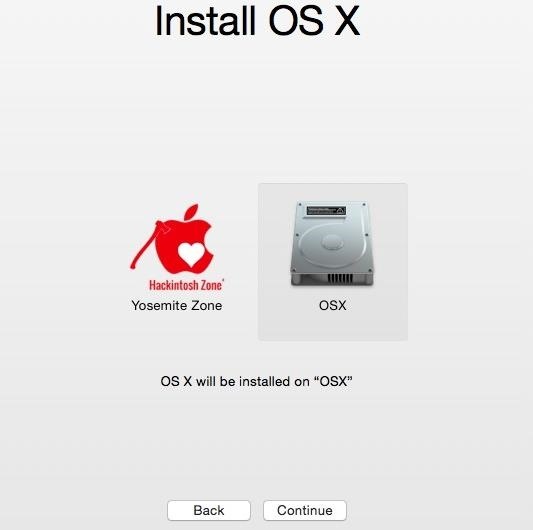
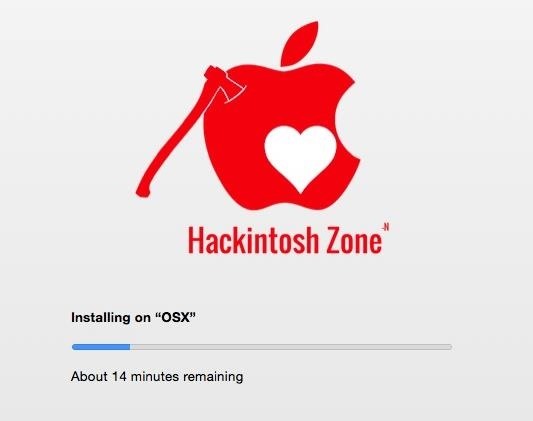
you know you have click continue now. It will now install. (will take some time though).
This guide is still incomplete.. I will keep updating it as I progress
When installation is complete, Power off the virtual machine. Remove the ISO from the disk (remember from where we mounted the ISO file on the CD ROM in settings). Load it up and enjoy.
Remember: username and password have been mentioned above.
Also you can add the network adapter so that you have it on lan with you Kali/ParrotSec OS and start testing the exploits and malwares, and hopefully design something that defends the people from attackers.
From the movie 'American Sniper':
"There are three types of people in this world: sheep, wolves, and sheepdogs."
"Some people prefer to believe that evil doesn't exist in the world, and if it ever darkened their doorstep, they wouldn't know how to protect themselves. Those are the sheep."
"Then you've got predators, who use violence to prey on the weak. They're the wolves."
"And then there are those blessed with the gift of aggression, an overpowering need to protect the flock. These men are the rare breed who live to confront the wolf. They are the Sheep Dog."
"We don't raise sheep in here and I will beat your ass if you become a wolf!"
~ScriptKiddie55 (DragonSlayer)
Just updated your iPhone? You'll find new emoji, enhanced security, podcast transcripts, Apple Cash virtual numbers, and other useful features. There are even new additions hidden within Safari. Find out what's new and changed on your iPhone with the iOS 17.4 update.


5 Comments
I've got guru meditation error.. The VM is set right i think. Can you help me?
Did you choose the 64bit version when you created the VM? If you choose 32bit you will get this error.
Yes i choose 64 bits, i've read the log and i get no error codes except guru meditation 1155
lol that was me that told him that it was, and I quote, "a pain in the dick" Thanks for the tutorial!
Mmmm.... mine just hangs on "About 2 minutes remaining" during the installation to disc.
Share Your Thoughts