


Backing up your files is a requirement in today's world of tech. In an instant, your storage device can fail. This is an unacceptable situation that should never happen to anyone. Storage is cheap, and backups are easier than ever to perform. Most of the time, this can be completely automated, so you can just set it and forget it. Today, Null Byte will be covering how we can automatically, and efficiently back up our data across all OS platforms, while giving a few alternatives to the built-in OS tools to compare their pros and cons.
File back-ups are different on different platforms, because of the file system and architecture differences. Windows, Mac, and Linux all have differing file system trees. In order to back up a storage device, regardless of its OS, you would need to make it a 1:1 backup (also called cloning). This makes an exact binary clone of the storage and places it on another storage medium, or into a disc image file, ready to be restored. However, there are a few drawbacks to this method, namely the lack of autonomy and the need for a bigger storage medium than what you started with. If this still piques your interest, then you can check out Clonezilla.
Platform Independent Backups
Clonezilla is a live CD that you can simply boot from with an external storage media and create a 1:1 backup of a storge medium, regardless of OS, filesystem and partitions. This essentially clones the disk.
- First, let's install some easy-to-use, free software to burn our ISO. Download Free ISO Burner.
- Download Clonezilla.
- Open up Free ISO Burner and select the Clonezilla ISO file.
- Check off Finalize Disc.
- Set the burn speed to as low as you can. The slower the burn, the higher the quality it is. It also helps reduce turning CDs into a coffee coaster due to incorrectly burning the image.
- Click "Brun" (program typo).
- Put the disc in the disc tray, and reboot.
- In your system setup, make sure your computer boots from the CD/DVD drive.
- When the disc boots, after keymap selection, select Start_Clonezilla.
- Select device-image.
- Pick beginner mode.
- For now, we will do a local disk-to-disk copy.
- Then, choose the source and destination drives.
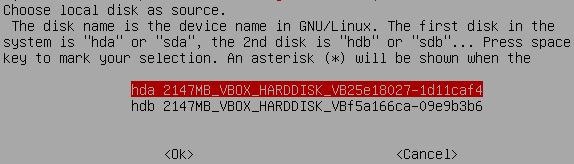
- Let it do its thing! It will finish and your other drive will be a perfect clone with working programs, partitions, and master boot record.
Windows Backups
There are thousands of solutions for backing up files on Windows. Formerly known for having awful backup tools and allowing third party backup software to flourish, Windows 7 comes with a really cool and easy backup and restoration tool. Here are some of its great features:
- Full and differential backups. This means you can backup your drive once, and every time after it will only update file blocks that have been altered.
- Automatic capabilities.
- Easy to use.
- Network, disc and drive backups are all possible.
- Can restore individual files.
- Disadvantages: You cannot alter or manage files once backed up. Also, you need a system repair disc to recover when Windows can't boot (the same holds true for all non-1:1 backups). Very slow.
Windows Backup and Recovery
- Click Start > Computer
- Right-click on your local drive and select Properties.
- Click on the Tools tab and click the Back up now... button.
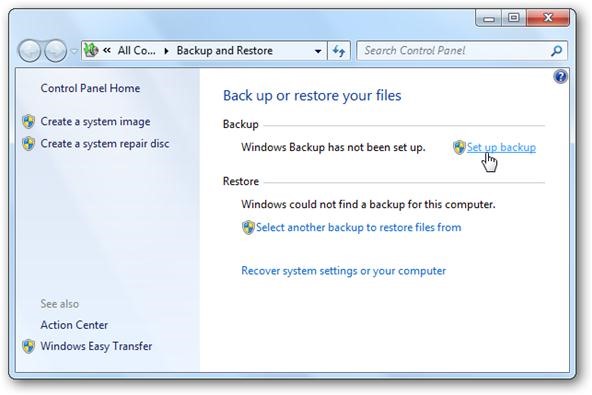
- Click Set up backup.
- When Windows is done scanning for drives, pick the device you would like to back up your computer to. Make sure the device is large enough!
- Click Next.
- Don't let Windows choose if you want a full backup. It will not backup programs, anything formatted with the FAT file system, files in the Recycle Bin, or any temporary files that are 1GB or more.
- Check everything you want to back up.
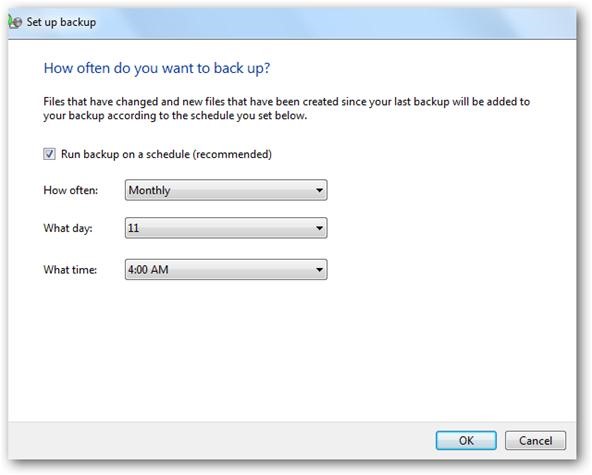
- Proceed untl you can set your backup schedule. Set this to automatically backup files at a time you will not likely be using your computer. Ideally, you should backup your files once every week. If you are like me, you do a lot of work on your computer, and can't afford to lose even an hour's work. If you fall into this category, consider using daily backups to mitigate potential data loss.
- Sip your coffee while you never have to mess with backups again (until your drive croaks)!
- To restore files, simply go the the Backup and Restore center and click Restore my files. The interface will walk you all the way through it!
Macrium Reflect: Free Edition
In my opinion, this solution is leagues better than the default Windows program for a number of reasons. On top of what the Windows program offers, here are its additional features:
- Incremental backups—Faster than differential, and basically the same thing. It doesn't read each block, it just creates a backup of new files.
- Individual file backup.
- Create 1:1 images or clones of media.
- Password protection and encryption.
- Email notification of backup status (seriously).
Let's create a 1:1 backup, since we have already created a file backup.
- Download and install Macrium free edition.
- Allow the program to connect to the internet and register with the default product key.
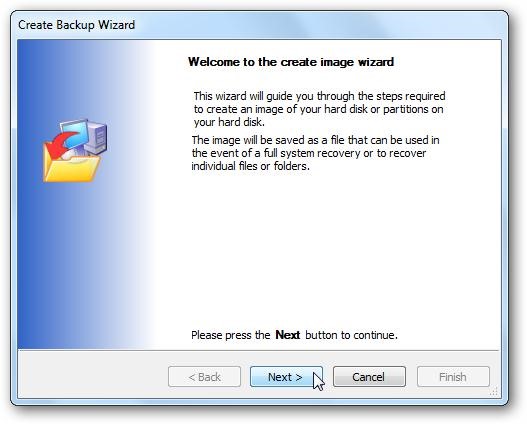
- Click the new image icon. It will start the wizard to create a clone of the disk.
- Choose which drive you are backing up, and where you are backing the data up to.
- Name your backup image to whatever you choose, and click Next.
- Click Advanced. Here we can edit encryption options, add a password and even compress the image!
- To restore the image, go back to the main screen and simply click the icon to Restore an image. Just select your .mriso file.
In closing, there is a clear winner when it comes to backing up files on Windows. Macrium Reflect has many more features, and can do everything that Windows can. If you don't need to backup files often, or you don't need a 1:1 image, you can probably stick with the Windows backup program.
Mac OSX Backups
Performing backups on a Mac is actually very easy, and a lot more convenient than Windows (and I dislike Mac, so that says something). The built-in tool, Time Machine, dominates in every area. It is capable of all kinds of backup solutions, with bonus features, such as file manipulation within the backup. You honestly shouldn't use a tool other than Time Machine on a Mac, and if necessary, just use Clonezilla.
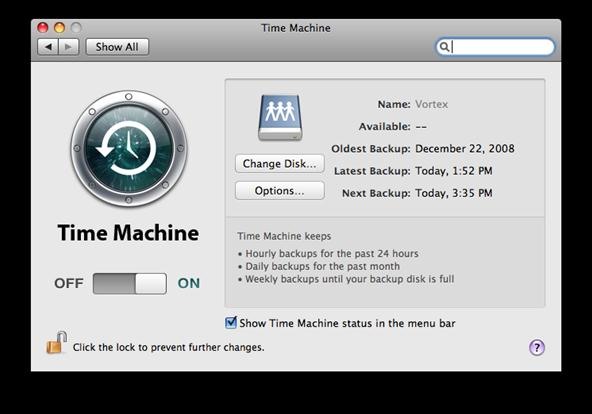
Time Machine
Time Machine keeps an up-to-date copy of everything on your Mac—system files, digital photos, music, movies, TV shows, documents, and so forth. You can easily go "back in time" to restore files if you ever need to.
Time Machine places strict requirements on the backup storage medium. The only officially supported configurations are:
- A non-booting hard drive or partition connected directly to the computer, either internally or by a bus like USB or FireWire, and formatted as journaled HFS+ (recommended).
- A folder on a journaled HFS+ file system shared by another Mac on the same network running at least Leopard.
- A drive shared by an Apple Time Capsule on the same network.
Here are some of the amazing features in this program:
- Time Machine takes snapshots of your computer state. So rather than just being a backup, it also acts as system restoration.
- You can pull individual files from different states in time.
- Full disc is recovery is possible with the standard Time Capsule. No extra backups or configuration necessary.
The latest Mac OSX comes with this elegant solution by default. So let's create some file backups with it.
- Start Time Machine.
- Set the location of your "Time Capsule" (the device that you are backing up files to).
- Here you can mess with your preferences in any way you please. By default, Time Machine keeps hourly backups for the past 24 hours, daily backups for the past month, and weekly backups until your backup drive is full. Awesome.
- Once the initial backup is completed, Time Machine performs subsequent hourly backups of only the files that have changed on your Mac since the last backup (as long as your Mac is awake and the backup disk is connected).
- To recover files, while your backup disk is connected, click the Time Machine icon in the Dock and the Time Machine restore interface appears. You can click windows and your computer will be restored, just as it was in that point of time. Ah, the perfect mixture of backups and system restore rolled into one.
Linux Backups
Linux also has a million backup solutions, but it's easiest to stick with the classic tar, and rsync backups. rsync is very advanced and can perform any kind of backup, but it is command-line only. Tar is simple, and quick, but only capable of differential file backups (the only kind most people need).
Tar Archiver
Text in bold is a terminal command.
All Linux installations have tar installed by default, so no need to install it.
- Navigate to the directory you want to back up. I will use ~/ as an example.
- Tar the files into an archive on external media. This will source all files from the current directory (recursively) and place them in an external USB device.
tar zcvf /dev/<external device> . - To backup as an incremental backup, use the following command.
tar zgcvf /dev/<external device> . - Create a startup command or a cronjob to have backups performed on a schedule. I just use my openbox initialization script to automatically backup on boot.
sudo nano ~/.config/openbox/rc.xml
Add tar zgcvf /dev/<external device> . & to the file, under autostart. - To recover files back from the archive, issue this command.
tar -zxvf <backup.tar>
Backups with rsync
This tool is amazing. It covers all common methods of backup, with added features like automatic network backups, and SSH access for security. Its only shortcoming is that it needs a server computer running the rsync daemon (this can be localhost). But that is what I am here for!
Here are some features of rsync:
- Support for copying links, devices, owners, groups and permissions.
- Exclude and exclude-from options similar to GNU tar.
- A CVS exclude mode for ignoring the same files that CVS would ignore.
- Does not require root privileges.
- Pipelining of file transfers to minimize latency costs.
- Support for anonymous or authenticated rsync servers (ideal for mirroring and remote backups)
Let's set up incremental backups to automatically run.
- Install rsync.
sudo pacman -S rsync - Run the rsync daemon.
rsync --daemon - Create an rsync configuration file that says where our files are located.
sudo nano /etc/rsyncd.conf - Paste this as the contents, altering the file path to your own, and adding your name to the users.
motd file = /etc/rsyncd.motd
log file = /var/log/rsyncd.log
pid file = /var/run/rsyncd.pid
lock file = /var/run/rsync.lock
[simple_path_name]
path = /my_backup_files
comment = rsync server
uid = nobody
gid = nobody
read only = no
list = yes
auth users = <your username here>
secrets file = /etc/rsyncd.scrt - To sync files from your local server, just enter local host as your path to sync from. Here is an example.
rsync 127.0.0.1::/path/to/files/you/need/to/sync
This can get pretty robust and crafty. We can even download from remote servers and FTP servers! However, in the end, I feel that it is more effective to use tar for backups of your /home and /etc directories. rsync is better for remote synchronization. For full disc cloning, nothing beats Clonezilla.
There you have it. If you want to back up your drive, these are the most efficient methods across all platforms that I, and many friends, use.
You can come visit the rest of Null Byte in the IRC. Alternatively, follow us on Twitter or G+ for the latest posts.
Just updated your iPhone? You'll find new emoji, enhanced security, podcast transcripts, Apple Cash virtual numbers, and other useful features. There are even new additions hidden within Safari. Find out what's new and changed on your iPhone with the iOS 17.4 update.


Be the First to Comment
Share Your Thoughts