

Hello everyone. It's been a while since I've posted anything (with good reason). But, now that the digital dust has settled, it's time to be an adult about this. I will be continuing to post to Null Byte on a smaller scale, and will also fully participate in whatever communities Null Byte members branch into.
With that said, let's learn about a very useful module that I was unaware of for quite a while, argparse. This module allows us to take command line arguments simply and very effectively. Not only will it manage the arguments for us, it will generate a help page if something doesn't go right. This article is going to go step by step how to use argparse. So, let's get stared!
Step 1: Importing Argparse and Set Up the Parser
To kick things off, we need to import argparse like any other module:
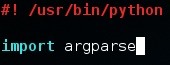
Note that we've also set the interpreter path at the top.
Now that we've done this, we need to make the parser. This is what will handle our arguments. We can make a parser object by calling the .ArgumentParser() method out of argparse and storing it in a variable. Let's make our parser now:

Alright, now that we have our parser, we can get started adding arguments. Note that we've also added a description that will be printed in the generated help page.
Step 2: Add and Parse Your Arguments
If we're going to be parsing arguments, we'll need to make some arguments. We can add arguments to our parser by using the .add_argument() method on our parser.
We're going to be adding 3 arguments to our parser, and then we'll evaluate them. When we add arguments, we have multiple options for them. We will using three of them. We'll have an argument that will store a True/False value based on it's presence, an arguments that will store the value that follows it, and an argument that will increase a number for every time it's found. Now that we've discussed our arguments, let's take a look at the code:

Alright, let's break this down. We can see that we start by actually saying what we want the argument to be. We can have multiple flags/switches tied to the same argument. Here we've tied two flags to each argument.
After we give the flags, we specify help for the flag. This string will be printed as help for the flag when the help page is generated. After the help string, we set the action.
If we want to store whatever follows the flag, we use 'store', if we want to increment a counter, we use 'count', and if we want to store a True/False value, we use 'store_true' (Note that we can also use 'store_false').
After we have the action sorted out, we set the default. This is the value it will hold if nothing is supplied for that flag, pretty simple. Finally, we set the dest. This is short for destination, and will be the name of the resulting variables when we finally parse the arguments.
We also parse our arguments. We do this by calling the .parse_args() method on our parser, and storing the return in the args variable. Now we can evaluate our arguments by calling args followed by the destination set in the argument.
Step 3: Evaluate the Arguments
Now that we have all that out of the way, we can evaluate that argument. (Side note: calling the logical operator "not" on a string or number will always return False, so using a double negative will return True, this helps us evaluate strings and integers as arguments)
We're just going to be printing different things based on what the user entered. Let's take a look at the code for this evaluation:
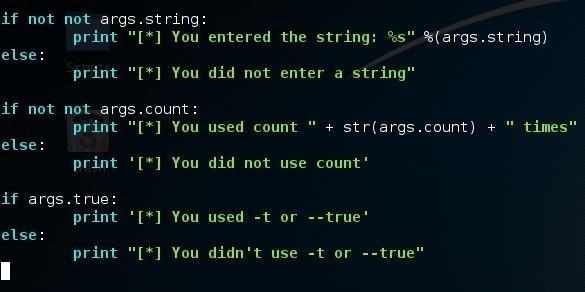
We can see here that all our evaluation really is just a bunch of if/else blocks that check the result of calling the 'not' operator on our arguments.
Step 4: Test Your Arguments
Now that we've seen how the arguments will be evaluated, we can test them to see if they work. First, let's take a look at the help page generated by argparse:
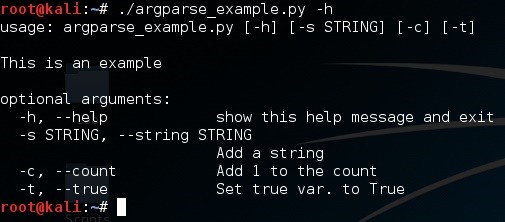
Alright, our help page looks good! Now, let's test our arguments, we're going to give them all at once now:

They work! Our arguments were successfully evaluated. Now that we've used them all, let's run it without using any of them:
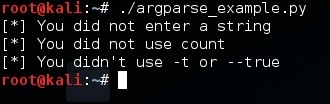
Alright, our arguments are fully functional! There isn't really anything else to cover, so let's wrap this up, shall we?
Wrapping It Up
We covered some very useful things here. Using argparse has made command line arguments 1,000,000 times easier for me personally, so I feel like it will help you all too! This module can be very useful when attempting to produce professional level scripts that are actually meant to be fully fleshed out and ultra-functional.
Thank you for reading!
-Defalt
Just updated your iPhone? You'll find new emoji, enhanced security, podcast transcripts, Apple Cash virtual numbers, and other useful features. There are even new additions hidden within Safari. Find out what's new and changed on your iPhone with the iOS 17.4 update.


3 Comments
hey defalt something out of the topic but is anyone the was good at hacking in these website including you online here anymore or not plz i have to know
Just started reading this series, and I'm curious to know if the python shell itself could be used to hack into a computer or phone? What are the limitations of hacking with the shell instead of scripting programs?
When is next part coming??
Share Your Thoughts