MacBook owners are certainly familiar with the numerous gestures that make it possible to greatly facilitate interaction with the laptop. However, not everyone knows how to call the preview function, the Notification Centre. Below are 10 multi-touch gestures that will help you save time and simplify your work with the MacBook.
1. Open and Close the Notification Center Using a Two-Finger Swipe
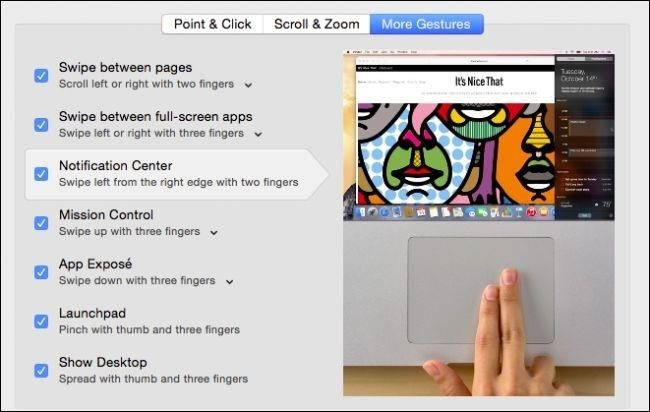
With the advent of Siri support in macOS Sierra , users have the opportunity to save various information, such as the time of showing movies, the schedule of sports games and even the results of the Finder. The notification center, which collects all reminders, events in the calendar, etc., opens with two fingers from the right edge to the center of the trackpad.
2 Open Launchpad or App Drawer
Launchpad helps you find, organize and conveniently launch programs on your MacBook. You can start the mode by tapping your thumb and the other three fingers. This gesture will require a little dexterity, but when you master it, opening Launchpad will become much easier.
3 Show Desktop
In order to cause the desktop, you need to put on the trackpad thumb and three other fingers and spread them to the sides. This is the most convenient way to access files stored on the desktop during operation.
4 Show Mission Control
Swipe three fingers up (in some models, the MacBook gesture is performed using four fingers) allows you to run the program Mission Control, which allows you to quickly view all open windows and spaces on the desktop. This feature is very convenient when working on laptops with a small screen, because it provides an easy way to see which applications are open at the moment.
5 Show All Windows of the Current Application
If during the work you need to see a list of all open windows in the current application, swipe three fingers down on the trackpad (in some MacBook models the gesture is performed using four fingers). This action will call the Expose function, which makes it easier to navigate among windows and applications.
6 Switch Between Desktops

Users working with multiple desktops can easily switch between them with a three-finger swipe (or four on some MacBooks) left or right.
7 Navigate Between Pages in a Browser, Calendar, or QuickTime
Swipe horizontally with two fingers to the left or right on the trackpad when working with the browser allows you to go to the next page or go back to the previous one. This gesture also works in a number of other applications. For example, in Calendar, you can thus switch between days or months, and in QuickTime, rewind the video forward or backward.
8 Quick Look in Safari

Touching three fingers when hovering over a word opens a pop-up window with the definition of the word. An easy three-finger tap on a link in Safari opens a preview of the site page, and a tap on a text file or image will launch the Quick Look.
9 Page Scaling in Safari
IPhone users are accustomed to the fact that on a mobile device the scaling is to couple / dilute two fingers to zoom in / out, respectively. This principle works in macOS.
10 Rotating Photos

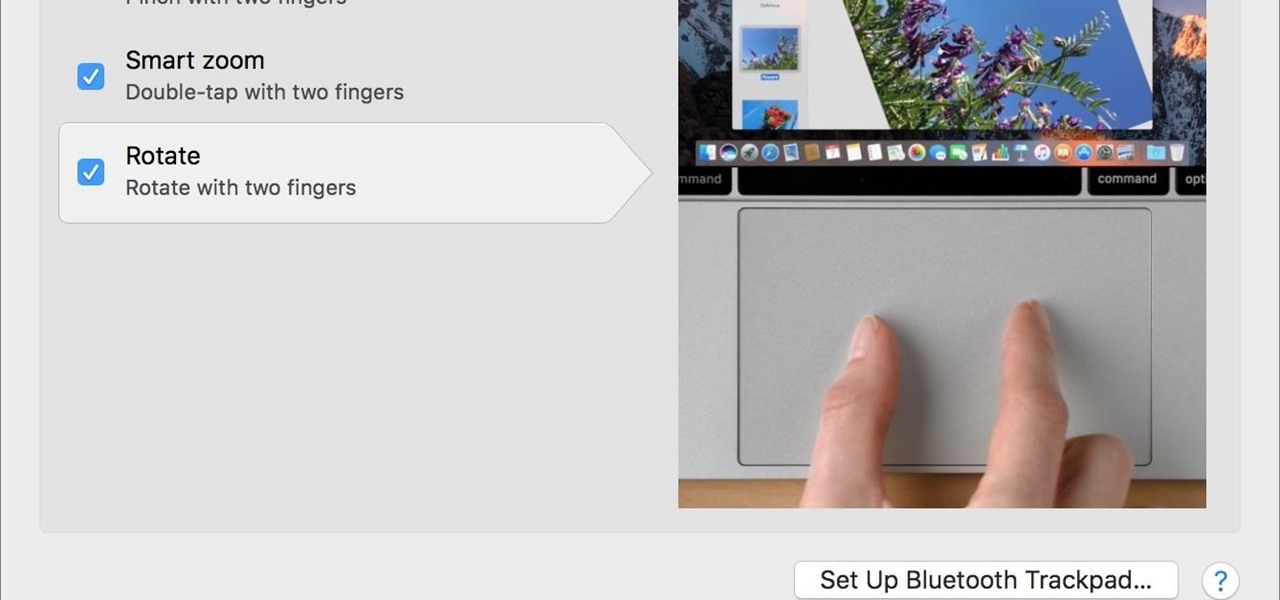
Here everything is simple. To rotate the image, place two fingers on the trackpad and rotate them 90 degrees.


















Be the First to Respond
Share Your Thoughts