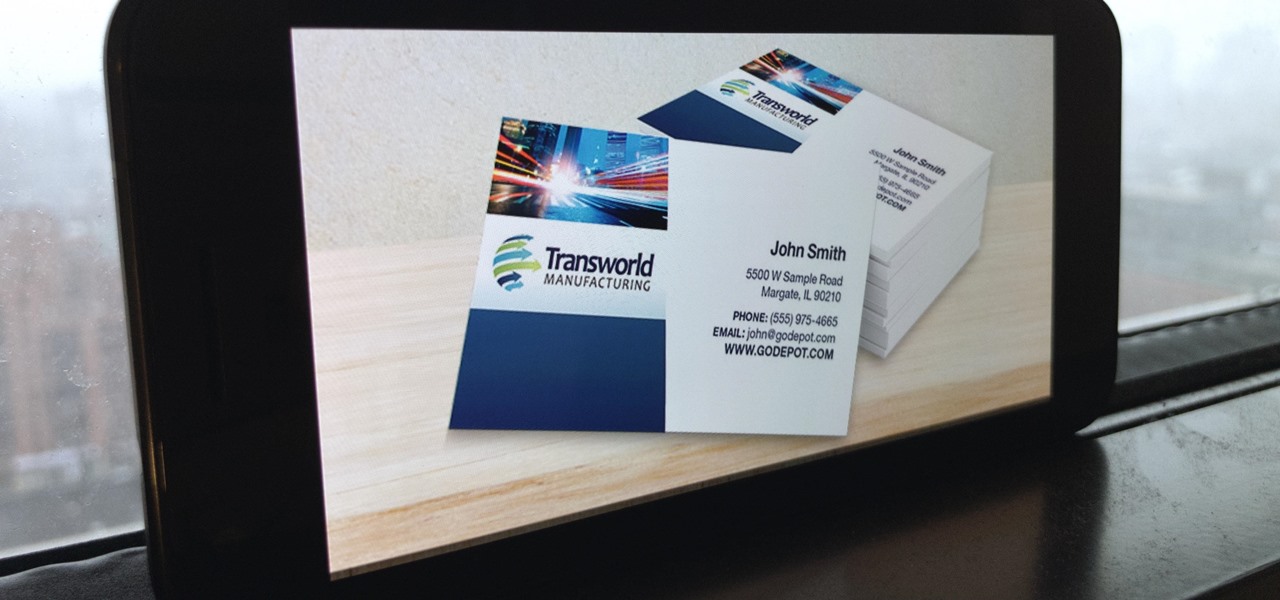

Business cards are a great way to keep tabs on the contacts we network with. So why shouldn't our smartphones make them even more useful? Enter Google Lens, which will help you save, search, and expand on the contact information found on all of the business cards you've collected.
Originally an exclusive feature of the Pixel 2 and Pixel 2 XL, Google Lens now comes standard with the Google Photos app for Android devices (just make sure to download the latest update). That means no additional apps to download and sign in to — all you need to do to get started is to take a picture of a business card whose owner you'd like to save as a contact.
Note: Lens is rolling out on iOS starting today, Mar. 16. While it won't be available to all right away, make sure to check up on your iPhone's Google Photos app to see if you have access to this feature.
Step 1: Scan a Business Card with Google Lens
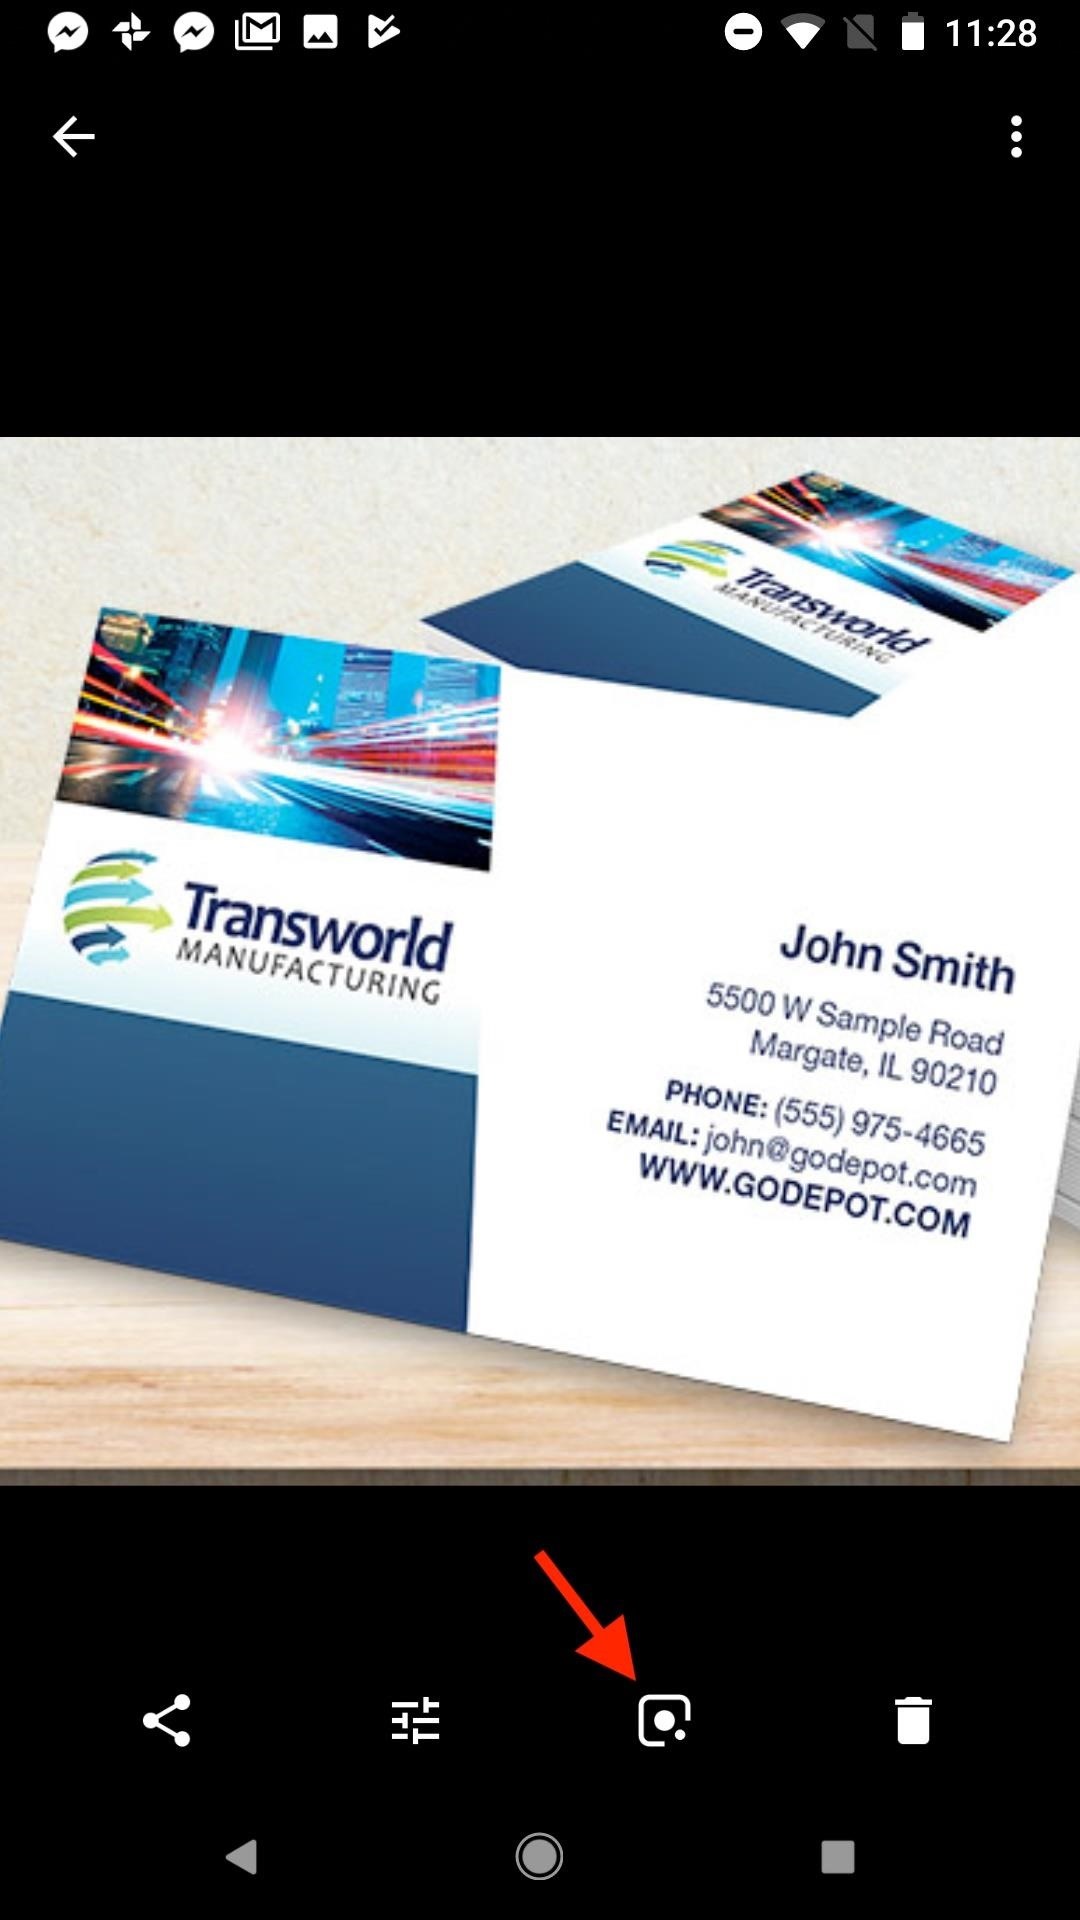
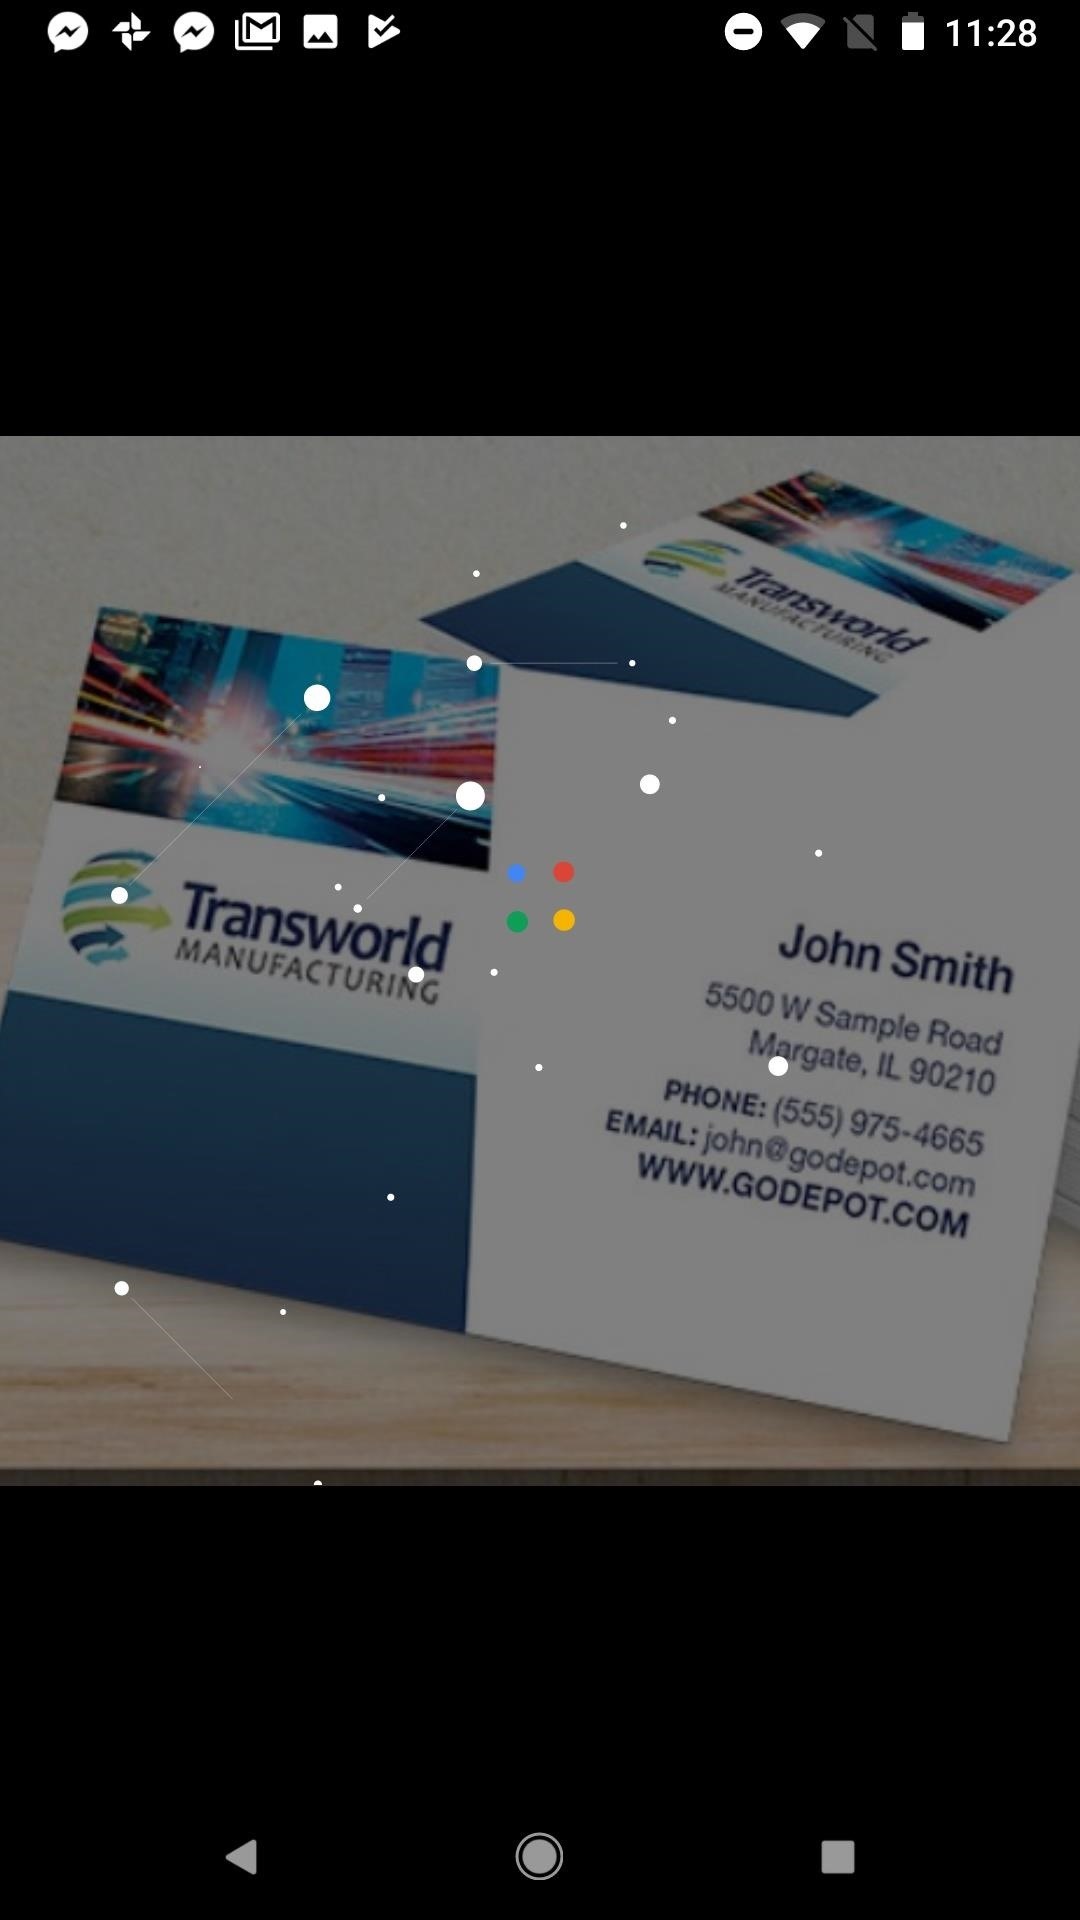
Once you have a picture of the business card in question, open it in Photos. Tap the Google Lens button in the bottom row of the app (to the left of the "Delete" trashcan key). Google Lens will then scan your photo with a cool animation before loading up all the information it was able to obtain from the card.
Step 2: Add a New Contact
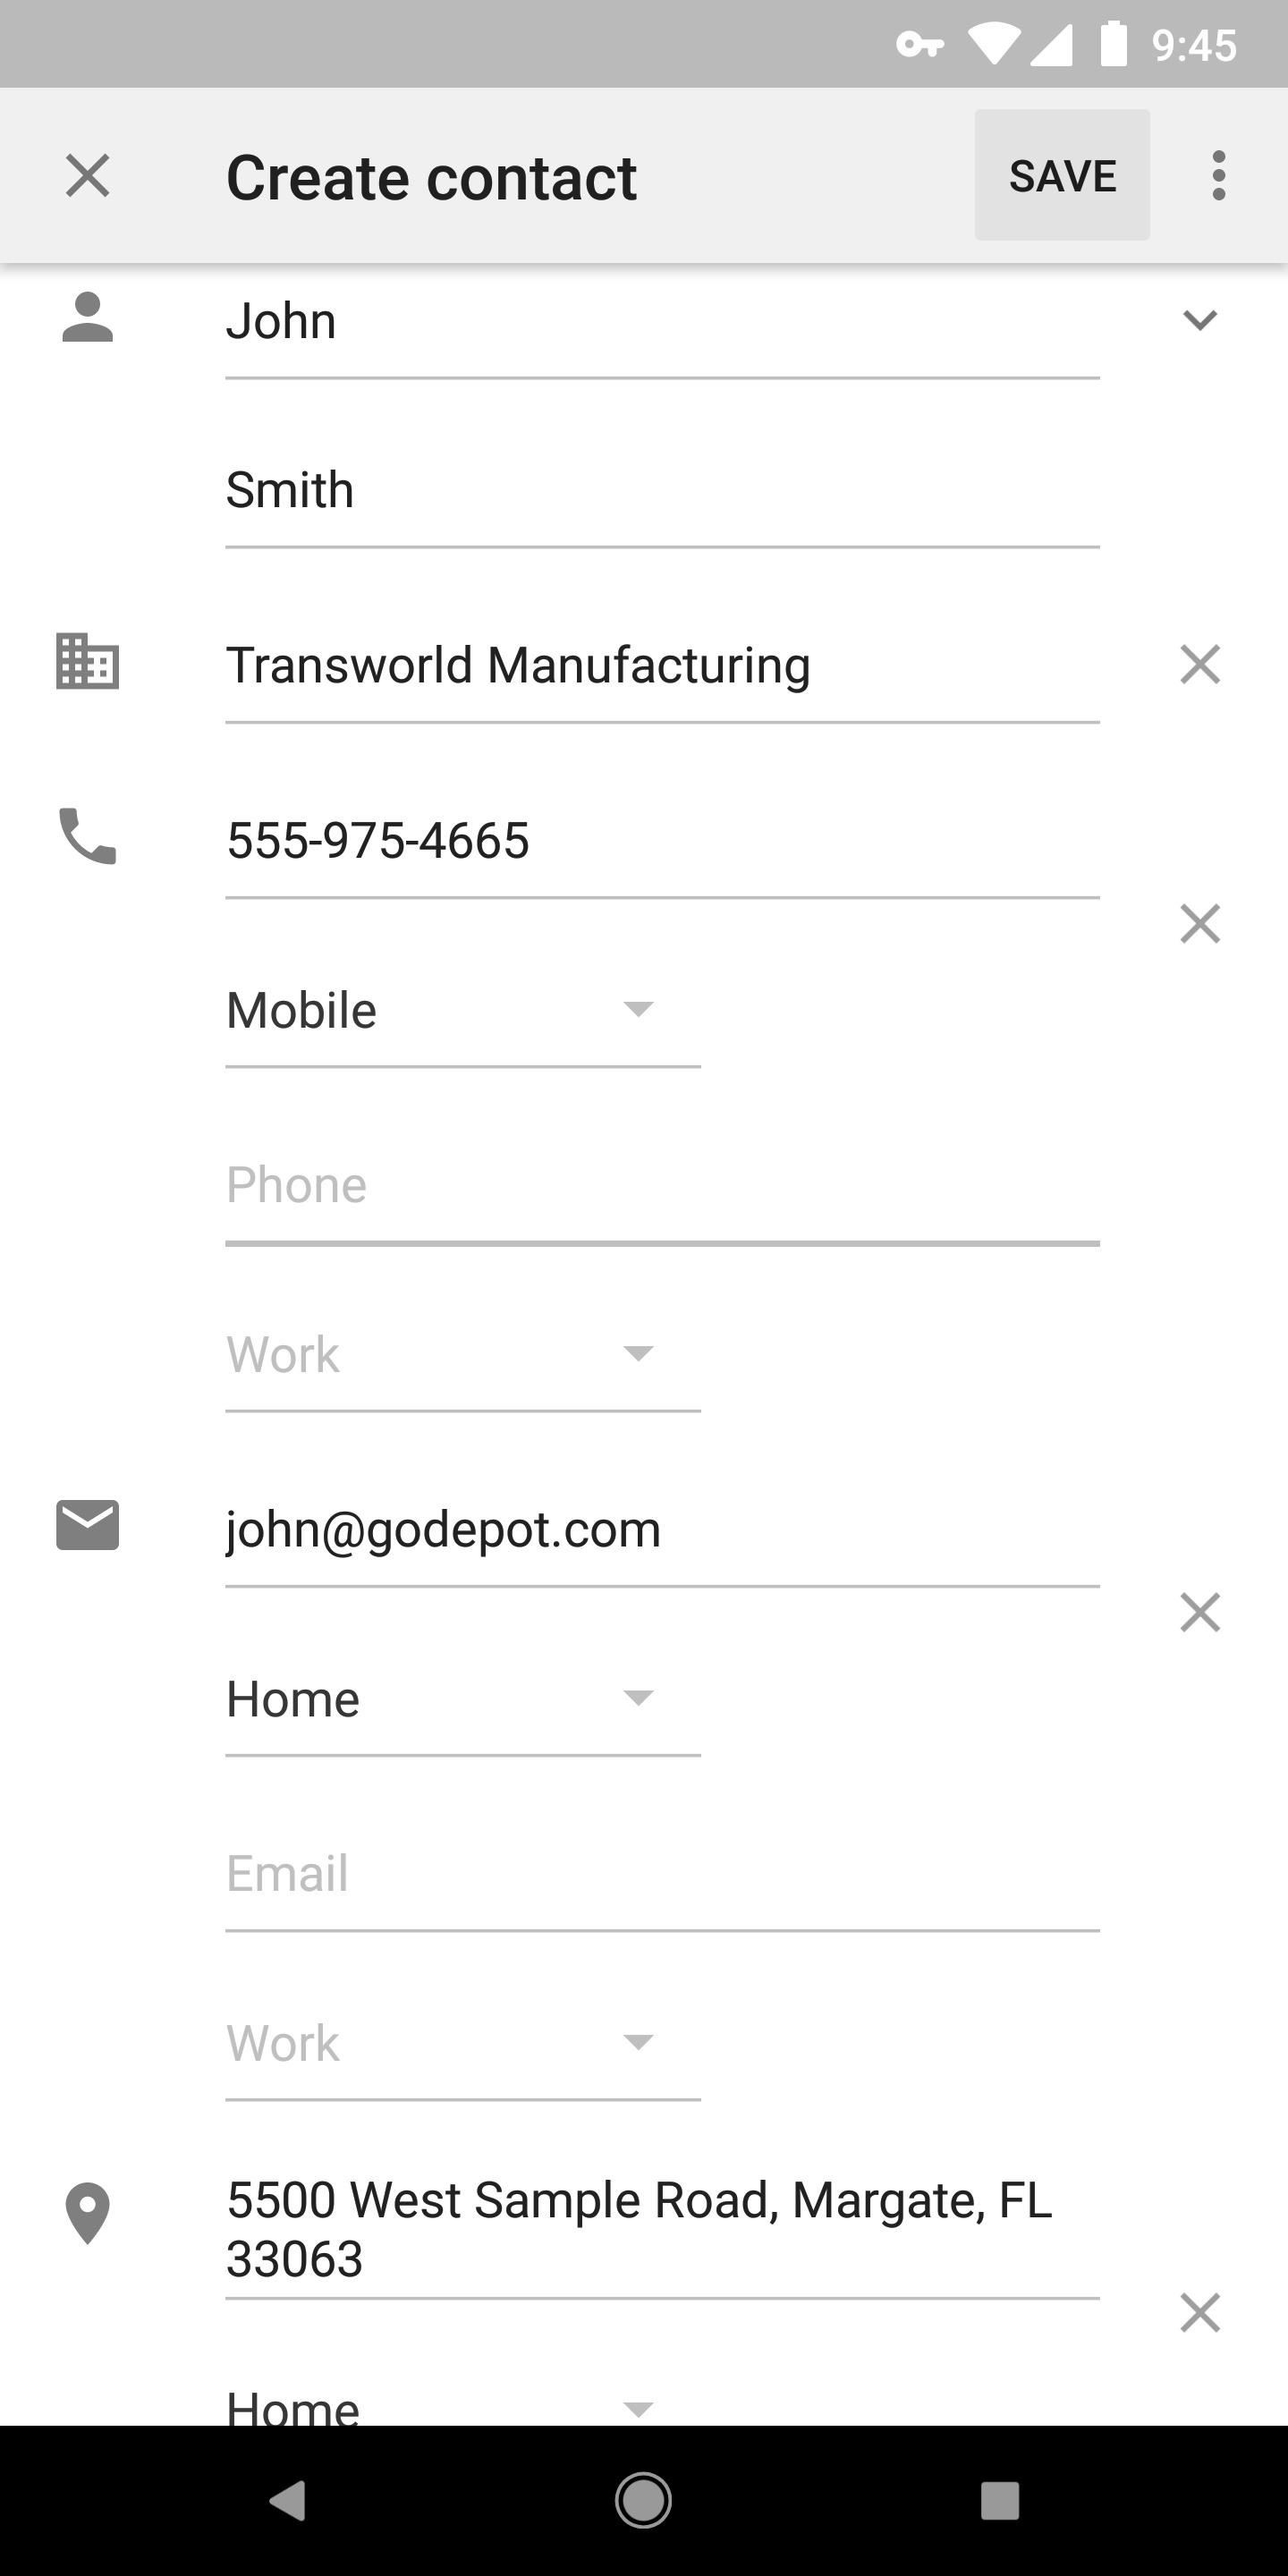
By default, Google Lens will key in on the contact information and lay out the person's name, email, address, and any other contact information it can process. You can quickly turn that information into a contact in your phone by tapping "Add contact" at the bottom of the display.
From there, your Contacts app will pop up. The interface will vary depending on what type of phone you're using, but for most, just tap "Create contact" or "New contact" to load up the information Google Lens found into a new contact. From there, the pertinent fields should already be filled out, but you can tweak the info or add to it if you'd like. When you're satisfied, make sure to tap the "Save" button to finalize your work.


Step 3: Interact with the Card in Other Ways (Optional)
That's not all you can do here, however. Google will break up the information it sees into different cards for a more focused look at each. The exact options you see will depend on the information Google Lens found on the business card you scanned.
In most cases, you can tap the "Gmail" icon to view this person's email address, then you can tap "Send email" to send them an email, "Add contact" to turn the address into a contact, "Copy text" to copy the email address, or "Share" to share the email address to another app or service on your phone.
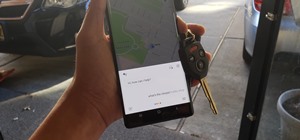
Tap on the Google Maps card to view the address listed on the card. You can tap "Open" to launch the address in Google Maps, "Copy Text" to copy the address to the clipboard, or "Share" to share the address with others.


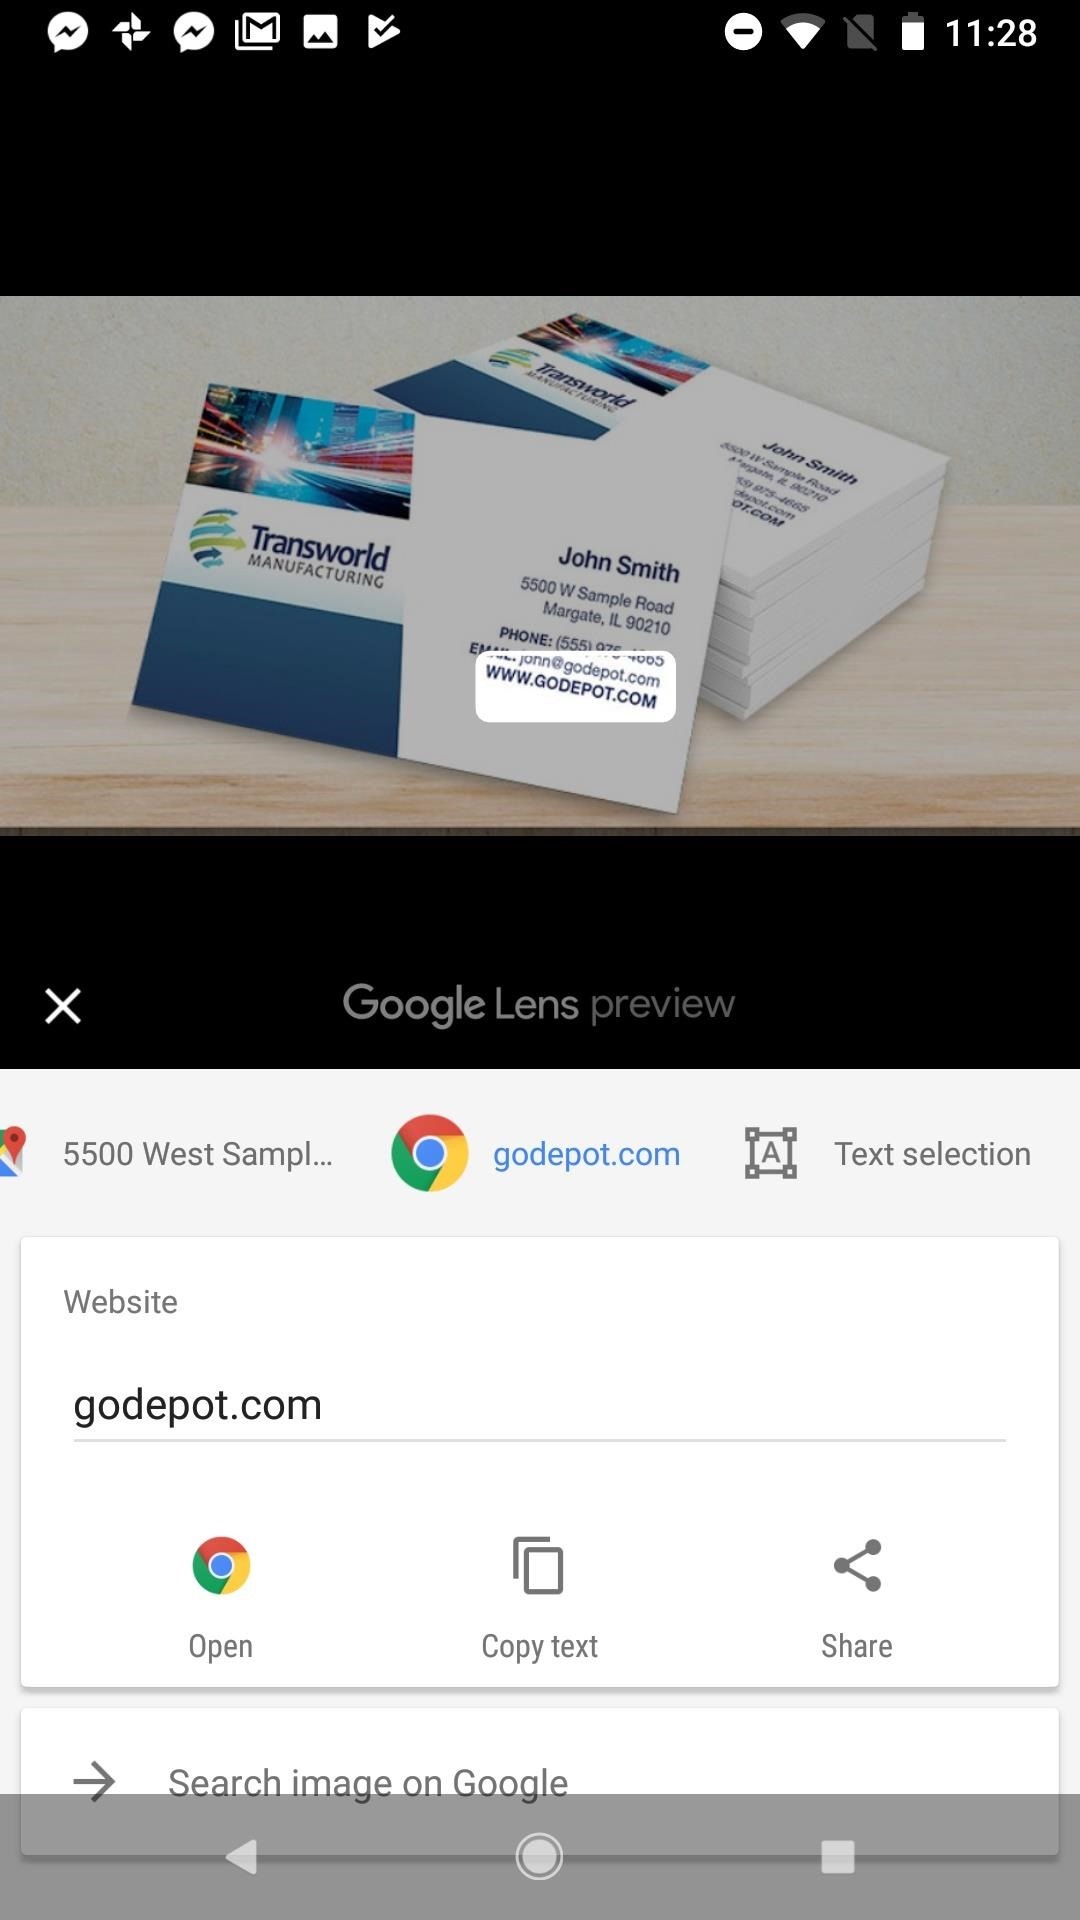
You can tap the "Chrome" icon to view the website the contact has on their card. Tap "Open" to jump into the link in Chrome, "Copy Text" to copy the site's address, or "Share" to send the website to friends.
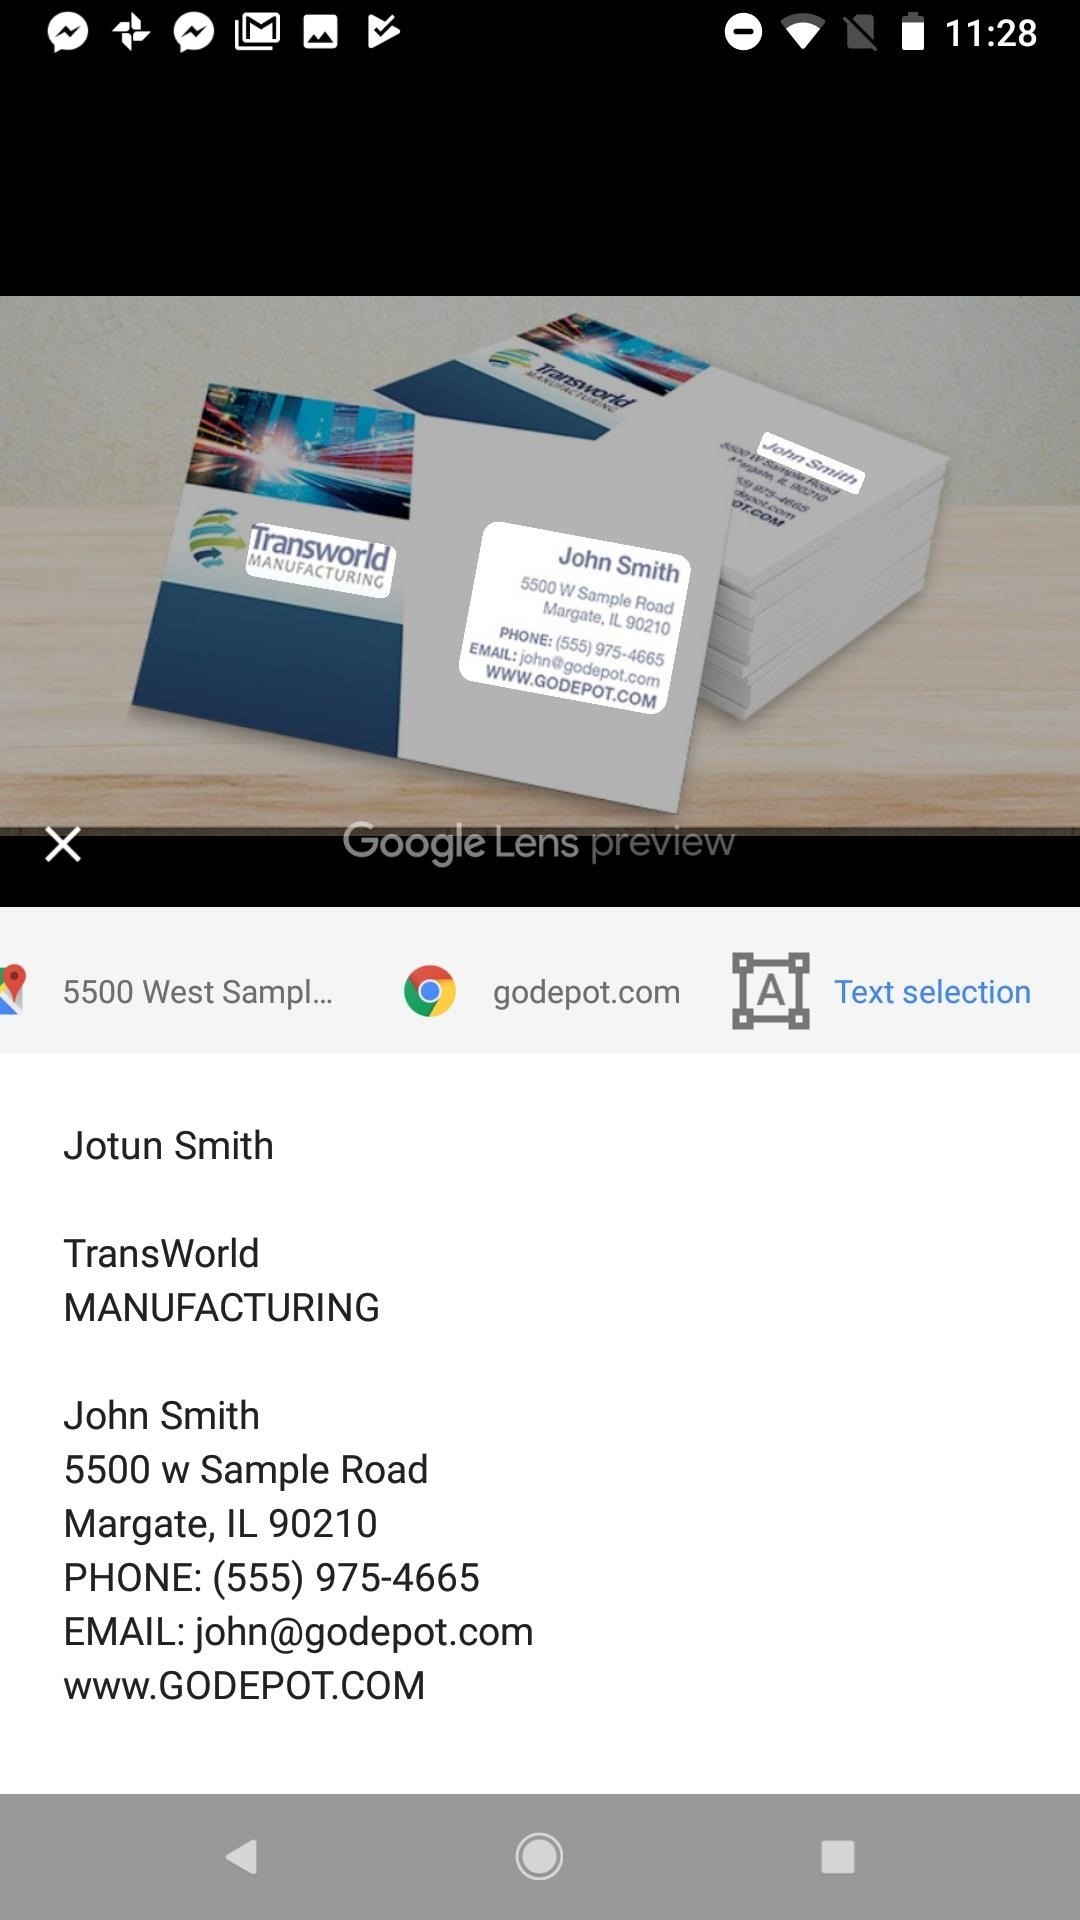
Finally, "Text selection" takes all text it can detect in the photo and lays it out for you to read. It might not be useful in all situations, but in a busy image, having the important bits listed out in plain text can be a big help. From there, you can long-press words or phrases to copy them to your clipboard.
Just updated your iPhone? You'll find new emoji, enhanced security, podcast transcripts, Apple Cash virtual numbers, and other useful features. There are even new additions hidden within Safari. Find out what's new and changed on your iPhone with the iOS 17.4 update.


Be the First to Comment
Share Your Thoughts