

The internet is constantly under siege by bots searching for vulnerabilities to attack and exploit. While conventional wisdom is to prevent these attacks, there are ways to deliberately lure hackers into a trap in order to spy on them, study their behavior, and capture samples of malware. In this tutorial, we'll be creating a Cowrie honeypot, an alluring target to attract and trap hackers.
A honeypot is a network or internet-attached device designed to be attacked and given a specific set of vulnerabilities. Honeypots usually intend to impersonate the sort of devices that attackers have an interest in, such as web servers.
While these devices can appear similar, or even identical, to authentic servers during passive scanning, there are a number of substantial differences between a deliberately-created honeypot and a vulnerable server.
These changes attempt to make the honeypot indistinguishable from a production server to any potential hacker who is scanning for open SSH ports to attack, while limiting the actual danger of an insecure server by creating one in a sandboxed environment. This creates something which looks real and appears vulnerable to hackers but does not create the same dangers to a server administrator as a truly vulnerable server would.
Cowrie is a honeypot which attempts to impersonate an SSH server, specifically one with weak and easily cracked login credentials. Once an attacker is logged in, they'll have access to a fake Linux shell where they can run commands and receive realistic looking responses, but the attacker will never be able to actually execute these real commands outside of the sandbox honeypot environment. That's because this Cowrie "shell" is in fact not a Linux shell at all. The command-line environment is implemented entirely in Python.
Like other honeypots, while fooling the attacker into thinking they're in a server, Cowrie will also log or analyze the attacks which are made against it. This allows for the honeypot administrator to gain an idea of what sort of attacks are being attempted, their general success or failure rate, as well as the geographical location of the IP from which a given attack originates. Cowrie is also capable of attempting to capture information about a specific attacker rather than just the metadata of their attack, such as accidentally exposed SSH fingerprints.
Honeypots Help to Understand How Malicious Hackers Work
The video below demonstrates a real-world attack which was captured and replayed. The hacker attempts to utilize a number of Linux utilities, presumably in order to download and run malware on the server, only to discover that while these commands return many generally normal responses, attempts to actually run malware or steal data seem to fail.
Perhaps with or without realizing they are on a honeypot, the attacker eventually becomes frustrated and attempt to delete every file on the system with rm, a command which, of course, also fails due to the protected nature of the honeypot.
For researchers, a honeypot is the best way to understand firsthand what sort of attacks are being used in the wild, and as such, be able to more effectively protect against them. A honeypot will attract hackers, some of which will be attempting to install malware automatically or perhaps even some who will directly attempt to access the machine in order to steal whatever data may be on it. Other less effective hackers may manually attempt to attack the machine, as shown in the video above.
Honeypots Protect Against & Help Identify Breaches
The presence of a honeypot may also distract some malicious attackers from real targets, and in wasting their time, potentially serve to protect a larger network with real production machines in use. They can also assist in identifying a local network breach, in that if another machine on a LAN is compromised, the evidence may be revealed when the attacker attempts to pivot to the honeypot. If a user on a large network unknowingly is infected by malware, it may be detected after a honeypot receives a login attempt originating from that infected device, and a network administrator then may be able to identify and resolve the issue.
A honeypot will never be shared with a real server, nor connected to a real network. Use caution when creating a honeypot, as if it is misconfigured it may create real vulnerabilities. Cowrie is not known to be vulnerable itself, however, bringing attention to a machine as a honeypot leads to a higher possibility of attacks on other services which may have security flaws. With this in mind, you should ensure that wherever you choose to install your honeypot is not being used as a live machine for any other services.
Step 1: Choosing Where to Install Cowrie
Cowrie itself doesn't require substantial technical specifications to run. The honeypot can be installed on practically anything with a Linux shell and a network connection, including on a Raspberry Pi.
In order to draw attacks over the internet, your honeypot will need to be connected to the internet and available to be port scanned. This port scanning may require adjustments to your router or firewall configurations on your network. One such adjustment may be router-focused port-forwarding to deliberately expose certain ports to the internet.
Rather than draw attention to a local network and adjust the network configuration, one can also use a virtual private server (VPS), a virtual machine instance provided by a hosting provider. Unlike traditional online server spaces, which generally only provide FTP access for hosting websites or files, a VPS provides direct operating system shell access, ideal for installing a honeypot.

If you choose to use a Raspberry Pi, it serves a relatively good platform for a honeypot, as its low cost makes the otherwise impractical application of resources to a honeypot easier to justify. Considering that a real server should never be used as both a functioning server and a honeypot at the same time, applying a tiny circuit board computer is a good solution. The Raspberry Pi 3 is an ideal platform as it has the highest specifications of any Pi available. It is available as just the single-board computer or with a convenient starter kit.
In this tutorial, Cowrie is installed on a VPS running Debian. VPS providers generally allow the choice of operating system as well as the amount of memory and CPU cores provided. For running Cowrie, any Linux server-specific distribution will work on even most low-specification server options. Desktop distributions are also functional, although some special-purposed distributions such as Kali Linux may not be ideal due to use of non-standard firewall rules and account privilege configurations.
In this tutorial, we're using Debian, a desktop and server Linux distribution known for stability and security. Other Debian-based distros like Ubuntu or Raspbian are also effective choices.
The exposure of a honeypot depends on its network connection. On a VPS, you're setting up the honeypot on the vulnerable port 22, which is exposed to the entire internet, as is true of any other device connected to the internet directly. If, instead, you're looking to detect breached and pivot attempts within that local network, set you honeypot up within a LAN.
Step 2: Preparing for Cowrie Installation
The first step to preparing your server is to make sure it is updated. While the honeypot will deliberately limit the actual exposure of the system, it's good to make sure that the version of Linux in use on the machine you intend to install the honeypot on is up to date and secure.
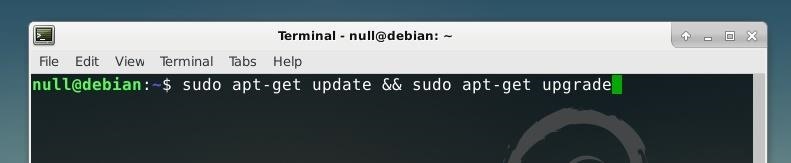
On Debian or Debian-based distros such as Ubuntu, the system can be updated using apt-get, as shown in the string below. This can be entered into the system command line or over SSH if you're connecting to the system remotely.
sudo apt-get update && sudo apt-get upgrade
Once you're up to date, we can install some of the Cowrie-specific dependencies by running the command below.
sudo apt-get install git python-virtualenv libssl-dev libffi-dev build-essential libpython-dev python2.7-minimal authbind

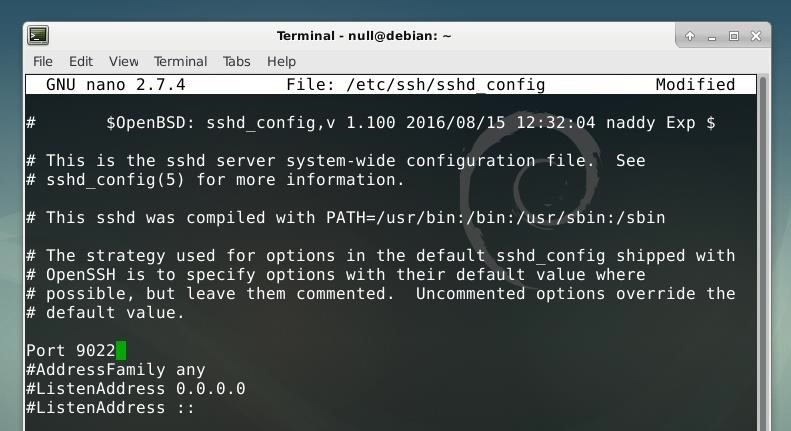
Once the prerequisites are installed, the next step is to move the actual SSH service to a different port. While the honeypot will impersonate an SSH server on port 22, we'll want to be able to still administrate the system over SSH on a different port. We can specify this in the SSH daemon configuration file. We can edit this file in the Nano text editor, included in most Linux distros, by running the command below in a terminal.
sudo nano /etc/ssh/sshd_config
Change the number after "Port" from 22 to whatever number you choose, and make sure to remove the "#" symbol from the beginning of the line if it was previously commented out. In this example, I changed the port to "9022." This port number represents the port where we will actually administrate the honeypot, while the vulnerable honeypot service will run on port 22 like a conventional SSH service. It can be set to any number, as long as it is not port 22.
After the changed are made to the file, they can be saved within Nano by pressing Ctrl + O and then exiting Nano with Ctrl + X. After the SSH configuration is changed, the service can be restarted with systemd by using the command below in a terminal.
sudo systemctl restart ssh

If you installed on a VPS or wish to connect to your honeypot machine remotely, when using SSH, use the -p option to specify this new port. To connect over SSH to the port 9022, the command below would be used, followed by the address of the server.
ssh -p 9022
Now, we're ready to begin the initial configuration of Cowrie.
Step 3: Installing Cowrie
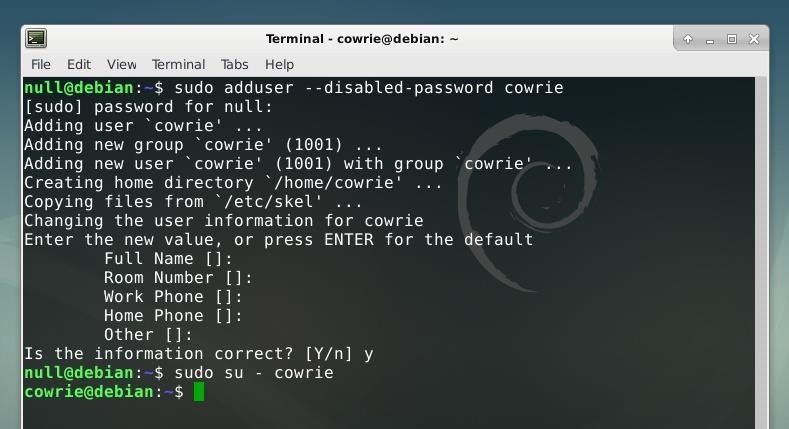
The first step of the installation process is to create a new user account specifically for Cowrie. We can do this with the adduser command by running the string below.
sudo adduser --disabled-password cowrie
This creates a new user account with no password and a username of "cowrie." We can log into this new user account using sudo su as in the command shown below.
sudo su - cowrie
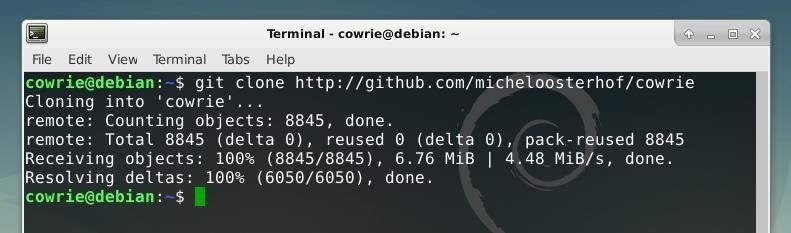
Next, we can clone the Cowrie source code into this new user account's home folder using Git, as shown in the command below.
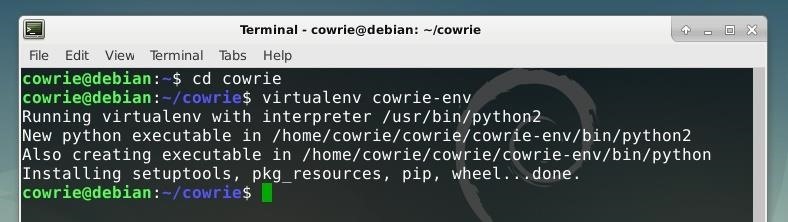
Now, we can move into the cowrie folder with cd.
cd cowrie
Within this directory, we can create a new virtual environment for the tool by running the command below.
virtualenv cowrie-env
We can then activate this new virtual environment:
source cowrie-env/bin/activate
From here, we can use Pip to install additional requirements. First, update Pip with the following command.
pip install --upgrade pip
Now, install the requirements with the string shown below. The requirements.txt file included with Cowrie is used as a reference for the Python dependencies for Pip to install.
pip install --upgrade -r requirements.txt

The configuration for Cowrie is defined in two files, cowrie.cfg.dist and cowrie.cfg. By default, only cowrie.cfg.dist is included when the tool is downloaded, but any settings which are set in cowrie.cfg will be assigned priority. To make it slightly more simple to configure, we can create a copy of cowrie.cfg.dist and use it to create cowrie.cfg, such that there is a backup of the original file. We can do this using the cp command, as shown in the string below.
cp cowrie.cfg.dist cowrie.cfg

We can edit this configuration file in Nano by running nano cowrie.cfg from the command line. The first setting which may be worth changing is the hostname of the honeypot. While this isn't necessary, the default "svr04" may be an indicator that this is a honeypot to an attacker.

Next, "listen_port" should be set to "22" rather than "2222," such that attempted connections at the standard SSH port are allowed.

We can now make any other changes to the file, save them with Ctrl + O, and exit Nano with Ctrl + X. After the file is saved, we can also update the port routing configuration for the system by tunning the command below.
iptables -t nat -A PREROUTING -p tcp --dport 22 -j REDIRECT --to-port 2222

We can now launch Cowrie by running the string below from the Cowrie folder.
bin/cowrie start
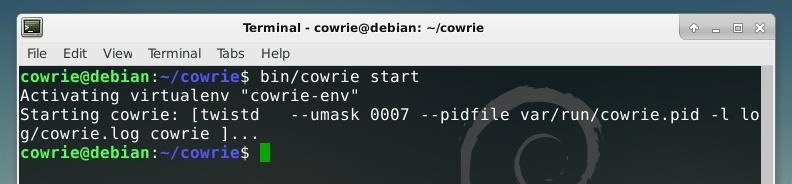
If this succeeds, the honeypot is now running! You can also stop it at any time by running bin/cowrie stop.
Step 4: Monitoring & Attacking the Honeypot
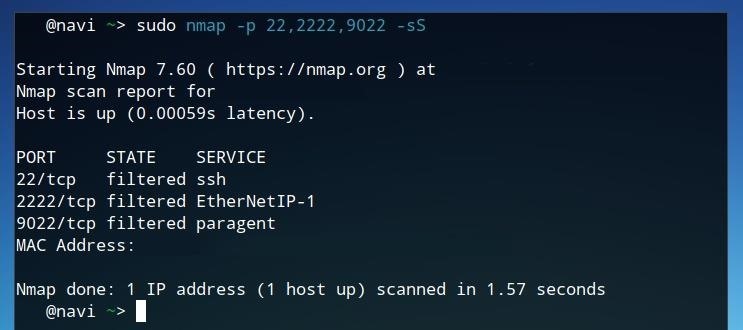
If we do a network scan like Nmap against our server, we'll see that all three of the SSH ports we configured are active. Port 2222 is visible, where Cowrie is running, as well as port 22, the standard SSH port being forwarded by the iptables configuration defined earlier. Lastly, port 9022 is also filtered, the actual SSH administration port in use.
If we attempt to connect to port 22 or 2222, we can directly "attack" our own honeypot. The honeypot will accept practically any attempted login credentials, as well as present something which looks like a Linux shell.

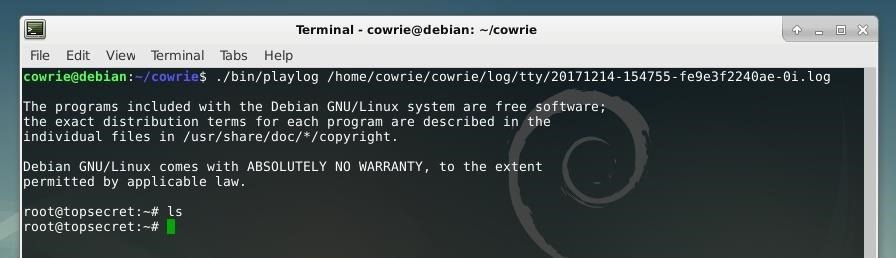
After logging in to the honeypot on port 22 and attempting to run commands on it, we can review what we did by logging back in on port 9022 to check the logs. These logs are recorded in a format which can be replayed in real-time using the integrated log replay tool. This script can be run followed by the specific log file as an argument in order to replay it in real time.
To call the script, use ./bin/playlog from the Cowrie directory followed by the name of the log you wish to replay. Logs are located in the /log/tty/ directory within Cowrie's root directory, and each is titled procedurally, with the date and time automatically set as the filename. To view the available logs, use ls by running ls log/tty from the Cowrie directory. Once you've selected a log to view, use it as the argument for the playlog script, as shown in the example command below.
./bin/playlog /home/cowrie/cowrie/log/tty/20171214-154755-fe93f2240ae-0i.log
If your honeypot is connected to the internet, you can just wait until the inevitable probes attempt to log in and drop malware on the machine. Cowrie is open-source and very configurable, and could absolutely be expanded and combined to have further functions to be suitable for a wide variety of honeypot projects. With very minimal setup, it's still very powerful, and a fascinating way to understand the attack landscape of the internet.
I hope that you enjoyed this tutorial on the Cowrie honeypot! If you have any questions about this tutorial or Cowrie usage, feel free to leave a comment or reach me on Twitter @tahkion.
Just updated your iPhone? You'll find new emoji, enhanced security, podcast transcripts, Apple Cash virtual numbers, and other useful features. There are even new additions hidden within Safari. Find out what's new and changed on your iPhone with the iOS 17.4 update.


1 Comment
Hey,
Really great tutorial, i'd like to know, how could I start/stop the cowrie-env with a script ?
Thanks
Share Your Thoughts