

Sometimes, you need to host an exploit (like any browser exploit) or handler for your payloads over a relativly long time and require it run stable and fast. In this case, you better go for a server or a Droplet than your virtual kali machine. If you decide to run a DigitalOcian Droplet, you quickly notice that you are not able to upload a custom image (Kali) to be installed on your Droplet. You can, however, still install all kali tools on a droplet:
Step 1: Basic Droplet Setup
After you've signed up to DigitalOcean and set up your payment method, click the "Create Droplet"-button right next to your avatar in the upper right corner.
![[How-to] Installing "Kali" on DigitalOcian Droplets.](https://img.wonderhowto.com/img/27/56/63623535298494/0/how-to-installing-kali-digitalocian-droplets.w1456.jpg)
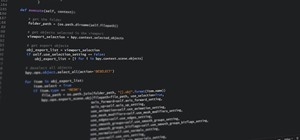
Since Kali is based on Debian, you should choose it as your distribution. (This tutorial likley will work on Ubuntu too, but I haven't tested it). When it comes to the Droplet size, I recommend the 2 GB Droplet if you want to use Metasploit or the smaller ones in the other case. After you've ignored the block storage option, you are free to choose your favorite datacenter location and enable IPv6 if you need to. Finally, scroll to the bottom and press the big green create button.
![[How-to] Installing "Kali" on DigitalOcian Droplets.](https://img.wonderhowto.com/img/94/52/63623535479523/0/how-to-installing-kali-digitalocian-droplets.w1456.jpg)
A few (5 - 20) seconds later, you will recieve an email with your IP-address and the root password.
Next, SSH into your droplet. You will have to set a new root password, I highly recomment choosing a safe one since Droplets are usually under a constantly SSH-Bruteforce attack. You also may consider using SSH-Keys (as described here) if you plan to use this droplet for a longer time.
Step 2: Configuring Apt
Firstly, you'll need to update the sources list. This can be done by simply running the command
"echo "deb http://http.kali.org/kali kali-rolling main contrib non-free" >> /etc/apt/sources.list". This will replace the default debian sources with Kalis "Up-To-Data" repository.
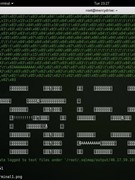
Next, run "apt-get update", but you'll get a GPG signature error soon. Fix it by running "apt-get install kali-archive-keyring", which basicly installs Kali's signatures. Finally execute "apt-get update" one more time (this time it should succed).
Step 3: Installing the Kali Tools
Now, we can choose between some bootsets, the so called metapackages. You can list them by running "apt-cache search kali-linux", you can find a good description here. However, here's a list with the metapackages that make most sence to run on a server for me:
- kali-linux-top10 : All the tools you can find in the Top 10 submenu of the normal kali installation, including Metasploit, Hydra, John, Aircrack, etc. (Size: 3.5 GB)
- kali-linux-pwtools : 40 password cracking tools (Size: 6.0 GB)
- kali-linux-web : A bunch of web application penetration testing tools including beef or different web page recon tools, but also basic utilities like apache, php, msqli, etc. (Size: 4.9 GB)
Further, you can use "kali-linux-full" (9 GB) to go for all the tools delivered on the ISO-images or "kali-linux-all" (15 GB) to download literally all tools being supported by kali.
Summary
Finally, I want to thank you for reading my first how to. I would really appreciate any feedback and hope didn't do to many typos or grammar faults since I'm not a native english speaker / writer.
Further, if you are interested into DigitalOcian, you can get 10$ credits for free just by clicking my refferal link before signing up. :)
PS: I somehow managed to not post this as how-to, but as forum thread. I would be happy if an admin / moderator can move this how-to into the how-to section :)


1 Response
Oh ok now, can I run some git clone stuff on it, changing of mac address will be possible also? am sure wifi spoofing and additional device won't work with it
Share Your Thoughts