
Welcome back, my greenhorn hackers!
Recently, I asked the Null Byte community what subject they would most like me to cover in future tutorials. Many of you cited scripting, and I decided it's best to cover this subject soon, so here goes.
Any self-respecting hacker must be able to script. For that matter, any self-respecting Linux administrator must be able to script. With the arrival of the Windows PowerShell, Windows administrators are increasingly required to script as well perform automated tasks and be more efficient.
As a hacker, we often need to automate the use of multiple commands, sometimes from multiple tools. To become an elite hacker, you not only need to have advanced shell scripting skills, but also the ability to script in one of the widely-used scripting languages such as Ruby (Metasploit exploits are written in Ruby), Python (many hacking tools are Python scripts), or Perl (Perl is the best text manipulation scripting language).
This is the first of a new series I'm starting in scripting. We will start with basic shell scripting, move to advanced shell scripting, and then to each of these scripting languages developing hacking tools as we go. Our ultimate goal will be to develop enough scripting skills to be able to develop our own exploits.
In a previous post, I showed you how to put together a simple script using nmap to scan a range of IP addresses to check for a particular port availability. We will need that script here, as we will be adding new functionality to it after completing some preliminaries.
Step 1: Types of Shells
A shell is an interface between the user and the operating system. This enables us to run commands, programs, manipulate files, etc.
There are a number of different shells available for Linux. These include the Korn shell, the Z shell, the C shell, and the Bourne again shell (or BASH).
As the BASH shell is available on nearly all Linux and UNIX distributions (including Mac OS X, BackTrack, and Kali), we will be using the BASH shell, exclusively.
Step 2: BASH Basics
To create a shell script, we need to start with a text editor. You can use any of the text editors in Linux including vi, vim, emacs, gedit, kate, etc., but I will be using kwrite here in these tutorials. Using a different editor should not make any difference in your script.
Step 3: "Hello, Null Byte!"
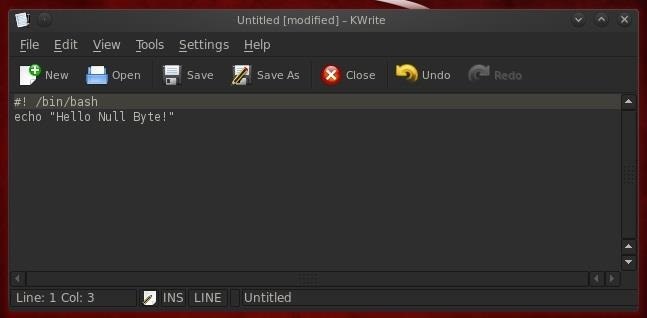
For our first script, we will start with a simple script that returns a message to the screen that says "Hello, Null Byte!".
We start by entering the shebang or #!. This tells the operating system that whatever follows the shebang is the interpreter we want to use for our script. We then follow the shebang with /bin/bash indicating that we want the operating system to use the BASH shell interpreter.
- #! /bin/bash
Next, we enter echo, a command in Linux that tells the system to simply repeat or "echo" back to our monitor (stdout) what follows. In this case, we want the system to echo back to us "Hello Null Byte!". Note that the text or message we want to "echo back" is in double quotation marks.
- echo "Hello Null Byte!"
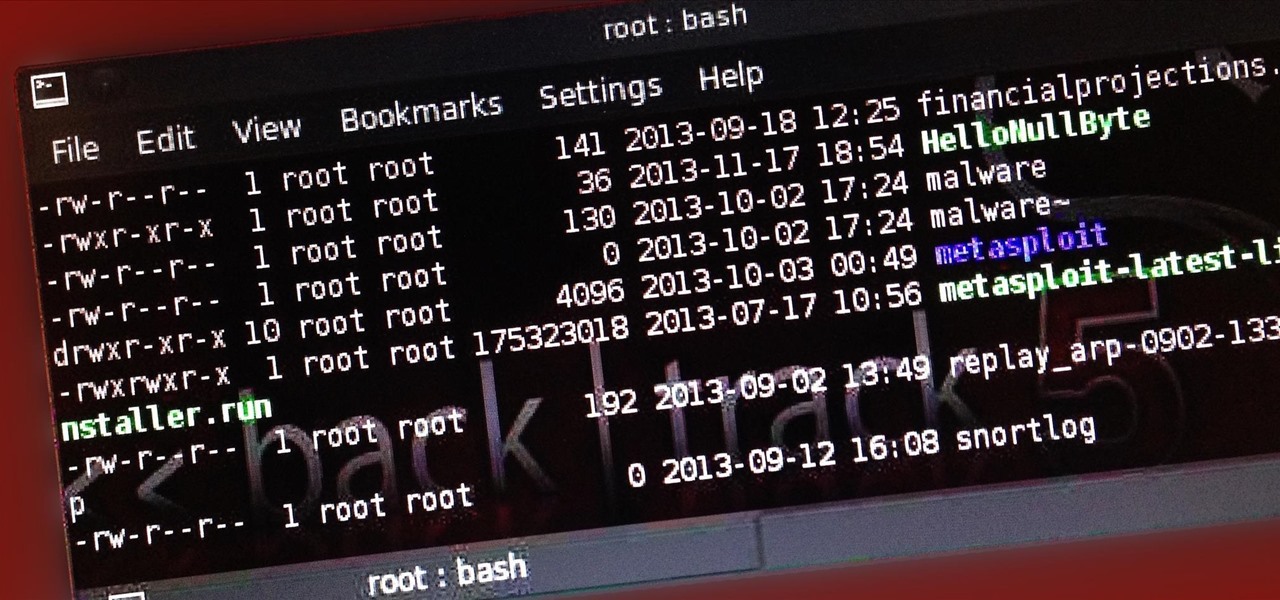
Now, let's save this file as HelloNullByte and exit from our text editor.
Step 4: Set Execute Permissions
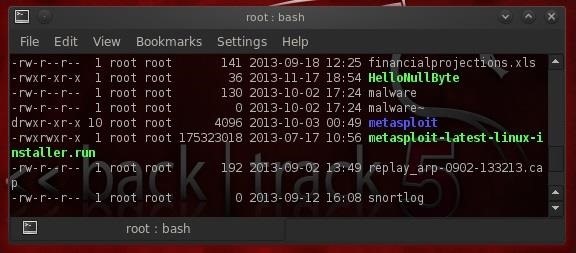
When we create a file, it's not necessarily executable, not even by us, the owner. Let's look at the permissions on our new file, by typing ls -l in our directory.
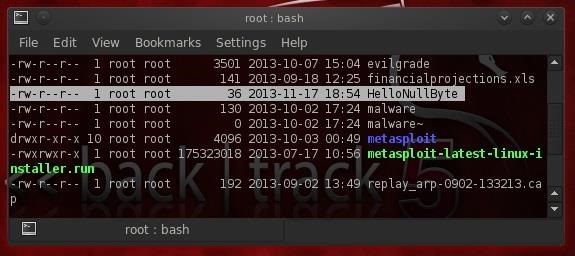
As you can see, our new file has rw-r--r-- permissions. The owner of this file only has read (r) and write (w) permissions, but no execute (x) permissions. The group and all have only read permission. We need to modify it to give us execute permissions in order to run this script. We do this with the chmod command. To give the owner, the group, and all execute permissions, we type:
- chmod 755 HelloNullByte
Now when we do a long listing (ls -l) on the file, we can see that we have execute permissions.
Step 5: Run HelloNullByte
To run our simple script, we simply type:
- ./HelloNullByte
The ./ before the file name tells the system that we want to execute this script in the current directory. This means that if there is another file in another directory named HelloNullByte, please ignore it and run HelloNullByte in my current directory.
When we then hit enter, our very simple script returns to our monitor.
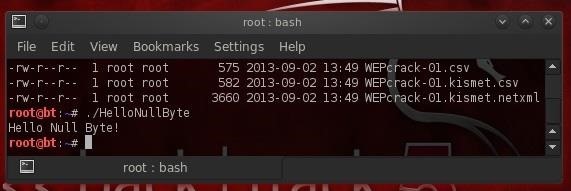
Hello Null Byte!
Success! We just completed our first simple script!
Step 6: Using Variables
So, now we have a simple script. All it does is echo back a message. If we want to create more advanced scripts we will likely want to add some variables.
Variables are simply an area of storage where we can hold something in memory. That "something" might be some letters or words (strings) or numbers. It can help to add functionality to a script that has values that might change.
Let's go back to the script we wrote to use nmap to scan for vulnerable machines with a particular port open. Remember, the famous hacker, Max Butler, used a similar script to find systems with the Aloha POS that he was able to hack for millions of credit card numbers.
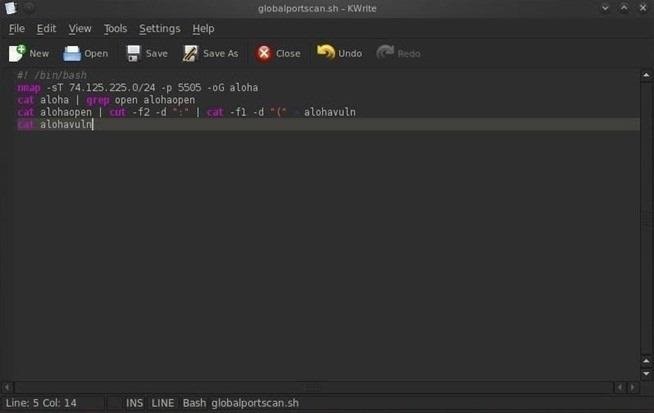
As you can see, this script was written to scan a range of IP addresses looking for port 5505 open (the port Aloha left open for tech support), and then create a report with all the IP addresses with this port open. The IP address range is "hard coded" into the script and can only be changed by opening and editing the script file.
What if we wanted to alter this script so that it would prompt us or any user for the range IP addresses to scan and the port to look for? Wouldn't it be much easier to use if we were simply prompted for these values and they were then entered into the script?
Let's take a look at how we could do that.
Step 7: Adding Prompts & Variables to Our Aloha Script
First, we could replace the specified subnet with a IP range. We can do this with a variable called "FirstIP" and then a second variable named "LastIP" (the name of the variable is irrelevant, but best practice is to use a variable name that helps you remember what it holds). Next, we can replace the port number with a variable named "port". These variables will simply be storage areas to hold the info that the user will input before running the scan.
Next, we need to prompt the user for these values. We can do this by using the echo command we learned above in writing the HelloNullByte script. So, we can simply echo the words "Enter the starting IP address :" and this will appear on the screen asking the user for the first IP address in their nmap scan.
- echo "Enter the starting IP address :"
Now, the user seeing this prompt on the screen, will enter the first IP address. We need a way then to capture that input from the user. We can do this by following the echo line with the read command followed by the name of the variable. The read command takes a value entered at the keyboard (stdin) and puts it into a variable that follows it.
- read FirstIP
The above command will put the IP address entered by the user into the variable, FirstIP. Then we can use that value in FirstIP throughout our script. Of course, we can do the same for each of the variables by first prompting the user to enter the information and then using a read command to capture it.
Next, we just need to edit the nmap command in our script to use the variables we just created and filled. When we want the value stored in the variable, we can simply preface the variable name with the $, such as $port. So, to use nmap to scan a range of IP addresses starting with the first user input IP through the second user input IP and look for a port input by the user, we can re-write the nmap command like this:
- nmap -sT $FirstIP-$LastIP -p $port -oG web
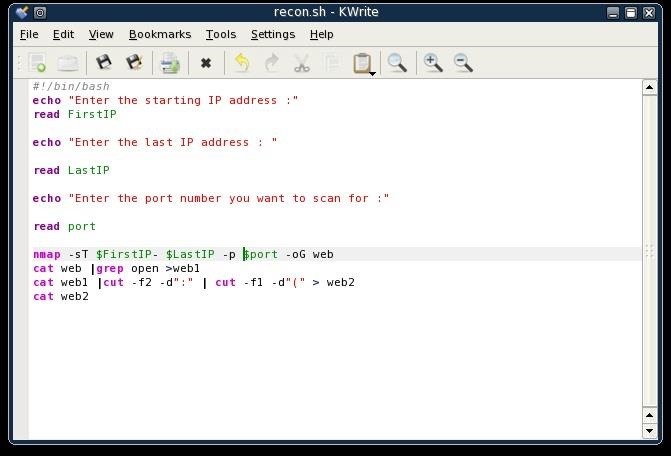
Now, as the script is written, it will scan an IP address range starting with FirstIP and ending with LastIP looking for the port the user input. Let's now save our script file and name it Scannerscript.
Step 8: Run It with User Input Variables
Now we can run our simple scanner script with the variables that tell the script what IP address range and port to scan without having to edit the script.
- ./Scannerscript
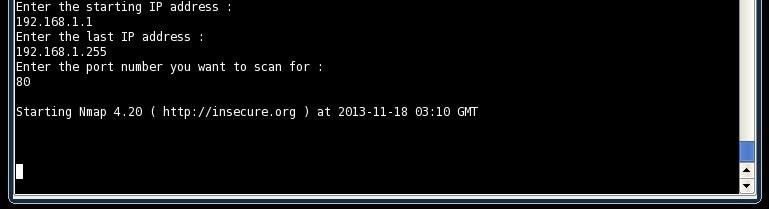
As you can see, the script prompts us for the first IP address, then the last IP address and the port we want to scan for. After collecting this info, it then does the nmap scan and produces a report of all the IP addresses in the range that have the port open that we specified.
Stay Tuned for More Scripting...
Make certain to save this script as we will return to it in future tutorials and add even more functionality to it as we learn more about shell scripting for hackers.
Just updated your iPhone? You'll find new emoji, enhanced security, podcast transcripts, Apple Cash virtual numbers, and other useful features. There are even new additions hidden within Safari. Find out what's new and changed on your iPhone with the iOS 17.4 update.


31 Comments
not too much different from using python or ruby.
thanks!
and again, as clear as can be! thank you very much!!!
What language is your scripts written in? Thanks
This is BASH scripting.
Oh! I thought the shell was something different. Good tutorial though!
Hey OTW
is there any ebook for bash scripting i mean a GOOD one
Annymous;
Unfortunately, I don't know of any but many of the linux books for good scripting sections.
OTW
Thanks for all the wonderful material OTW. Do you have any suggestions on what hardware features to maximise in a machine in order to run all these tools effectively? In short what specs should a hacker's laptop look for? Thanks
Absolute:
It really depends upon the platform you decide to use. If you use a virtual machine, I recommend 8gb of RAM, but it will run on 4gb. Most of the hacks are not CPU intensive and BT/Kali only use about 3gb of hard drive.
OTW
Thanks for that info OTW. What do wireless cards have to do with general hacking initiatives? Can you please throw some light there? Also is there any value to the power of a graphics card? . Don't most of Password Crackings apps works on graphics card,since it is capable of working on more data in less time? please comment on these points. Thanks.
Absolute:
The wireless card necessary for wifi hacking. There is no value for hacking to have a powerful graphics card.
GPU's can be used for password cracking and as you say, they are faster, but they certainly are not necessary.
OTW
What sort of Hardware would be good for 1. Dual booted BT based system & 2. USB booted BT system?
Thanks....
Absolute:
BackTrack is not that demanding on your hardware. Probably a dual core processor and 4gb of RAM would be good. You also may want an Alfa wireless card for wifi hacking.
OTW
The development of ruby will have a better
Long:
Welcome to Null Byte!
We will be getting to Ruby shortly, so keep coming back.
OTW
Okay, I got the script written just like in the post, but when I run it it says "./Scannerscript: line 11: nmap: command not found"
What am I missing?
This only works in BackTrack or other Linux distribution with nmap installed. What are you running, WalkingDude?
Ah. I'm running Kubuntu.
That's OK. Just download nmap and your script will run.
I do recommend that you install BackTrack as all the tools I use are in there.
OTW
Cool. Thanks for the fast replies, too!
You are very welcome.
BTW, welcome to Null Byte!
hey, this was the post i saw on this site and it was really good, i would like to learn hacking from the basics, can you give me a link to your first post or a link from where i can start. thank you :)
Welcome to Null Byte!
I would suggest you start with my Linux series which as grown to 21 parts and with my "Hacking for Newbies".
OTW
thanks for the reply
Check this out :D I improved upon it. :) Now I just need to learn how to get if else statements and prompts such as {Y/n} working :3 Here is the source. Pastebin link. It's simple, but fun :D
EDIT: Go here instead (I updated it to add another port example)
maybe some variation of this can help you out. (Excerpt(#) from your script)
Even though it's completely off guide from here. Just a thought for you really.
Yea lol, I only commented those out because I wanted to do something cooler than just a simple Y/n function
awesome im starting right now thanks for this advice
Hello Sir,
this annoying guy again, but I really need help here. I made this script to simplify cloning AP's and stuff, but through the script I need to return to some lines (GOTO would be nice in bash...) so I had to use functions to return to. However, when I specify a function at the start of a script it doesn't automatically start, cuz when i do sh eviltwin.sh it just stays there blank. However if I remove the setup function line it executes normally. Do you know how to automatically run functions as the code progresses. Thank you. Here's a pic
more understan, after read this post. thank you
big fan of this site and OTW -- thank you for all of your excellent tutorials! Without going too crazy I took some of the suggestions of @appledash48 and @cyberhitchhiker for user confirmation, added a function to allow the user to correct mistakes, and added a few lines for cleaning up temp files and feedback. just a few simple suggestions that might be useful for other greenhorns.
pastebin.com/yZ33kwgZ
Thanks again OTW!
Share Your Thoughts