

Welcome back, my hacker novitiates!
In an earlier Linux Basics tutorial, I had demonstrated the basics of the Apache web server. Since Apache is the world's most widely used web server on the Internet (as of July 2015, Apache was 38%, IIS was 26%, and Nginx is 15%), the more you know about it and understand it, the more success you are likely to have hacking it.
In this tutorial, we will examine the basics of how the Apache server is configured. Like nearly every application in Linux or Unix, configuration is done with a plain text configuration file. Apache is no exception. As a result, we will be focused on the apache2.conf file in the /etc/apache2 directory.
Step 1: Start Apache2
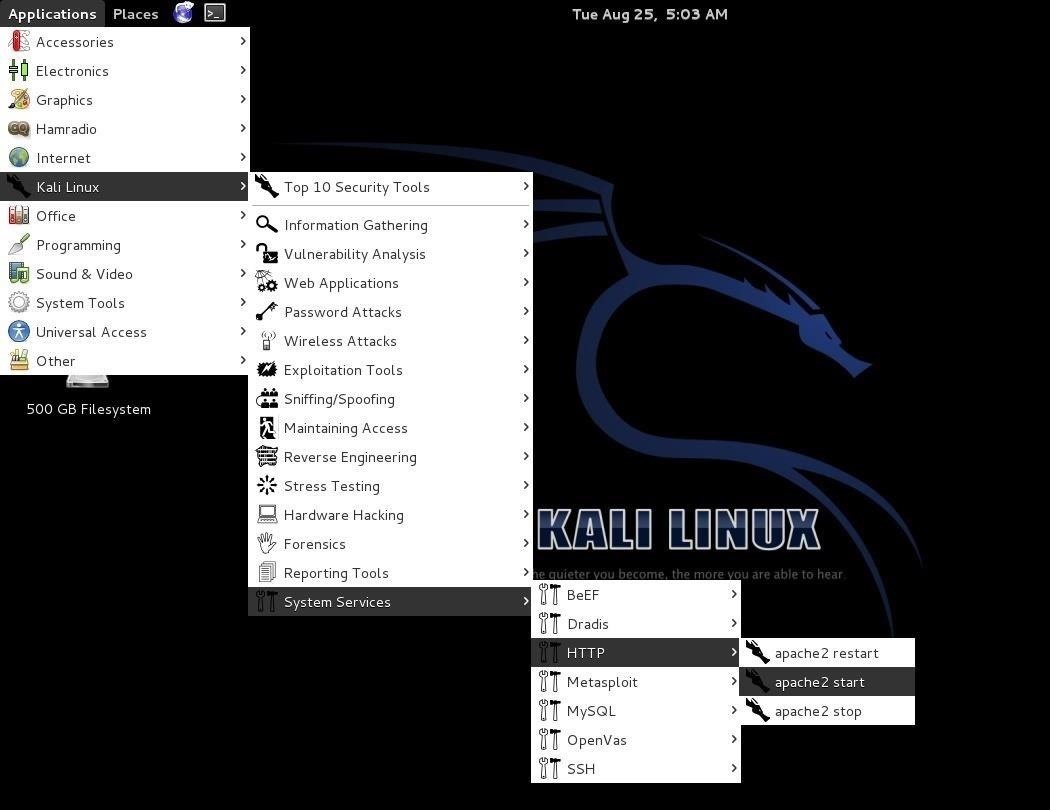
Let's begin by starting Apache2. We can do it via the GUI by going to Applications -> Kali Linux -> System Services -> HTTP -> apache2 start, as shown below.
Or start it by the command line, like below.
kali >service apache2 start
This starts the Apache2 daemon and the web server should now be serving our content to the Internet.
Step 2: Browse to the Server
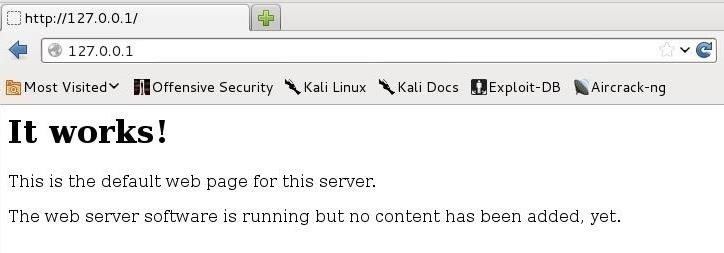
To check to see whether our Apache server is working, let's simply browse to the localhost or 127.0.0.1. If you see the following page, you now know that the server is working properly!
Step 3: Open the Configuration File
To configure Apache, we need to go to the /etc/apache2 directory.
kali > cd /etc/apache2
Then, do a long listing on this directory.
kali > ls -l
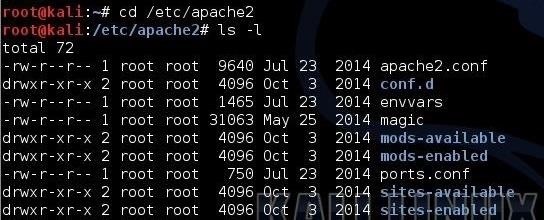
As you can see, there are several files and directories in this directory. For our purposes now, the most important is the apache2.conf, but also note that we have the ports.conf file and the sites_available directory, which we will be using later in this tutorial, and several other configuration files and directories.
We can open apache2.conf in any text editor, but here I will use Leafpad. It can be opened by simply typing:
kali > leafpad /etc/apache2/apache2.conf
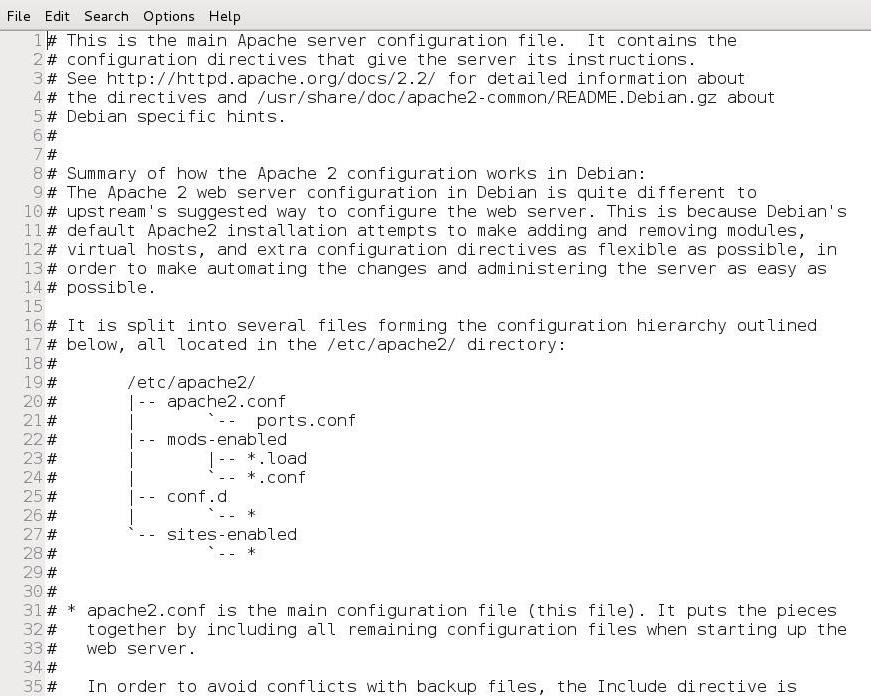
As you can see, this opens a plain text file with all the configuration information for our Apache web server. I will attempt to walk you through the key elements of this file in order to configure our server.
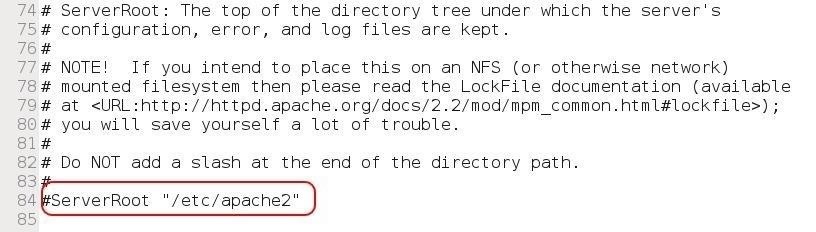
Step 4: ServerRoot
Let's scroll down past all the comments and get to line #70 where the global configuration section begins. Here we can see that the ServerRoot is configured here. This is the top of the directory tree where the Apache server keeps all its server-related files. Line #84 defines the ServerRoot. We can simply uncomment it if we want to set /etc/apache2 as our ServerRoot. I recommend that you do that.
Step 5: Timeout
In the next section, we have the variables that define the Timeout, KeepAlive, MaxKeepAliveRequests, and KeepAliveTimeout.
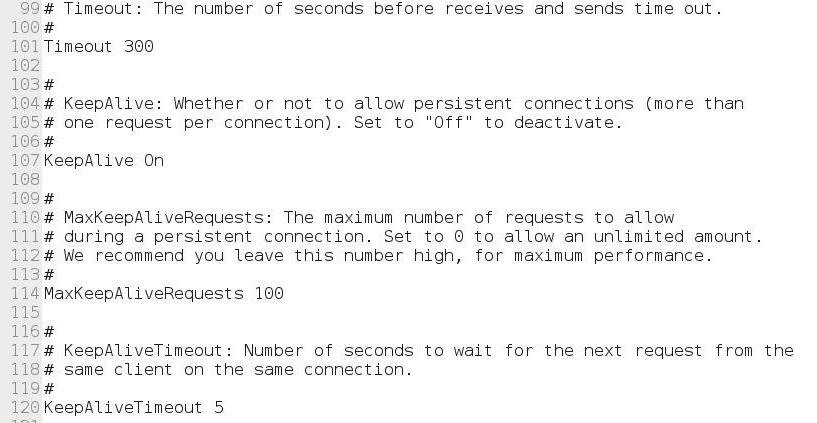
- Timeout: This is the time the server has to fulfill each request. The default setting is 300 which means that server has 300 seconds or 5 minutes to fulfill each request. This is probably too long and can probably be set to around 30 seconds
- KeepAlive: This means that the server is kept alive for multiple requests from the same client. It is set to "On" by default, which means that clients don't have to create a new connection with every request, saving much overhead on the server.
- MaxKeepAliveRequests: This is the maximum number of seconds between requests from an established connection. If we set this value to 0, then the amount of time is unlimited.
- KeepAliveTimeout: This is the amount of time between requests that the connection is kept alive.
I suggest you leave the defaults in all, except the "Timeout." Each situation is different and you may need to change these defaults to tailor performance to your particular environment.
Step 6: Apache2 User & Groups
Let's skip down a few lines in the apache2.conf file until we get line #177. Here we can set the Apache2 user and groups. Note in the comment on Line #177 that we can set these variables in the envvars (environment variables) file. We will leave this to a future tutorial, but note that both the User and Group are variables that come from the /etc/apache2/envvars file.
Next, we can define the AccessFileName in Line #187. This defines where we can go in each directory to find configuration directives.
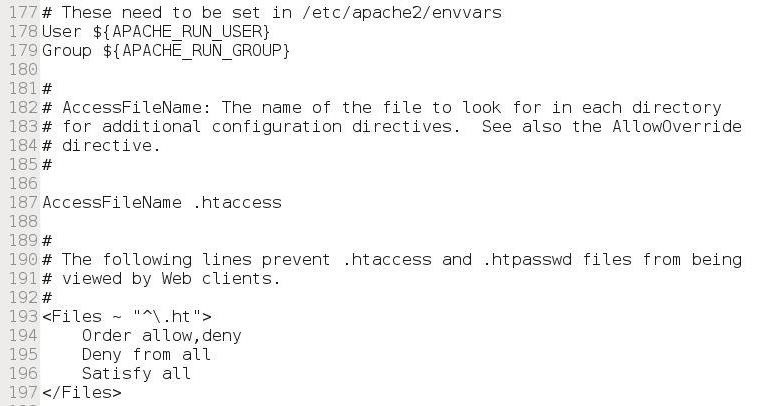
This final section starting on Line #193 here is critical to the security of Apache. These lines make certain that web clients cannot access either the .htaccess or .htpasswd files.
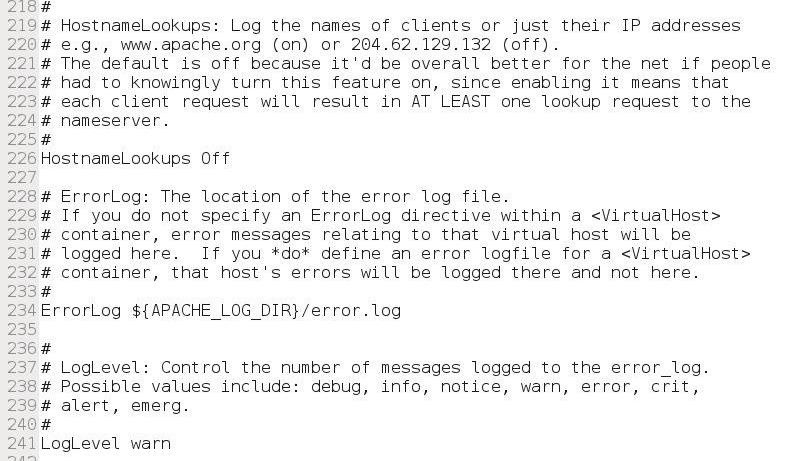
Step 7: Logging
This next section defines how Apache manages the logging.
In the first stanza, we address HostNameLookups. This directive tells Apache2 whether it should do a DNS lookup when it logs a connection. By keeping it "off" as it is by default, Apache2 performs much better.
Step 8: Site Available
Next, let's look at the site_available directory and, most importantly, the default file there. This is often referred to as the default Virtual Hosts file. Open this file by typing:
kali > leafpad /etc/apache2/site_available/default
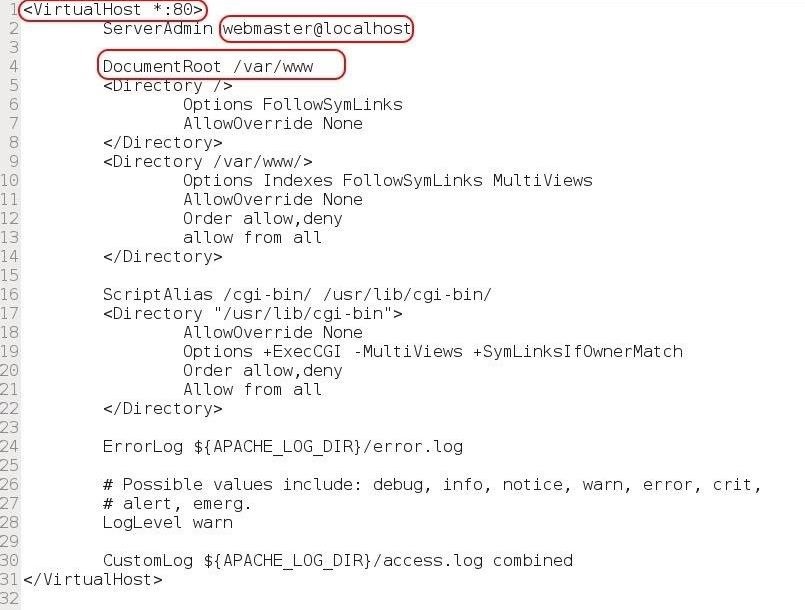
As you can see, there are three critical areas of this file. The first line defines what port the web server is listening on. Here, it is defined as listening on any interface on port 80 (*:80). The second line defines where email should be sent when there are server problems. By default, it is set to webmaster@localhost. If you are the systemadmin, you may want to set this to your email address (or simply alias this address to yours). The third item might be the most important, the DocumentRoot. It defines where the content for this virtual host will be located, in this case, /var/www. I suggest you leave it as defined here.
Step 9: Ports
Finally, for this tutorial, we can navigate down to line #248 of the apache2.conf file and notice that there is an "include port.conf" line. This directive simply tells Apache to go to the port.conf file to find ports it should listen on.

If we open that file, port.conf, we can see that it is configured to listen on port 80 (line #9). The next section, starting on line #11, checks to see whether the mod_ssl.c module is included, and if it is, opens port 443 (line 17).
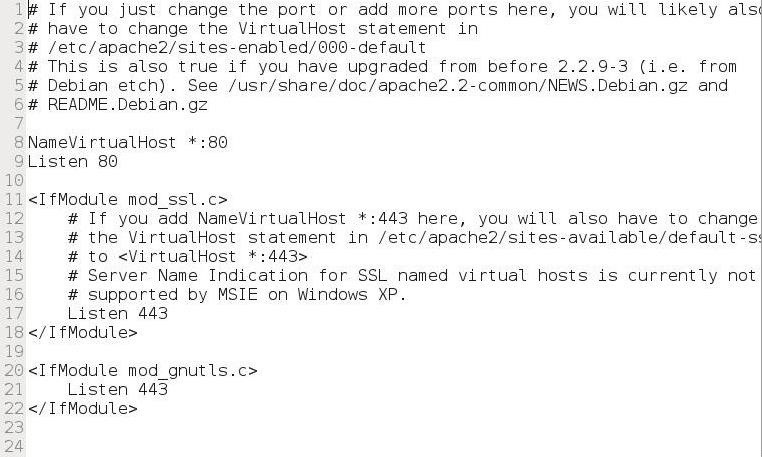
If we want to change the ports for either HTTP or HTTPS, we can do that here by simply replacing the port numbers in this file.
Step 10: Restart the Apache Server
Now that we have any changes to our Apache2 configuration, we need to restart the server for them to take place.
kali > service apache2 restart
Now we know a bit more about probably the most important Linux application, Apache Web Server. We will continue to expand your hacker horizons with more Linux Basics for the Aspiring Hacker, so keep coming back, my hacker novitiates!
Just updated your iPhone? You'll find new emoji, enhanced security, podcast transcripts, Apple Cash virtual numbers, and other useful features. There are even new additions hidden within Safari. Find out what's new and changed on your iPhone with the iOS 17.4 update.


18 Comments
What happened? Why is the site so dead?
Robyn
Not much cool articles I think...people should contribute
I think many people went back to school this week.
I just go to vocational high school today.
It was fun for me to learn new things about computer science.
Hope you have a nice day.
--------------------DAGONCHU
Yeah a lot of us are college students I believe. Anyways great article as always!
Thanks for this, I'm starting a website project so I'll be checking this one out soon.
Hello Sir,
Not directly relevant, but have you planned to make a post about session hijacking (cookies and stuff?)?
Yes, I do. There are SO many ways to hack. I hope to get to all of them eventually. That will likely be in the web app hacking series.
bro i'm using Kali-linux 2.0.0-vm-amd64. I didn't see apache2 :(
Do i need to install???
okay i found it :)
hello master otw,
but in what language are the config files written in? like this particular one for apache, sure not bash right?
thank you
Config files are not written in a language like C, python, perl ... they are just.. well.. 'config files' ! They are loaded and parsed by the main program (Apache, in this case). Each program has its own way to parse the file, that's why you always have a lot of comments and examples inside, that explain you how to configure your program according to your needs. Sometimes it can look like an XML file, sometimes it's just name:value but it's designed by the programmer, not bound to a real language.
thanks so much triphat, I was like, what sort of scripting language is this? lol...
so one has to read a lot about the documentations...thanks
thanks thanks
On Step 8, for Kali 2.0 that is, site-available is actually sites-available.
Also default.conf is actually 000-default.conf.
Of course you can always change the name of both.
Thanks alot
i think that articles was good enough for understanding
I'm unable to open leafpad in my terminal .. when I try to update leafpad it shows 'unable to locate package ' can anyone help ???
Unable to cross this step
Share Your Thoughts