
The Watch Dogs video game series came out in 2014, enamoring audiences with the idea of a seemingly magical smartphone that could change traffic signals, hack web cameras, and even remotely control forklifts. This may sound like science fiction, but The Sonic uses a customized flavor of Kali Linux to allow you to unleash the power of Kali from any smartphone — all without the need to create a hotspot to control it.
If you've ever tried hacking on an iPhone, you know it's not a straightforward process. A few problems arise when trying to do any sort of hacking from a smartphone. First, the operating systems are incredibly restrictive. The closest thing to "hacking" you'll ever get on an iPhone is a port scanner.
You could jailbreak your iPhone, or put Kali NetHunter on an Android device, but even then you are extremely restricted when it comes to wireless hacking by the hardware. Essentially, these strategies expect too much flexibility from devices that were designed for a specific purpose.
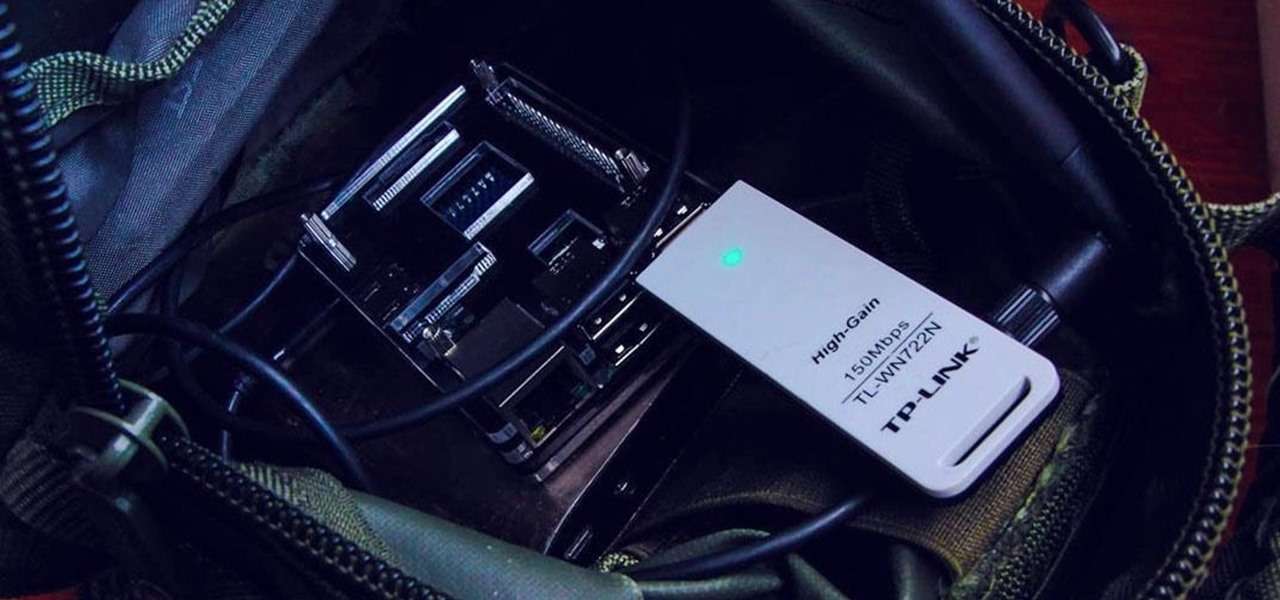
Enter The Sonic. It comes pre-built with all of the tools needed to control a Raspberry Pi right from your smartphone. This is where we start to loosen the proverbial chains of our smartphones, by adding a more versatile companion device. When we connect to The Sonic, we can offload any work our phone can't do and take advantage of a fully functional Kali Linux attack suite.
This build is different from our previous Raspberry Pi-based Kali Linux, in which our Pi connects to our smartphone's hotspot to be controlled. If your phone doesn't have a hotspot, The Sonic will turn the Raspberry Pi's internal Wi-Fi card into a command-and-control communications Wi-Fi link, which you can connect to from any smartphone to access its features.
One major difference in these two build methods is that the The Sonic will not be able to tether an internet connection from your phone. To connect to the internet, you will need to first connect to The Sonic's wireless AP from your smartphone, and then connect The Sonic to a nearby Wi-Fi network to establish a link to the internet.

This means The Sonic will need two interfaces, the command-and-control to host the connection to your smartphone and the "attack" antenna to connect the Pi to the network you want to access the internet from.
For more on our alternative Kali Linux build, check out the link below.
Step 1: Gathering the Necessary Parts
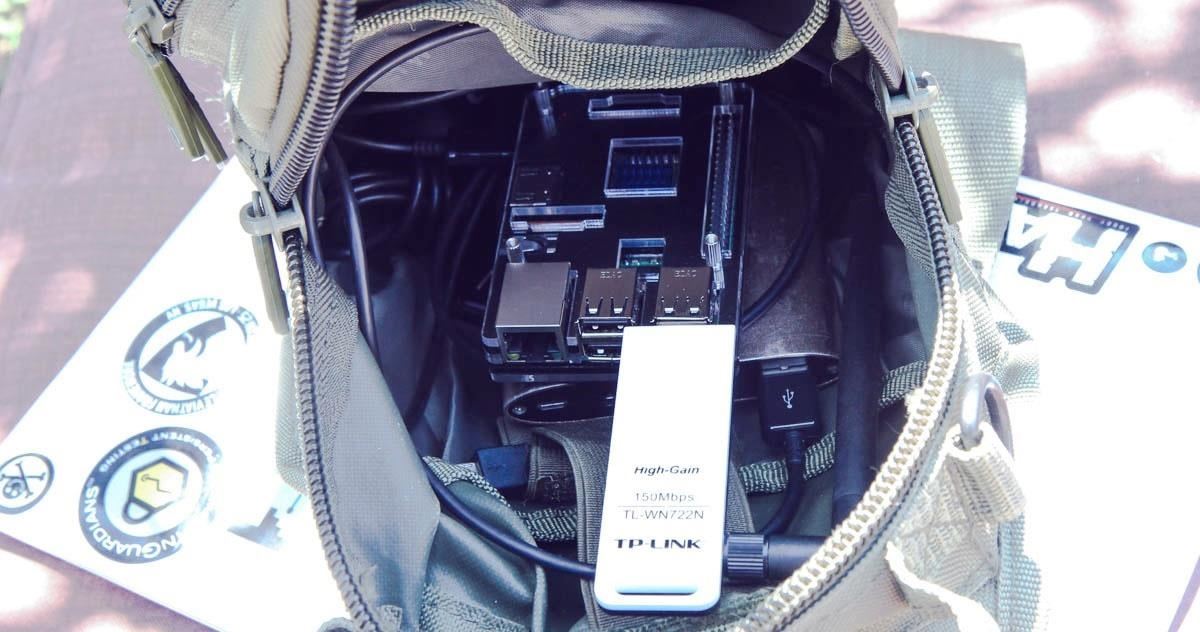
Going on the Sonic's website, we see that there are some other parts we're going to need. In addition to a Raspberry Pi 3, the following parts are suggested:
- A TP-Link TL-WN722N wireless card. Any wireless card with an Atheros chip should also satisfy this recommendation. If you're not sure what chipset your wireless card uses, check out the link below for our breakdown.
- We will also need a microSD card to burn The Sonic image to.
- Although it isn't a specific requirement on The Sonic website, we're also going to want to pick up a good battery for our Raspberry Pi. If we want truly mobile hacking, we need a truly mobile solution. I tested this battery with a Raspberry Pi 3 B and it lasted more than 7 hours!

The main benefit to using the Pi over something like a laptop is portability and stealth. While a laptop with several antennas sticking out looks pretty suspect, someone using The Sonic appears to be doing nothing more than checking their phone.
Now that we've got the hardware, we need to get some matching software. For mobile devices, we need to make sure we have the Google Chrome web browser. Safari on iPhone doesn't support the JavaScript functions that The Sonic uses, so we need Google Chrome to access it properly.
Step 2: Downloading & Burning the Sonic Image
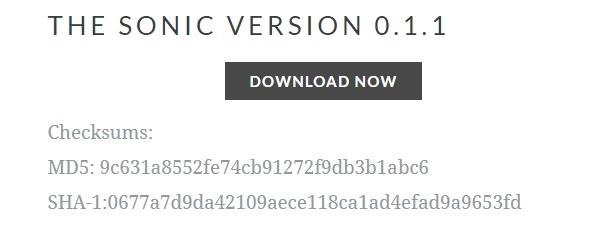
You can download the IMG file for The Sonic from here. The image will be delivered in the form of a 2.1 GB ZIP archive, which you'll have to extract. After you unzip the image, the total size will be around 16 GB, so be aware you're working with some pretty big files.
Because the files are so massive, it's a good idea to verify their integrity. You can do this by checking the hash values for the downloaded file and comparing them to the ones shown on the download page of the website. FCIV is an easy to use command line tool for Windows to calculate the hash values. For Linux, you can use the command md5sum, and Mac users can use the command md5.
Once you have the image, the steps to flash it to the microSD card vary depending on your operating system. Find your operating system below and follow the necessary steps.
On Windows
In order to flash The Sonic image on Windows, we need some additional software. Win32 Disk Imager will let us pick the image file, select what device we want to write to, and finally take care of the rest for us.
On Mac & Linux
We can use dd in our terminal. First, we will need to figure out which connected disk device represents the SD card. This can be done by running lsblk in Linux, or diskutil list in macOS. Next, we need to unmount the device via umount (disklocation) in Linux, or diskutil unmount /dev/device in macOS. Finally, we write the image to the SD card with the following command.
dd if=theImageFile.img of=/dev/device bs=4m.
Once the card has been flashed, insert it into your Raspberry Pi.
Step 3: Connecting to the Sonic
Now it's time to start up our Sonic!
A quick note before we continue: The Sonic is programmed to automatically configure the necessary Linux files to set up an access point. To do this, the Pi will restart itself once or twice. This is completely normal.
During this process, The Sonic is assigning your Raspberry Pi's internal Wi-Fi card a special interface name so that it can run an access point. After that, The Sonic will run a few startup scripts to configure the access point, enable SSH login, and run the web application.
Plug your wireless network adapter into the Raspberry Pi, and power on the Pi by connecting it to a power source via the Micro USB power cable.
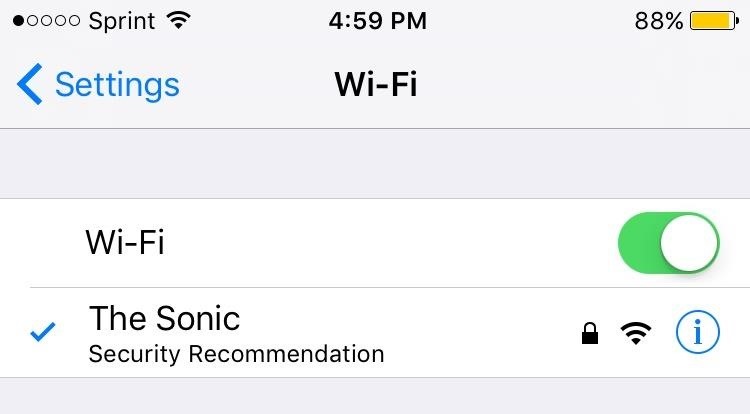
Once the Pi is done setting itself up, it will start the built-in access point. By default, the SSID is The Sonic and the password is password. It's definitely a good idea to change these at some point. This can be done by going to the "AP Manager" tab on The Sonic web app, which we'll take a look at soon.
Step 4: Troubleshooting Issues with the Sonic
If you don't see an access point named "The Sonic" after 15 minutes, there are a few things to check.
First, turn off your Sonic, plug it into a monitor, and power it back on. We want to check and see if the device is booting up normally, or if there's an issue such as an infinite reboot loop or error message.
If the device is stuck in an infinite loop of rebooting, or you get an error message reading "link wlan0 is not ready" for eternity, there may be a problem with the drivers related to your particular wireless network adapter. If you have another wireless adapter available, try switching to that card.
Otherwise, try unplugging the card and booting The Sonic up without the external interface. Once the Pi boots successfully, check to see if the driver for your wireless card is installed. You can find out what drivers are installed by typing the following.
lspci | grep -i wireless
If the driver for your wireless card is not installed, the steps for installation vary. Visit the manufacturer's website for steps on how to install the drivers necessary for Debian Linux.
If the Pi boots up successfully, but you can't see an access point called "The Sonic," try connecting a keyboard and running the following.
Check see if both Wi-Fi cards are detected, and if an interface named "wap0" is present. If you can't find an interface named "wap0," type the following.
/var/www/html/scripts/ifaceChecker.py
This will run the script that checks the current state of the Raspberry Pi's built-in Wi-Fi interface. If it can't find the interface, there may be a problem with the built-in Wi-Fi card on your Raspberry Pi.
In that case, try using a second Raspberry Pi if you're lucky enough to have another one around, or double-check the Wi-Fi card with a different Raspberry Pi image such as Raspbian and a monitor.
If none of the above seem to help, there may have been a mistake when you first imaged your SD card. Try re-imaging the card as well. You can also look at the documentation on the website here.
Step 5: Using the Sonic
Once we're connected, the world is our oyster! Well, at least the parts of the world with serious security flaws. Before we do anything though, we're going to want to connect to Wi-Fi, since the current connection will not serve data to our phone or Pi. Thankfully, The Sonic has a built-in web application that makes those sort of otherwise tedious terminal tasks very trivial.
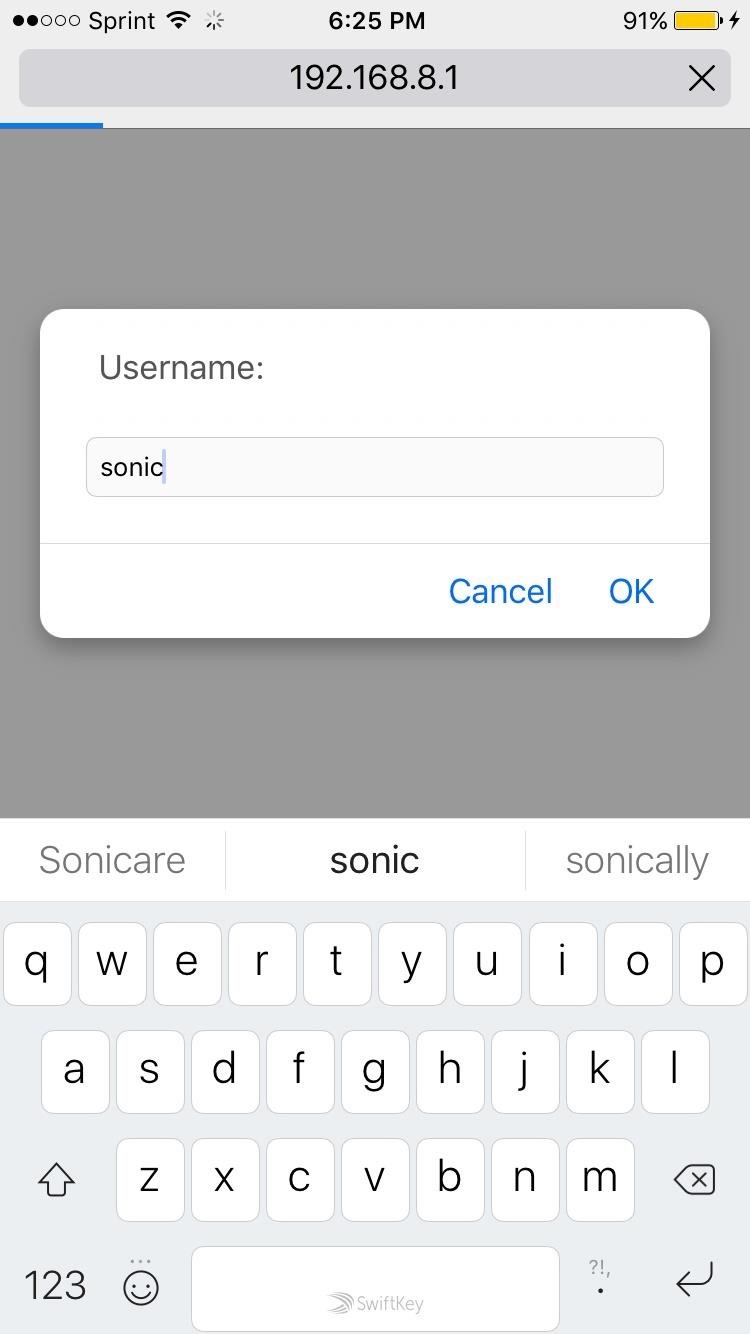
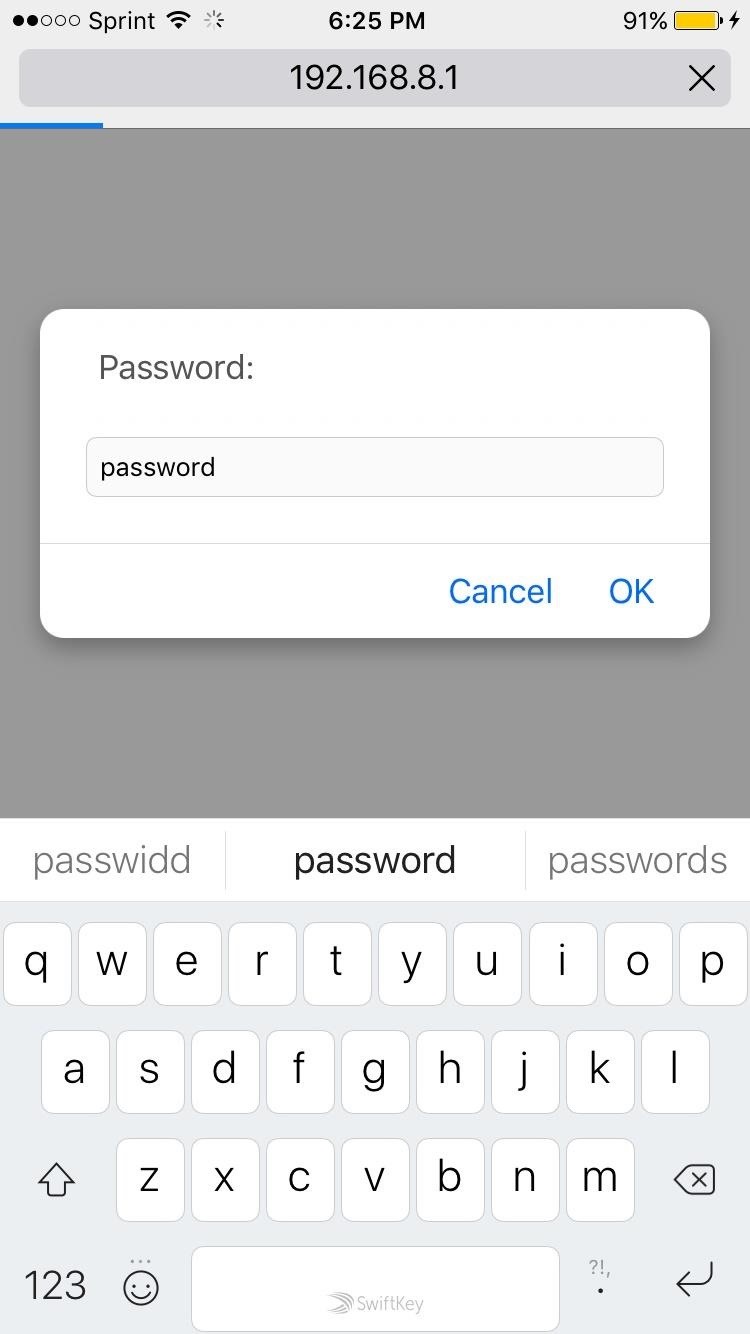
By default, the web application is located at 192.168.8.1. Just punch that address into the browser on your smartphone, and you'll be greeted by a prompt for a username, and then a password. By default, the username is sonic and the password is password.
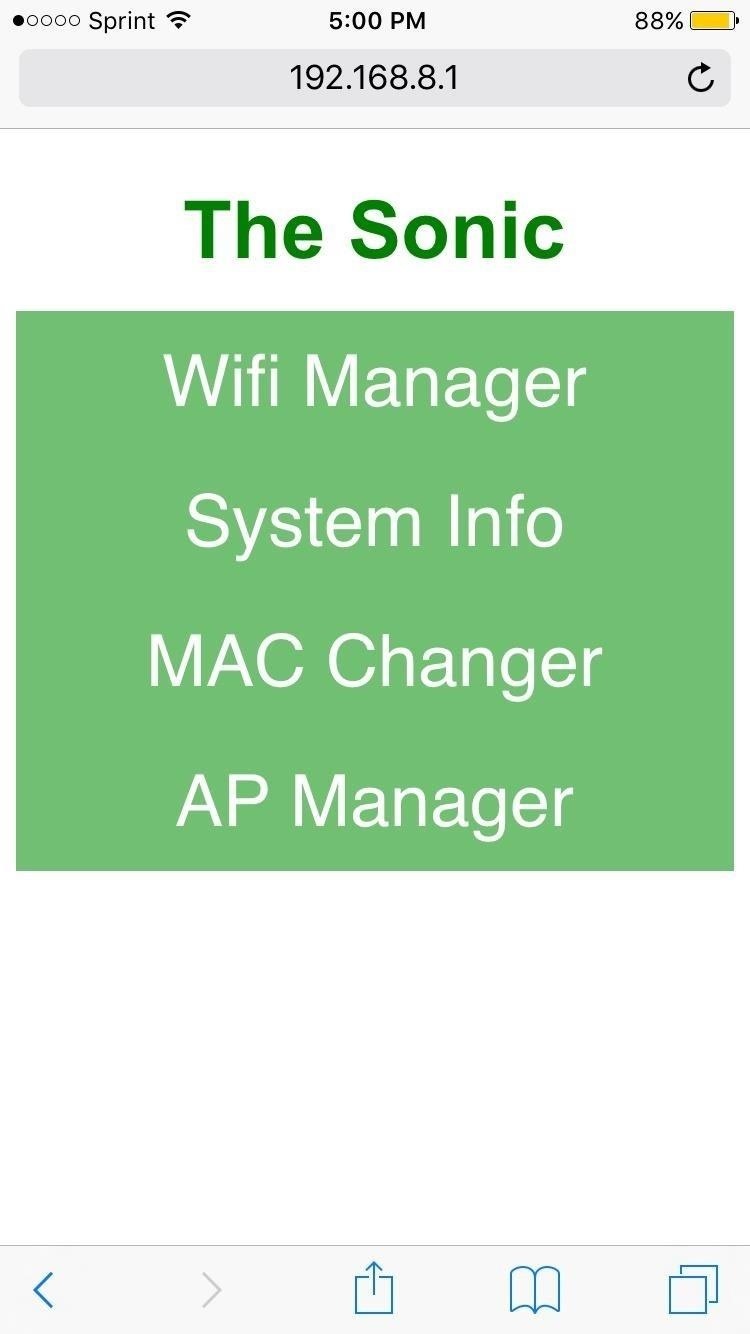
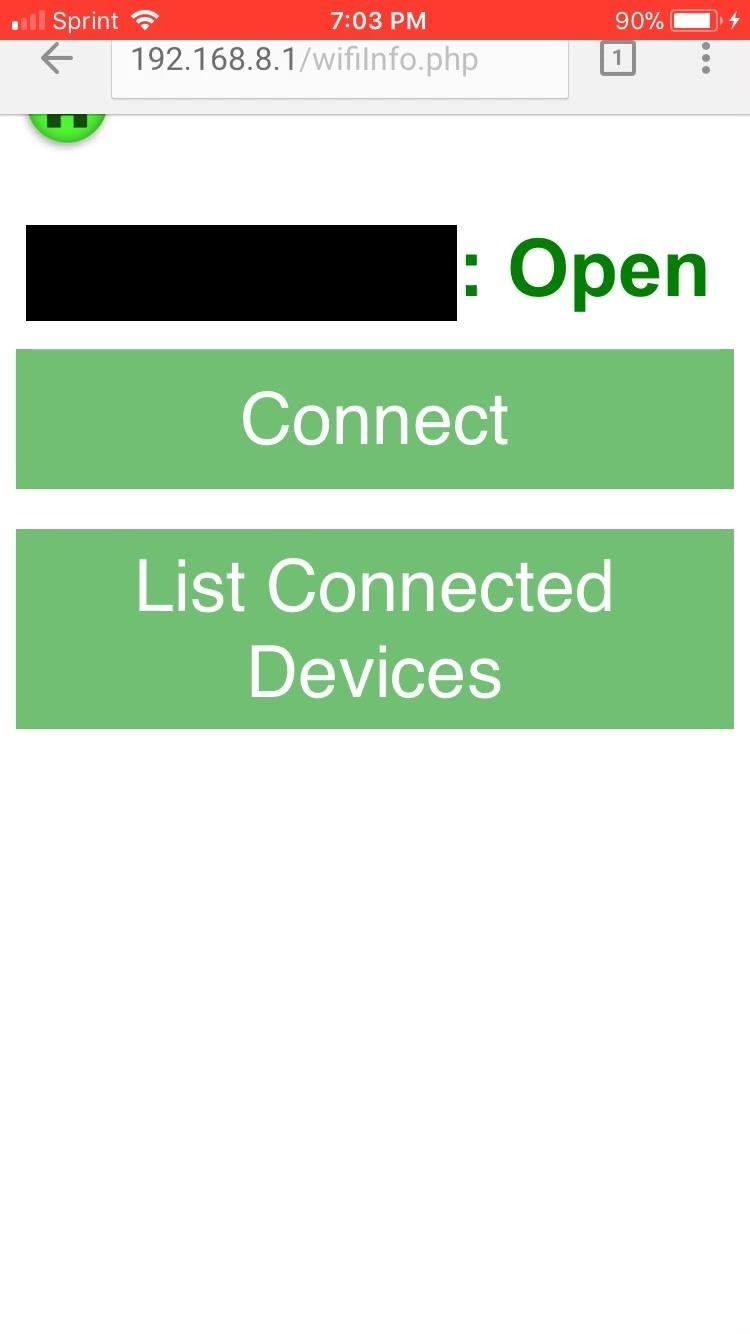
Once you've done that, the main menu will come up as seen on the left-hand side below. The menu design is definitely basic, but it's to the point. By tapping "Wifi Manager," we can quickly list Wi-Fi points around us (seen on the right-hand side).
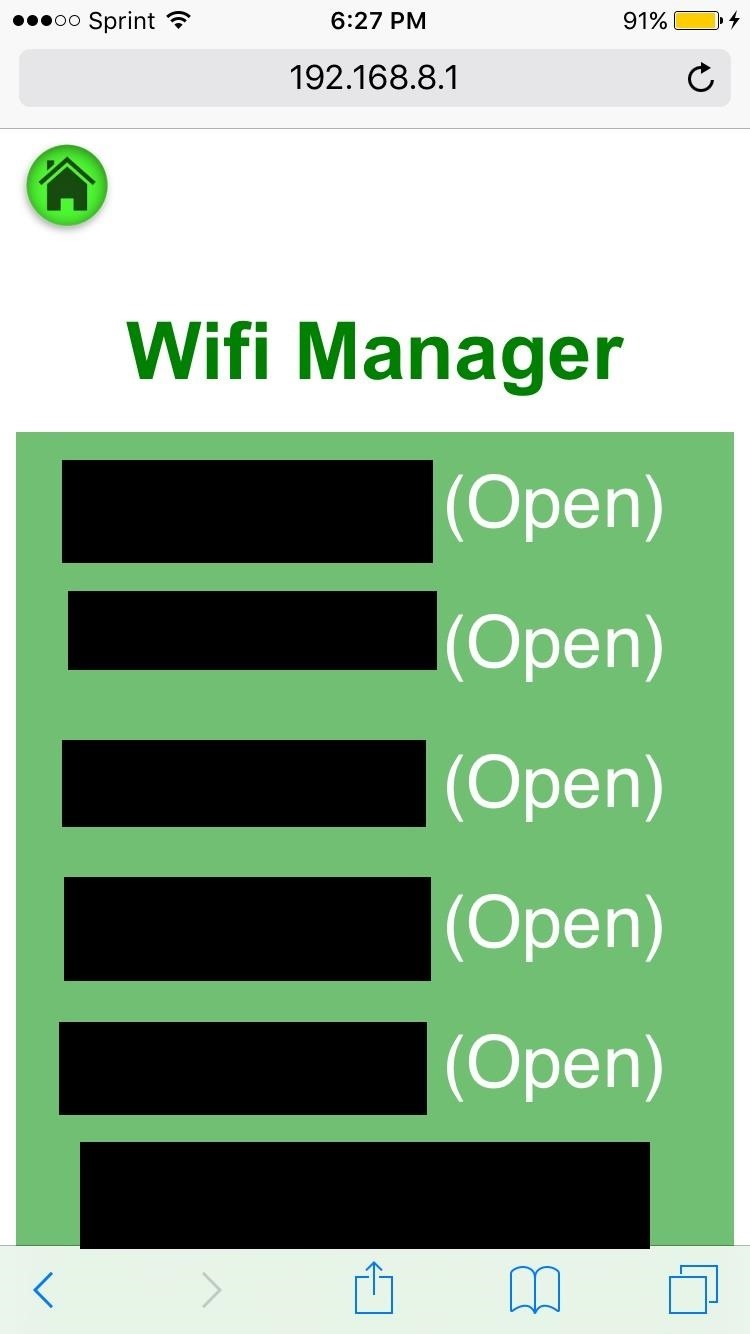
The access points we see are listed by signal strength. In this example, all of the access points with "(Open)" are a part of a Wi-Fi network that doesn't have a password, but requires authentication via a web portal to use.
Unfortunately we don't have credentials. However being the smart hackers we are we, we can still get access anyway.
Step 6: Gaining Access to a Network
In order to bypass the web-based authentication for this network, we first need to understand how the authentication keeps track of its users. Just like certain websites use cookies to pre-authenticate users who have already logged in, these types of networks log the MAC addresses of clients to keep track of whether a device is authorized or not.
So what we need to do is find the MAC address of a client already connected. The Sonic makes this process incredibly easy for us. If we hop back into the web app, we can find some pretty nifty features.
In the Wifi Manager, let's tap on the button for the network we are trying to hack into. We'll be greeted with a screen similar to the one on the left below. Here we see a couple options: We can either connect to the network or do some wireless sniffing and see all of the clients connected to the network. Of course, we want to snoop, so we tap "List Connected Devices."
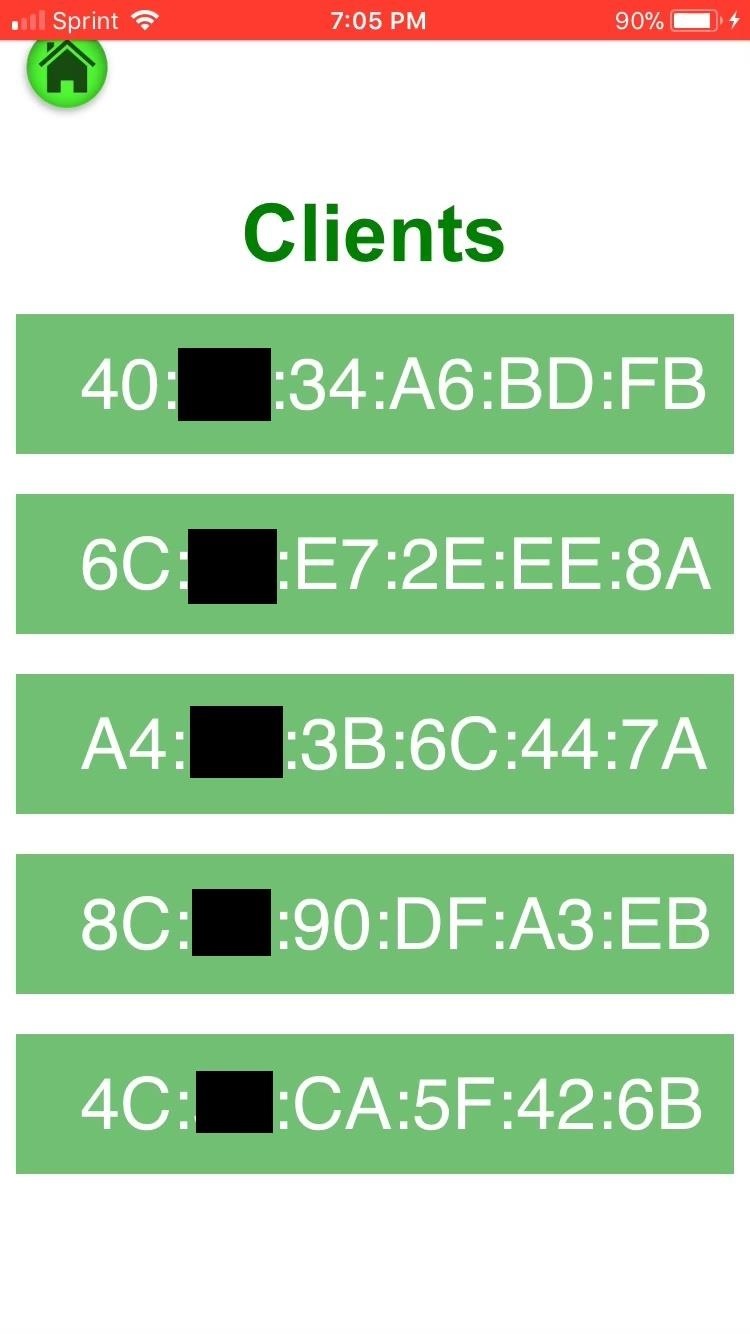
Upon tapping this button, the Sonic will open a new tab that will start scanning for connected devices. Basically, a background process running Airodump-ng from the Aircrack-ng suite will process the output and show us the results. This process takes about 33 seconds to load, so you'll have to be patient.
This feature is currently the only one that doesn't work in the Safari browser. Safari doesn't support the new tab JavaScript function the Sonic uses. Plans are in place to extend support to Safari once additional features have been implemented.
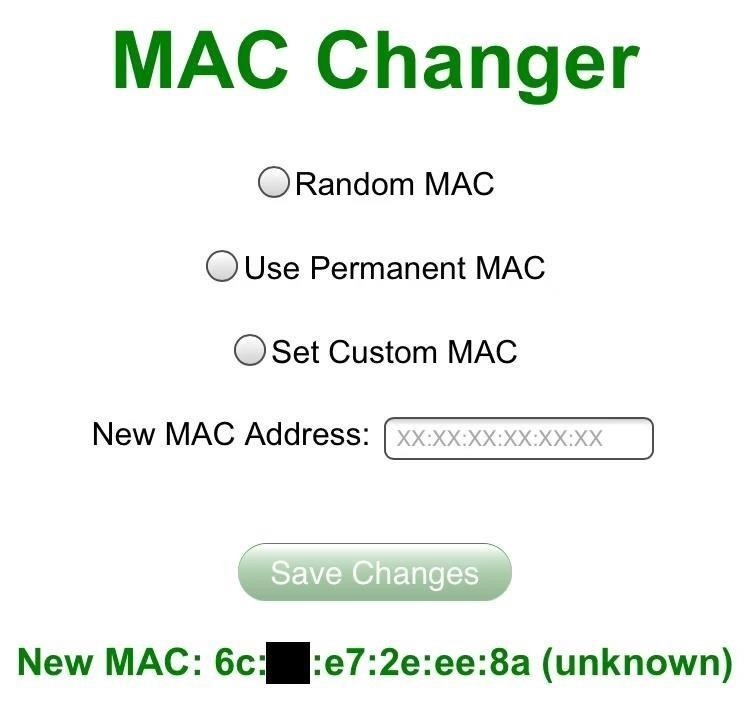
Step 7: Changing Our MAC Address
Once the web app has finished loading, we'll be presented with a list of client MAC addresses. By simply tapping one, we'll be sent to the MAC Changer page where all of the necessary data will have been sent to assign our device this new MAC address. Now, all we have to do is go back to the Wifi Manager and connect to the point. We're in like Flynn!
It is worth noting that by doing this, you will most likely disrupt the service of whoever the device you are masquerading as belongs to. With this in mind, the attack isn't exactly stealthy.
But putting that aside, now that we can connect to the network, there really isn't much we can't do. The Sonic is set up to route its built-in Wi-Fi access point through the access point it's just connected to in order to connect to the internet. This means you can still access the internet from your phone, once The Sonic is connected to a nearby access point.
From here, we have the ability to sniff local traffic, spoof a DNS server, run exploits on network devices, and just about anything else you could do from a Kali Linux laptop or desktop. The beauty of The Sonic is how portable and stealthy the device is.
Get Started & Unleash Your Inner Hacker
Again, while the project is still very new, the foundations of The Sonic make it a plug-and-play hacking tool like no other. The Sonic is being actively maintained right now, and new features are being added to the web app to make it much more intuitive and convenient to use.
If you want to be able to wield The Sonic to its full potential, you'll have to first master Kali Linux. Keep scrolling through Null Byte and drinking in all of the hacking goodness we have here!
Feel free to comment below with questions or contact me on Twitter @xAllegiance.
Just updated your iPhone? You'll find new emoji, enhanced security, podcast transcripts, Apple Cash virtual numbers, and other useful features. There are even new additions hidden within Safari. Find out what's new and changed on your iPhone with the iOS 17.4 update.
Screenshots by allegiance/Null Byte


65 Comments
Wow! Never knew about it until now!
I made portable headless Raspberry pi with kali linux and for now it works.
I will have to buy another sd card to check this one up.
It's a really new image. Still in early development, but the potential is crazy.
Please suggest more info on The Sonic Pi. Googled it, searched on YouTube, but there not much info at all. Tempted to try, but don't want to jump in deep until read more about it.
The project is still really new, so there isn't much information. The website will be getting updated with a documentation page soon, which we'll link to here when it goes up.
After I put the SD card and try to boot it up I get this error:
Kernel panic - not syncing: Attempted to kill init! exitcode=0x0000000b
random: crng init done
And then it just stops there, do you have any idea what went wrong?
Thomas, if I were you, I'd make sure I've downloaded distro in full fist. They provide checksums on the site, so make sure they match after download.
Allegiance, the post you've written is a teaser, share your experience, please. For example, can you still run terminal via the sonic web interface if required?
The Sonic has SSH already set up. You can login with the root password "toor". The recommended SSH app is termius for iPhone and Android.
As far as sharing my experience...I'd love to write more articles about this device as it continues to develop. Stay tuned!
Allegiance, not clear, when do I plug in external wifi. As far as I understood firstly let it set up with internal Pi wifi card and once all complete, turn Pi off, plug in external wifi and then power back on, so that then The Sonic will start using external wifi. Is that correct?
No, you should plug in the external wifi card before you power on the device for the first time. Leave it in during the setup process.
Worked from first attempt for me. Noticed some lags in wifi manager when trying to search for APs. Didn't manage to break through open wifi because simply don't have them in my area. Will try them out in the field soon. Here is my setup:
Yeah there will always be lag when using the Wifi Manager. Basically, the web app runs a python script that searches for wifi, parses the data, then displays it. Because of the server-side nature of the processing, this has to happen. The website has a recommended battery and RPI case now too for a more compact build:
It's the pibow coupe case and the makerfocus battery. You can attach the battery to the bottom of the case with the included stand-offs. It's bulky, but it'll fit into your pocket this way.
Looking forward to hearing about your experiences with the device!
Of course can make it smaller, just wanted to try out 'The Sonic Pi'. Will get my hand on SSH later, though might be a bit suspicious for people see you typing commands in terminal on iPhone. Ha-ha-ha ;)
Went out with it in the car to find few open wifi's. Funny enough, but when AP is on radio broadcast stops working in the car, though showing enough signal.
I've managed to access AP, search all wifi's, find connected MAC addresses on open wifi's and then something not clear happening. Once click on connected user MAC address, it transfers you to Change MAC screen and shows selected new MAC address at the bottom. Should I click SAVE/input selected MAC address into NEW MAC section or simply go out back in WIFI Manager it is not clear, but I've tried all variants, none of them make any difference. Anyway, whichever way you choose to go and then go back to WIFI Manager screen to log in to selected SSID, it then asks to input the password. Again, clicking OK or Cancel, does make no difference, as a result was always "Connected to ...". From this point I assume we nicked someone's cookies and now ready to go and use Internet. Unfortunately, it wouldn't let as it still comes up with authentication web-based portal which requires your login and password. I have tried different open SSID and story is the same.
When it transfers you to the MAC change screen, you don't have to do anything. The MAC address will have already changed. After that, go to the SSID of the AP, click on connect and just hit Ok without putting in a password for an open network. If your phone is still connected to the raspberry pi, it should route right through to the internet. If the internet doesn't work at first, forget the wifi connection to The Sonic and reconnect. Sometimes a DNS configuration has to be updated.
I tried this except forgetting the Sonic wifi connection. Will try this tomorrow.
Just to confirm SSH and VNC work just fine. Unfortunately, I was able to use internet via open wifi's, but will try again today.
OK, have had second attempt this evening and the story is the same as I explained few posts above. Application tells that you are connected and when you try to use Internet, it drags you to Open WIFI portal and here where the end of story is.
Unfortunately, where I live I could only find single provider in multiple locations, obviously they deal with authentication more seriously than just using MAC address of previously authenticated user, but that's what I got.
Of course, I could pull out laptop and spend some time sniffing network, investigating how provider deals with request and how respond, but that would have been a different topic. Meanwhile, application wouldn't work for everybody.
Yeah if you're still getting the web login portal, then it can't just be based on the MAC address. It may also use the hostname of the device because it assumes that won't change- and rightly so. It might be more accurate to say that the attack doesn't work for every network, because not every network has MAC-based authentication. Have you been able to at least use the internet on your home network with the device?
To be honest, I haven't tried, but I have played with SSH and VNC and did some monitoring and injecting, so all in all it seems to work fine, just not for its initial purpose. BTW, it would be nice to read documentation on how it is all developed and configured.
Anyone from UK, let me know if you seen any other open security wifi's around other than BT.
It is good to use WiGLE for searching available commercial APs, but unfortunately it doesn't show up security type being used. Just wondering around is a bit tough job, I must admit :)
So wouldn't you be able to achieve the same thing with the headless Kali build by bridging the C&C and attack card interfaces and using SSH? I'd like to know what the brass-tacks differences are between The Sonic and Kali as far as the OS itself goes(Haven't had the chance to try it out yet)
The headless Kali build relies on being able to connect to your phone's hotspot. In this build, the raspberry pi creates it's own access point which makes it a little more versatile when it comes to which devices you can use with it.
Right, but it seems to me that you could effectively accomplish the same thing with the headless build. Using the headless configuration, couldn't you set it up to automatically use the Pi-native interface to be the AP that your phone connects to, set up a DHCP service that assigns your phone a static IP, change your mac address(one of the benefits of the sonic listed above) and then bridge the Rpi interface and the attack interface once you have worked your way into your target AP? Again I haven't had the chance to try yet, but it just all seems like stuff that you can add onto the headless Rpi tutorial. Am I missing something?
I've spent the last couple days trying to accomplish exactly what you described, and there is one particular issue I can't seem to overcome. There is an issue with the wlan driver on the RPi wifi card, its detailed heavily in github.com/mame82/P4wnP1_nexmon_additions#access-point-mode-with-hostapd
essentially, a monitor interface has to be spun up before hostapd starts, otherwise it won't accept clients. A kind fellow by the name of Re4son gave some excellent advice on
forums.kali.org/showthread.php?38920-Access-point-configuration-problem-on-RPi3&styleid=2
and from that, I was able to set up a virtual interface in monitor mode, then relaunch hostapd. From there, my phone gets a connection. The final problem I have is that I am too much of a noob to figure out how to have that all happen on boot, so I have to spin up the virtual monitor manually every time it boots. Just thought I would add my two cents in case anyone was interested, and I would be very interested to see if anyone has solved this.
Hi, @Allegiance I have a question:
So I am fiddling with my new sonic setup, same as your compact one, and I am trying to connect to my home wifi network from sonic. When I am inside the Wi-Fi manager, all of the APs around me are clickable except for my home network. I can click on it, but nothing happens.
The network is run on an Apple Airport if that helps at all. Are there certain AP setups that just cannot be connected to?
Thanks!
When you say it 'cannot be clicked', what do you mean? The app just doesn't redirect you to the options page for the AP?
Hi community. I was wondering how to use this os in a good way and i have a question. I want to connect my phone with SonicPi with ssh and send commands. Can i open metasploit or nmap in my phone via ssh with SonicPi? How?
ssh -X root@192.168.8.1 nmap ?
I want to see nmap scan data in my phone. Is it possible? Thx
Metasploit is possible too?
If you go on the website for The Sonic, they recommend the Termius SSH app. You can use it to open a remote terminal to use metasploit or nmap.
Hey, I have a strange problem with my Wifi-Adapter. I have the TP-Link TL-WN722N, but my Pi won't power it. The green LED doesn't light up. It's running fine on my PC.
Can no one help me?
Do you manage to run the router in sonic...
If yes could you please guide me with procedure
Thanks
What wifi interface uses the sonic to serve the php web? The wifi of the raspberry or the tp link wifi?
The wifi of the pi
I've tried all the different ways I have found of running The Sonic with the Alfa AWUS1900...there obviously isn't much about it with Sonic specifically but none of the other Kali work around seem to work either. Everything else is working fine with the pi, I now have a fresh SD card with The Sonic on it. How can I get the sonic to recognize the Alfa AWAUS1900/AC1900, or is it even possible?
If I were you I would do some research on what driver the AWAUS 1900 uses, and see if there's one that can be downloaded onto an ARM device like The Sonic
I haven't been able to get it working, albeit still determined. As far as I can see there is a driver for it in the Kali repot believe it's apt install Realtek-rtl8814au-dkms. There's plenty of issues with headers and such though. I solved the problem by getting me of the dongles you verified as PNP :) but after I'm done playing I'm determined to get the awus1900 (rtl8814AU chipset)running if you'd like I can post it here when I get it correctly installed.
That's one of the most frustrating parts of Kali ARM to be honest. The driver support is really spotty. If you can get the awus1900 working definitely let us know how.
Awesome, will do! They have the arm driver in the repo for that chipset, it just has module and header issues that I should be able to fix, but it's my first time battling that particular demon head on.
On a positive note though, access to terminal from phone is pretty neat but really they're only a handful of buttons away from making something legendary a WiFi pentest gui suite that runs through your phones browser. Postting encryption types next to the APs, being able to execute fluxion, krack, injection etc etc doesn't seem like it would be any more complicated than the template they've started. I REALLY hope development continues and brings this gem to the level it is capabale and deserving See ya when the
rtl8814au is runnin!
And thank you for the great articles, inspiration and contributions!
For some reason I can't seem to connect to any AP. Even my own home network. I just get an "unable to connect" message.
VIA the interface at 192.168.8.1?? What WiFi dongle are you using?
Yes sir. I am using the web interface and I have the TP-Link wifi adapter mentioned in the article.
Are you sure that the wifi adapter is running? What does the output of the "ifconfig" command give you?
Yup, ifconfig shows both wap0 and wlan0 are present. I able to scan for APs and see what clients are connected to them (using both the web interface and airodump.) Although when I try to scan my home network for connected clients nothing comes back even though computers and/or phones may be connected to it.
Well there are a couple factors which could effect this: First, some devices only broadcast if they are actively being used. For instance, an iPhone that's asleep won't be broadcasting hardly at all unless it's in the middle of a download. Second, the proximity to the device is also important. You likely won't be able to pick up a computer that is on the other side of your house.
So I am able to see associated clients to my home network AP when using airodump-ng but just not with the web interface and still can't seem to figure out why I can't connect to my home network. I re-imaged the sonic just to make sure and still the same problem.
It's strange that you could see the clients in airodump but not the web interface because the interface parses directly from the airodump output. What encryption type does your home network use?
Yeah it is definitely strange. I can get the associated clients to come up on the web interface for other APs, just not my home network. I reset my modem and router just to make sure and still no dice. My router uses WPA2-AES.
EDIT: It is not AES it is TKIP
Hi. Please don't use this software unless you want your Pi to get pwned.
Explain? Because of the ssh?
No, look at the web application source code. It's full of holes. Connect this thing to a public network, and anyone can root your pi.
EDIT: it whas the pi that not works with the sript.
now i test the 9 raspberry pi 3 and only one works with this...
sorry that is not so good, make more driver for it, by 3 GB is it a joke.
ok now works it for me.
i hope other user need not 9 raspberry pi 3 for this check...
thx for help
best regards
having trouble using it with a canakit wifi adapter (RT5370),it doesnt dump/show the mac address
Hey i tried this os, but the problem is i unable to get in into another network and no proper tools in the web interface.
Kindly make the interface enough for wifi hacking
Hi friend, is possible hide the sonic ap for manually connect?
Unfortunately, no it is not. This is because of incompatibilities with the driver for the Pi's built in wireless card.
Hi ,
Sir how to install TP link adopter tl wn 722n in sonic...
Kindly provide procedure to install
Needs updating to be compatible with Pi 3B+
Hi guys, is possible update or upgrade of the Kali version? In SSH works well but for Vnc the screen is gray with a terminal Windows. Is normal?
the link for downloading isnt working for me! shows 404 error
same
I have the img file but I am having trouble updating it
Google is no help to find this device...out give results for some old arcade game.
anyone know if this can still be done? the weebly site doesn't work
I have the image file but It needs to be updated. If anyone can help with that I would share it...
Share Your Thoughts