
During a penetration test, one of the most important aspects of engaging a target is information gathering. The more information you have coming into an attack, the more likely the attack is to succeed. In this article, I'll be looking at SpiderFoot, a modular cross-platform OSINT (open-source intelligence) gathering tool.
Open-source intelligence is data that can be gathered from public sources. OSINT isn't just limited to the internet, it can be gathered through print media, government records, academic publications, and more. Depending on your target, gathering publicly available data from the internet may be enough to profile a target. It all really depends on the web footprint left by your target.
For hackers, OSINT comes in handy in a number of ways. Spear-phishing campaigns rely on publicly available information about individuals to target them. Search engines can be leveraged to provide pages containing login portals for further scrutiny. Forgotten subdomains can be located and connections between data visualized in useful ways. Given time, you can use OSINT techniques to build quite a large dossier on a target, all without ever coming into direct contact with the target.
Unfortunately, gathering large amounts of information on your targets can be time-consuming, especially if the process must be run manually. This is compounded by the added time required to sort through and analyze the information to determine if it is actionable. Not all information gathered will be directly applicable to your operation. Analyzing and filtering out actionable information is somewhat of a skill set of its own.
In this article, we'll cover the basic usage of SpiderFoot. A quick, modular, and broad OSINT tool.
Step 1: Install SpiderFoot on Kali Linux
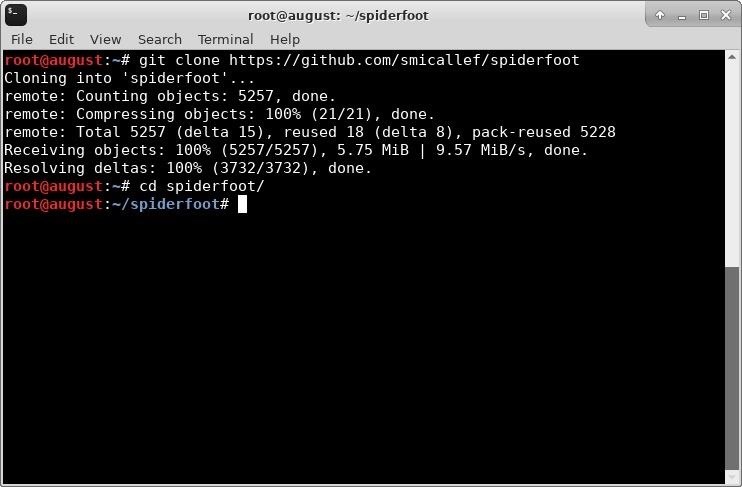
Unfortunately, Kali Linux doesn't come with SpiderFoot installed by default, so we will need to download the source. The source is also available via the SpiderFoot downloads page.
This page doesn't support HTTPS, so I opted to clone the source directly from GitHub. If you choose to download directly from the SpiderFoot downloads section, be sure to check the hash.
Once it's downloaded, navigate to the folder as seen below.
git clone https://github.com/smicallef/spiderfoot
cd spiderfoot
Once we have the source, we will need to ensure that all dependencies are met. Run the following to install any dependencies that may be missing.
pip install lxml netaddr M2Crypto cherrypy mako requests bs4
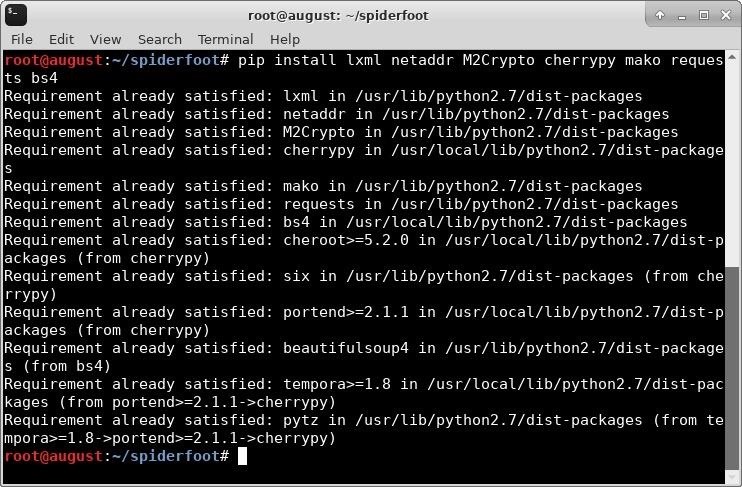
In my case, the dependencies were already installed on my machine. Once all of the dependencies are met, we are ready to launch SpiderFoot.
Step 2: Launch SpiderFoot
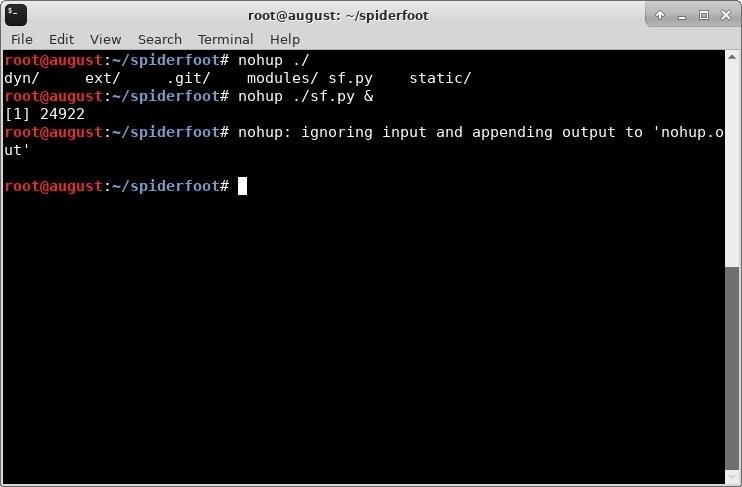
Next, we start the SpiderFoot server. In a terminal window, type the following to begin.
nohup ./sf.py &
In this command, nohup runs sf.py so that it is immune to hang-ups, and directs output from sf.py into a file called "nohup.out." The & at the end backgrounds the command so we can continue working in our terminal. Since we used nohup, we can also safely close this terminal window without terminating the sf.py process.
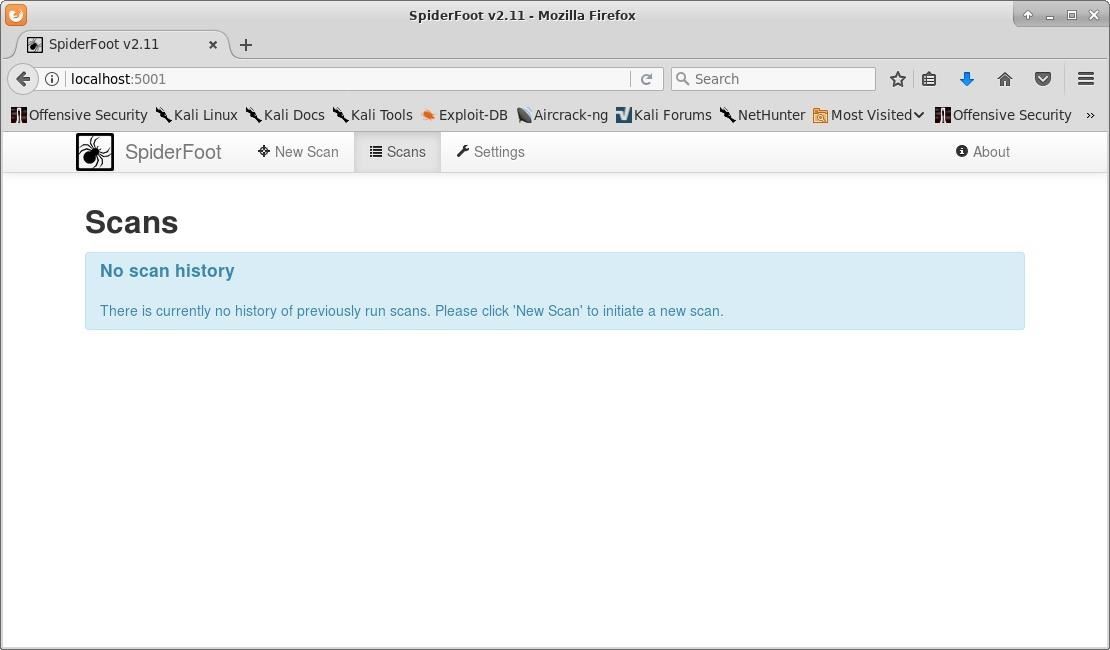
Once this completes, you can use a browser to navigate to the SpiderFoot control panel on your local host. The default address is 127.0.0.1:5001.
It's important to note that, by default, SpiderFoot doesn't use HTTPS or any form of authentication. If you are intending to run SpiderFoot for a group of penetration testers or on a VPS, you will want to do additional configuration that is outside the scope of this article.
Upon navigating to your localhost in your browser of choice, you will be greeted with the SpiderFoot manager. I haven't run any scans yet, so my manager is empty.
Before we actually run any scans, we want to ensure that the settings are to our liking. We can view these settings by clicking the "Settings" button in the top menu of the manager. SpiderFoot has a huge set of options, including settings for use through Tor.
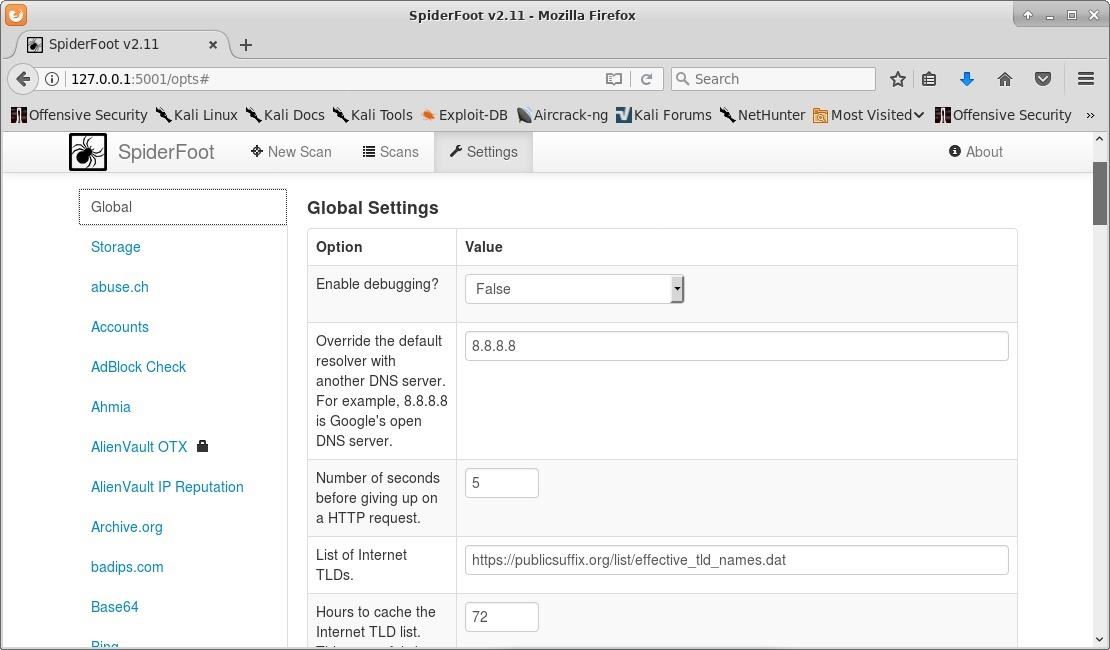
I left all of the options in their default configuration, except for the DNS option, which I changed to use Google DNS. I would definitely recommend reading through all of the available settings to ensure that everything is configured to your liking.
Step 3: Add API Keys
If you navigate deeper into the settings, you will see that some modules in SpiderFoot use API keys. In some cases, these modules will not function without properly setting up the API keys first. In other modules, the API keys are only to speed up the scanning. Below is a list of the modules that benefit from API keys and the steps required to get them, sourced from the SpiderFoot documentation page.
Honeypot Checker:
- Go to http://www.projecthoneypot.org.
- Sign up (free) and log in.
- Click on "Services," then "HTTP Blacklist."
- An API key should be listed.
- Copy and paste that key into the "Settings" -> "Honeypot Checker" section in SpiderFoot.
SHODAN:
- Go to http://www.shodanhq.com.
- Sign up (free) and log in.
- Click on "Developer Center."
- On the far right, your API key should appear in a box.
- Copy and paste that key into the "Settings" -> "SHODAN" section in SpiderFoot.
VirusTotal:
- Go to http://www.virustotal.com.
- Sign up (free) and log in.
- Click on your username in the far right and select "My API Key."
- Copy and paste the key in the grey box into the "Settings" -> "VirusTotal" section in SpiderFoot
IBM X-Force Exchange:
- Go to https://exchange.xforce.ibmcloud.com/new.
- Create an IBM ID (free) and log in.
- Go to your account settings.
- Click on "API Access."
- Generate the API key and password (you need both).
- Copy and paste the key and password into the "Settings" -> "X-Force" section in SpiderFoot.
MalwarePatrol:
- Go to http://www.malwarepatrol.net.
- Create an account (free) and log in.
- Click on "Open Source" and scroll down to the bottom.
- Click on the "Free" link in the subscription pricing table.
- Click the free block lists link.
- You will receive a receipt ID.
- Copy and paste the receipt ID into the "Settings" -> "MalwarePatrol" section in SpiderFoot.
BotScout:
- Go to http://www.botscout.com.
- Create an account (free) and log in.
- Under "Account Info," your API key will be there.
- Copy and paste the API key into the "Settings" -> "BotScout" section in SpiderFoot.
Cymon.io:
- Go to http://www.cymon.io.
- Create an account (free) and log in.
- Under "My API Dashboard," your API key will be there.
- Copy and paste the API key into the "Settings" -> "Cymon" section in SpiderFoot.
Censys.io:
- Go to http://www.censys.io.
- Create an account (free) and log in.
- Click on "My Account" (in the bottom right).
- Copy and paste the API Credentials values into the "Settings" -> "Censys" section in SpiderFoot.
Hunter.io:
- Go to http://www.hunter.io.
- Create an account (free) and log in.
- Click on "API" in the top menu-base.
- Copy and paste the API key into the "Settings" -> "Hunter.io" section in SpiderFoot.
AlienVault OTX:
- Go to https://otx.alienvault.com/ and sign up.
- Log in, click on your account in the top right, then go to "Settings."
- Scroll down and copy and paste the OTX Key value into the "Settings" -> "AlienVault OTX" section in SpiderFoot.
Clearbit:
- Go to https://dashboard.clearbit.com/login and sign up. (Clearbit will require a phone number with SMS capability during registration.)
- Log in and click on the API link on the left.
- Copy and paste the "secret" API key into the "Settings" -> "Clearbit" section in SpiderFoot.
BuiltWith:
- Go to https://www.builtwith.com and sign up. You get 50 queries for free before having to pay (it's totally worth it though).
- Log in and click on the "Domain API" tab. No other API key type will work with SpiderFoot!
- Your API key will appear on the right.
- Copy and paste it into the "Settings" -> "BuiltWith" section in SpiderFoot.
FraudGuard:
- Go to https://fraudguard.io.
- Register with the plan you choose. The free plan is also available.
- Click to "Create" an API key, in the form of a username and password.
- Copy and paste both into the "Settings" -> "Fraudguard" section in SpiderFoot.
IPinfo.io:
- Go to https://ipinfo.io.
- Click on "Pricing" and select the plan you choose. They offer a very generous free plan with 1,000 queries per day. (IPinfo.io no longer offers a free API key.)
- Click "Subscribe," enter your details, and follow the registration process.
- Copy and paste the "Access token" in your Profile to the "Settings" -> "ipinfo.io" section in SpiderFoot.
For the best performance and OSINT gathering, you will want to get keys from all of these services. If you are just trying the tool out, these keys aren't all necessary. Spending the time to get them will definitely enhance the amount of information you gather with SpiderFoot.
Step 4: Launch a New Scan
With SpiderFoot running, launch your favorite browser and again navigate to localhost:5001. Next, click the "New Scan" button in the top-left menu bar.
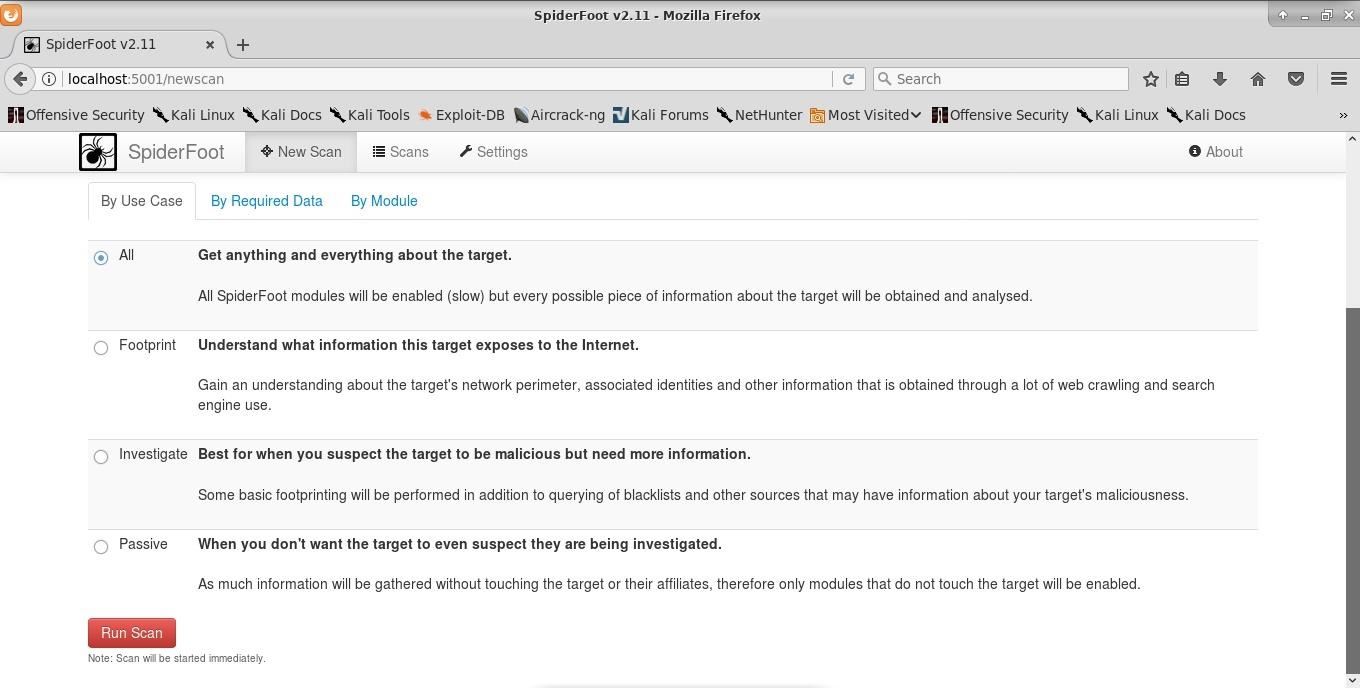
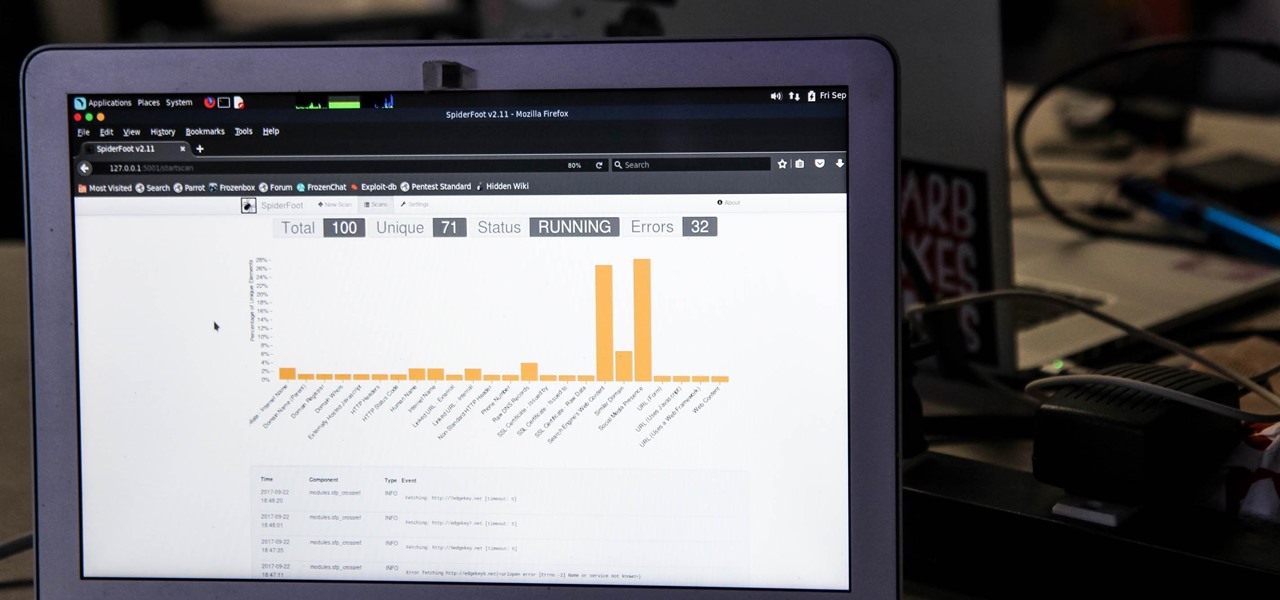
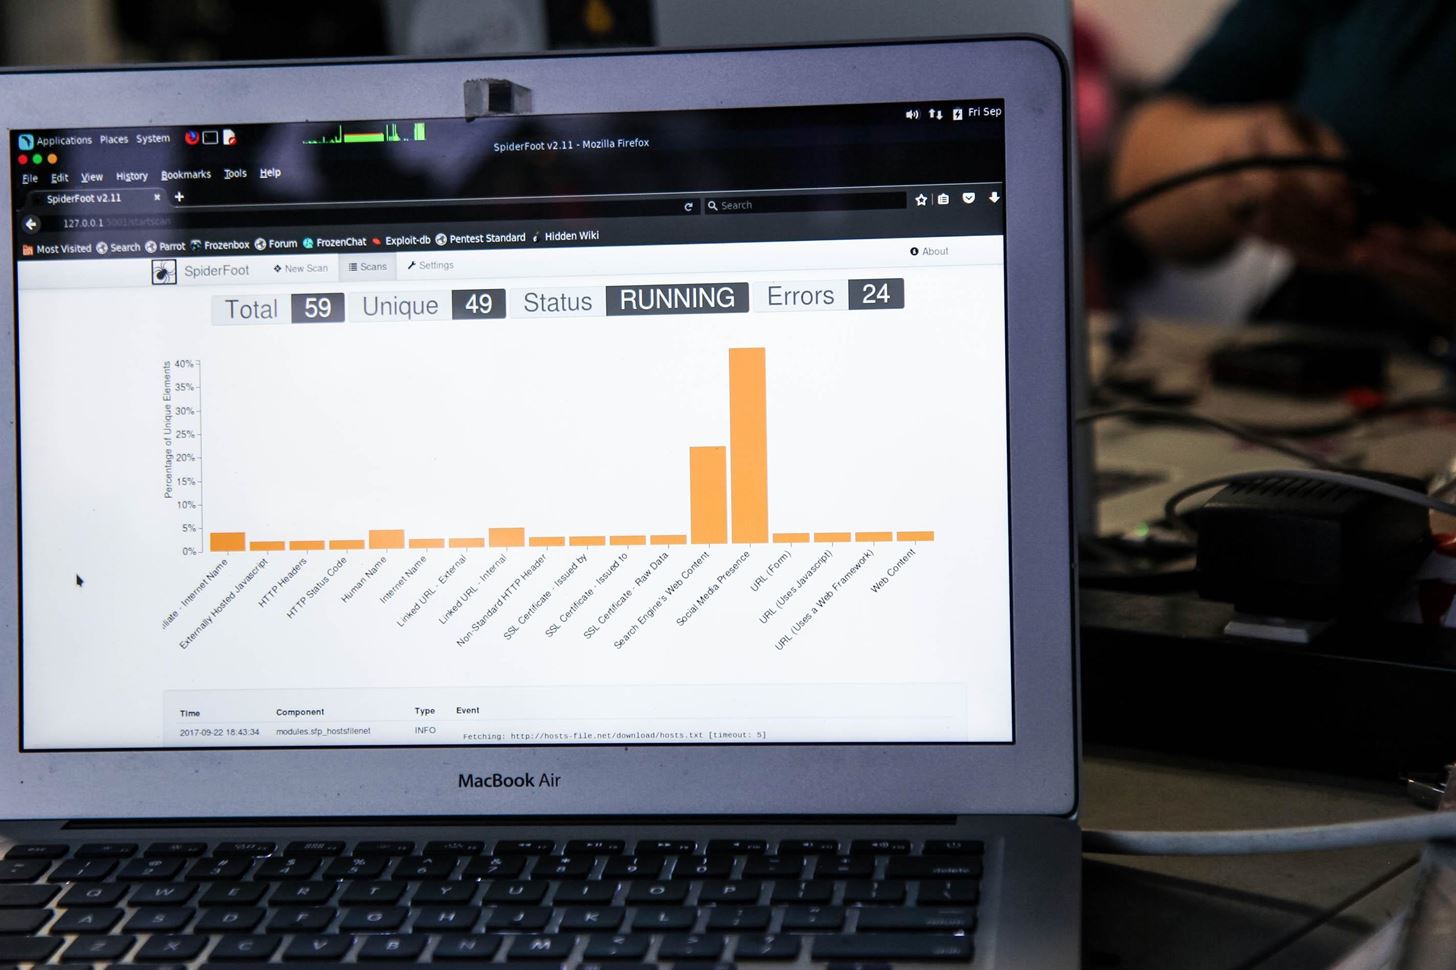
The scans page is clearly laid out, with each scan type described. I will be running my scan on scanme.nmap.org. To start the scan, click the "Run Scan" button at the bottom of the New Scan page. The scan will update in real time.
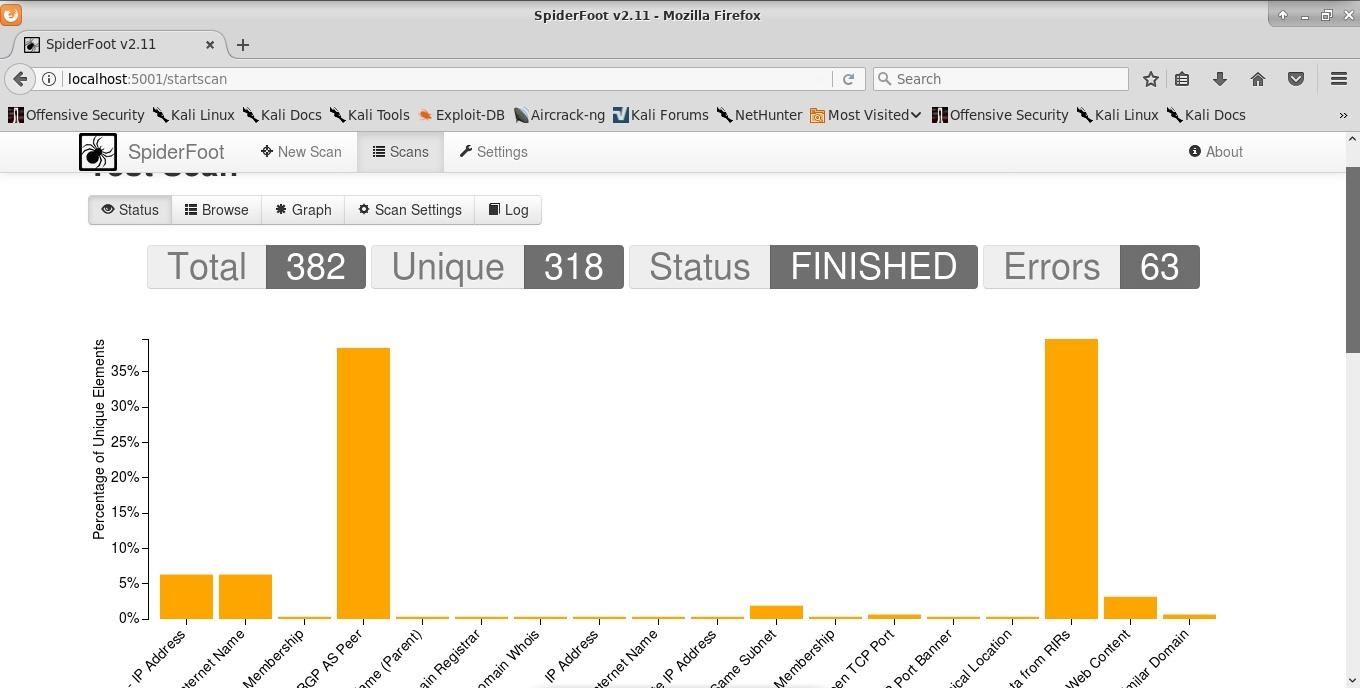
Below the graph, you will see information on the current status of each module. Each bar on the graph is clickable to reveal more information. The errors you are seeing in the top left are due to the lack of API keys entered into SpiderFoot. If a module is reliant on an API key, it will simply not function instead of causing the entire application to halt.
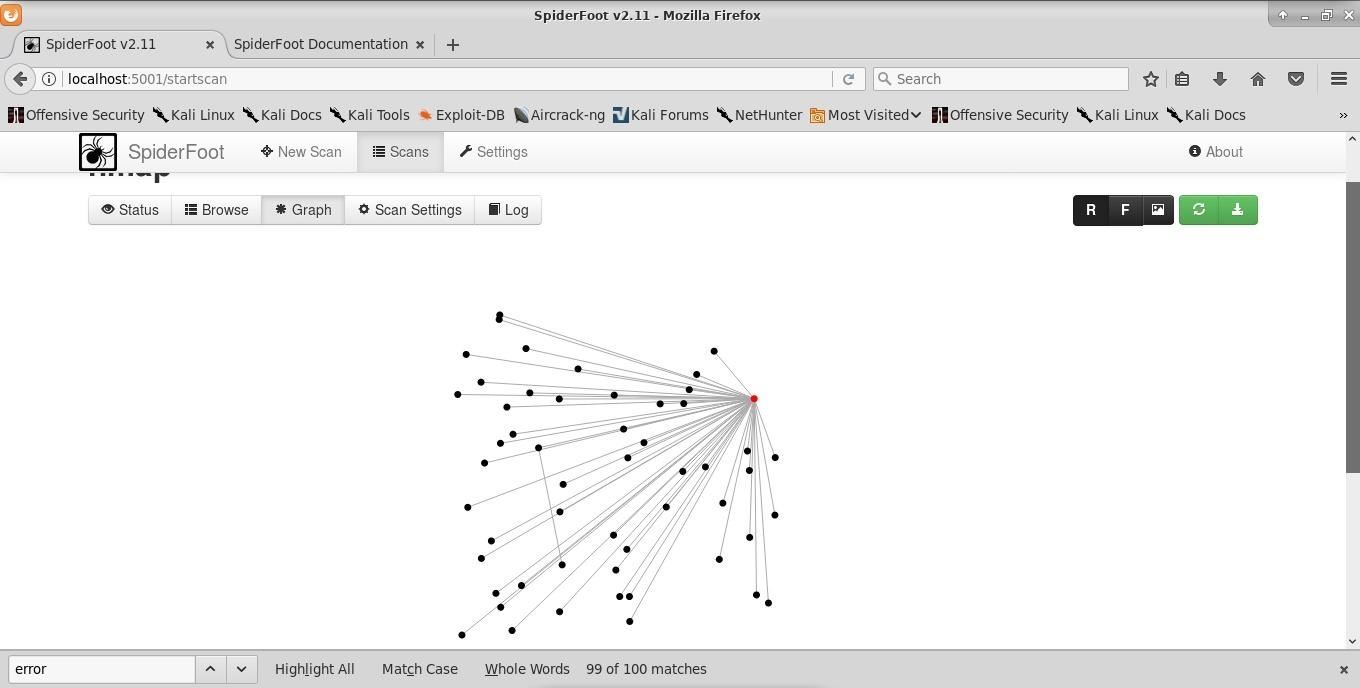
Step 5: Parsing the Information
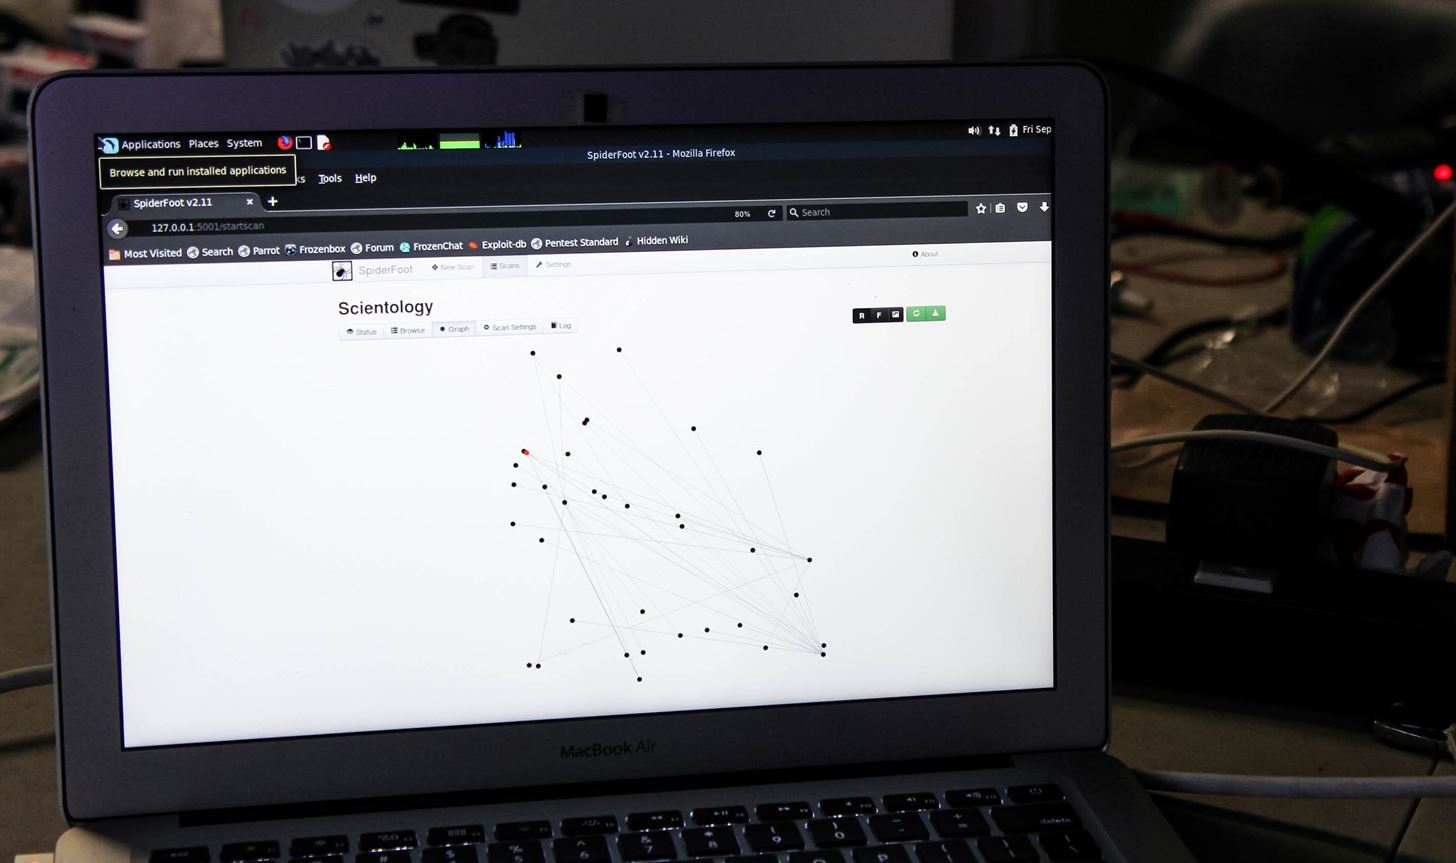
Once the scan completes, we can start analyzing the information. I started on the graph page, which is accessed by clicking on the "Graph" button in the top submenu. This gives us a view of connected domains. This can be useful if any of these domains are misconfigured in a way that leaves them vulnerable to attack.
Next, I browse through the data collected. This can be accomplished by clicking on the "Browse" button in the top submenu.
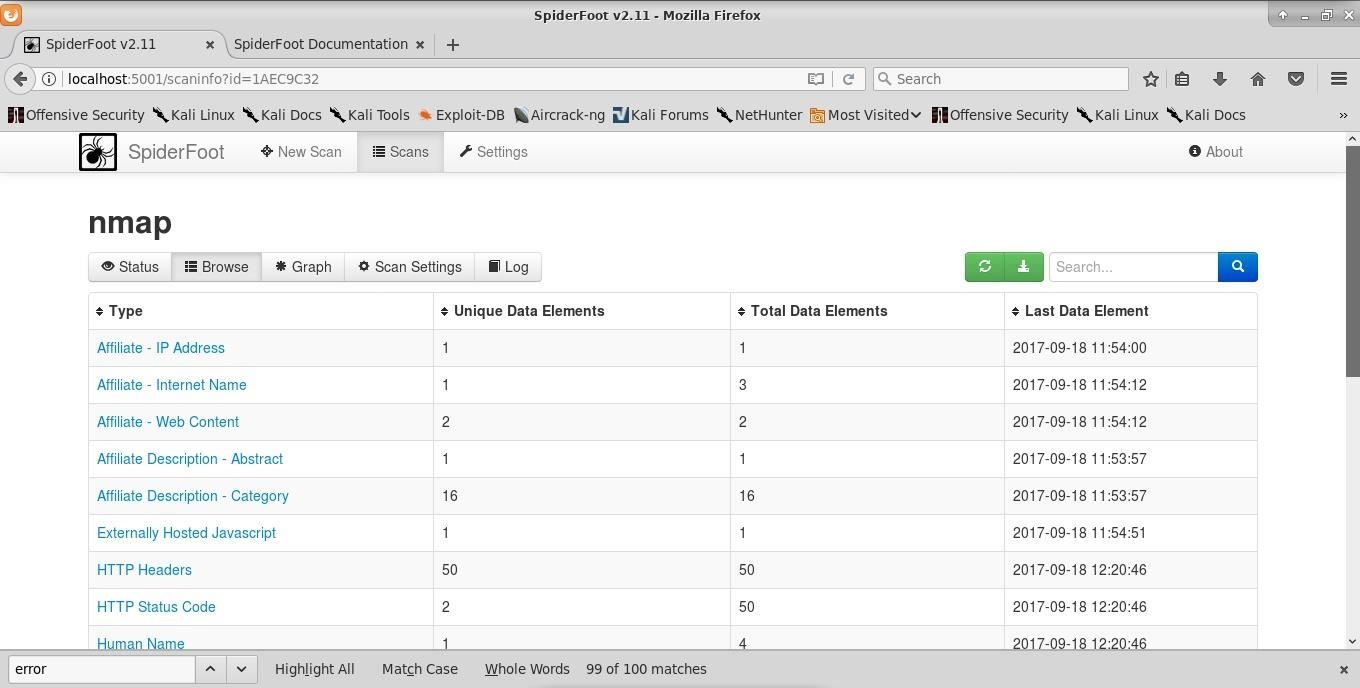
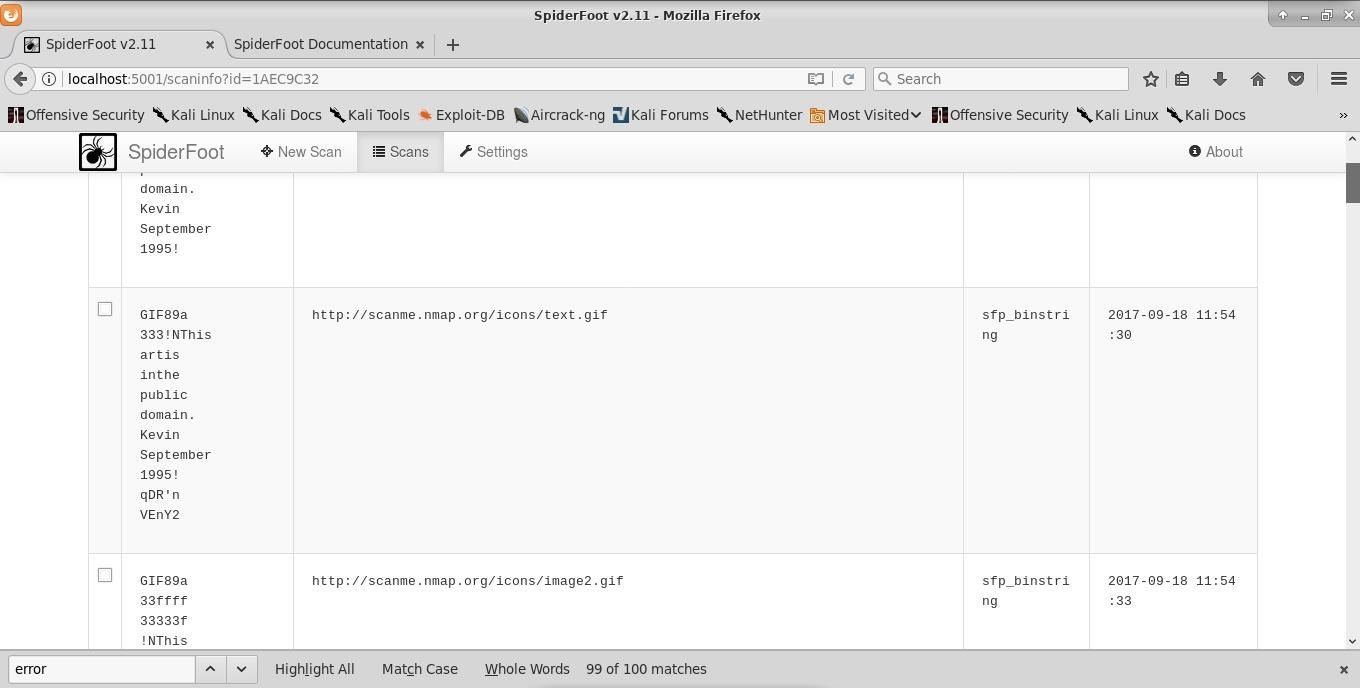
Some of my modules failed to fire due to lacking API keys, but I'm still getting a decent picture of scanme.nmap.org. One of the more interesting modules called "Raw File Meta Data" pulls the metadata from images found on the site. There's nothing extremely telling in the image metadata from scanme.nmap.org, however, on a site that's less well-managed, you may gather quite a bit of information from images.
In this case, we simply see some information saying "September 1995 Kevin." This in itself is telling about how often this site gets reworked.
Looking at the "Web Server" category gives me some information about which HTTPd and operating systems are in use.
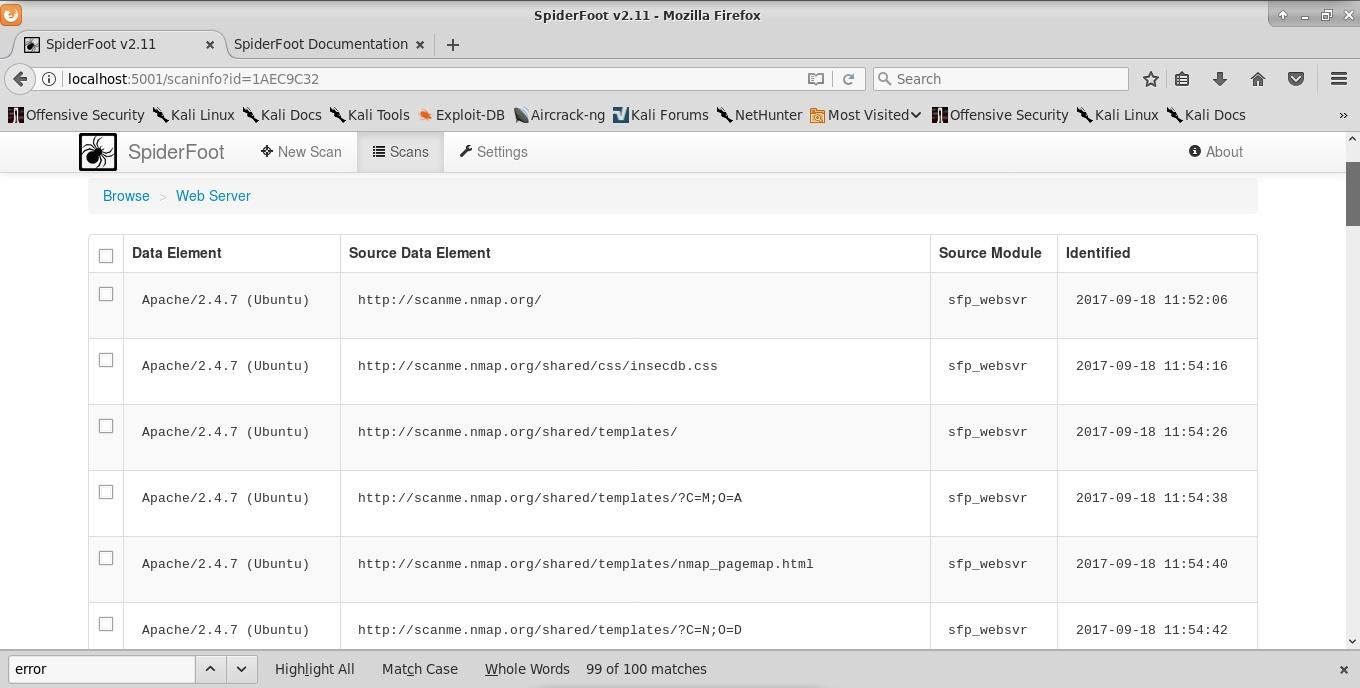
We also see additional publicly accessible directories on the site scanme.nmap.org. With the information, here we can start looking for CVEs that may work on this target.
SpiderFoot Is a Valuable OSINT Tool
SpiderFoot generated a lot of information relating to our target, scanme.nmap.org. Used on a larger target, one could expect much more information. This data could be extremely helpful in getting an initial idea of what you're up against in a penetration test. The publicly available information gathered by SpiderFoot provides a great starting point for further enumeration and honing in on softer targets.
I would consider SpiderFoot a first stage information gathering tool, giving me a somewhat broad overview of what I'm up against. The information uncovered with SpiderFoot is intended to be a starting point to deeper insight. With the API keys enabled, the scans will, of course, be a more detailed overview of the systems you are targeting. This kind of broad-scale OSINT approach can be incredibly time-consuming to execute manually. SpiderFoot makes it fast; really fast comparatively.
Based on the very real benefits provided by SpiderFoot, I suspect this tool will be added to Kali Linux very soon. Thanks for reading, and stay tuned for more tutorials! You can ask any questions here or @0xBarrow on Twitter.
Just updated your iPhone? You'll find new emoji, enhanced security, podcast transcripts, Apple Cash virtual numbers, and other useful features. There are even new additions hidden within Safari. Find out what's new and changed on your iPhone with the iOS 17.4 update.
Screenshots by Barrow/Null Byte


Be the First to Comment
Share Your Thoughts