


As you might know, there are a multitude of tools used to discover internal IP addresses. Many of these tools use ARP, address resolution protocol, in order to find live internal hosts. If we could write a script using this protocol, we would be able to scan for hosts on a given network. This is where scapy and python come in, scapy has modules we can import into python, enabling us to construct some tools of our own, which is exactly what we'll be doing here.
Open Your Text Editor of Choice and Let's Get Started!
First, we'll import some needed modules
import sys
from datetime import datetime
These aren't all the modules we need, but we'll import the rest later on.
Next, we'll set up some user input that we need to begin the scan

We place these within a try so that we can add an exception, this exception will be in case the user decides that they don't want to continue with the scan.
Now, we'll add that exception we talked about

Now, on to the actual scanning portion of the script!
We'll start this by telling the user we've started scanning, starting the clock for the total scan duration, importing the needed scapy modules, and beginning the scan.
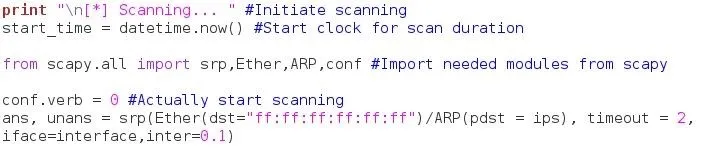
We simply print that we've started the scan, and set the start-time variable equal to the current time, datetime.now()
Then, we imported the necessary modules from scapy
from scapy.all import srp,Ether,ARP,conf
We set the conf.verb variable equal to 0
conf.verb = 0
Now we start the scanning, we set two variables, ans and unans equal to srp(Ether(dst="ff:ff:ff:ff:ff:ff")/ARP(pdst = ips), timeout = 2, iface = interface, inter = 0.1). the series of f's and colons is the default broadcast address, we set the pdst variable equal to the range of IP address we prompted the user for in the beginning, timeout is set to two, iface gets set to the interface to got from the user before, and the inter variable is set to 0.1, this helps to avoid skipping packets.
Now that we have this information, all we need to do is go through it and present it to the user!
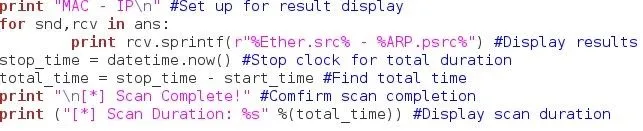
We print MAC - IP so that we can set up a format for the results to be displayed, we then use a for loop to iterate through the results and print the values, once we're through with that, we stop the clock for the scan duration by declaring another variable equal to datetime.now(). We find the total scan time by subtracting the two and print the result.
Test It Out!
Now that we have our script, let's test it out!
We'll be scanning for my virtual system running Windows XP
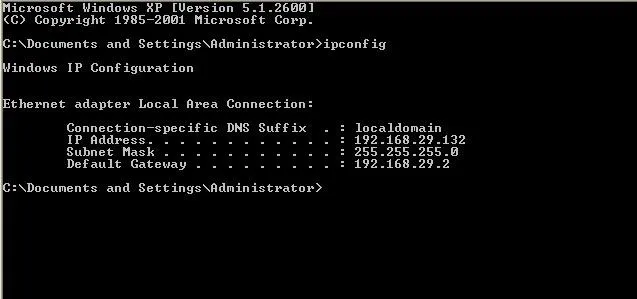
Here we can see that we'll be looking for the IP address of 192.168.29.132.
Let's navigate to our script and get started!

We start our script and we will be prompted for some required information

In this instance I'll be entering vmnet8 as my desired interface

I'll be scanning for the entire range of IP addresses, from 192.168.29.1 to 192.168.29.255
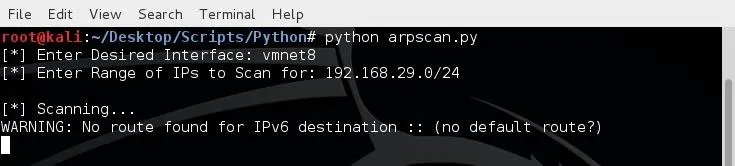
We will be prompted that the scanning has started, now we wait for the scan to finished and print our results

We see here that our scan was successful! We were able to confirm the Windows system presence on the network!
Feedback!
Let me know what you think, post any questions you might have to the comments and I'm sure they'll be answered.
Thank you for reading!
-Defalt


Comments
Be the first, drop a comment!