


While there are a variety of privacy-focused search engines available like StartPage and DuckDuckGo, nothing can offer the complete trust offered by creating one's own search engine. For complete trust and security, Searx can be used as free metasearch engine which can be hosted locally and index results from over 70 different search engines.
Search engines inevitably carry some traces of metadata about anyone who uses them, even if just temporarily. If you don't want to trust this data to a third-party search engine, the only solution is to host your own. One could choose to host this on an external server or even use it on a local network.
Many search engines also create user profiles even for website viewers who do not register accounts. While it is possible to see the customization of search results according to mined data as a convenience, it can also be seen as an invasion of privacy or even a form of censorship. A metasearch engine instance facilitates the same valuable search results while limiting the type and amount of data which can be gathered about individual users, especially if multiple users are using a given instance.
The Searx "About" page summarizes the tool using the three following points.
- searx may not offer you as personalized results as Google, but it doesn't generate a profile about you
- searx doesn't care about what you search for, never shares anything with a third party, and it can't be used to compromise you
- searx is free software, the code is 100% open and you can help to make it better
For the privacy-minded or even those who wish to customize their search engine experience to the greatest extent, Searx can be an ideal choice.
Choose a Local or Web-Based Instance
Before installing Searx, it's best to first decide on what sort of access you would like to have to the Searx instance. Searx, when installed, is accessible through a web browser, similar to any other search engine. This instance could be accessed on a remote web server or simply through a local install of the metasearch tool.
In this tutorial, Searx is installed locally and accessed on the same device on which it is installed, but the software could also be used on an internet-connected server to create a web-based search engine, such as the public instances listed on GitHub.
Update Your Linux System
Once you've chosen a device to install a Searx instance on, the next step is to ensure that the system is updated and secure. On Debian-based Linux distributions like Ubuntu, this updating process can be completed using apt-get. The command below will update the system software repositories and upgrade any out-of-date software.
sudo apt-get update && sudo apt-get upgrade

Install Searx
Installation of Searx creates a server-like stack of services which can be accessed locally or used to create a real live instance of the metasearch engine on an internet-connected server.
Using Docker
Docker can be used to install Searx in a container, assuming Docker is installed and configured on the system one wishes to install Searx on. We have a guide on setting up and using Docker, and Docker also has some instructions on its site. If you do not wish to use Docker, you can skip to the installation instructions in Option 2 for the classic installation method.
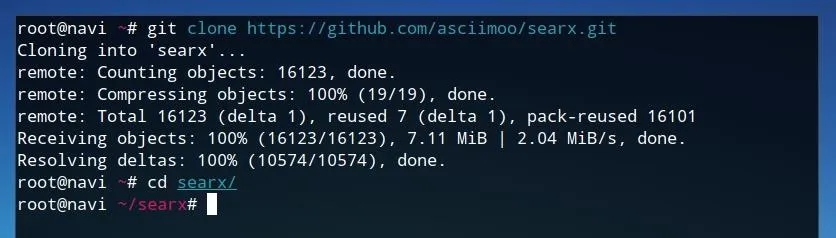
First, make a copy of the Searx repository on GitHub. Unlike in the classic installation method, the dependencies will be handled by Docker, so they do not need to be manually installed. To clone the Git repository, run the command below in a terminal window.
git clone github.com/asciimoo/searx.git
After the source code is finished downloading, move into the directory with cd.
cd searx/
Now, we can use Docker to build Searx in its own container.
docker build -t searx .

Once the build process is complete, Searx can be launched on port 8888 locally by running the command below.
docker run -d --name searx -p 8888:8888 searx

If Docker launches without any errors and returns a hash, it's now ready to use!
The Classic Installation
Searx can also be installed conventionally, rather than using Docker containers. To begin the manual installation process, first install the required dependencies by running the command shown below in a terminal. This command will install Git, which assists in copying the Searx source code, as well as a number of other libraries required by the software to compile and run.
sudo apt-get install git build-essential libxslt-dev python-dev python-virtualenv python-babel zlib1g-dev libffi-dev libssl-dev

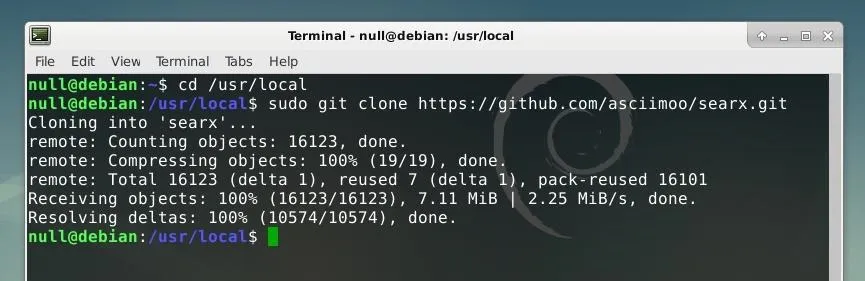
Once the dependencies are installed, we can move to the directory where Searx should be installed using cd, then use Git to download a copy of Searx. First, we'll move directories by running the command below.
cd /usr/local/
Now, we can download a copy of the Searx source code by running the following command.
sudo git clone github.com/asciimoo/searx.git
Next, we can create a new user account for Searx to use and add directory privileges using chown. First, create a new user by running the command below.
sudo useradd searx -d /usr/local/searx
Next, assign the same user account to the Searx directory with chown.
sudo chown searx:searx -R /usr/local/searx

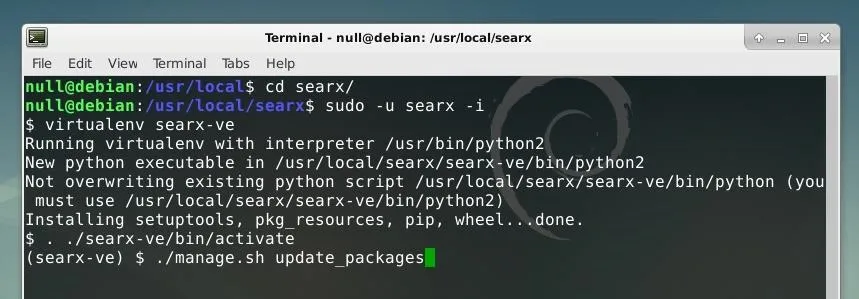
Once the system accounts and privileges have been established, we can begin the process of building Searx. First, move into the directory created by Git by running cd searx/ on the command line. Next, we'll switch to the newly created Searx user account by running the command below.
sudo -u searx -i
Once this user account is in use, we can activate the Searx virtual environment by running the command below. This allows the tool to run within its own operating environment to ensure proper usage of dependencies or libraries. To activate the virtual environment:
virtualenv searx-ve
We can use an included shell script to update the tool by running the command below.
./manage.sh update_packages
Finally, we can launch Searx with a Python script by entering the string below into the terminal window.
python searx/webapp.py

As long as this script is being run in this terminal window, Searx will continue to run. To stop Searx, press Ctrl + C in this terminal window to stop the script.
Access & Use Your Searx Search Engine
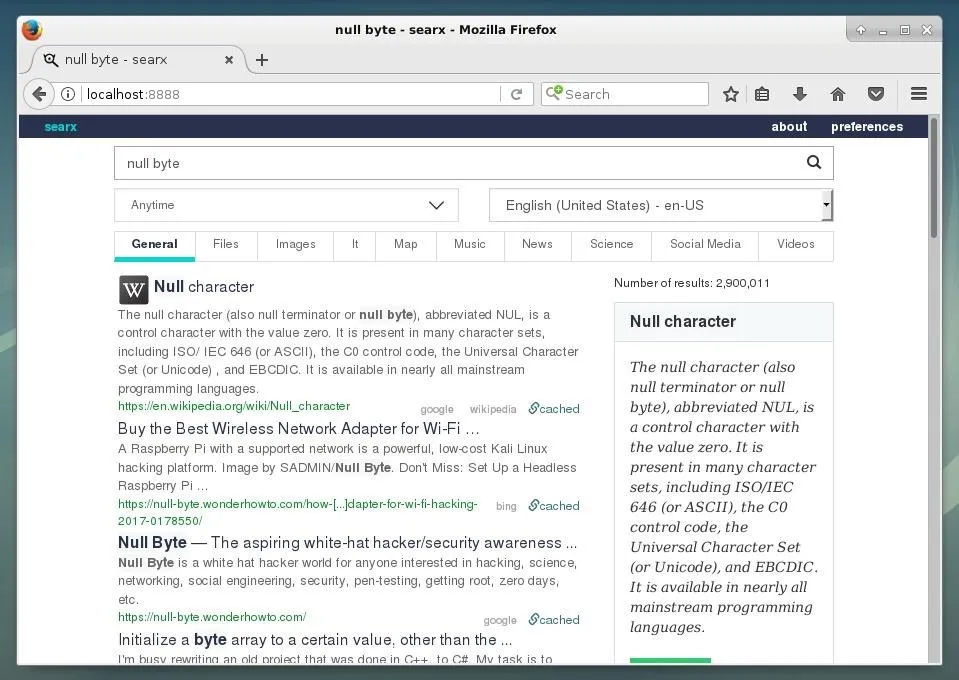
Once Searx is running, it can be accessed locally by going to http://localhost:8888/ in a web browser. It will look like and function very similar to any other search engine.
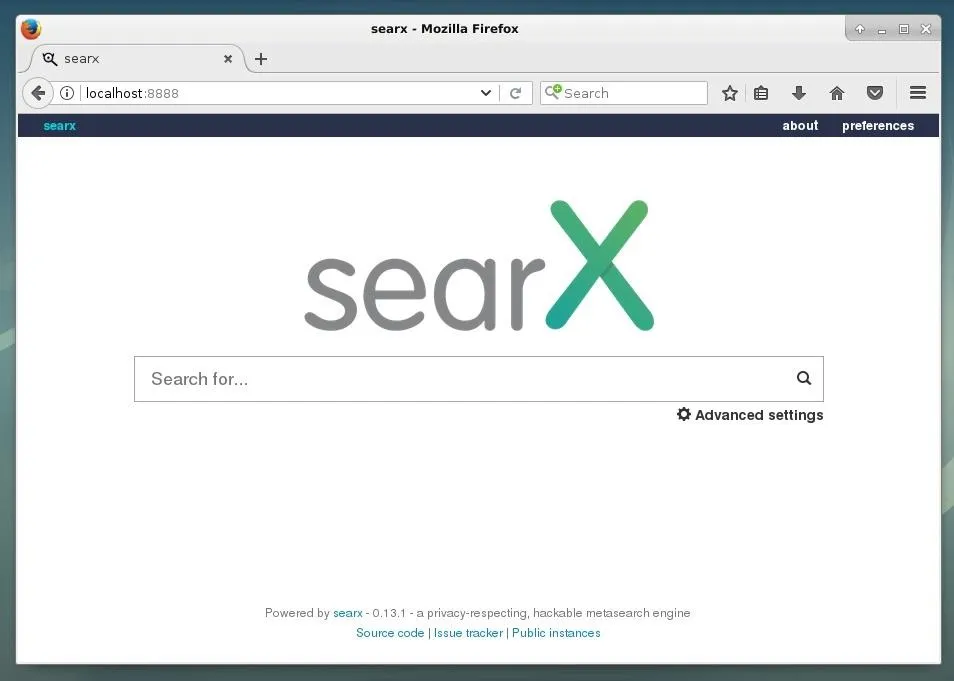
A search can be entered and results will be returned as a list of links or other related content. While this is relatively normal, the fact that these results are actually being retrieved from an immense amount of different search engines in a way which limits the possibility of creating special user profiles is very unique.
At the right of the URL for any given result shown in Searx, the originating search engines will be listed, such as Google and Bing in the results seen in the image below. Searx also directly integrates other forms of searches, including ones to look for files, images, maps, and even social media.
Make Your IP Address Anonymous
Searx can simply be run in the background or on its own server and used as your own instance of the search engine, or one could place Searx on an internet-connected server in order to provide the service to other users.
It should be noted that the IP address that Searx passes to other search engines is the same as the outgoing IP address of your device. For additional privacy, one could link the search engine to a proxy server so that the requests made to other search engines are made via the proxy server, rather than wherever the Searx instance is running. It's also possible to just use services like Tor or a VPN to obfuscate your outgoing IP address from the search engines that Searx uses.
I hope that you enjoyed this tutorial on Searx! If you have any questions about this tutorial or Searx in general, feel free to leave a comment or reach me on Twitter @tahkion.
- Follow Null Byte on Twitter, Google+, and YouTube
- Follow WonderHowTo on Facebook, Twitter, Pinterest, and Google+
Cover image by Daniel Lobo/Flickr; Screenshots by TAKHION/Null Byte


Comments
Be the first, drop a comment!