


In order to increase the security and harden the integrity of an email account and its content, you'll want to use PGP on your Windows, macOS, or Linux computer. This is usually the first thing security analysts do to protect communications with encryption, and everyone else should consider it too, especially since there's an easy way to incorporate PGP that anyone can follow.
For the uninitiated, PGP stands for Pretty Good Privacy, an encryption program that constructs encryption, signing, and decryption of text, files, email, or entire harddisks. PGP uses an assortment of hashing, data compression, symmetric-key cryptography, and public-key cryptography for encrypting and decrypting data.
We are going to use the asymmetric method of encryption. With the asymmetric method, you create a public and private key, then download the public keys of people you want to communicate with. When you have their public key, you use that to encrypt an email to them, then they use their private key, which is mathematically linked to their public key, to automatically decrypt the message.
It works the same the other way too. Someone uses your public key to encrypt an email, they send it to you, then you decrypt it with your private key. In order to do this, we need to set up PGP with our current email account, then upload our public keys to a centralized location online so that other users can find it. Alternatively, you could also share the public key privately so only one person has it.
Download & Install the Email Client
To start, we are going to use Thunderbird as our email client. To install it on Windows or macOS, just visit Thunderbird's website and click on the "Free Download" button which will download either an EXE or DMG file. Once downloaded, open the file and install it just like any other app you would download off the internet.
On a Linux machine, it's even easier. Just open up a root terminal and use the apt-get command below. Afterward, make sure to follow the on-screen terminal prompts to finish installing.
apt-get install thunderbirdInstall the PGP Add-On
After the email client has been installed, you need to configure an email address. Open up Thunderbird, and if you get asked to get a new email address, choose "Skip this and use my existing email." If that popup doesn't appear, you should immediately see an option to create or set up a new email account, so select that, which shows the popup.
Alternatively, you can click on the three-lined icon in the top right, select "Preferences," then "Account Settings." You'll see a drop-down for "Account Activities," so click on that, then select "Add Mail Account."
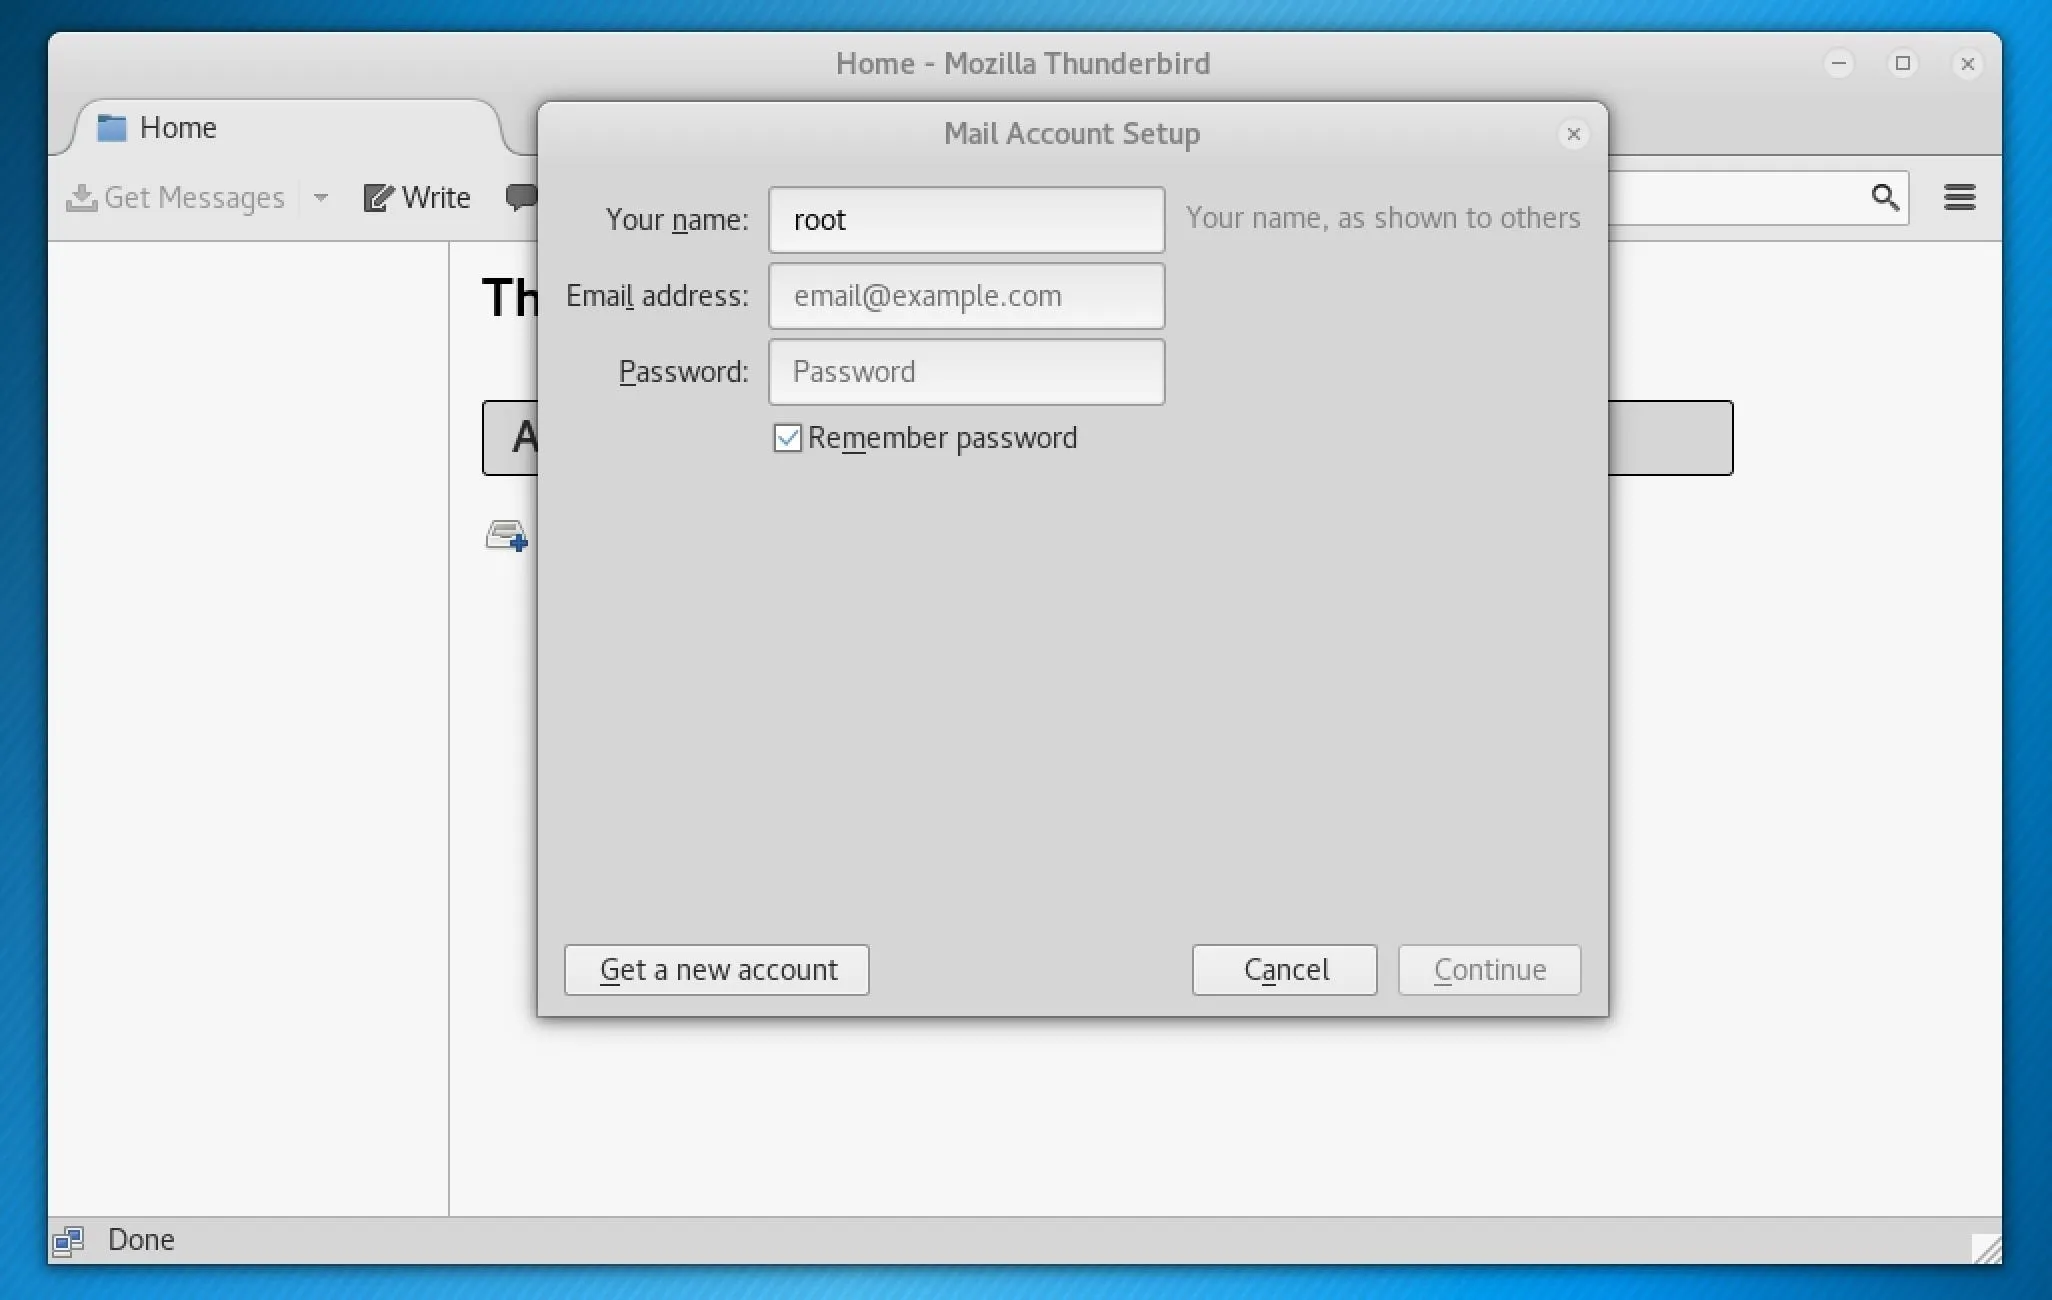
Next, a small window will pop up for Mail Account Setup, so enter your email address and its password in the appropriate fields, then select "Continue" and follow the on-screen prompts to finish adding your email account.
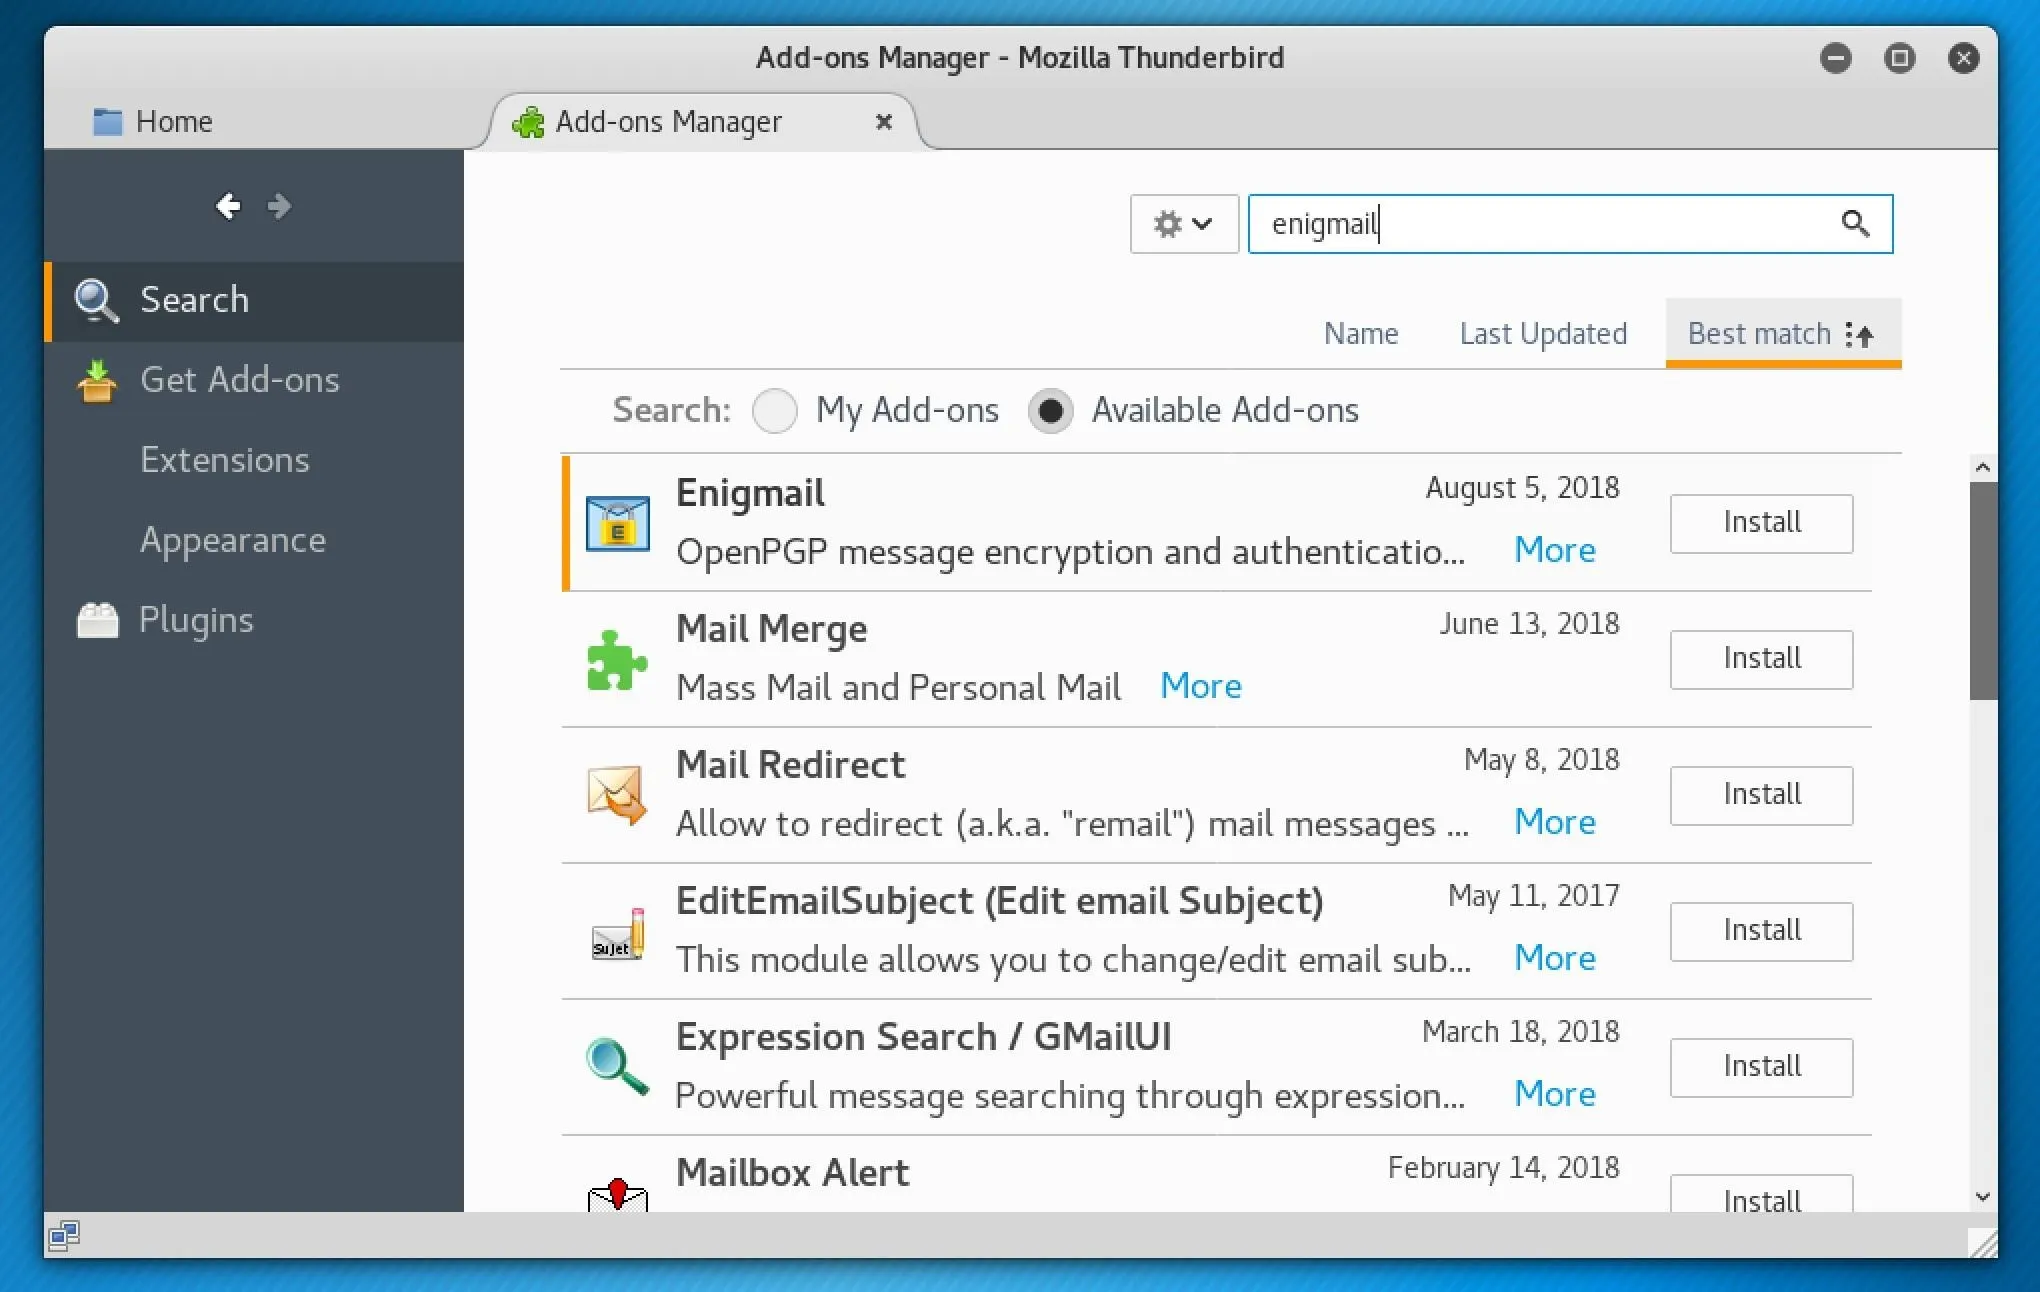
Once the email is configured, click on the three-lined menu button in the top right, then select "Add-ons." Select the "Extensions" tab, then use the search box to find "Enigmail." This add-on will give us the ability to create and manage PGP keys for encryption and description. From the results, select "Install" or "Add to Thunderbird."
If you don't have GnuPG installed on your system, you will be prompted to do so before you can use Enigmail.
Create a Set of PGP Keys
Next, we want to create some PGP keys in order to encrypt and share our public keys to an index for others to search and decrypt our message.
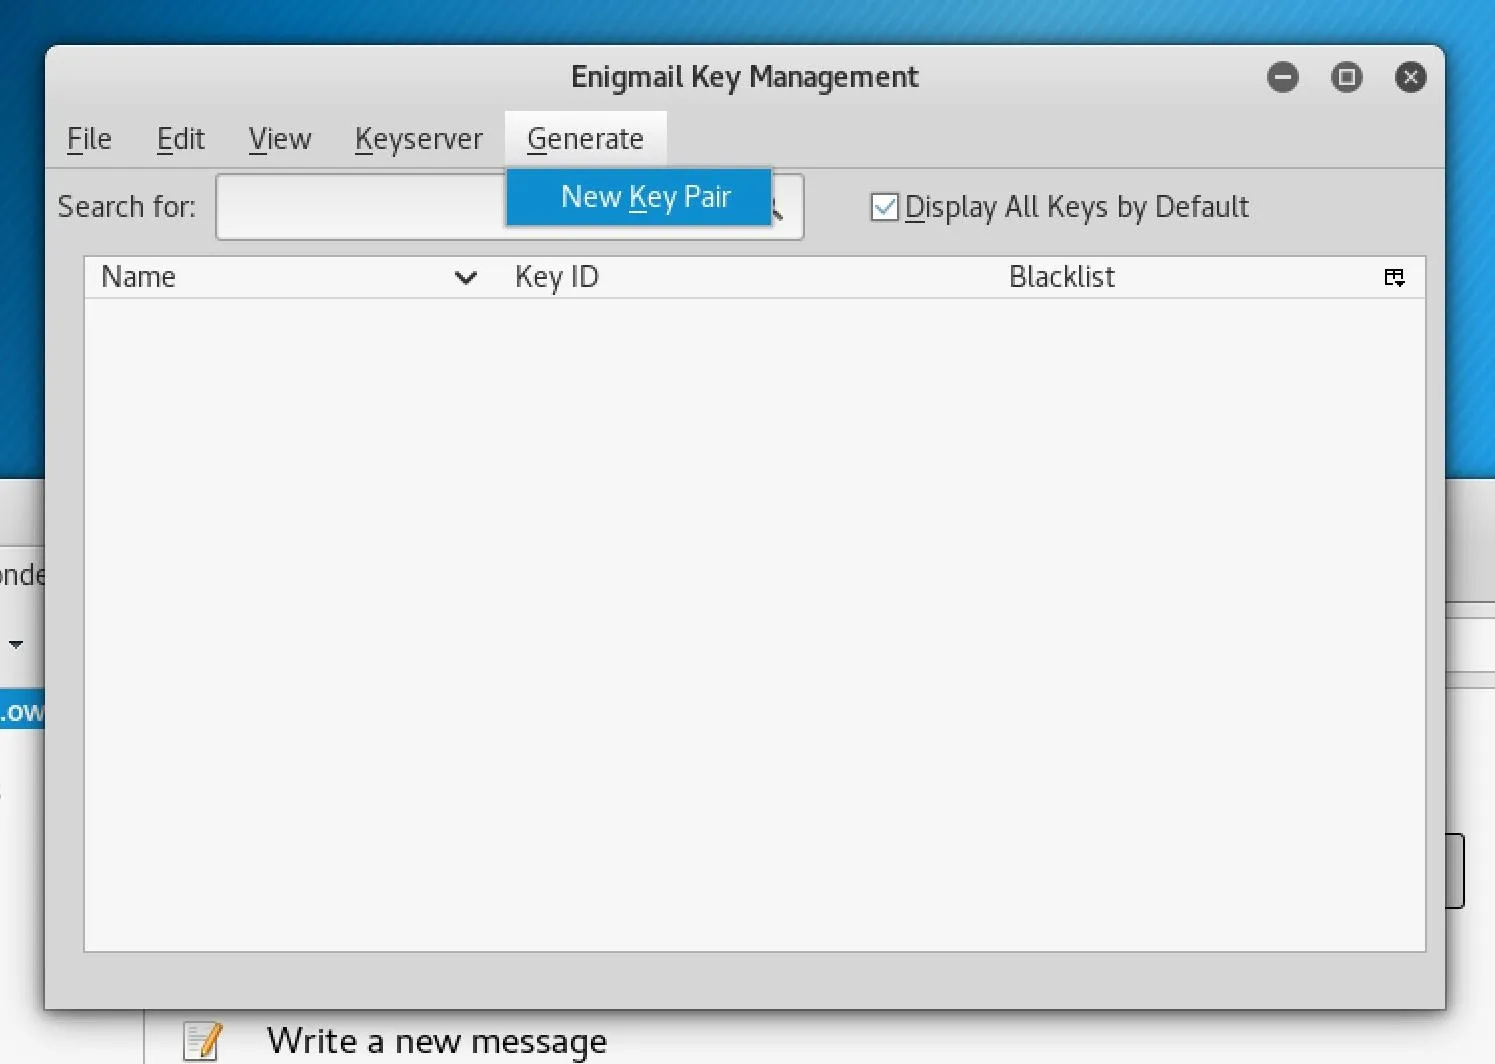
Open the menu again from the three-lined icon in Thunderbird, and select "Enigmail." Next, select "Key Management," click "Generate" in the window's menu, then "New Key Pair."
- Don't Miss: Cryptography Basics for the Aspiring Hacker
That will take you to a new window to configure a new set of PGP keys for the email account. Your email account should already be selected, but you'll need to create a passphrase for both the public and private key sets. Once that's done, choose an expiration date and hit "Generate key."
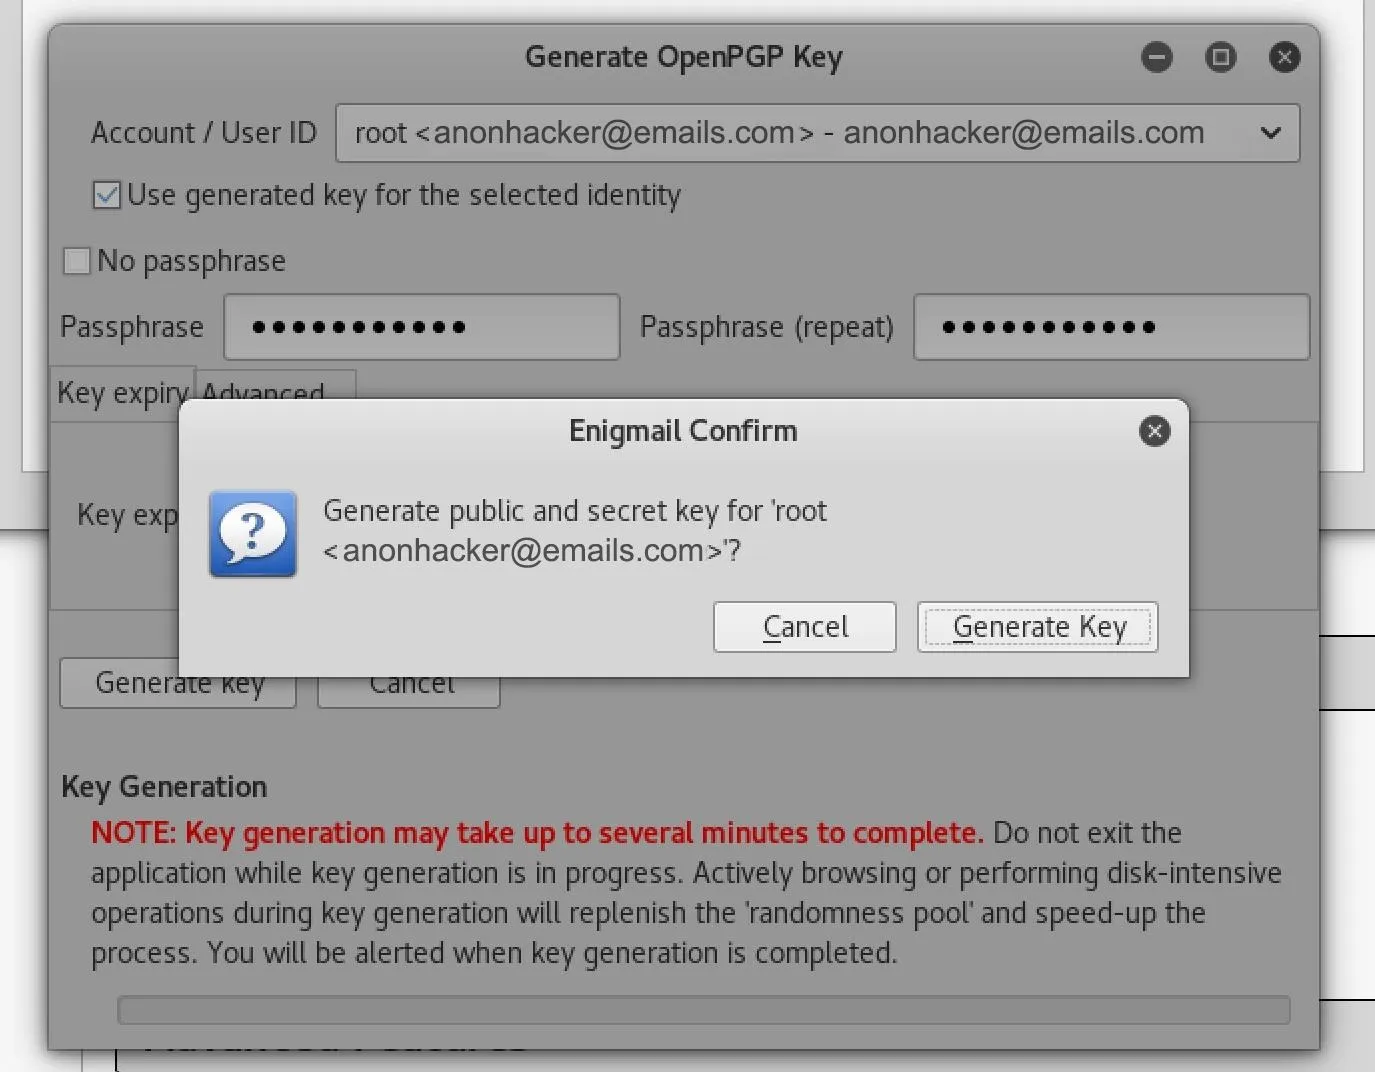
You'll now see a progress bar and a message saying it will take up to a couple of minutes to create the keys. Once the creation is done, a new prompt will appear asking you to make a revocation certificate.
A revocation certificate revokes the public key if the private key has been compromised or when the password is not remembered. So, go ahead and select "Generate Certificate." Next, select where you want to store the file; use either a USB flash drive or place it somewhere safe in a folder on your computer. After hitting "Save," you'll need to enter your passphrase to confirm.
Hand Out Your Public Key
Once those steps are complete, you can upload your public key to the web or just share the public key to one or two select people. The key is plain text, so you can share it as a note file however you want. In order for people to send you encrypted emails, they need your public key to perform the encryption.
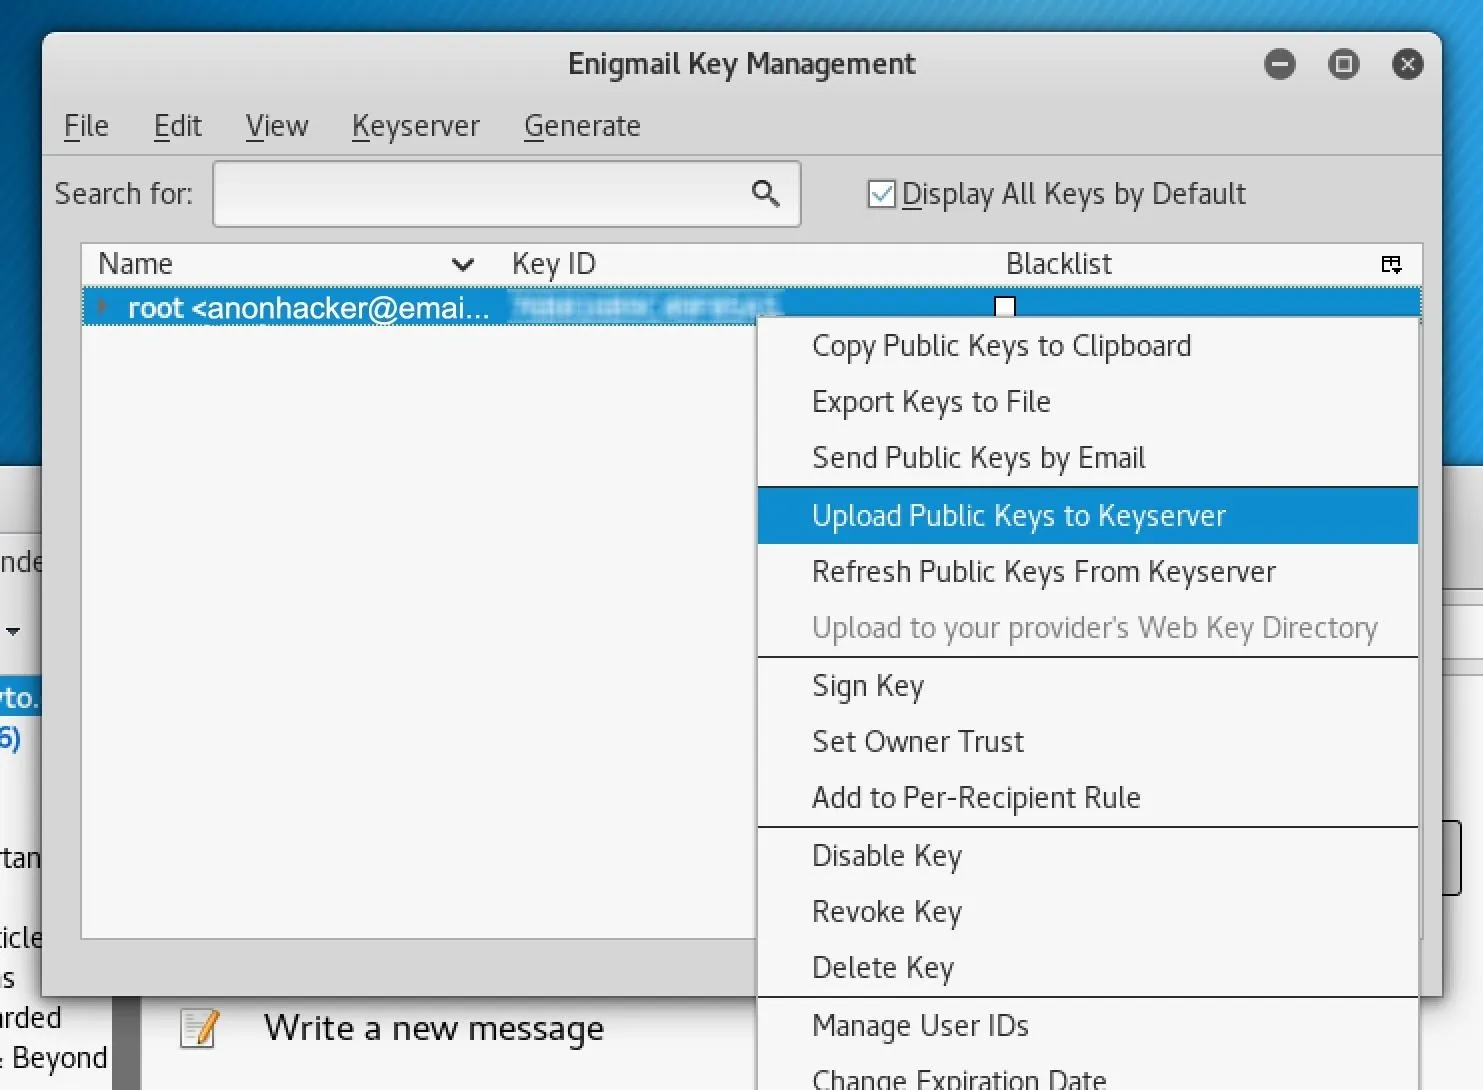
To do this, go back to the "Key Management" menu for Enigmail in Thunderbird, where you'll see the key that you made earlier for the associated email address. Right-click on the key, then select "Upload Public Keys to Keyserver," which will upload your public key into the Keyserver index for the world to see.
If you only want to share with a limited group instead of on a public server, when you right-click on your public key, you can either "Copy Public Keys to Clipboard," which will let you enter it wherever you want (it's long, so maybe not the best choice), "Export Keys to File," which lets you share it however you want, or "Send Public Keys by Email," which lets you email the file instead.
Now, remember to always share your public key and never your private key because the public key is used for the encryption while the private is for the decryption part. Also, make sure that your recipient does the same steps because you have to download their public key as well.
Download the Recipient's Public Key
Now, other people have your public key so they can send you encrypted messages, but you can't send them any encrypted messages yet. Make sure they are using PGP and have uploaded their public key to a server or sent it to your directly to add to your list of keys.
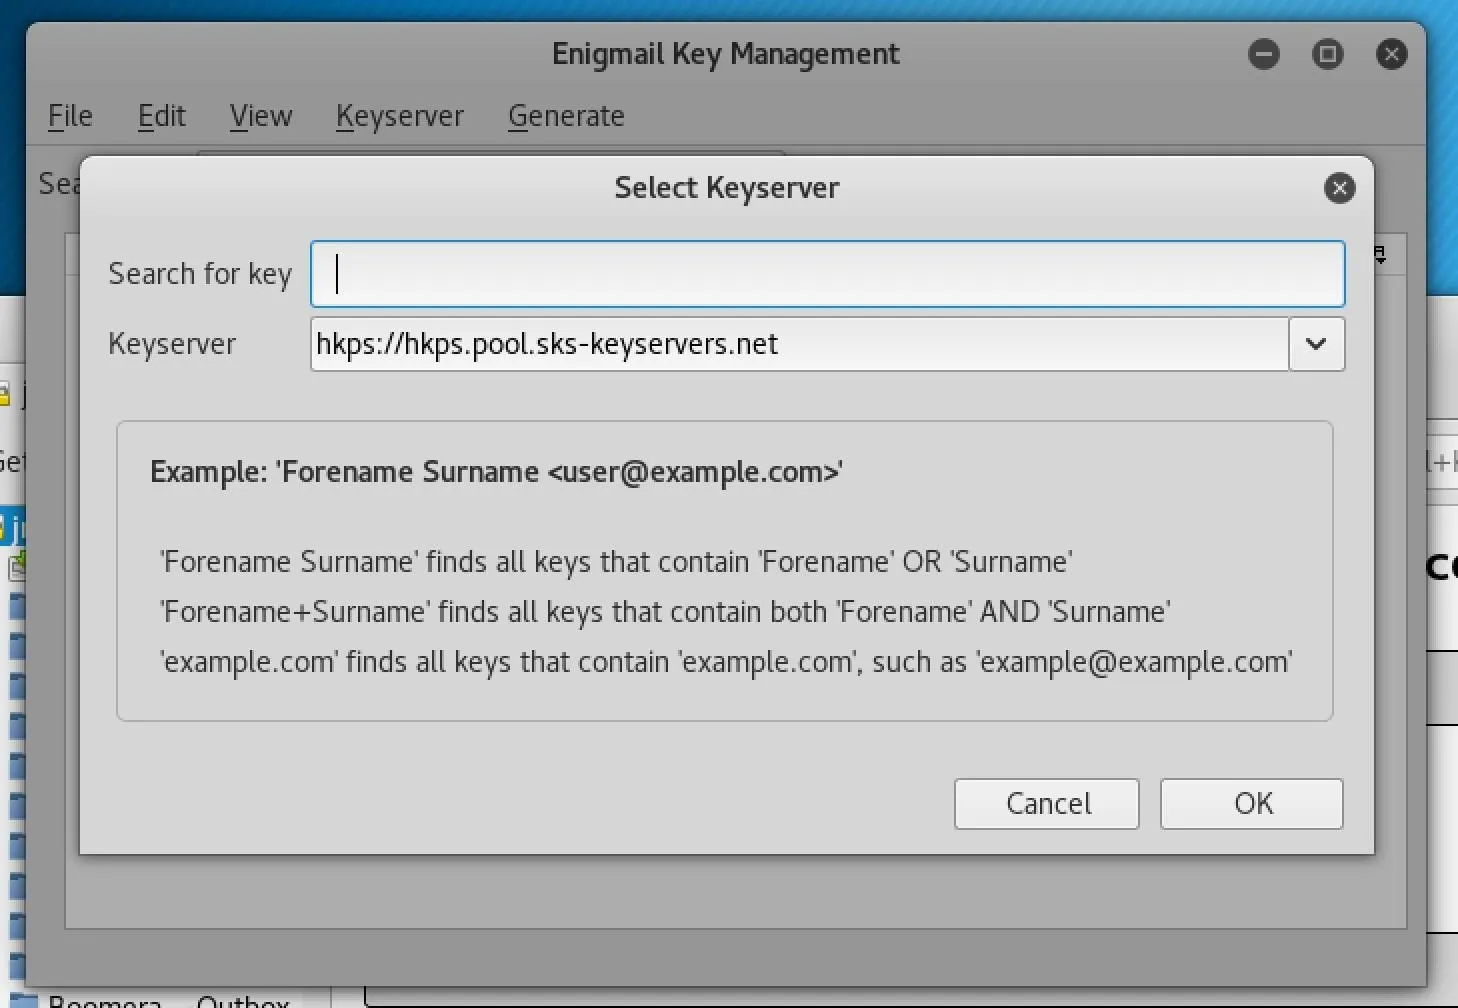
In order to download someone else's public key from the server, go back to the "Key Management" menu for Enigmail in Thunderbird, then click the "Keyserver" tab, and select "Search for Keys." In the pop-up window, enter your recipient's email address in the Search for key field, then click "OK." The public key will be added to your key manager.
If you are importing a file instead, from the "Key Management" window, select "File" to see find the "Import Keys from File" option. Select that, find the file, then open it up. Done.
Send an Encrypted Message
Next, to test it out, you'll want to compose an email then encrypt it. Click on the "Write" button in the top quick bar for your email account in Thunderbird, which will open a window to compose your email.
Now, you can only send encrypted messages to your recipient if you have downloaded their public key. If you want to send an encrypted message to multiple people, you have to download all their public keys.
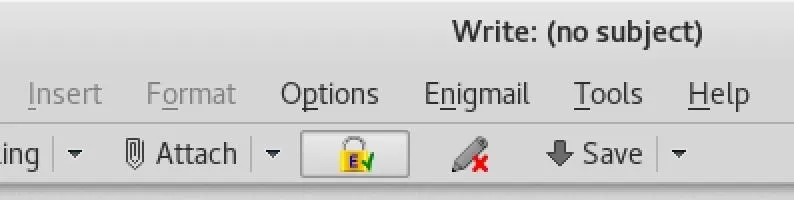
After entering the recipient's email address in the To field, you'll see a lock icon above in the bar. If the lock is in full color with a green check mark, your message is automatically encrypted with that person. If it has a red X on it, you will just be sending them a regular, unencrypted email.
Decrypt a Message Sent to You
When somebody sends you an email this way, it will automatically be decrypted when you open it, since the public key that encrypted it is mathematically linked to your private key. The same goes for your recipient opening up your email on their end — it will auto-decrypt as long as you sent it with their public key.
Whether you are sending a loved one some family pictures or sending a confidential message to a high official, using encryption software like this will help verify that your message was sent with no interceptions.
- Follow Null Byte on Twitter, Flipboard, and YouTube
- Sign up for Null Byte's weekly newsletter
- Follow WonderHowTo on Facebook, Twitter, Pinterest, and Flipboard
Cover image by Kody/Null Byte; Screenshots by Nitrous/Null Byte


Comments
Be the first, drop a comment!