


Net neutrality is dead and your internet service providers can collect all the data they want. While VPNs are a great way to protect some of that privacy, they're not perfect. There is another option, though, called Noisy, which was created by Itay Hury. It floods your ISP with so much random HTTP/DNS noise that your data is useless to anyone even if they do get it.
If you've been hiding under a rock the past year or so and don't know what net neutrality is, then let's catch you up real quick. ...
What people have been talking about lately is S.J.Res.34, the bill (now law) that repeals net neutrality. This means that your ISP can now legally collect your web data without your knowledge or consent. In practical terms, that means your IP addresses, which could be turned into a physical location, your web history, and non-HTTPS webpages and content including forms submitted. The Electronic Frontier Foundation (EFF) believes they could do even more than that, using the data themselves or selling it to the highest bidder en masse.
This is where Noisy comes in. The tool helps protect your data by hiding it in plain sight. More precisely, it's a "simple Python script that generates random HTTP/DNS traffic noise in the background while you go about your regular web browsing." In this way, your data is no longer unique or useful to advertisers or other data analytic firms.
Noisy isn't a new idea, as it was inspired by Squawk, which is a bit of HTML code added to websites that cause the pages to send additional random requests, but Noisy makes it an easy-to-use and modify Python program. Let's take a look at how to get it up and running.
Install Dependencies
As a Python program, you will need to have Python installed. In Kali Linux, it's already installed. It's compatible with both Python 2.7 and 3.6. You can use the following command to check the version you have.
python -VThe Noisy program uses the requests module for Python, so you'll need that. You can use pip to install it:
pip install requestsAdditionally, you may get more use out of Noisy if you have Docker installed, since you can isolate the traffic in a contained environment away from what you're trying to hide, but it isn't required for the program to run.
- Don't Miss: How to Create a Reusable Burner OS with Docker
Clone Noisy from GitHub
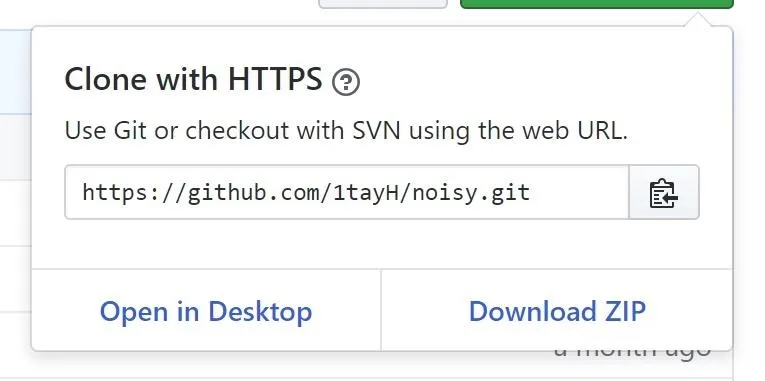
Now that Python is taken care of, download Noisy from GitHub with git:
git clone https://github.com/1tayH/noisy.gitAlternatively, you can navigate to the GitHub repository and download the .zip file. Click "Clone or download," then "Download ZIP." Once it's downloaded, open the file and click "Extract all" to unzip the file.
Open the Config File
Now we need to edit the configuration file. It's not required for the program to run, but it's an excellent opportunity to discuss how the program works and improve it. First, move into the Noisy directory with cd:
cd noisyAfter that, you'll want to open up its config.json file in your favorite text editor. For example, if you'd like to use Vim, just use this command:
vim config.jsonAlternatively, you can open the "Files" folder on your desktop, navigate into "noisy," then open the config.json file with your favorite text editor. I like to use Notepad++.
Once you open the file, you'll see some JSON data. Noisy works by starting from a "root_urls" and then waiting a random time between "min_sleep" and "max_sleep" (in seconds) before clicking a random link from the page going "max_depth" links deep. It then moves to the next root URL going through them in order.
{
    "max_depth": 25,
    "min_sleep": 3,
    "max_sleep": 6,
    "timeout": false,
    "root_urls": [
        "https://4chan.org",
        "https://www.reddit.com",
        "https://www.yahoo.com",
        "https://www.cnn.com",
        "https://p---hub.com",
        "https://www.ebay.com",
        "https://wikipedia.org",
        "https://youtube.com",
        "https://github.com",
        "https://medium.com",
        "https://thep-----bay.org",
    ],
    "blacklisted_urls": [
        "https://t.co",
        "t.umblr.com",
        "messenger.com",
        "itunes.apple.com",
        "l.facebook.com",
        "bit.ly",
        "mediawiki",
        ".css",
        ".ico",
        ".xml",
        "intent/tweet",
        "twitter.com/share",
        "dialog/feed?",
        ".json",
        "zendesk",
        "clickserve",
        ".png"
    ],
    "user agents": [
        "there are many user agents here!"
    ]
}
You might notice a few problems with this config.json file. To begin with, there are only 11 root URLs. Additionally, some of those root URLs could be troublesome depending on the environment you find yourself in.
The root sites are not going to appear on screen but could draw unwanted attention if anyone is monitoring the local network or if proxies or bans are in place on those particular sites. You may want to consider removing them, but be careful, because you want as many different sites on this list as possible. The more sites, the more random the noise.
This is the biggest problem with the default config.json file — there are only 11 root URLs. With them going in order and looping back once it's reached the end, it could potentially create an easily recognizable data pattern that can be filtered out.
Add More Sites to the Config File
To help remedy the problem above, I decided to make a custom config.json file. I decided that one million URLs would be a good number, so I downloaded the Alexa top one million websites and used a quick and dirty Python program to randomize their order. Next, I ran the list through the randomizer five more times to make sure they were right and well mixed up. Finally, I copied the list of URLs over to the config.json file, which will make the noise that Noisy generates much more random.
If you want to use my config.json file (which is over 25 MB in size), visit its GitHub page and either right-click on "Download" and select "Save Link As" or just click on "Download" to open the file. If you clicked "Download," once it has loaded, right-click on it and "Save Page As" to your "noisy" folder to replace the original config.json. If you downloaded immediately, make sure to move the file over to the "noisy" folder manually.
If you decide to put in your own URLs, remember we are editing JSON data, so each URL should have double quotation marks (" ") on both sides of it and a comma (,) at the end. I also like to put in the https:// so it will always try the HTTPS version of the site first. For example:
"https://website.com",Start Being Noisy
With the config.json file updated, we're ready to get noisy! Make sure you're in the noisy directory with cd, and then run the Python program with the required config argument:
cd noisy
python noisy.py --config config.json
And that's it. You're now generating random traffic. If everything's working, you should begin seeing an output stream like the one below, only with different URLs.
INFO:root:Visiting https://azerbaijantourism.az/about
INFO:requests.packages.urllib3.connectionpool:Starting new HTTPS connection (1): azerbaijantourism.az
INFO:root:Visiting https://azerbaijantourism.az/
INFO:requests.packages.urllib3.connectionpool:Starting new HTTPS connection (1): azerbaijantourism.az
INFO:root:Visiting https://azerbaijantourism.az/booking-conditions
INFO:requests.packages.urllib3.connectionpool:Starting new HTTPS connection (1): azerbaijantourism.az
To stop Noisy, just hit Ctrl-C on your keyboard.
See What Else You Can Do in Noisy
When Noisy is not running, use the h or help argument to see what else you can do, like set a timeout.
python noisy.py --helpHere are the other arguments you can use:
usage: noisy.py [-h] [--log -l] --config -c [--timeout -t]

optional arguments:
  -h, --help    show this help message and exit
  --log -l      logging level
  --config -c   config file
  --timeout -t  for how long the crawler should be running, in seconds
Run Noisy Using a Using Docker (Optional)
It's also possible to containerize Noisy by using Docker, as discussed previously. If you want to do this, it's as easy as using the build command. (You may need to install Docker first on your system.)
docker build -t noisy .You can even build it for a Raspberry Pi running Raspbian stretch; This would be a great option if you want to offload Noisy to have it run on a Pi somewhere else on the network.
docker build -f Dockerfile.pi -t noisy .Once the Docker build is done, you can launch it with docker run:
docker run -it noisy --config config.jsonBe the Noisiest with Noisy in Docker (Optional)
You might have noticed when looking at the config.json file that the sleep time is a random integer in seconds. In practical terms, this means that the fastest Noisy can work is one new URL every second, if we set the configuration like so:
"min_sleep": 0,
"max_sleep": 1,
However, this won't be fast enough for some users. For example, if you have a lot of real people on your network, you may want to generate more fake traffic to obfuscate their data. But that's not possible with the one-second limitation.
Thankfully, Docker-compose can save us by allowing us to run multiple containers simultaneously to generate unlimited noise. Just move to the examples folder, then build the new docker image and run it with the number of containers you want.
cd examples/docker-compose
docker-compose build
docker-compose up --scale noisy=<number-of-containers>
If you do go this route, be careful about just how much data you're using. If you have an unlimited data connection, then it should be fine, only slightly slowing down the internet speed. On the other hand, if you do have some kind of data cap, then be mindful of just how much of that is being used by Noisy.
As you've seen, Noisy is incredibly simple to get set up, and once you've done a little configuration, it's incredibly powerful. It should be a part of everyone's privacy strategy, guaranteeing if anyone does get ahold of your data, it's useless to them.
Thanks for reading! If you have any questions, ask below or on Twitter @The_Hoid.
- Follow Null Byte on Twitter and Google+
- Follow WonderHowTo on Facebook, Twitter, Pinterest, and Google+
Cover image and screenshots by Hoid/Null Byte


Comments
Be the first, drop a comment!