


Hacking from a host machine without any form of proxying is reckless for a hacker, and in a penetration test, could lead to an important IP address becoming quickly blacklisted by the target. By routing all traffic over Tor and reducing the threat of malicious entrance and exit nodes with a VPN, we can configure Kali to become thoroughly private and anonymous.
Running Kali Linux in a virtual machine can be an ideal hacking platform for launching attacks, but is only as anonymous or private as the connection used. Tor is an effective traffic obfuscation network, and while Tor Browser alone cannot support a hacker's behavior, we can use Whonix to route the entirety of our Kali Linux traffic over the Tor network.
Finally, in order to add a further level of anonymity, we can combine a VPN with Tor in order to further obfuscate our host traffic and prevent against Tor Deanonymization Attacks.
Gathering Prerequisites
VirtualBox is used for all virtualization within this tutorial. It runs on Windows, OS X, and is available in the repositories of most Linux distributions. It can be downloaded from here, or it can be installed on a Debian-based Linux distro such as Kali with the following command.
sudo apt-get install virtualboxIn order to virtualize Kali, we'll need a Kali disc image. We can download it here, choosing the correct architecture (32- or 64-bit) and the desktop environment of our choice. "Kali 64 bit" should work for most users.
Whonix provides an OVA file which can be opened and configured within VirtualBox. We only need the Gateway image, as we will be using Kali as our workstation rather than the Whonix Workstation environment. The Whonix-Workstation file can be downloaded here.
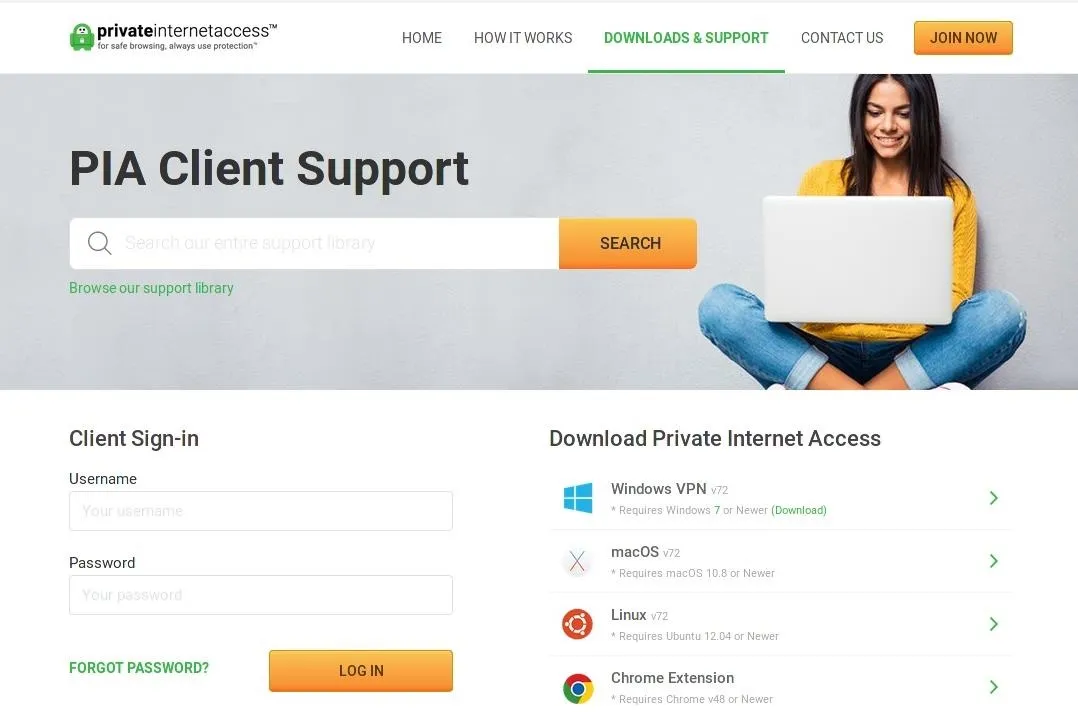
Finally, you'll need a VPN service to be able to route traffic over the VPN before entering the Tor network. We recommend Private Internet Access's VPN service, however, there are a number of other free and paid VPN services available online.
When choosing a VPN, it's best to consider the general trustworthiness of the service, the location of their servers, as well as their stated policies regarding data and metadata logging. PIA has a stated policy of not keeping logs, but no server outside of one under a user's own control can ever be assumed to be completely trustworthy.
With all of the prerequisites prepared, we can begin configuring our virtualized environment.
Configuring Whonix in VirtualBox
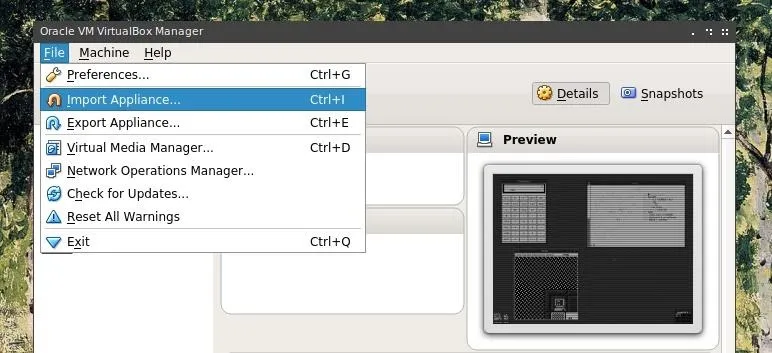
With VirtualBox open after completing it's installation, first select the "File" menu and click on "Import Appliance."
Click the folder icon on the right to "Choose a Virtual Appliance File to Import" and to open a file browsing menu.
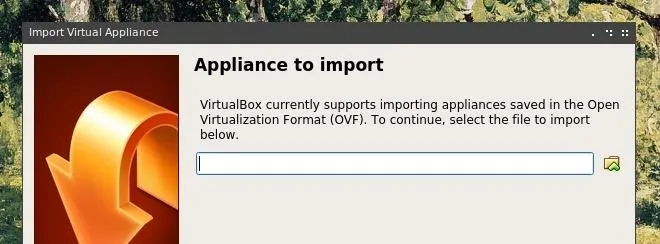
Browse to the Whonix Gateway OVA file which was previously downloaded, select it, and click "Next." After this, click "Import" to initiate the configuration of the Whonix Gateway virtual machine.
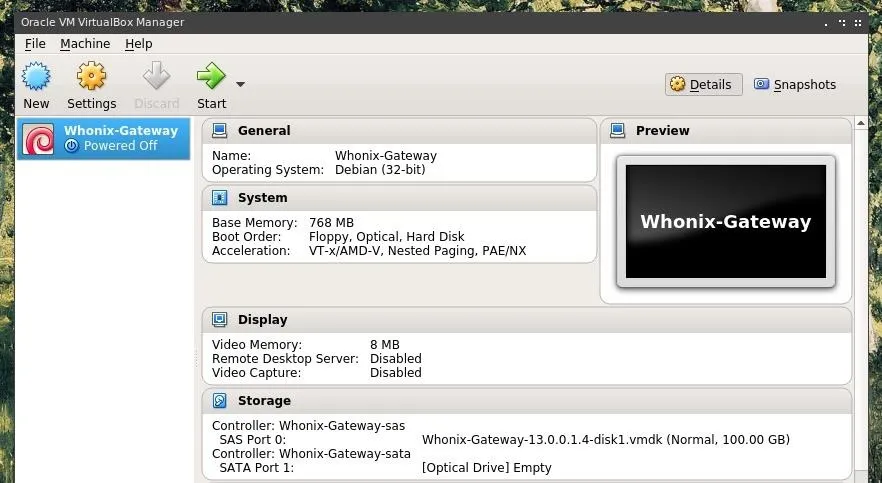
The License Agreement must be agreed to by clicking "Agree" in order to continue the configuration process. After completing this process, VirtualBox should look something like the image below, with a Whonix Gateway virtual machine available in the left pane of the window.
Running Kali in VirtualBox
The steps for configuring the Kali virtual machine within VirtualBox will be similar to the process for configuring the Whonix Gateway. We'll need to choose a few additional configuration options, and directly point VirtualBox towards our Kali disk image.
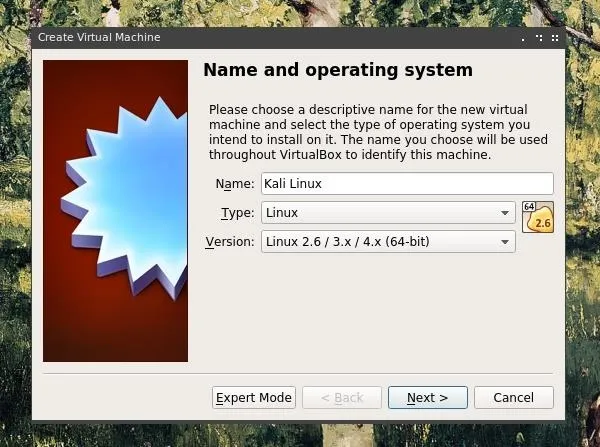
Begin by clicking the "New" button at the upper left corner of the VirtualBox interface.

In the next form, choose a descriptive name for your virtual machine, in this case "Kali Linux," and select "Type: Linux" and "Version: Linux 2.6 / 3 / 3.x / 4.x (64-bit)"
In the next step, allocate the amount of memory you would like for the virtual machine to access. At least 1024 MB, or 1 GB, is recommended. On hardware with more RAM, a larger allocation could lead to more effective performance.

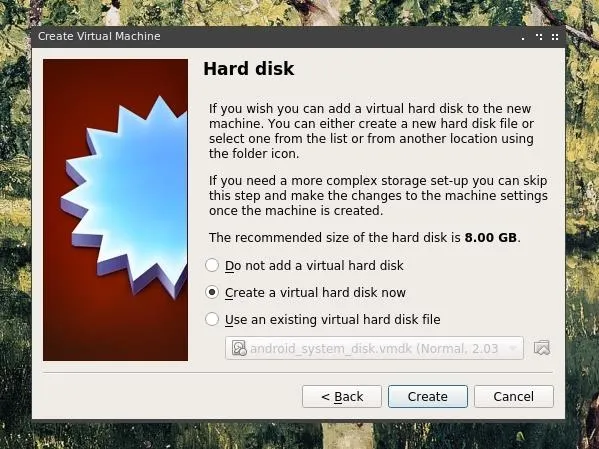
Then choose "Create a virtual hard disk now."
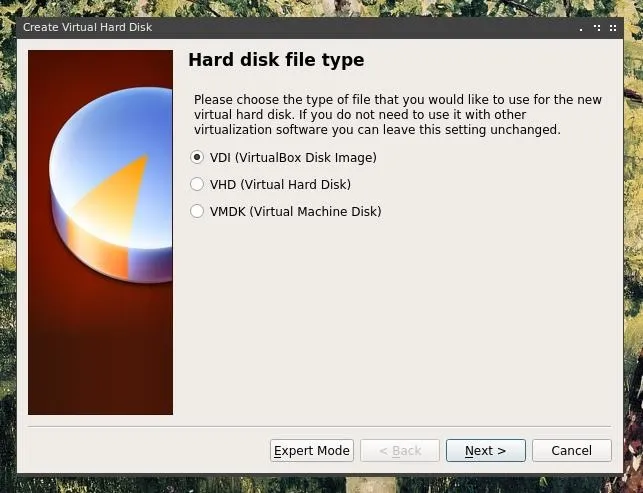
Select VDI or "Virtual Disk Image" and "Dynamically Allocated."
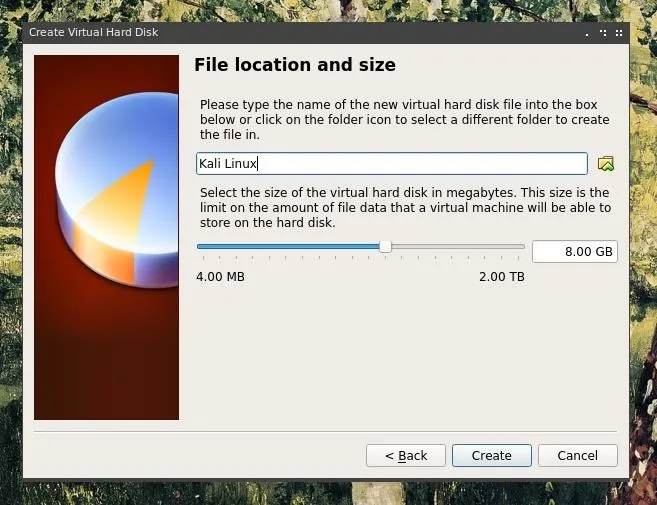
Lastly, allocate the amount of space you are willing to provide for the Kali virtual machine.
Keep in mind that this limit is based on the maximum size the VM will be allowed to take up on your hard drive, and not necessarily the amount of space which it will actually take up.
The size of the virtual machine is more likely to correlate more closely to the size of the disc image, or ISO file, which the VM boots from.
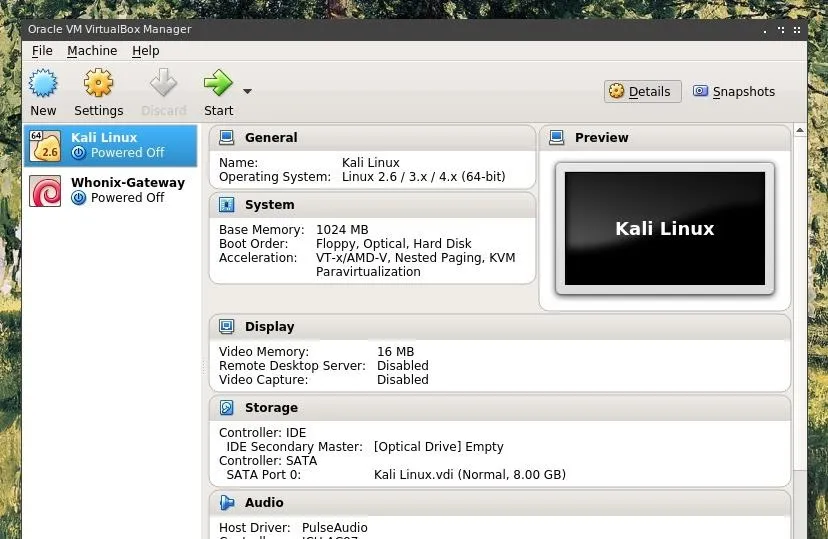
Finally, after clicking "Create" the Kali virtual machine should appear in the left pane, along with the previously configured Whonix Gateway VM.
Booting & Installing Kali
After the virtual machine has been added, we can run it by pressing the start button with our Kali virtual machine selected.

Upon booting up the virtual machine, we'll be prompted to select a virtual drive. At this stage, the Kali Linux ISO file should be selected.
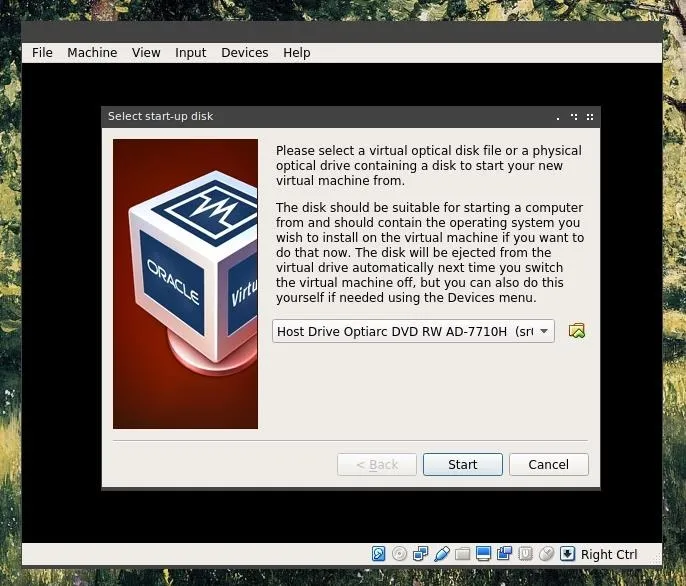
After "Start" is pressed, a Kali should begin it's startup process and open a boot menu.
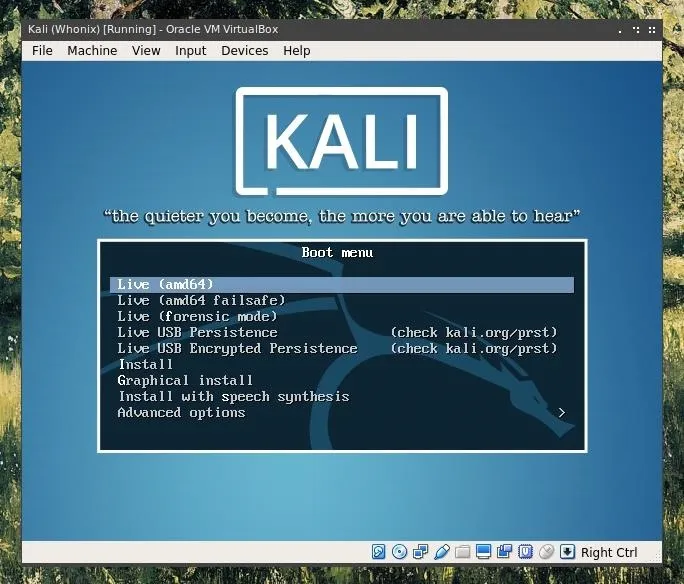
The virtual machine behaves as if it were a Kali image being loaded onto any other piece of hardware, and as such at this stage it can be installed, or run as a live boot. The Whonix and VPN configuration will still function with a live boot device, and the machine state and configuration can be saved using VirtualBox's save state function.
Installing Kali onto the virtual machine does, however, provide some benefit. The virtual machine can be booted and rebooted, and with this, it may be easier to save configuration states on the virtual hard drive rather than solely within VirtualBox's save states. The graphical install works as any other distro install wizard and should be relatively simple to follow.
After the virtual machine has been installed or booted, the following steps will allow us to configure it to work with Whonix.
Upon booting our Kali VM, our first action should be to open a Terminal window and update the system. We'll update the package registry, and upgrade outdated packages.
sudo apt-get update && sudo apt-get upgradeAfter our system has finished updating, we can shut down the system using Kali's login manager.
Routing Kali Through Whonix
First, we'll want to boot our Whonix virtual machine in the same way as we started the Kali VM, by pressing the "Start" button in the upper left of the VirtualBox window. After initial configuration, and potentially a required reboot of the virtual machine, we should be left with something similar to the window below.
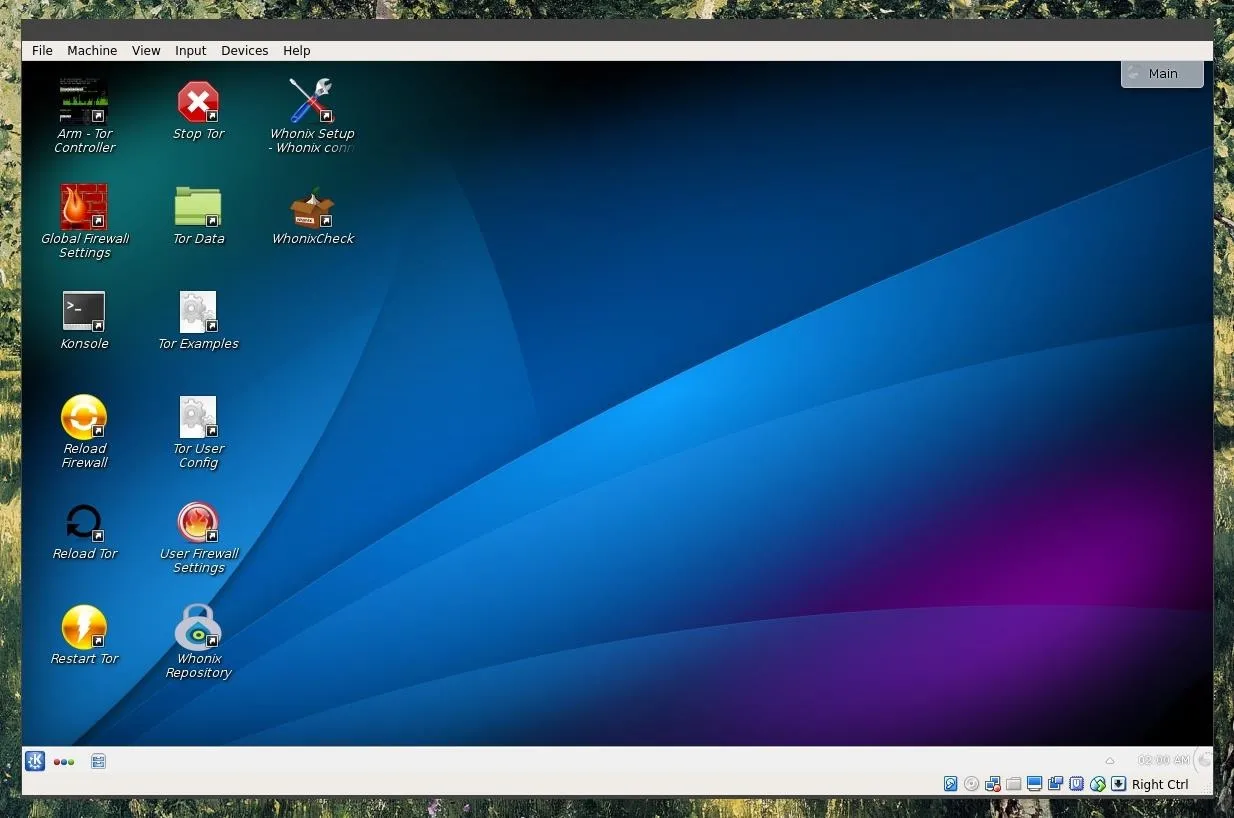
We'll want to leave this open as we configure Kali, as all of Kali's traffic will be passed through Whonix, and through Whonix over Tor. This Tor gateway will only work so long as it is booted and running.
Next, we'll return to the VirtualBox manager, right-click on the Kali VM, and select settings. Within the setting window, we'll want to select the "Network" option in the left pane, and here change "Attached to" to "Internal Network" and select "Whonix" as the "Name" parameter.
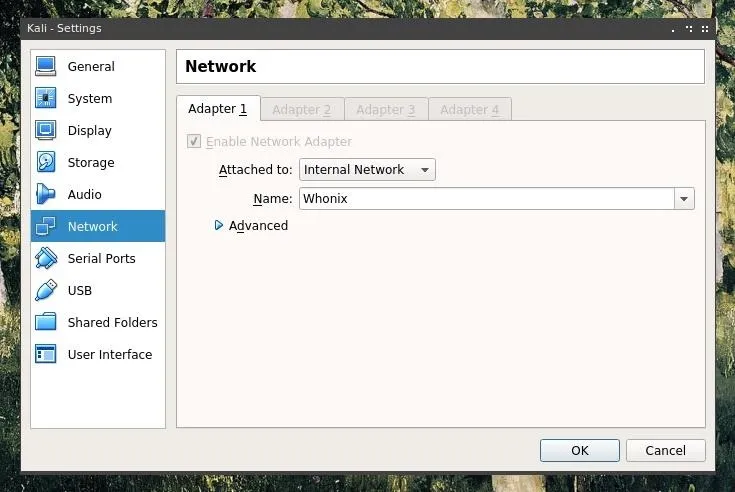
After this settings change is saved by pressing "OK" we can boot our Kali virtual machine back up. Once Kali is booted, the first thing we want to do is set the time zone to UTC.
UTC is the universal time zone used by all Whonix Workstations and Tor Browsers. It helps prevent time-based de-anonymization attacks and can be accomplished using the below timedatectl command.
timedatectl set-timezone UTCThen, use the date command to verify the correct UTC time has been configured.
date

Tue Dec 18 23:52:57 UTC 2018
Simply using timedatectl is a quick-and-dirty solution. Proper time-zone syncing must be accurate to the millisecond for adequate protection again time-based attacks. Readers are encouraged to reference the official Whonix documentation to learn more about network time synchronization and the dangers of creating custom Whonix Workstations.
Next, network activity will not be functional. Before Kali traffic can be routed through Whonix, a few changes will need to be made to Kali's networking configuration. First, let's disable the network adapter using ifconfig.
ifdown eth0
ifconfig etho0 down
Now, /etc/resolv.conf will be updated with the correct Whonix nameserver. We can edit this in GNU Nano. Nano's controls are relatively simple, the arrow keys and page up/down keys move the cursor, and keyboard inputs are inserted into the file. To open a nano window, type the following.
nano /etc/resolv.confWe'll want to add the following to the file, first removing any other configuration parameters if any are present.
nameserver 10.152.152.10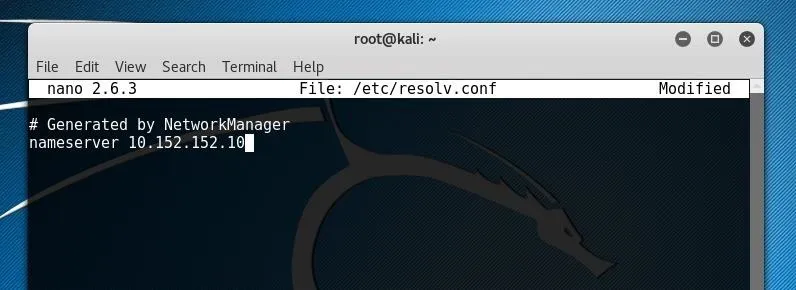
We can write our changes to the file with Ctrl+O and then exit Nano with Ctrl+X.
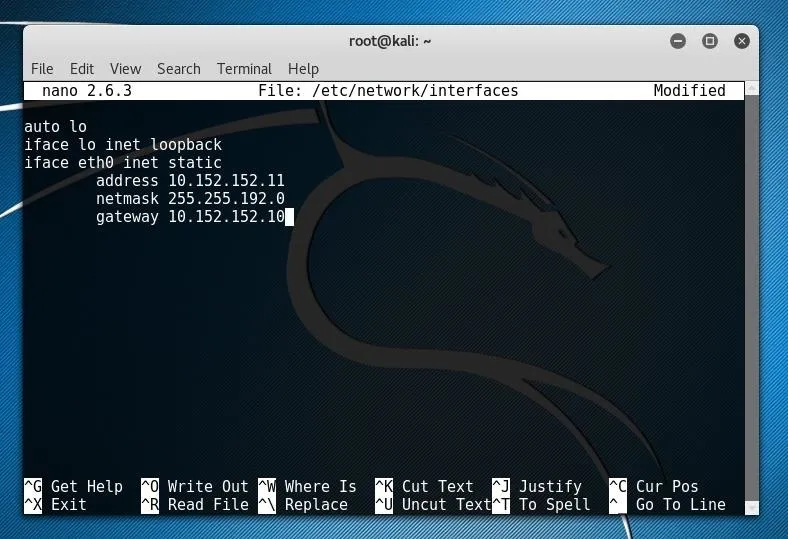
The next file we're going to edit is /etc/network/interfaces. We can do so by typing the following.
nano /etc/network/interfacesAt the bottom of the file, we'll want to add the following information in order to define where the virtual network adapter should look for certain network items.
iface eth0 inet static
address 10.152.152.11
netmask 255.255.192.0
gateway 10.152.152.10
Again, write our changes to the file with Ctrl+O and then exit Nano with Ctrl+X.
Finally, we just bring our virtual network adapter back online and traffic should be routed properly by typing the following.
ifup eth0We can check that our traffic is being routed over Tor by going to a page like this Tor testing page. If the page confirms we are using Tor, we've succeeded in routing all of our Kali traffic over Tor!

Adding a VPN
As we are routing all of our traffic within the virtual machine through Tor, we can enclose all traffic leading towards them by adding a VPN, either on the host device which is running the virtual machines, or by adding a VPN to our Whonix configuration. It's generally easier to add a VPN to the host, but if we wish to ensure that all of our traffic is enclosed in the VPN and that no leakage is possible, we may use a tool like VPN Firewall for Linux host systems.
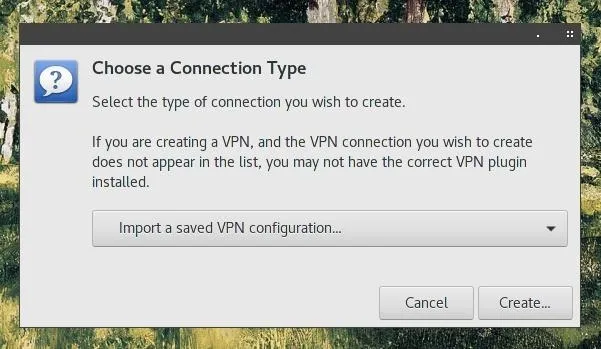
VPN configuration differs according to different operating systems or distros. If your VPN provider offers a configuration file for their VPN, such as an OpenVPN file, you may be able to simply import the configuration.
Private Internet Access's VPN, for example, provides a Downloads and Support page which explains how to install and configure their VPN on a variety of operating systems.
With all of these anonymity tools configured and a Kali virtual machine, you're ready to browse and hack privately, securely, and anonymously! If you have any questions, you can ask in the comments below or on Twitter.
- Follow Null Byte on Twitter, Flipboard, and YouTube
- Sign up for Null Byte's weekly newsletter
- Follow WonderHowTo on Facebook, Twitter, Pinterest, and Flipboard
Cover image by Null Byte; Screenshots by Takhion/Null Byte


Comments
Be the first, drop a comment!