Welcome back, my novice hackers!
I've written a couple of articles on reconnaissance and its importance, and as I've said before, a good hacker will spend 3 to 4 more times doing reconnaissance than actually exploiting the system. If your recon isn't good, you'll likely fail, or worse—end up serving time and becoming Bubba's wife for a couple years. I can't say it enough—recon is critical.
Among the information we need to gather are the open ports, running services, and the operating system. Although such tools as nmap and hping2 can do operating system fingerprinting, they are not as accurate and reliable as the tools that are built specifically for this purpose.

In this tutorial, we'll use one of the best active tools for doing OS fingerprinting, xprobe2, which is an active OS fingerprinter, meaning that it actually sends probes to the target system, then gauges the OS from the system's response. In total, xprobe2 has 16 different modules it runs to help determine the OS.
It probably goes without saying that any fingerprinter that's probing with special packets is going to be noisy and likely detected by NIDS and other security systems.
Find xprobe2
Like so many other great hacker tools, xprobe2 is included in our BackTrack distribution. To find it, type:
- whereis xprobe2

As you can see from the screenshot above, it's in the /usr/local/bin, so if that directory is in our PATH variable, we can use xprobe2 from any directory.
Find Help
Now, let's get some basic help to run xprobe2 for OS fingerprinting.
- xprobe2
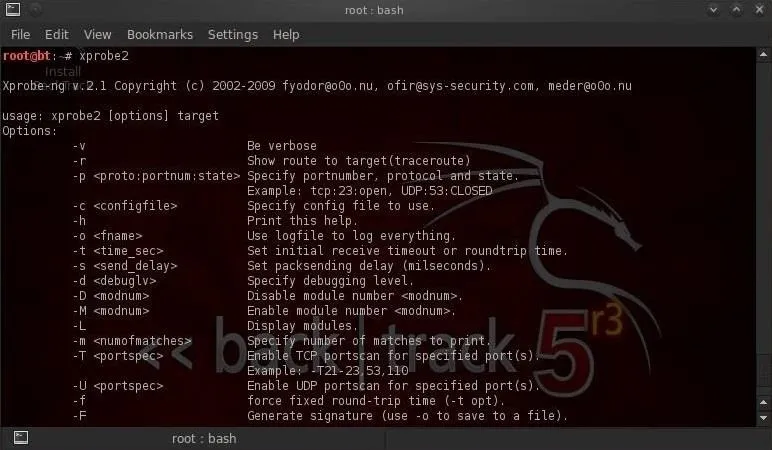
The syntax for running an xprobe2 fingerprint is really straightforward. We simply need the command and the target.
- xprobe2
Fingerprint with xprobe2
Now, let's point xprobe2 at some systems and see what it's able to tell us. I'll first point it at my Windows 2003 Server VM.
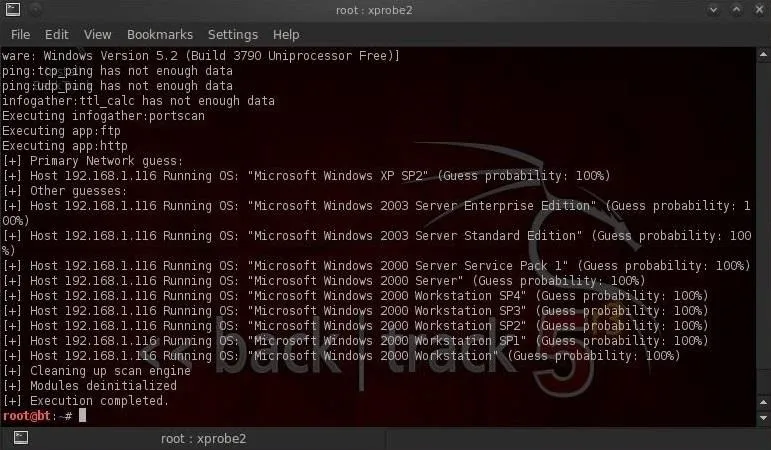
As you can see, xprobe2 identified it as Windows XP (100%) and Windows 2003 Standard Edition (100%). As these are the same Windows build, this is not surprising.
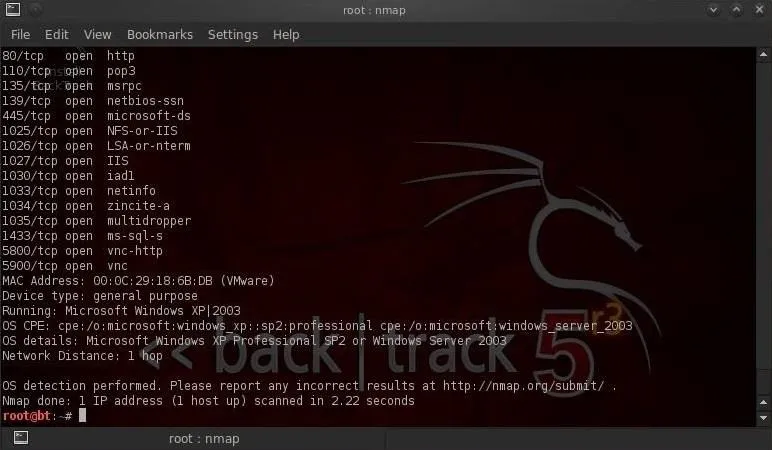
When I run nmap with OS fingerprinting (nmap -O), I get similar results.
Fingerprint an Unknown System
Now, let's try fingerprinting an unknown system. For example, google.com.
- xprobe2 google.com
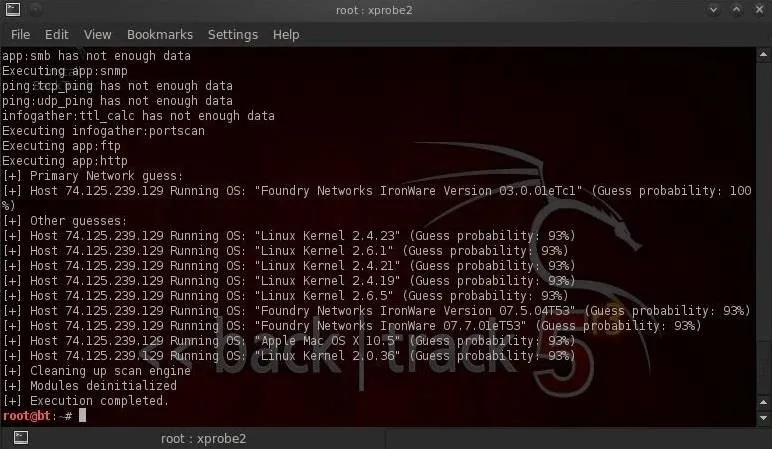
Xprobe2 tells us with 100% probability that the system is Foundry Networks Ironware. This is the gigabit switch on the google.com domain.
Xprobe2 then identifies, with lower probability of being correct, the Linux kernel version of the server. This is good example of how imperfect even very good products are and require some knowledge and skill to interpret the results.
List xprobe2 Modules
As I mentioned earlier, xprobe2 has 16 modules that it uses to try to determine the operating system of the target. It uses each of them to try to determine the probability of its guess. Let's look at those modules.
- xprobe2 -L
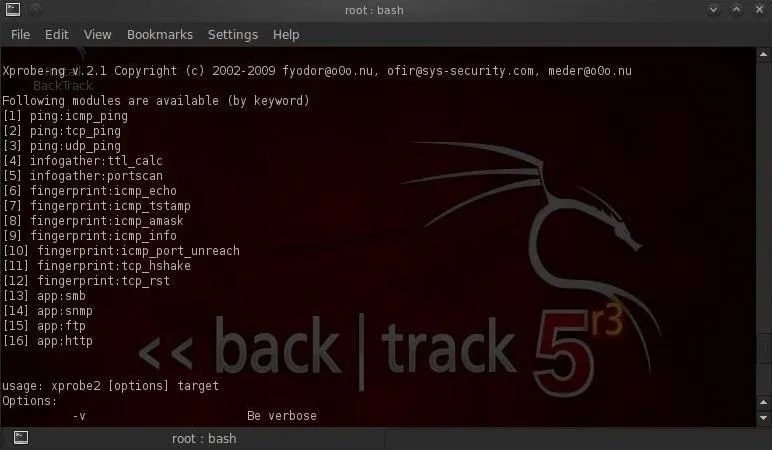
By default, xprobe2 uses all of its modules, but we can remove modules by using the -D switch. For instance, on many networks the icmp modules will hang and you may need to remove these modules to get xprobe2 to work. To run xprobe2 without the icmp port unreachable module (#11), we could run xprobe2 like this:
- xprobe2 -D 11 google.com
Test Another Public Domain
Let's try xprobe2 on another public domain, such as espn.com.
- xprobe2 espn.com
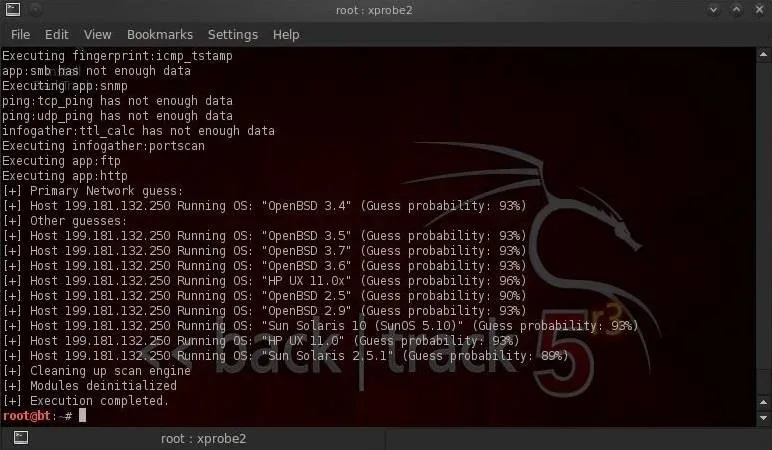
As we can see, xprobe2 tells us that it has determined with a 92% probability that espn.com is running OpenBSD 3.4. It also shows us that espn.com might be running a different version (3.5-3.7) of OpenBSD, but it's pretty certain it's OpenBSD.
Xprobe2, like nmap and hping, is an essential reconnaissance tool that should be in every hacker's toolbox. If you have questions on this or any hacking recon, ask below in the comments.
Fingerprint photo via Shutterstock


Comments
Be the first, drop a comment!