Welcome back, my novice hackers!
In this series, we have been exploring how a forensic investigator can find evidence of illegal or illicit activity. Among other things, we have examined the registry and prefetch files for artifacts and have done some rudimentary forensic analysis. For those of you who are seeking career as a forensic investigator or security engineer, this can be invaluable training. For hackers, it might be life-saving.
In this tutorial, we will explore where and what the forensic investigator can find information about the activities of the suspect in their web browser. It's important to note that this information will vary by operating system and browser. Here we will look briefly at Internet Explorer and go into a bit more depth on Mozilla's Firefox.
Internet Explorer
Let's begin with Microsoft's Internet Explorer. It is installed on every single Windows system as the default browser (except on newer versions of Window 10 where Edge is default, though IE is still installed), so it is widely used. In many institutional and corporate environments, it is the only browser allowed.
IE places its records in different places depending upon the version of Windows. Let's look at its recent versions since 2000 first.
Windows 2000 & XP
We can get evidence of the user's internet activity in the following locations.
- %systemdir%\Documents and Settings\%username%\Local Settings\Temporary Internet Files\Content.ie5
- %systemdir%\Documents and Settings\%username%\Cookies
- %systemdir%\Documents and Settings\%username%\Local Settings\History\history.ie5
Windows Vista & 7
The path of the files is slightly different beginning with Windows Vista and 7. We can find IE's files at:
- %systemdir%\Users\%username%\AppData\Local\Microsoft\Windows\Temporary Internet Files\
- %systemdir%\Users\%username%\AppData\Local\Microsoft\Windows\Temporary Internet Files\Low\

Click or tap on image to expand to full size.
Please note that AppData and Temporary Internet Files are hidden files.
Mozilla Firefox
With Mozilla Firefox and its many variations (Iceweasel in Kali is one), most of the information is stored in SQLite databases. We can find those databases at different locations based upon the operating system.
Below is the path to the database in Windows (XP, Vista, and 7), Linux, and Mac OS X.
Windows XP
- C:\Documents and Settings\
\Application Data\Mozilla\Firefox\Profiles\ \places.sqlite
Windows Vista & 7
- C:\Users\
\AppData\Roaming\Mozilla\Firefox\Profiles\ \places.sqlite
GNU/Linux
- /home/
/.mozilla/firefox/ /places.sqlite
Mac OS X
- /Users/
/Library/Application Support/Firefox/Profiles/default.lov/places.sqlite
Mozilla uses a relational database to store the user's data, which has a structure like that below.
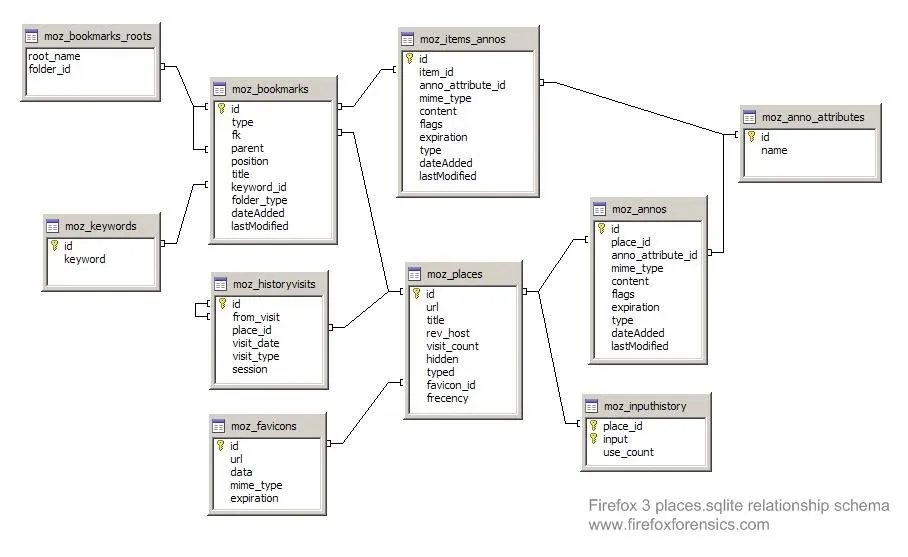
Click or tap on image to expand to full size.
Using SQLite to Find Browser Evidence
SQLite is now being used by many browsers, applications, and mobile devices that require a small, lightweight relational database. Due to its lightweight nature, it is becoming increasingly popular among mobile devices and mobile apps. That being the case, it is critical that any competent forensic investigator become familiar with it as it is becoming very popular.
To view or query the data in these SQLite databases, we will need a browser. You can download SQLite browser here. If you are using Kali, the SQLite browser is preinstalled.
Load the Database File into the SQLite Browser
Once you have installed the SQLite browser, navigate to the location specified above for the operating system you are investigating. In my case, its a Windows 7 system, so I navigate to:
- C:\Users\
\AppData\Roaming\Mozilla\Firefox\Profiles\ \
You will see many files ending with "sqlite." These are the database tables that Mozilla uses to store the information on the user's browsing activities.
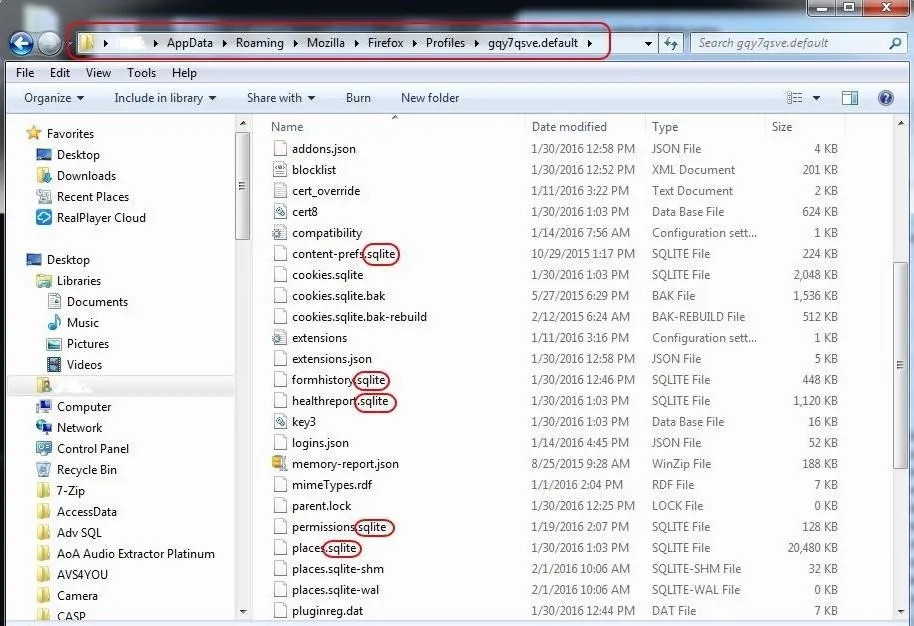
Click or tap on image to expand to full size.
Let's open that database in the SQLite browser. Next, click on the "Database Structure" tab to the far left. In the screenshot below, we can see all 13 tables in the database. Note that each table name begins with "moz."
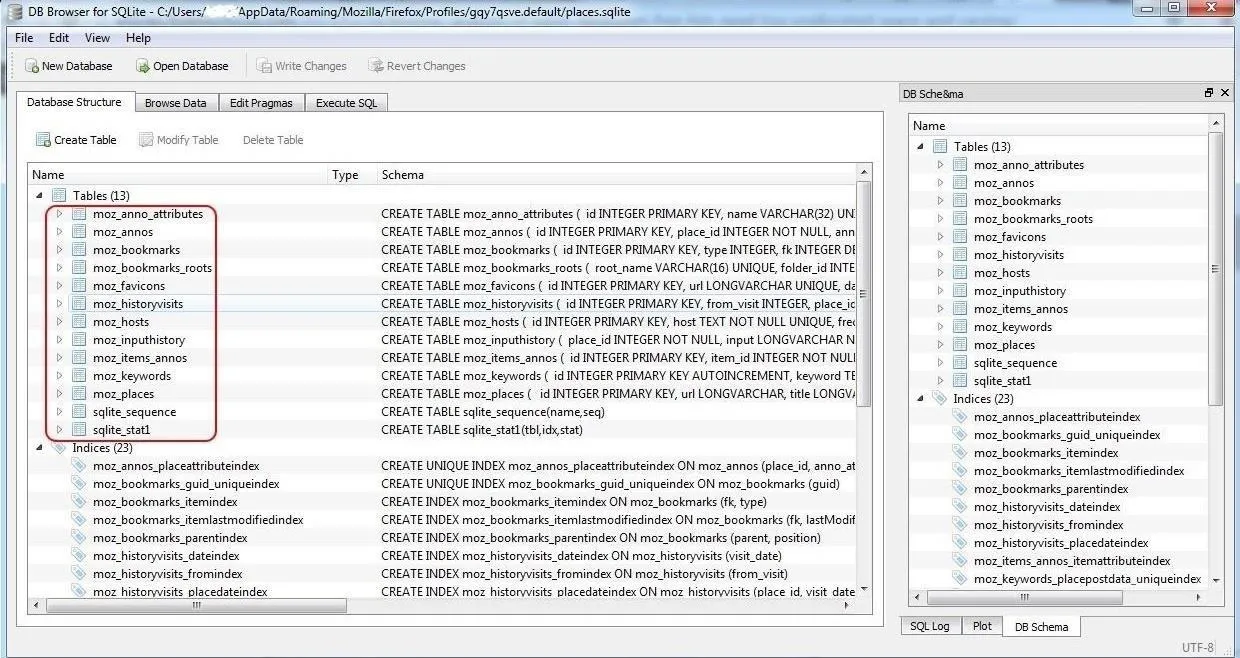
Click or tap on image to expand to full size.
If we click on the "Browse Data" tab, the SQLite browser will display the data in the table we have selected. In the screenshot below, we are looking at "moz_anno_attributes."
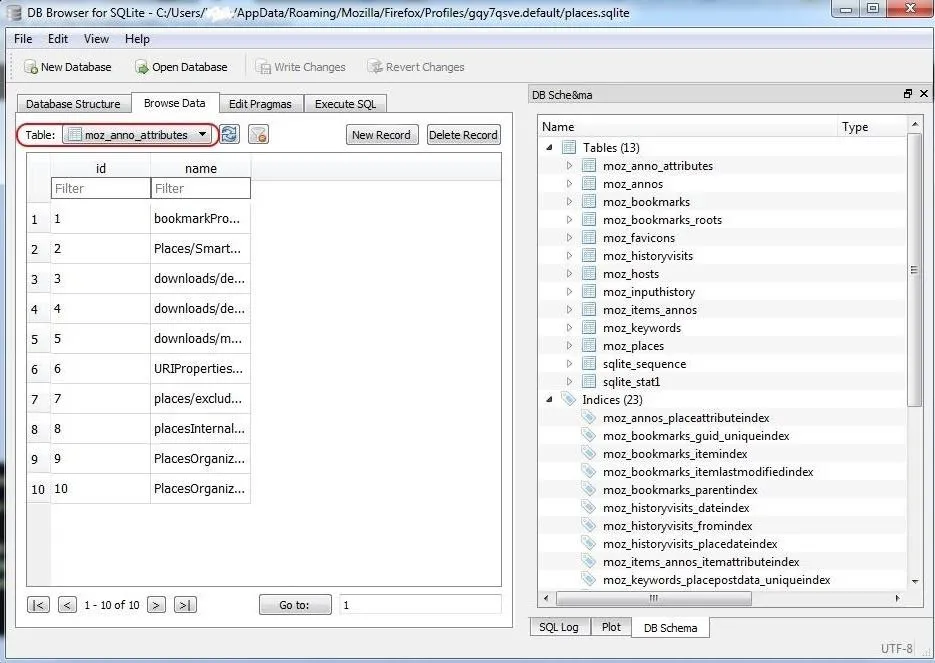
Click or tap on image to expand to full size.
Now that we have a basic knowledge of the database structure, let's use some simple SQL queries to find specific and relevant data to our investigation.
Querying the Database
To effectively use the SQLite browser to find eveidence, you need to know some basic SQL syntax. Take a look at my article on SQL in my database hacking series here.
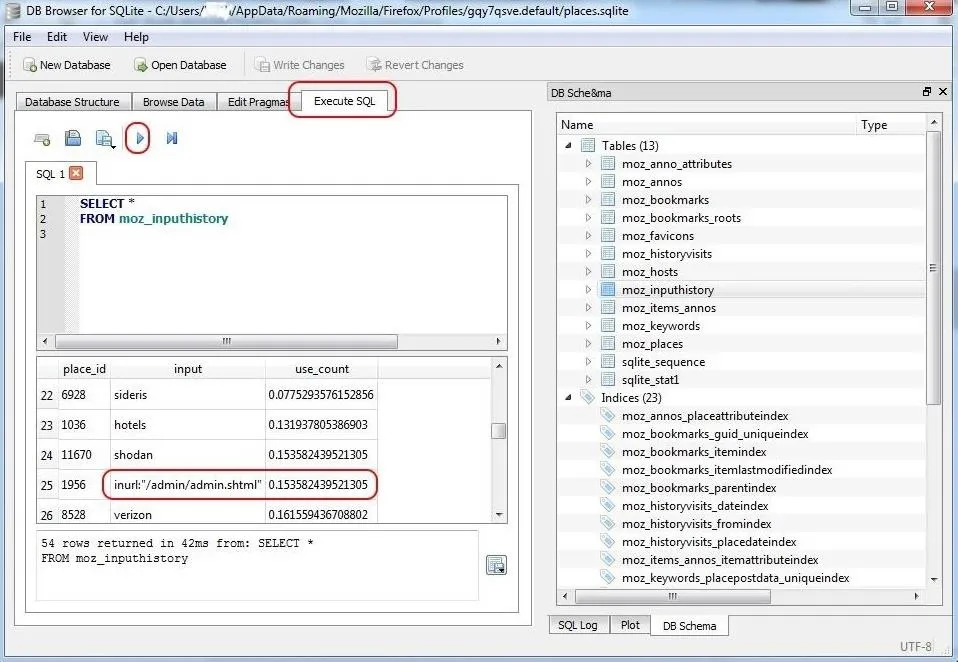
Let's look in the moz_inputhistory table for input that the user entered into the browser. Click on the "Execute SQL" tab to open a SQL query window. We could then write a general SQL query to find all the input data by entering:
SELECT *
FROM moz_inputhistory
After entering the query, click on the play (>) button to execute the query.
Click or tap on image to expand to full size.
As you can see, the suspect was typing some suspicious Google hacks using the keyword "inurl" and looking for admin directories. Hmm... we may be on to something here!
Finding Specific User Input
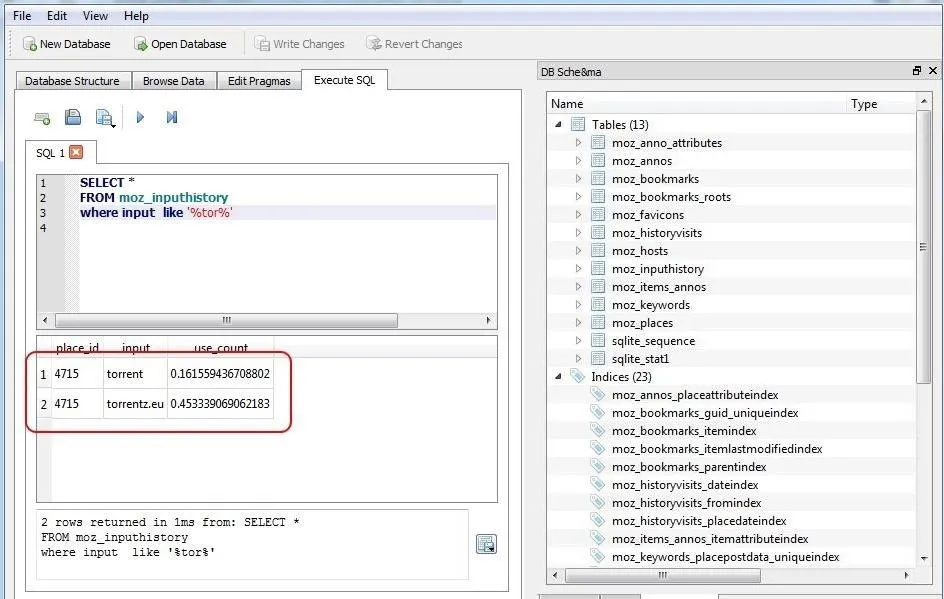
Let's assume that this was a case where the employee is suspected of having downloaded pirated files from a torrenting site (in many companies and institutions this is prohibited activity, and in many countries it is illegal). We could be very specific in our SQL query to find where the suspect may have input "tor." We could find every occurrence where they typed "tor" querying the input history with:
SELECT *
FROM moz_inputhistory
WHERE input like '%tor%'
This query will provide us all columns (SELECT *) from the input history table (FROM moz_inputhistory) where the typed input is like "tor" (WHERE input like '%tor%'). Note the wildcards (%) before and after tor. This indicates that we are looking for anything before tor and anything after tor.
This query should provide us with results of any input by the user that has "tor" anywhere in it.
Click or tap on image to expand to full size.
As you can see in the screenshot above, we were able to find two occurrences where the suspect/user had input "tor." This may be enough evidence to prove that the suspect was actually looking for torrent sites, but we may want to dig a bit deeper to actually find the URLs of the sites in his places history (moz_places table).
Keep coming back, my novice hackers, as we continue to explore the skills and techniques of the forensic investigator!


Comments
Be the first, drop a comment!