


Welcome back, my fledgling hackers!
In this series, I am trying to develop your knowledge of digital forensics, which is valuable whether you're choosing a career in it or just want to know how your hacker activity can be traced. Few professional digital forensic investigators have a hacking background, but the best ones do.
The occupation of digital forensic investigation is a rapidly growing one. Nearly every crime has a digital component these days. This might include things as innocuous as a text message, a Google search, or an email, and law enforcement and civil litigators need trained professionals to find the necessary information and preserve it in a forensically sound manner.
Finding Storage Device Artifacts in a Windows Registry
As I have mentioned in a previous article in this series, the registry in Windows is how Microsoft manages the operating system. As such, it contains volumes of information on who, what, where, and how activity took place on this system. If we know where and how to look in the registry, we can build a strong case of what actually took place there.
In this tutorial, we will focus on finding evidence of storage devices within the registry. Often, the suspect will use a Flash drive or hard drive for their malicious activities and then remove them so as not to leave any evidence. The skilled forensic investigator, though, can still find traces of evidence of those storage devices within the registry, if they know where to look.

The registry on a Windows system varies a bit from version to version. A skilled, professional digital forensic investigator needs to be able to work with nearly all versions of Windows and other operating systems. Since Windows 7 is still the most widely used operating system, by far, I will be demonstrating on it. Keep in mind, though, that this will vary slightly between versions.
Open Regedit
Although a forensic investigator will usually be working on an image file and using a forensic suite, we can clearly demonstrate the principals and locations by using regedit on a live system. In some forensic investigations, you might actually have the need or luxury of working on a live system, but it is rare. Usually, you will be using an image, but the registry remains the same whether live or image.
To open the Registry Editor, type "regedit" at the command prompt. When you do so, it will open the Registry Editor as seen below.
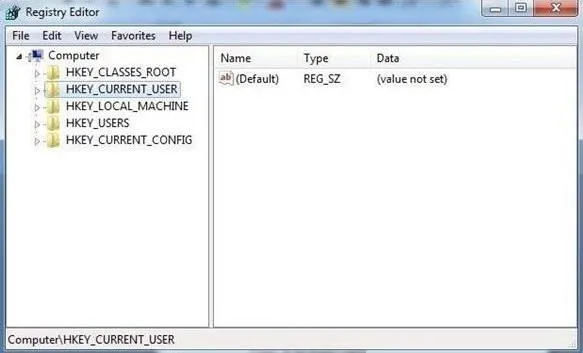
As you remember from a previous tutorial, the registry has five hives.
USB Storage Devices
Imagine a case where we suspect that someone installed a keylogger or removed confidential information with a USB drive. How would we find evidence that a USB storage device was inserted and used? To find evidence of USB storage devices, we want to look at the following key.
HK_Local_Machine\System\ControlSet00x\Enum\USBSTOR
In this key, we will find evidence of any USB storage device that has ever been connected to this system. Expand USBSTOR to see a listing of every USB storage device ever connected to this system.
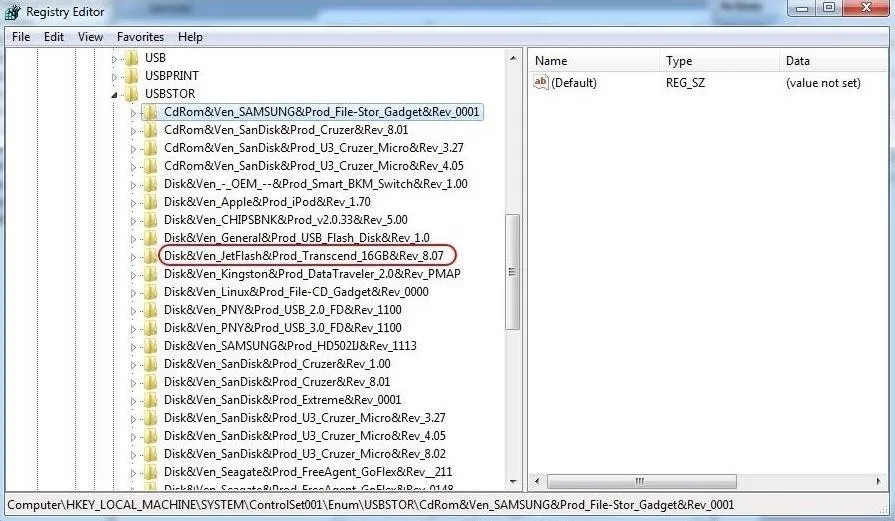
In the screenshot above, I have circled one suspicious looking USB device. When we expand it, it reveals a unique identifier for that device. By clicking on this identifier, we can find much more information about the device.
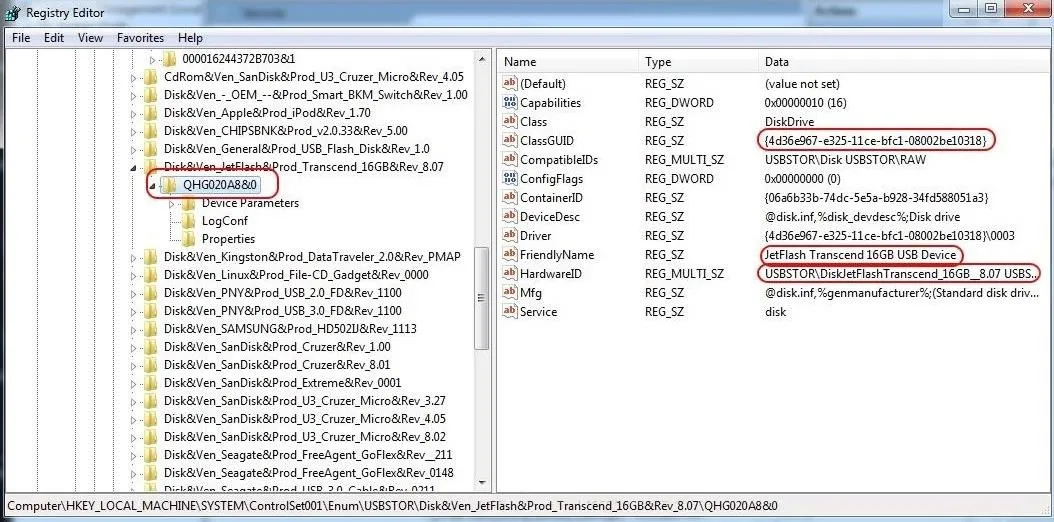
As you can see in the screenshot above, when we click on the USB storage identifier, it reveals in the right-hand window the Global Unique Identifier (GUID), the friendly name, and the hardware ID, among other things. This may be exactly the evidence we need to tie the suspect to their activity on this system!
Mounted Devices
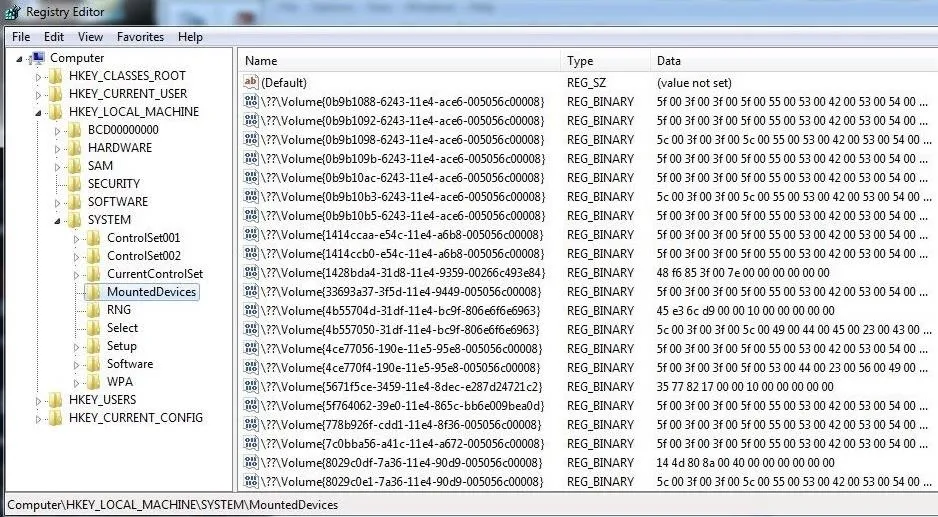
If the suspect used any hardware device that must be mounted to either read or write data (CD-ROM, DVD, hard drive, flash drive, etc.), the registry will record the mounted device. This information is stored at:
HKEY_LOCAL_MACHINE\System\MountedDevices
As you can see below, when we click on this key, it provides us a long list of every device ever mounted on that machine.
If we need further information on any of those mounted devices, we can simply click on it, and it will open a small app that will enable us to read the data in ASCII. As you can see, this device was an IDE CD-ROM manufactured by Teac.
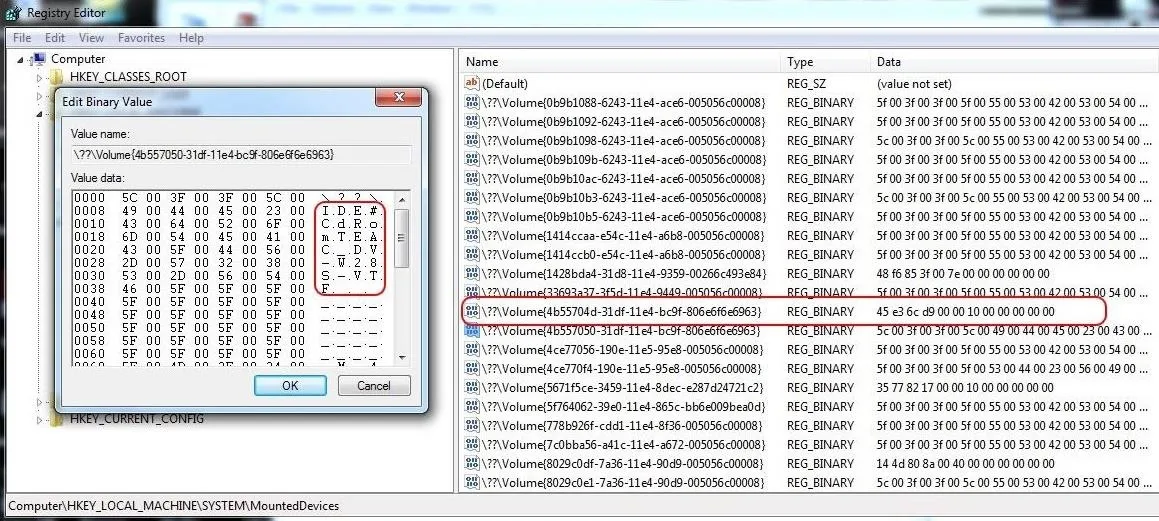
If there is not a TEAC CD_ROM on the system, the forensic investigator now knows that they need to find this piece of hardware to find further evidence of the crime.
The registry is a depository of volumes of information on what happened on a Windows system, and by learning our way around it, we can reconstruct the elements of a crime that it was used for.
Keep coming back, my aspiring forensic investigators, as we explore more ways to find evidence of criminal or malicious activity.
Cover image via Shutterstock


Comments
Be the first, drop a comment!