


3D printers allow hackers and makers alike to create something from nothing. They're an incredible technology that lets you build protective cases and covers for gear such as a wardriving phone and Raspberry Pi-Hole. 3D printers can even help you out in a bind when something breaks, and it's impossible to get the part, since you can just print one out yourself.
And with 3D printers being relatively cheap these days, there's little reason not to get one if you think you'd have many uses for it. Anyone with $200 to $300 can get started 3D printing simple or sophisticated plastic objects at home using affordable options like the Creality Ender 3.
If you're new to 3D printing, we'll dive into the basics that any first-time 3D printer user will need to go through to create their first print. 3D printing isn't exactly straightforward, so you can't just put any sort of plastic in the machine and get started right away. However, it won't take long to get up to speed with the general steps. There are many different types and brands of 3D printers out there, but we're focusing mainly on open-source ones like the Creality Ender 3.
What's a Good 3D Printer to Purchase?
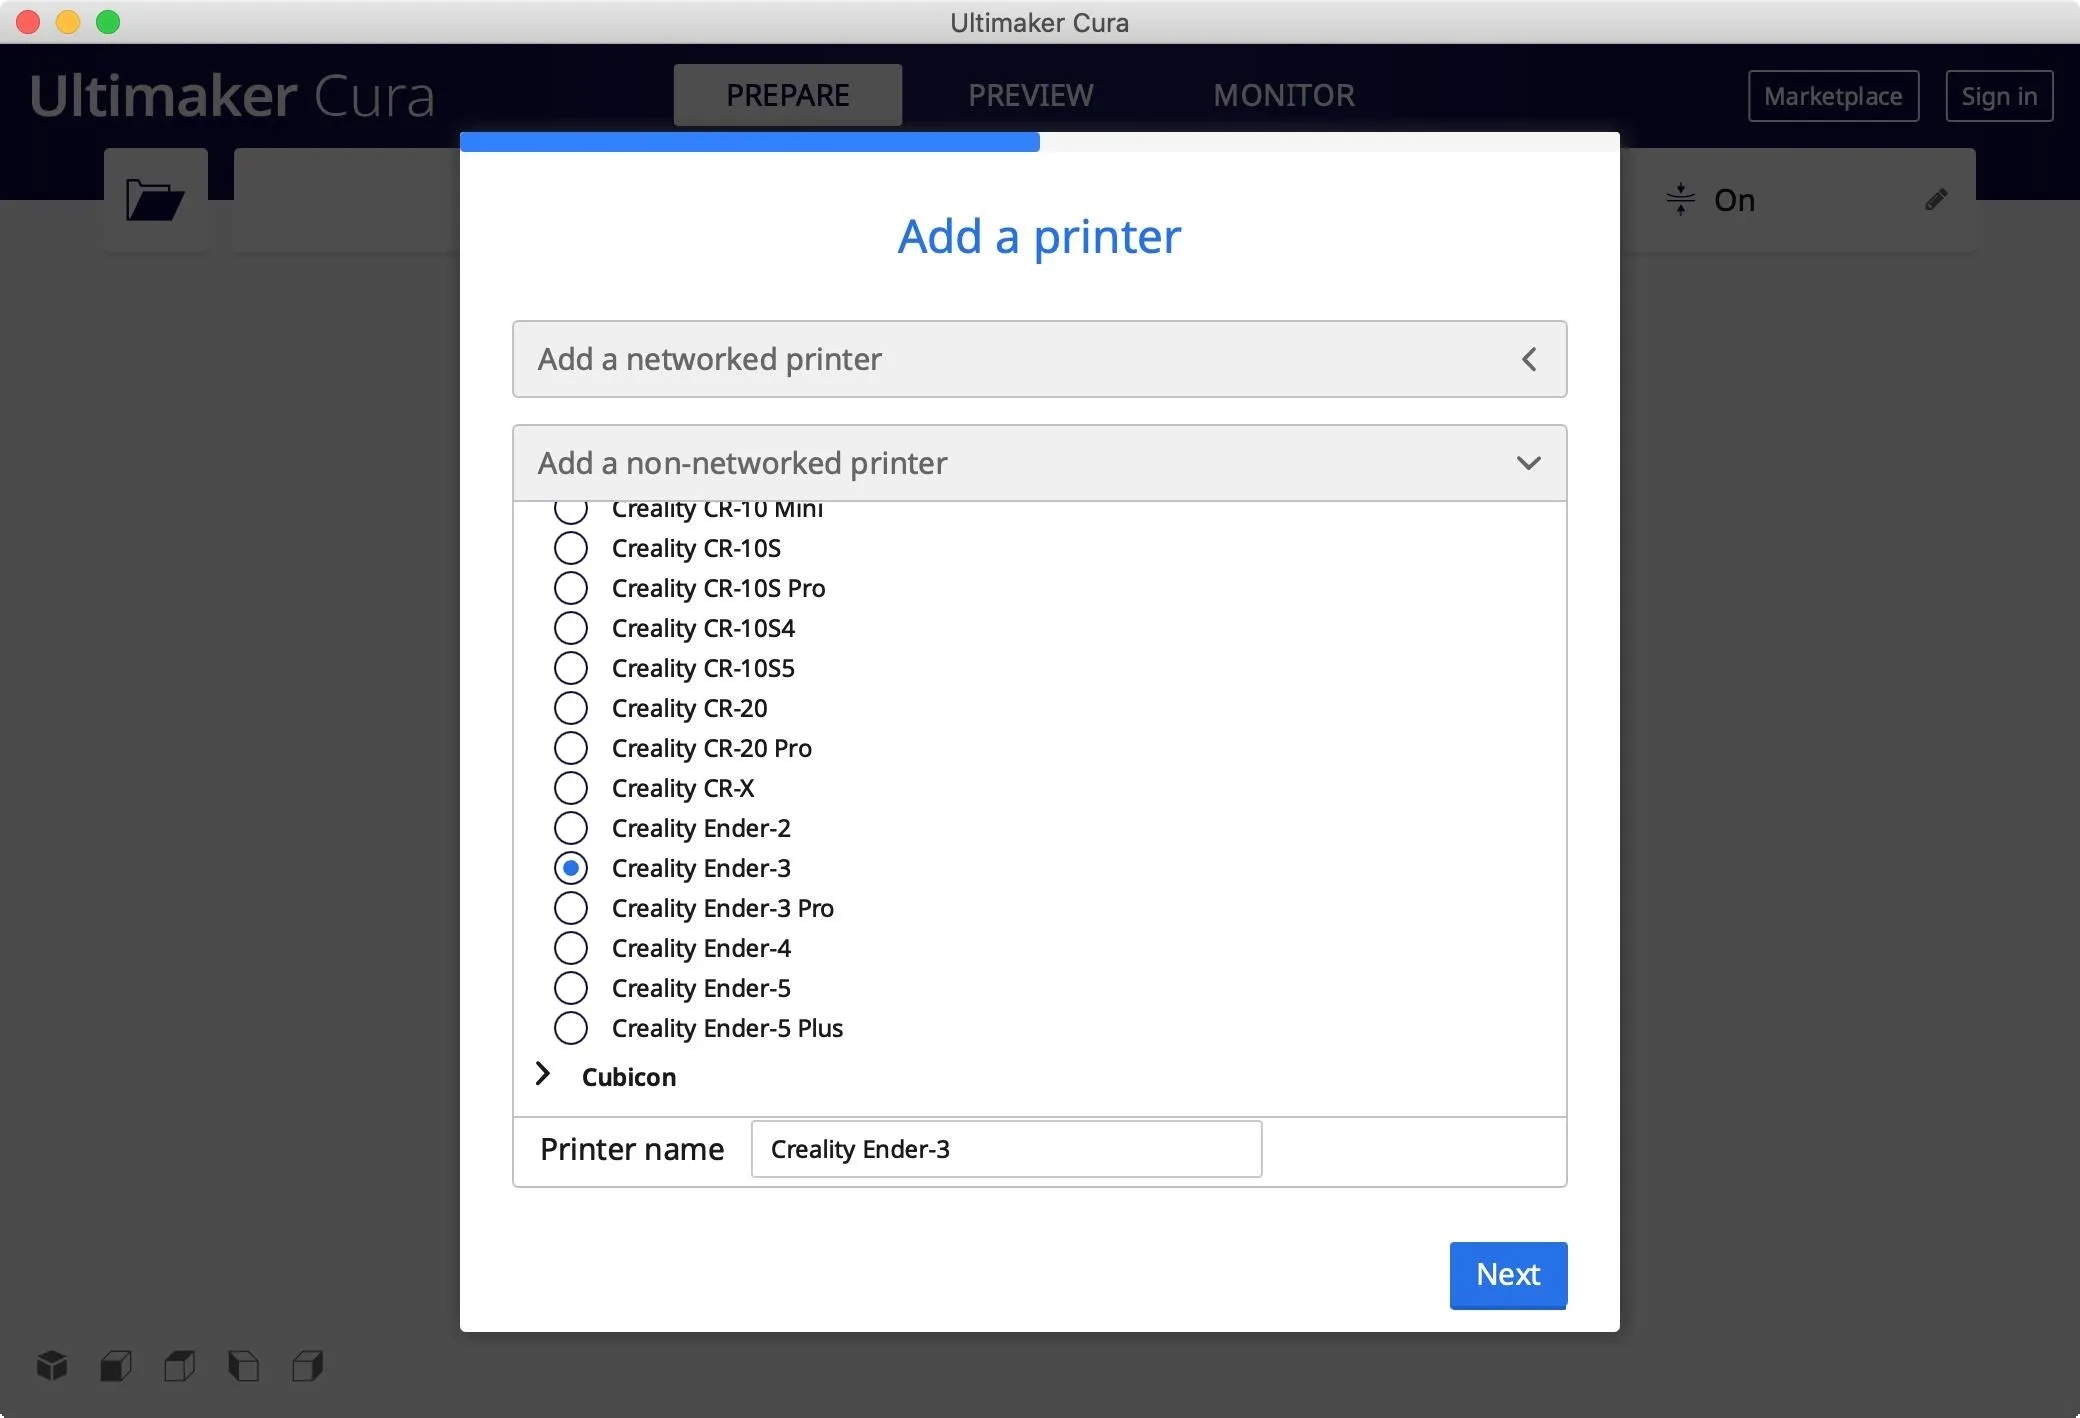
To follow along, you'll need a 3D printer. After doing some research and some in-house testing, we recommend going with the Creality Ender 3, Creality Ender 3X, or Creality Ender 3 Pro since the print quality is great right out of the box.
The original Creality Ender 3 is an affordable, open-source, well-documented printer with a great community behind it. It's a solid option over other frugal printers such as the Anet A8. But which Creality Ender is better?
The Pro model's biggest upgrade is a better extrusion for the Y-axis base which stabilizes the print better. The power supply unit is smaller and quieter, the board fan is on the bottom instead of the top to prevent falling filament bits, and it has a magnetic printing bed to help with filament adhesion and removing prints.
The X model has a tempered glass print bed which is supposed to be even better than the Pro's magnetic one. It also improves the extruder to reduce clogs, reduced the printer's overall noise, and comes with additional print nozzles. Many reviewers online like the X over the Pro, but many maintain the original is more than good enough for beginners.
- Creality Ender 3: Amazon ($225) | AliExpress ($190–$240)
- Creality Ender 3X: Amazon ($222) | AliExpress ($190–$225)
- Creality Ender 3 Pro: Amazon ($269) | AliExpress ($230)
Creality also makes newer versions called the Ender 5, Ender 5 Pro, and Ender 5 Plus, so you could look into those models too. For us, the older 3 models are perfectly fine and cost less, but the Ender 5 Plus is worth looking into if you want to create larger items and can afford the much higher price tag.
What Else Will You Need?
Aside from the open-source 3D printer, you'll need an open-source slicing application for your computer. The one we're using is Ultimaker Cura. So download and install it or another program like it before continuing. We like it because it's free, and Creality Ender 3 is one of its available 3D printers.
Level Your 3D Printer's Bed
Once your printer is assembled, you'll need to make sure that its bed is completely level. First, from the printer's menu, make sure "Auto Home" is on for the printer head so that the X/Y/Z axes return to the home position where you can use it to help with the leveling. Now, from the menu, disable its stepper motors with "Disable Steppers" so you can move the bed and printing head freely.
Next, take a piece of paper and lay it on the bed underneath the printer nozzle. Using the knobs underneath the bed to adjust the bed's height, position the bed so that the nozzle is just barely scraping the paper but so that the paper can still move around freely. Then, move the head to the other corners and do the same thing.
Once that's done on all four sides, try it again on each corner to make sure nothing has changed from adjusting the other areas. Once it looks level, you're good to keep moving on.
Load the Filament & Select a Test Print
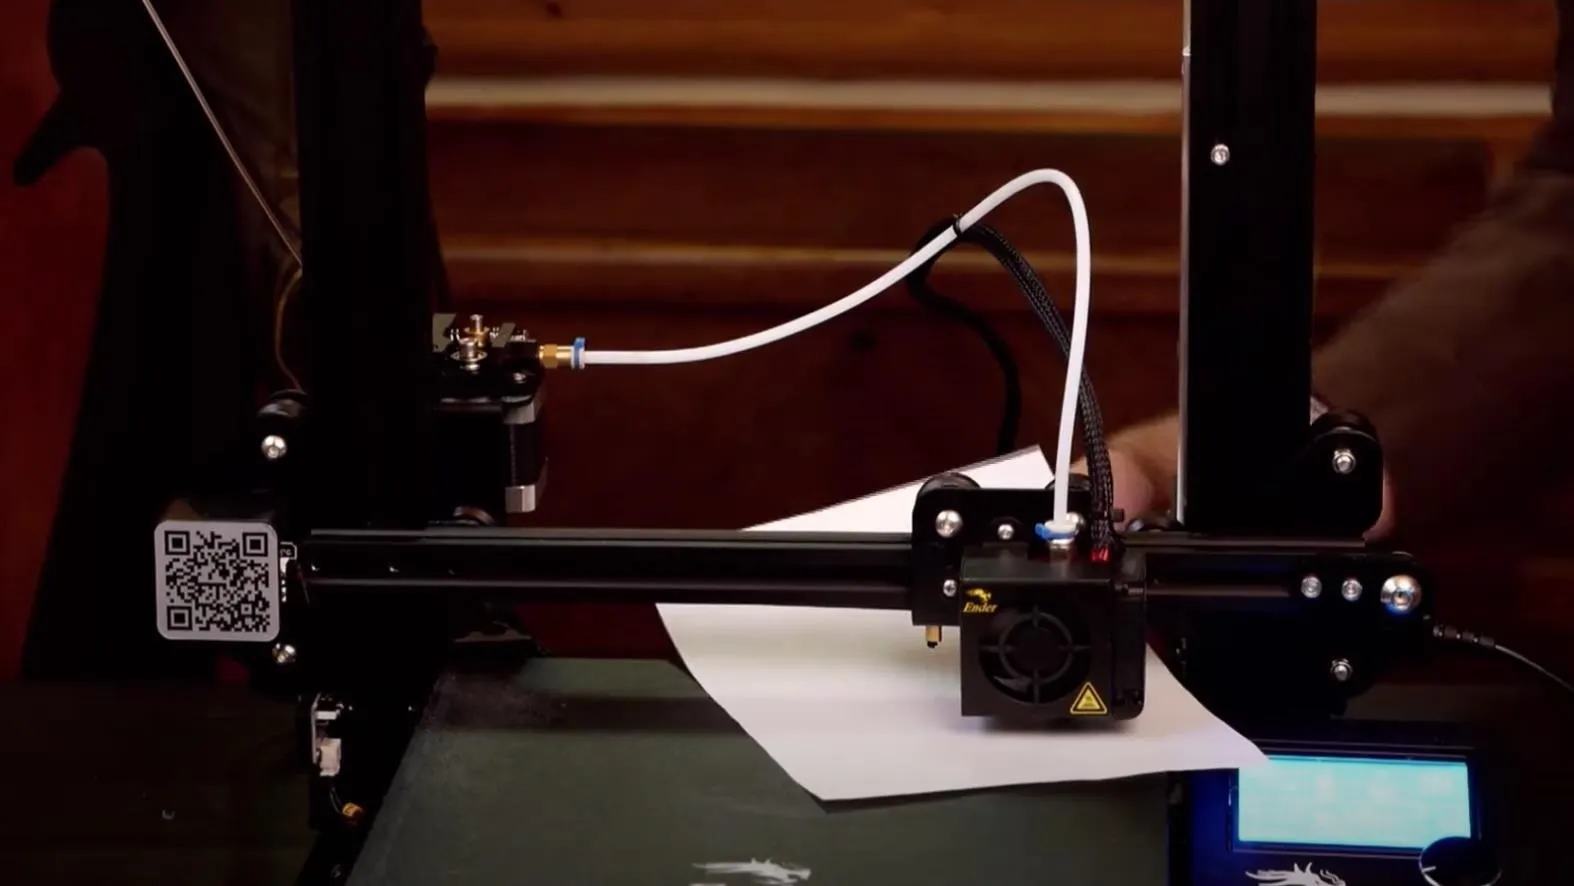
Now, heat the nozzle to the temperature your filament says to print at. For PLA (polylactic acid or polylactide), it can be between 200–235 degrees Celsius (392–455 degrees Fahrenheit). Once the nozzle is at the right temperature, you can feed the filament into the extruder and tube, holding down the spring-loaded lever to allow the filament to pass through.
Once it's loaded and the bed is level, select a test print to see if the bed is truly level. A good one, one that we like to use, is the "Ender 3 Bed Level" on Thingiverse by Elproducts. It'll print out a big square, and if the bed is not leveled right, it'll mess up on one or more corners on the square, then you can diagnose which it is and fix it.
Download Your Model & Open It in Cura
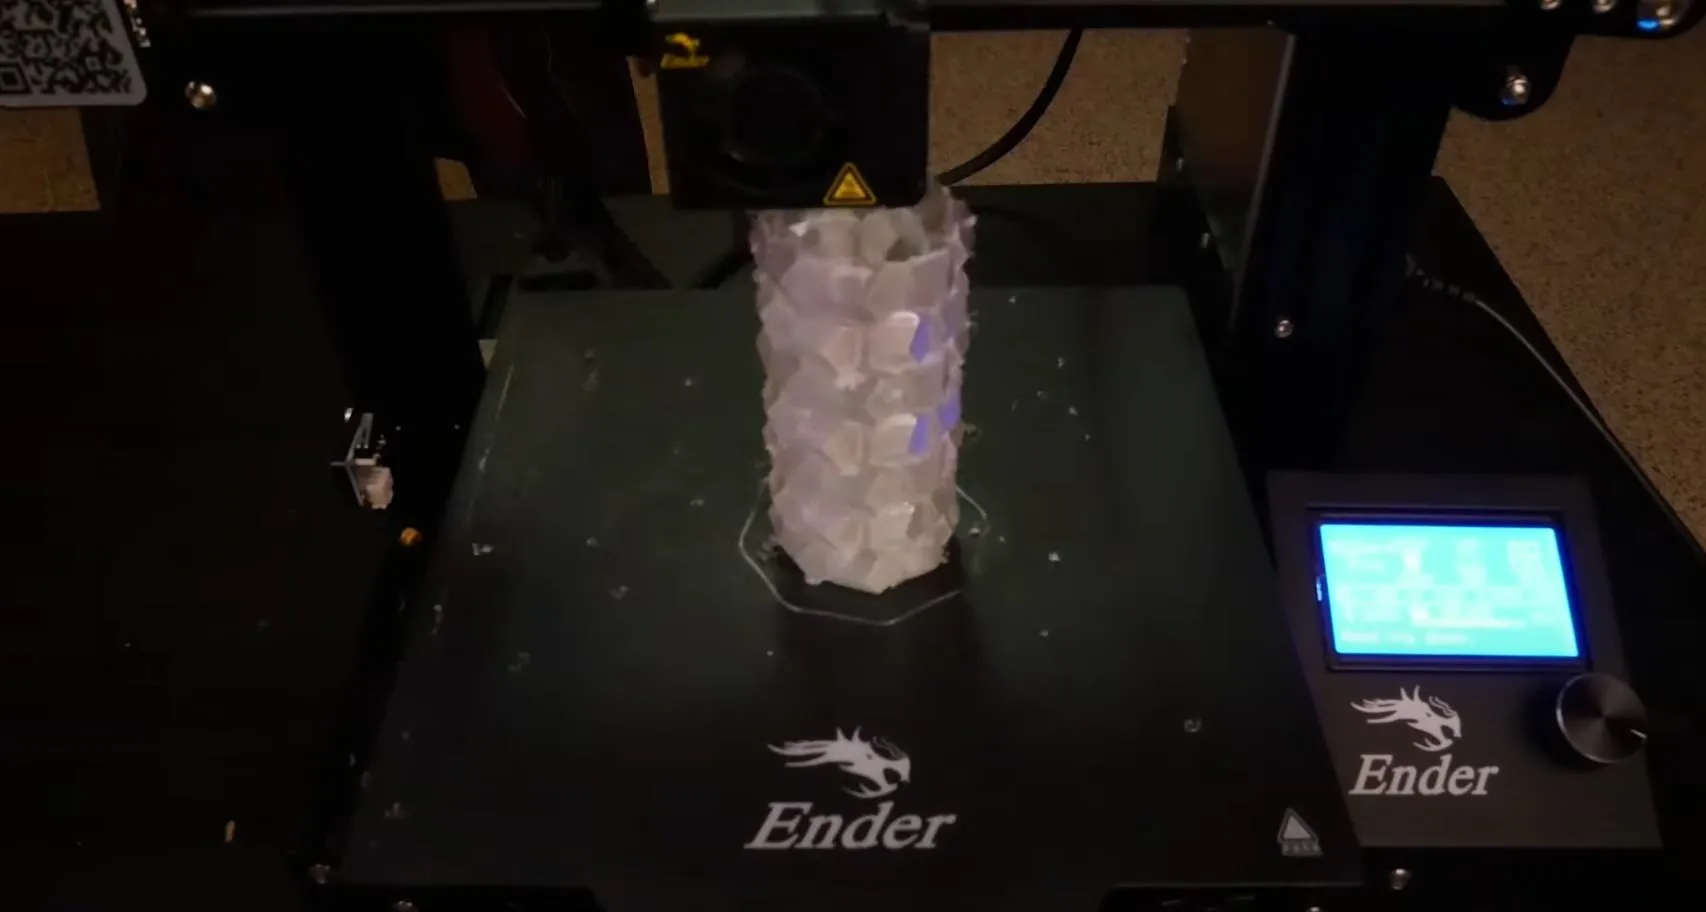
Next, we'll be slicing our model using the free Ultimaker Cura. Before you can do so, you do need a model, which you can build from scratch or get online from somewhere like Thingiverse. In our video, we're printing out a honeycomb vase. Whatever it is, make sure it's an STL file, which is a format that Cura accepts.
On Thingiverse, you can see if the model works well printed out just by viewing other people's finished products and remixes, which will give you a better view of how it looks and how it can be tweaked.
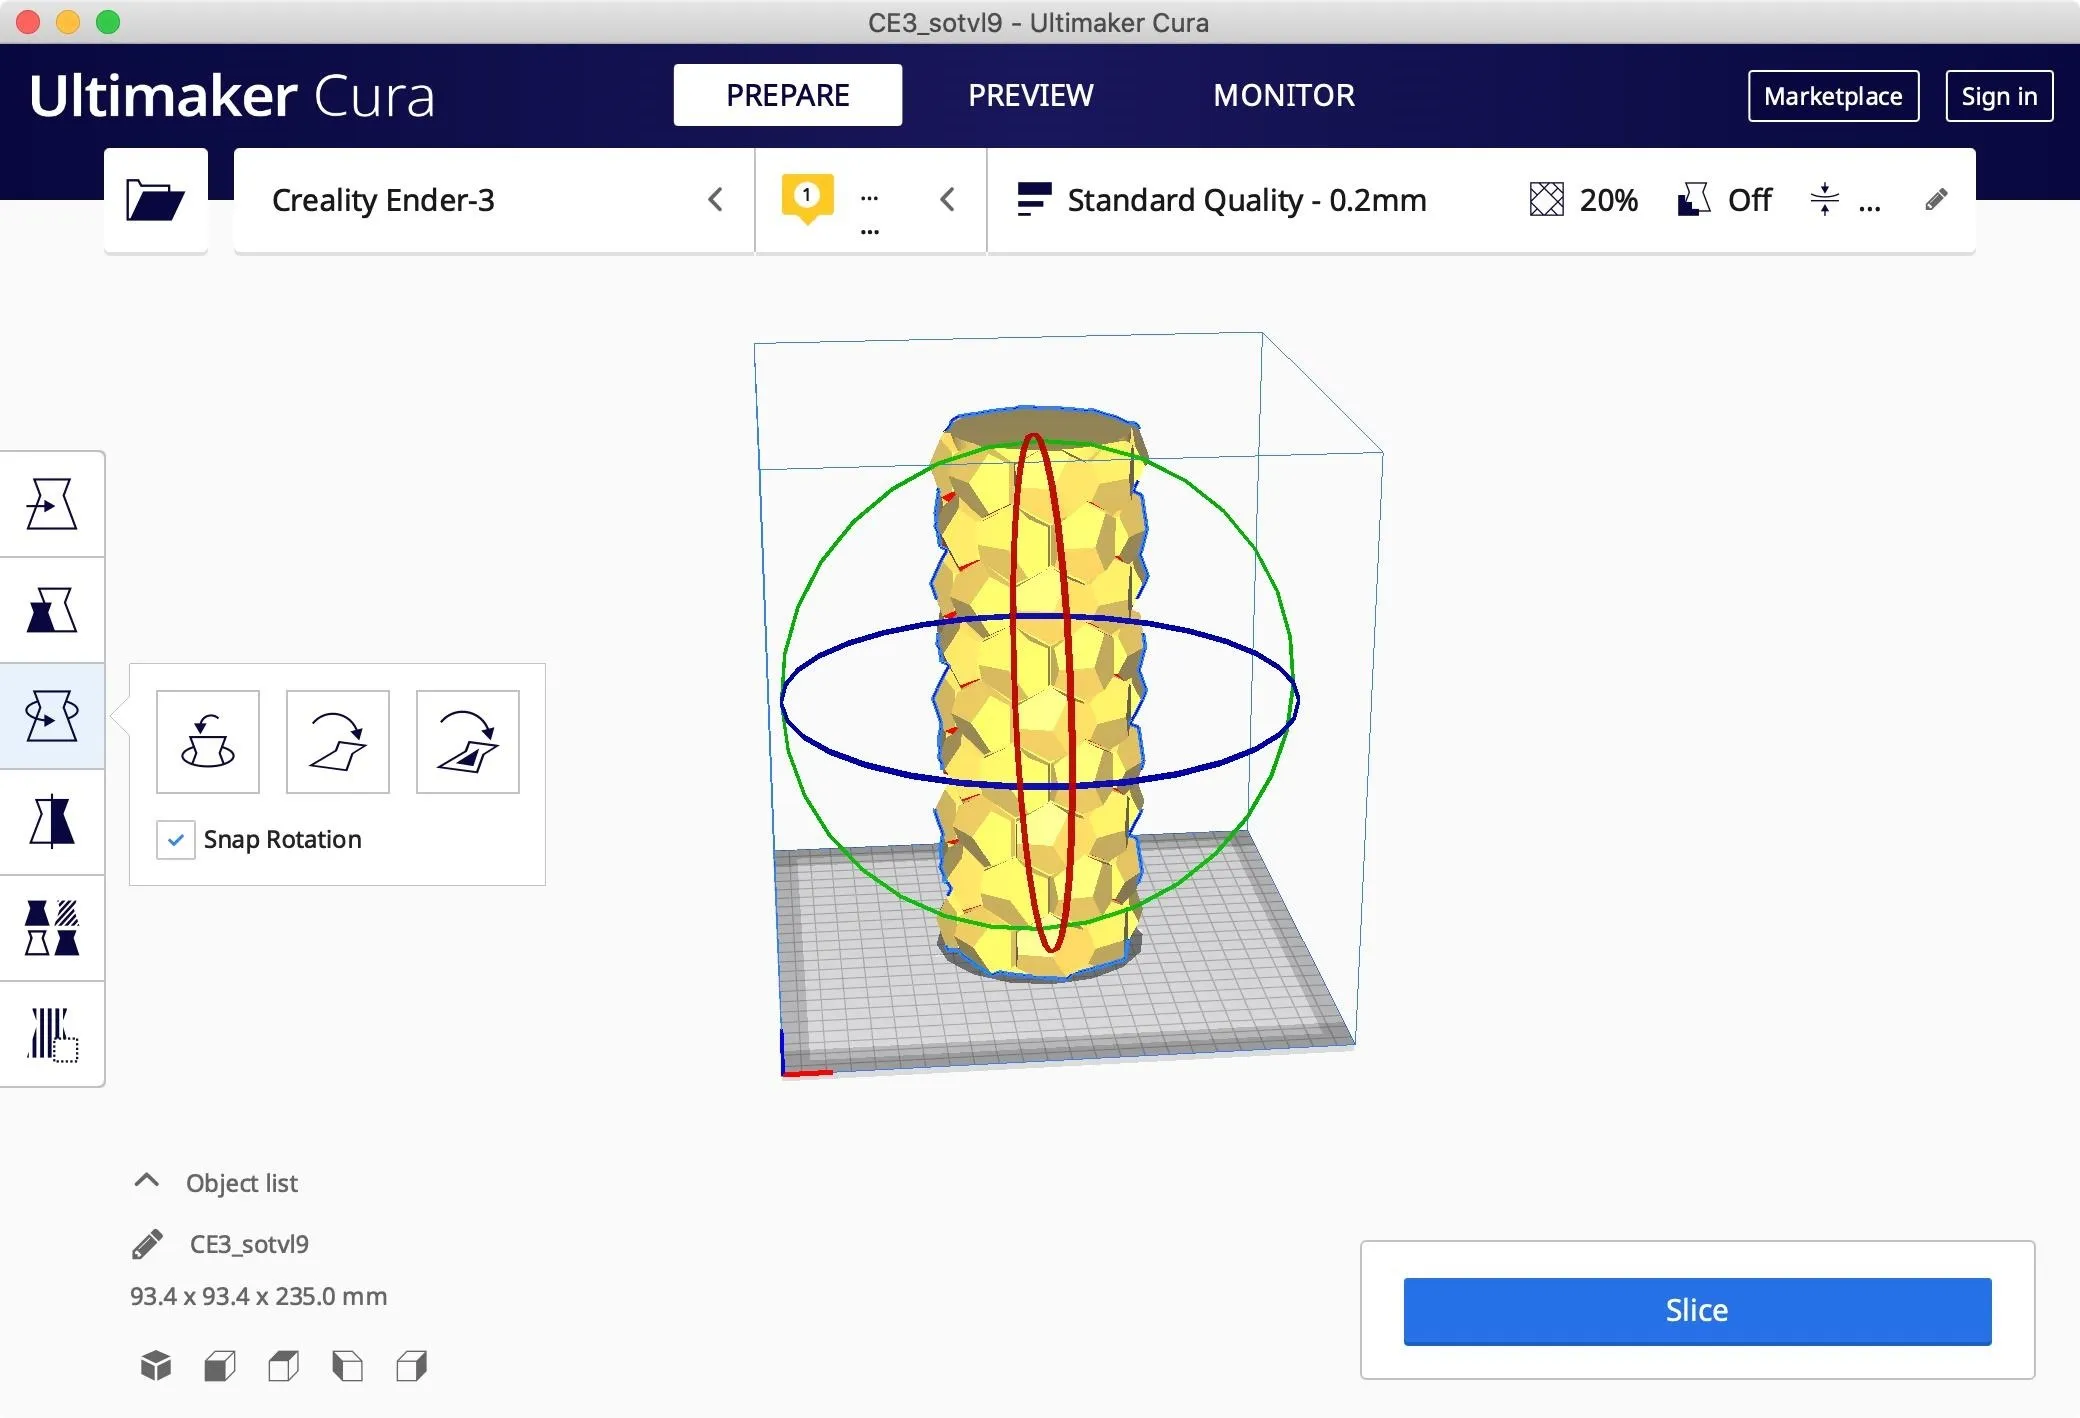
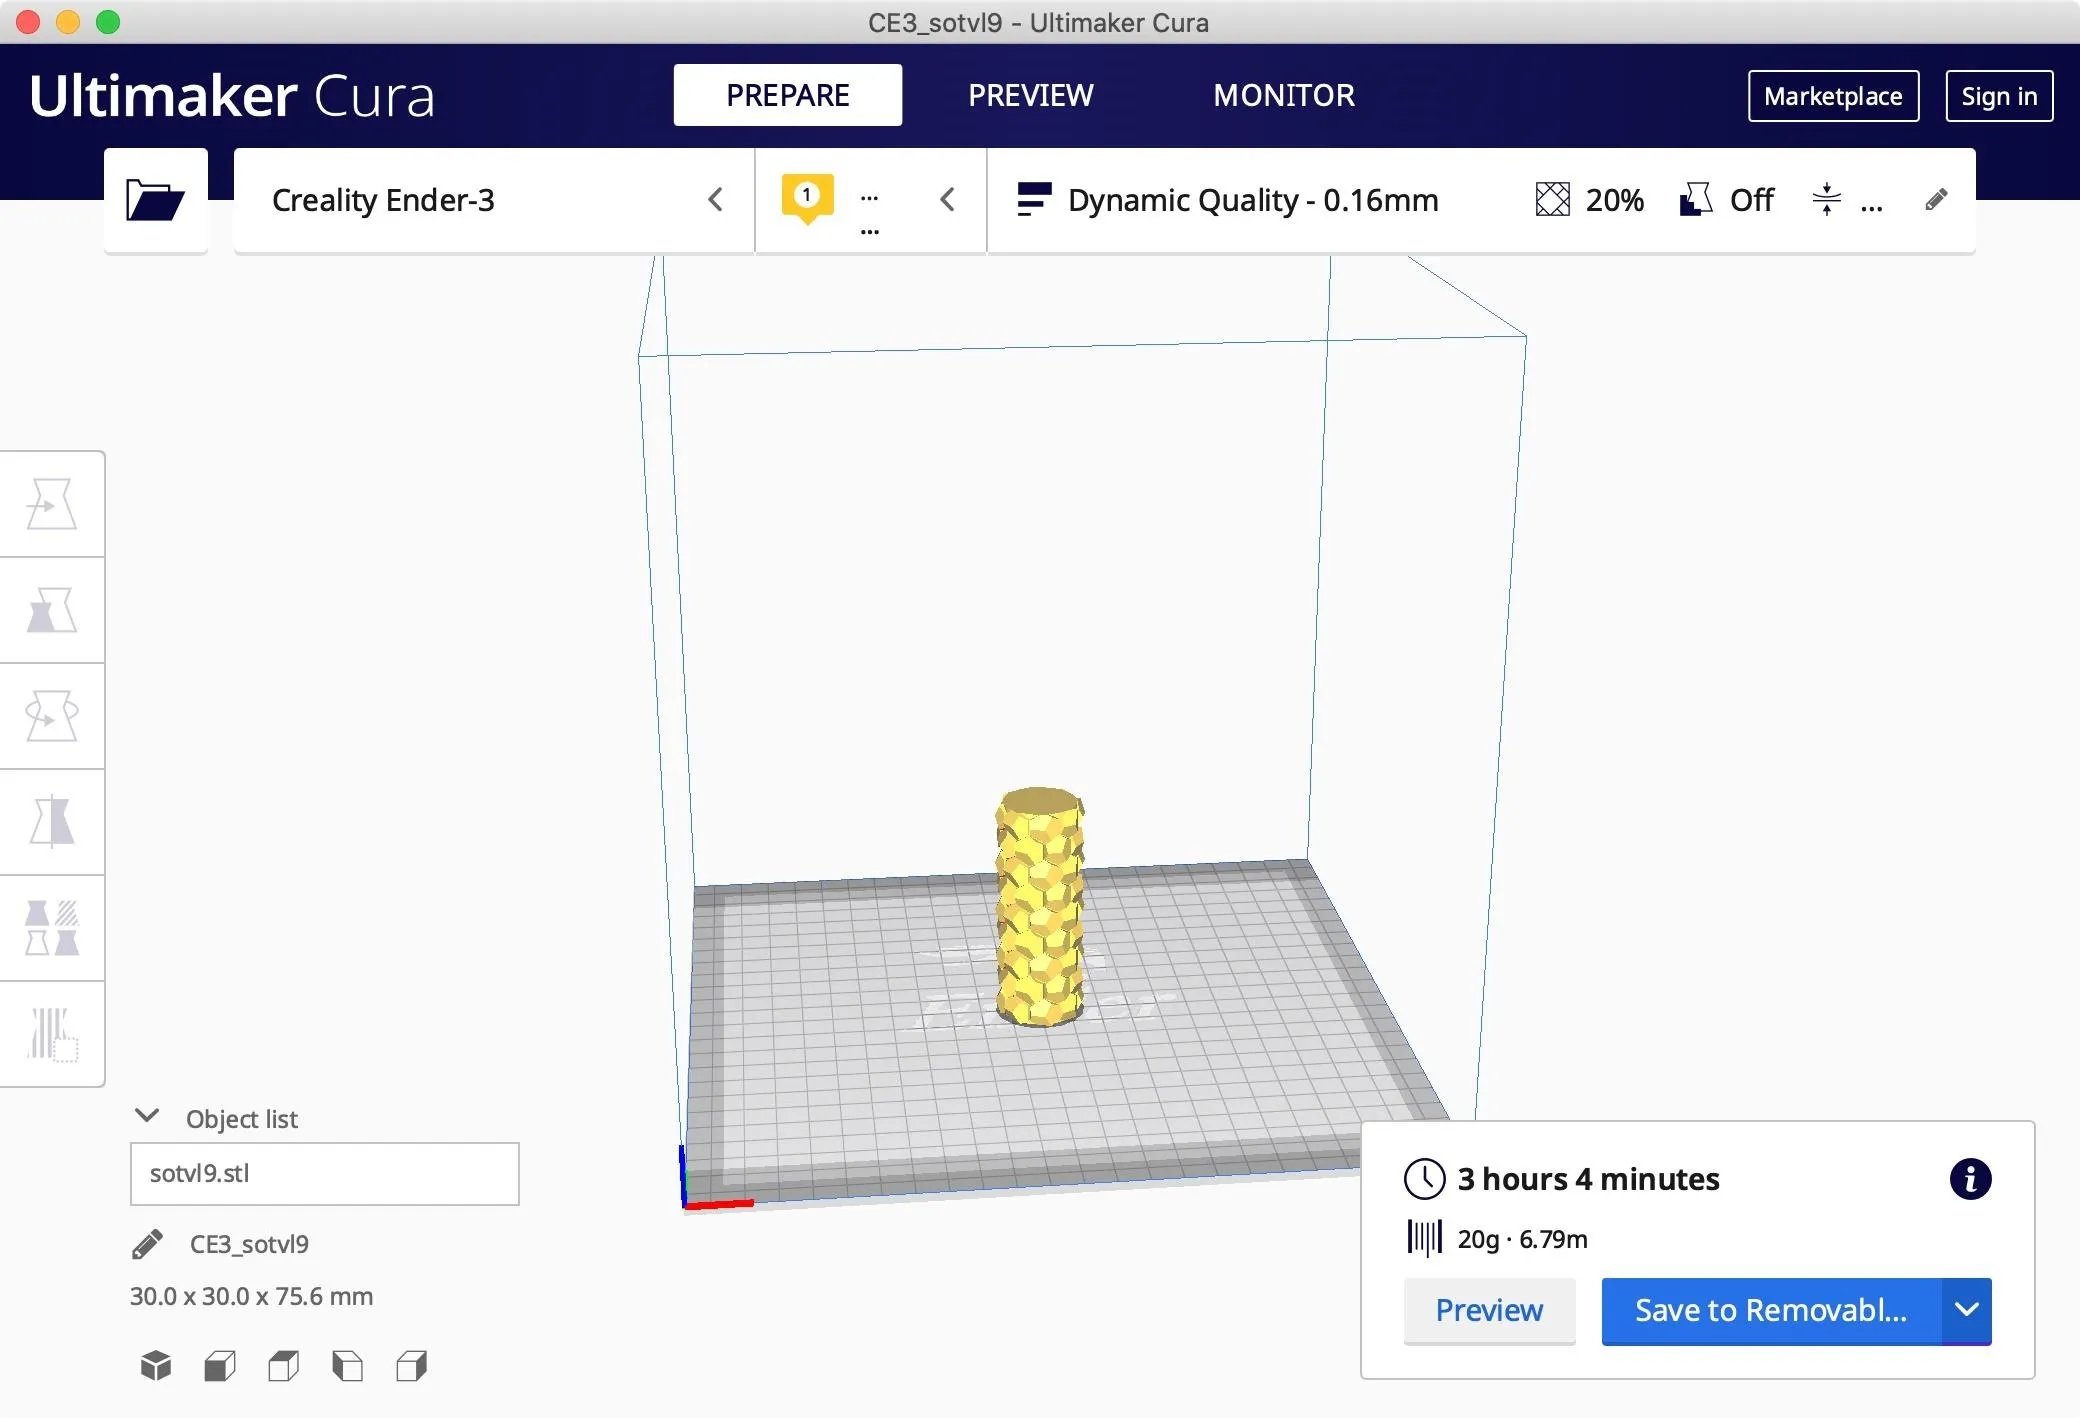
After setting your 3D printer model in Cura and adjusting the machine's settings, open your model up, and you should see it displayed as below.
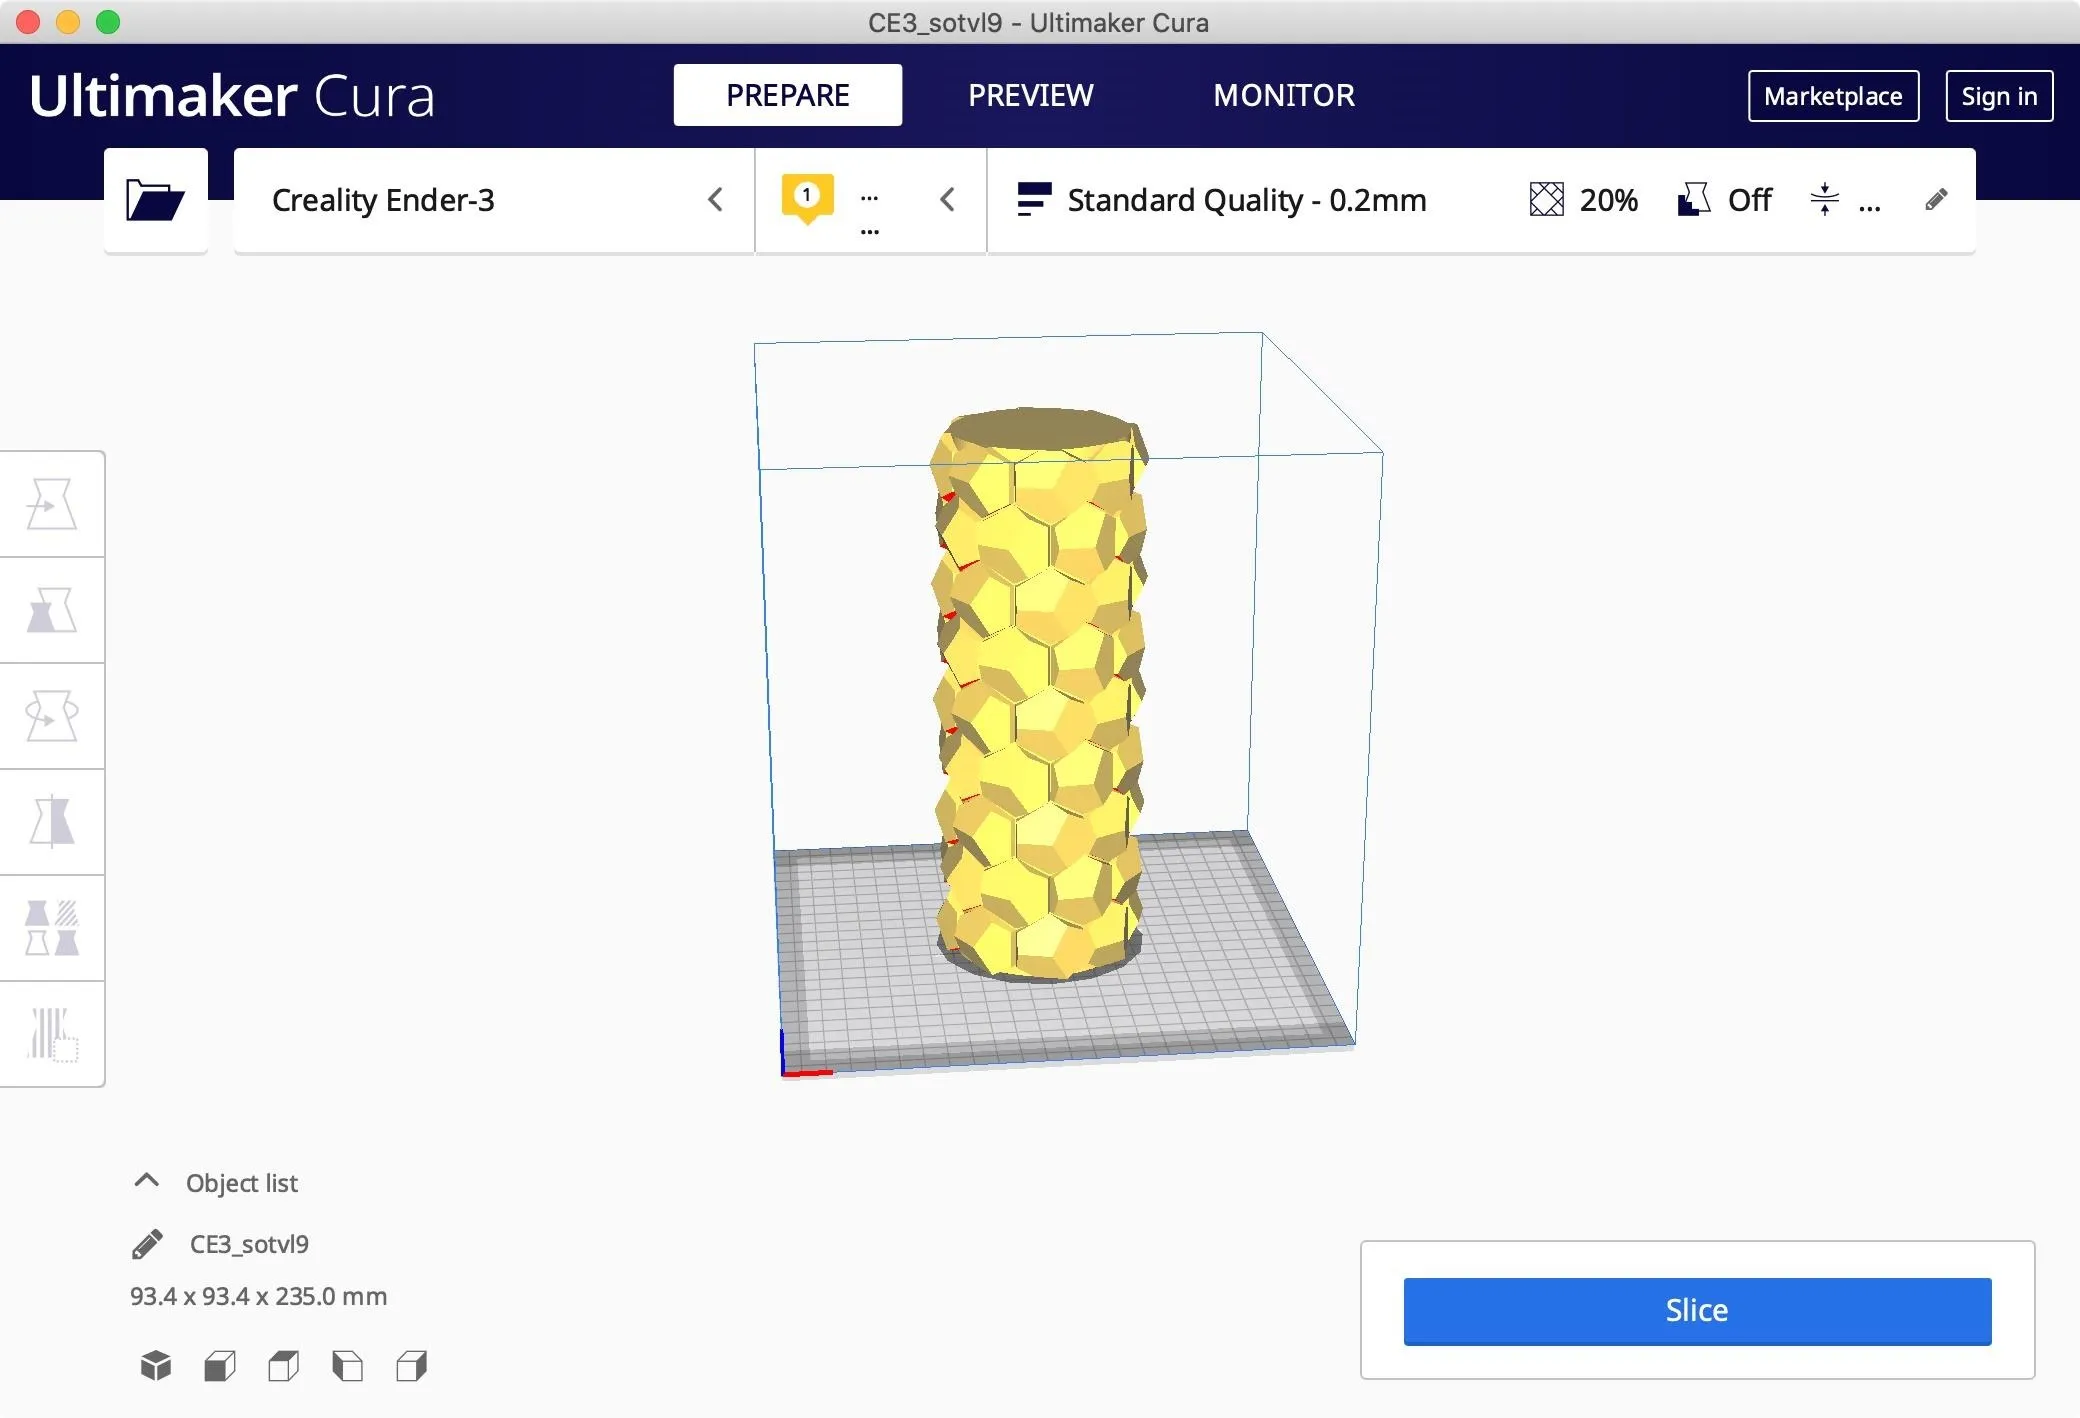
Click on your model, and you'll see that you can change it with the controls on the left side. Those include Move, Scale, Rotate, Mirror, Per Model Settings, and Support Blocker. "Move" is helpful if there's an area of your bed that works better than other areas; you can simply move the model to that area of the bed. "Scale" is nice if you want to make the model smaller or larger in just a few seconds.
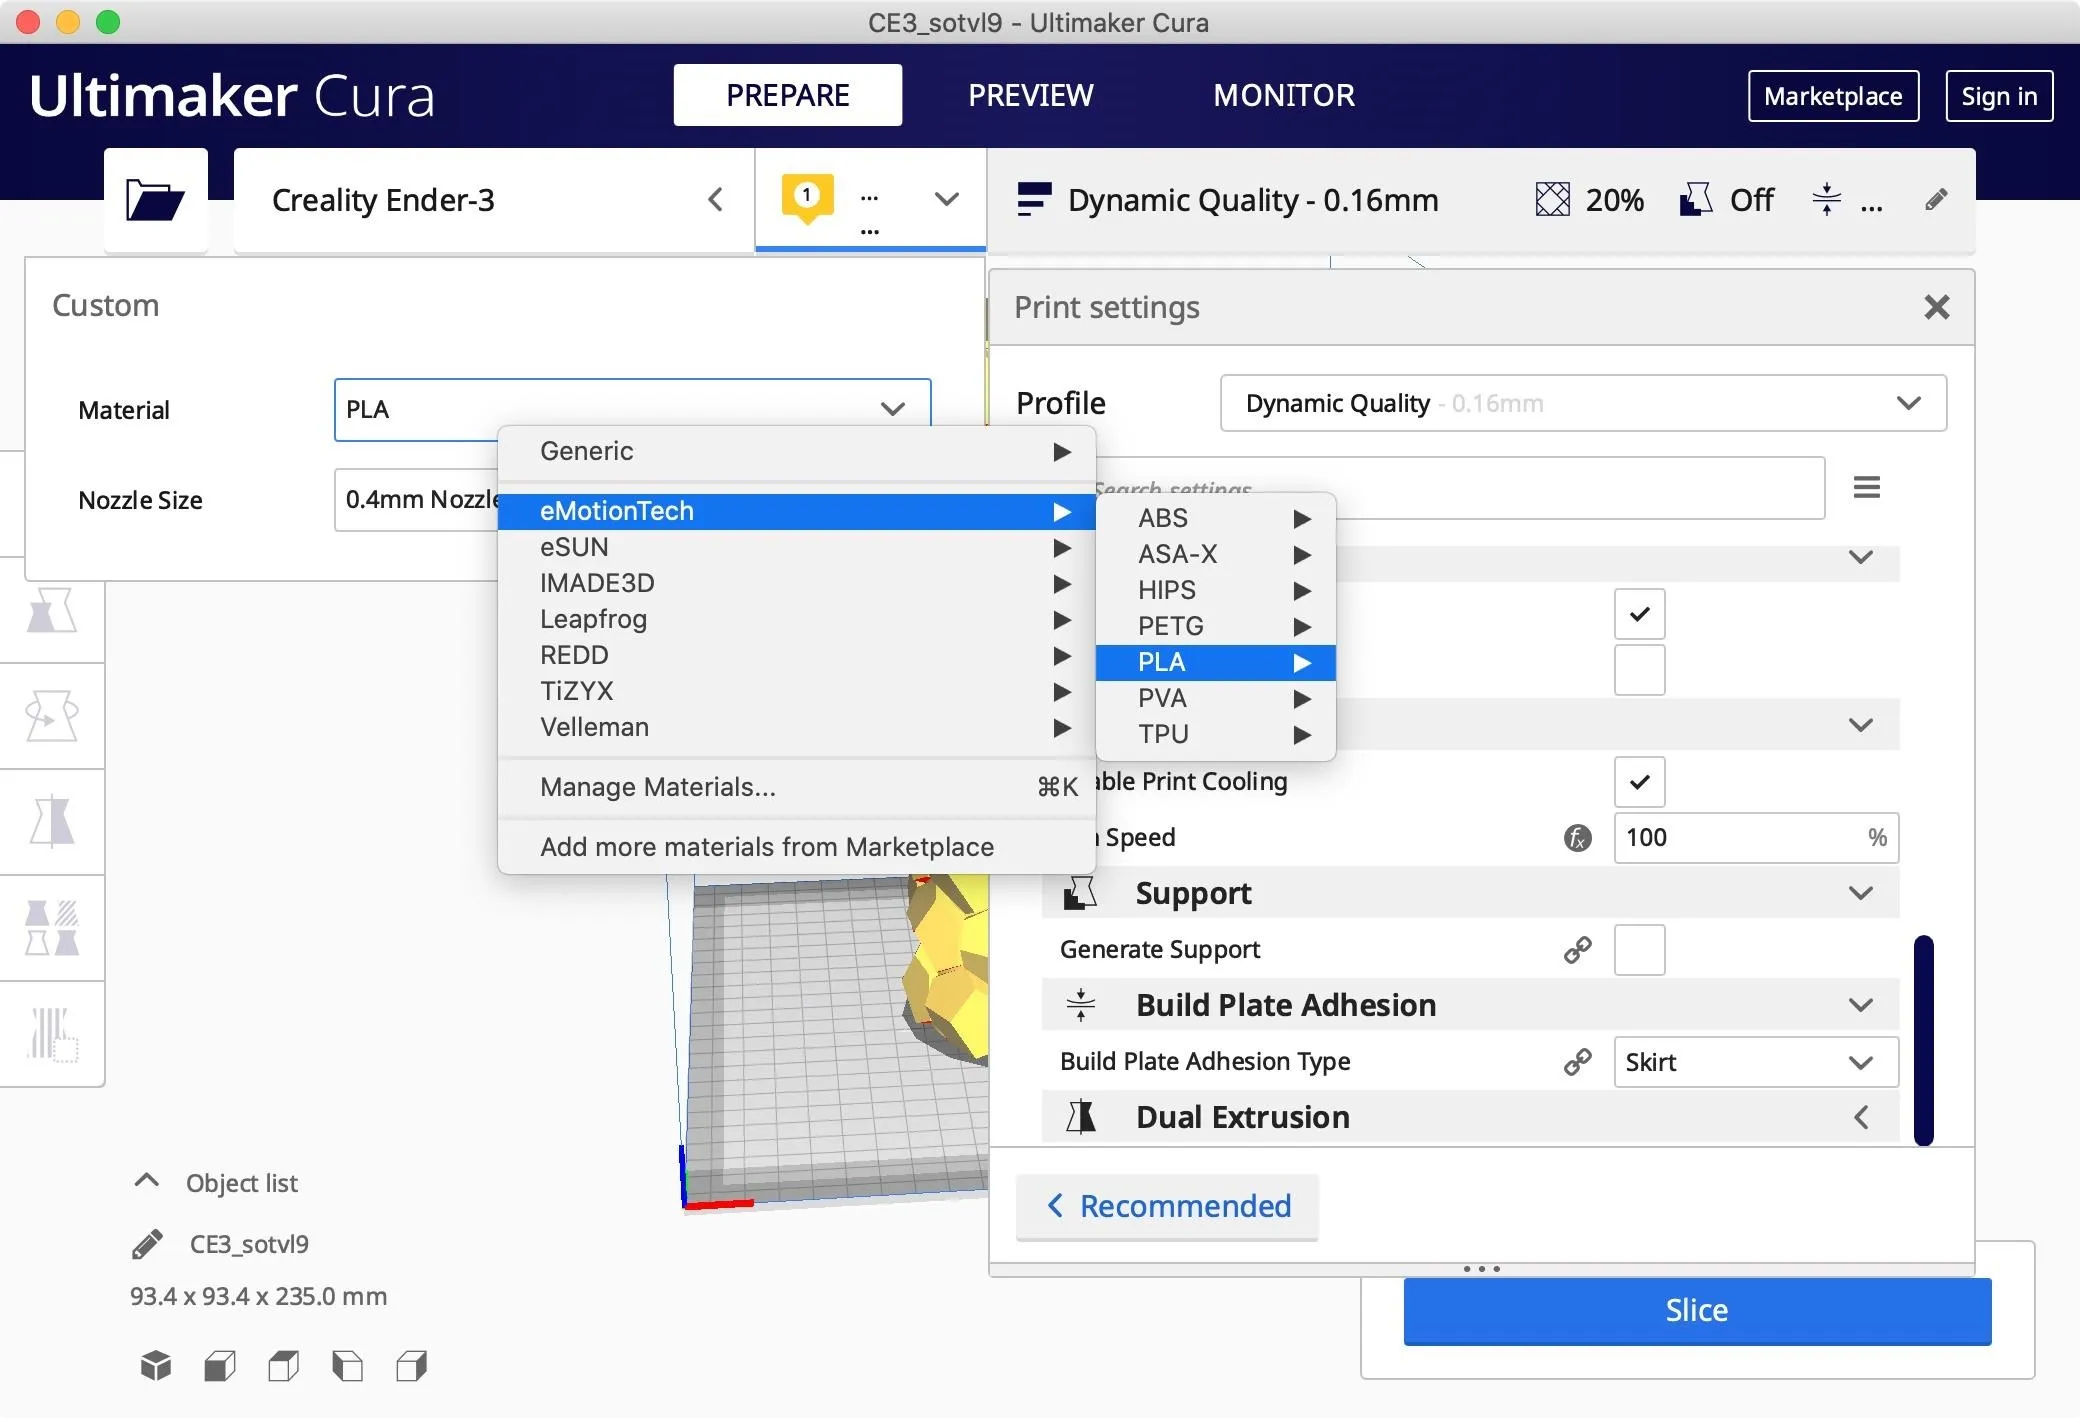
If you haven't already done so, make sure to select the type of material you're using and the nozzle size of your printer. You can do that from the button next to the "Quality" settings, which looks like a yellow comment box. You can choose PLA, PETG, or any number of filament types.
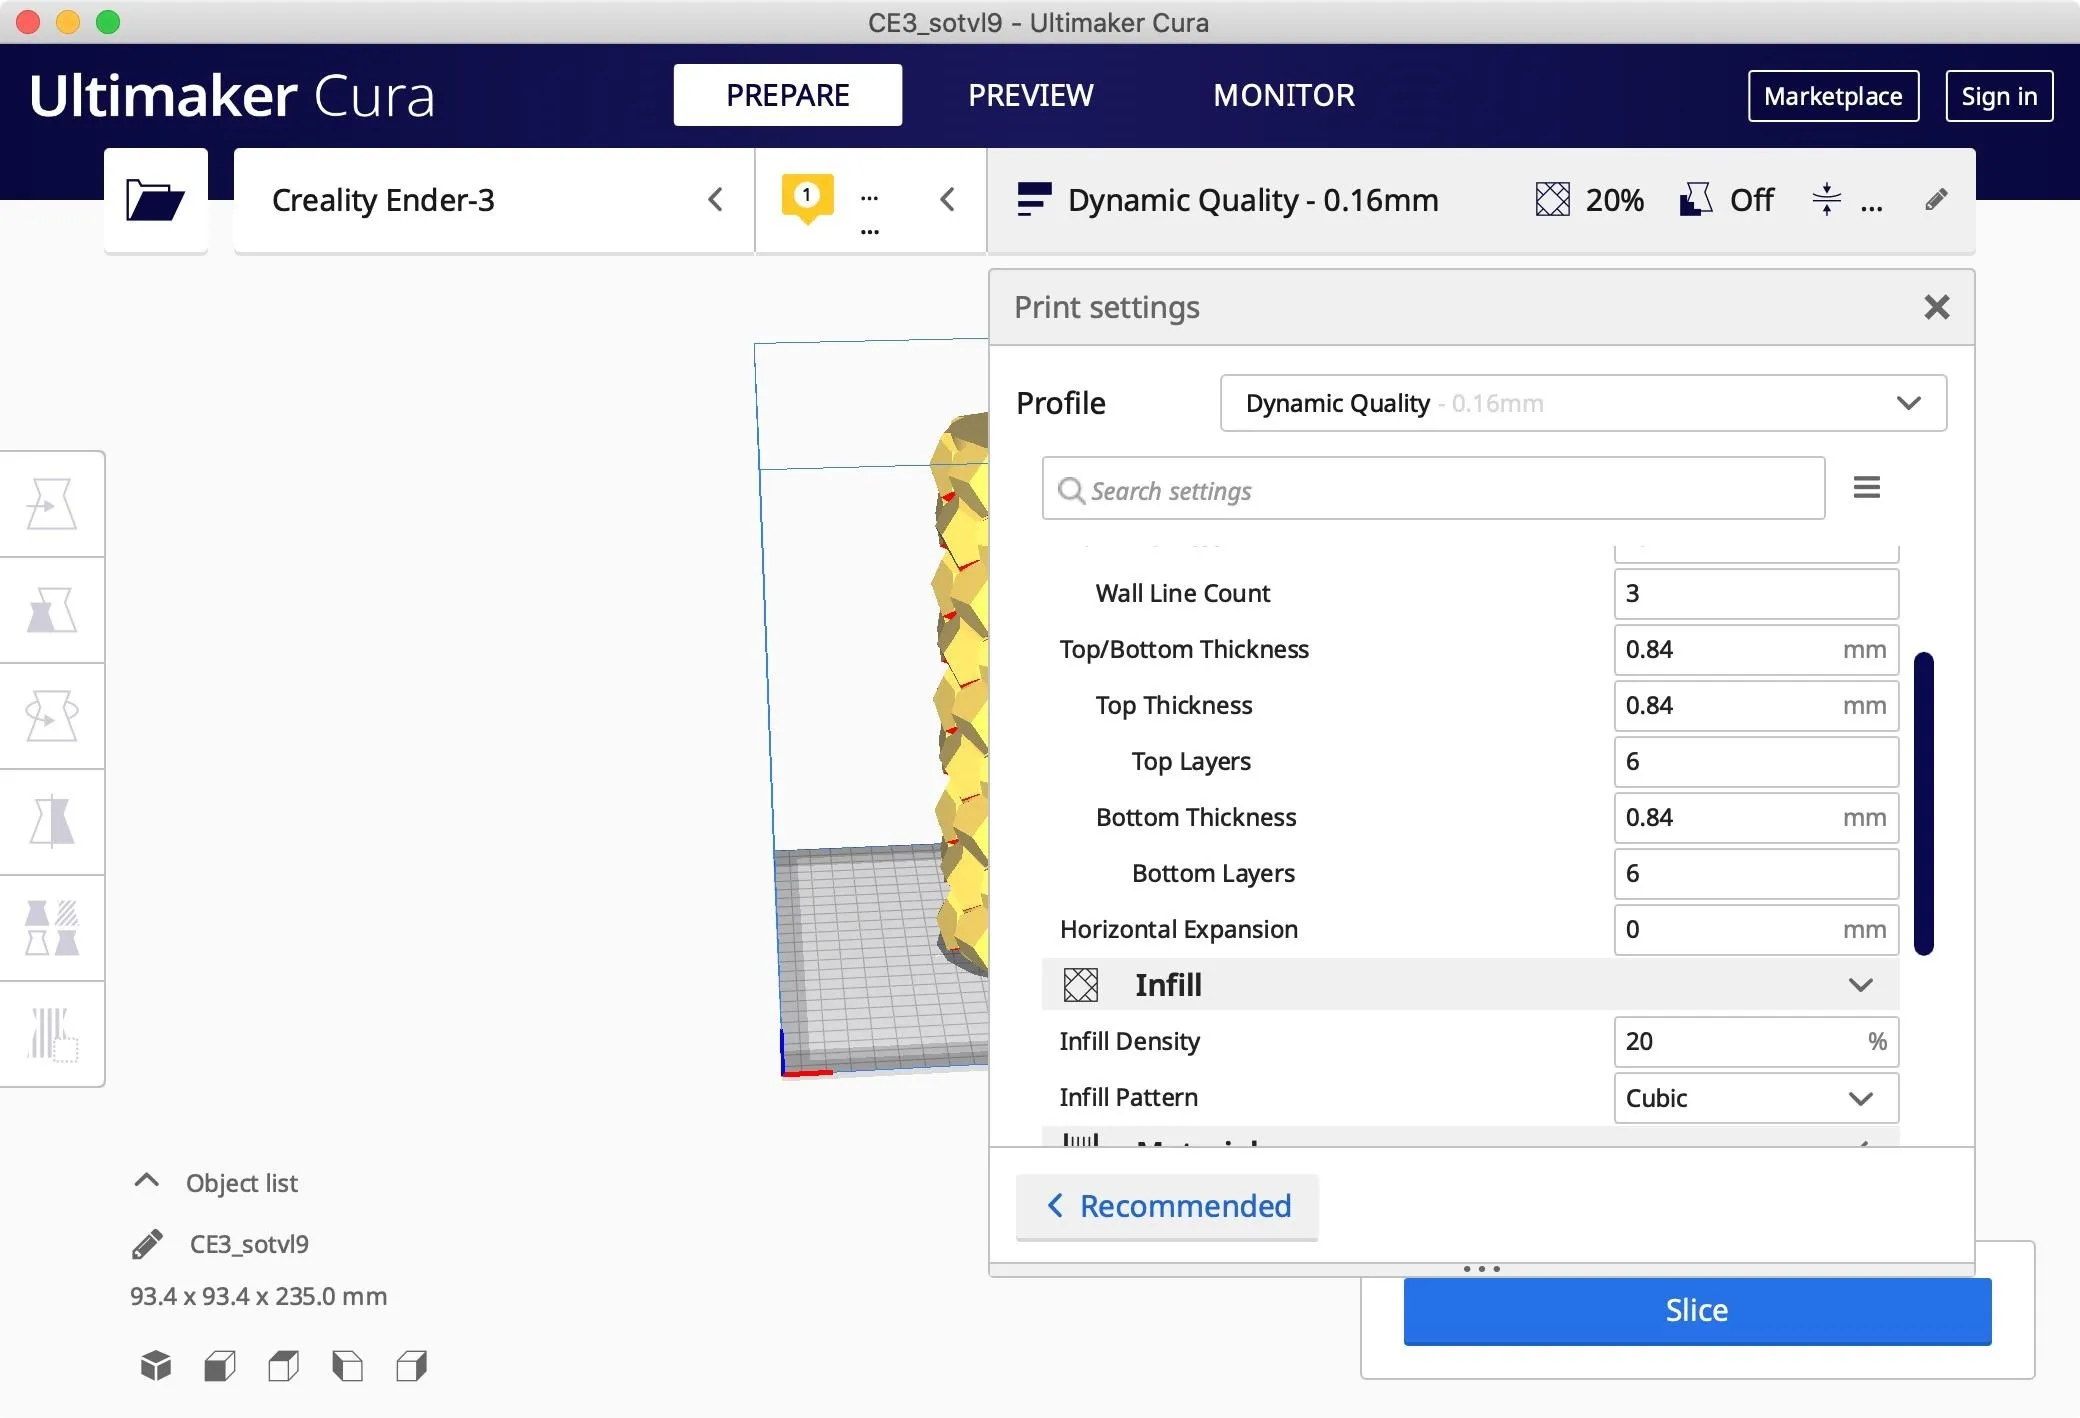
Click on the "Quality" tab in the top right and adjust the settings for your filament. It defaults to the "Recommended" quality but you can click on "Custom" to fine-tune things. We're going to go with Dynamic Quality since it prints at a higher resolution, where the print nozzle doesn't raise as much as with the Standard Quality, which means it'll have a tighter print. The higher the quality, the longer the print takes, but that's up to you.
Some of the things you can adjust include the layer height, wall thickness, wall line count, horizontal expansion, infill density and pattern, printing temperature, print speed, retraction, print cooling, fan speed, build plate adhesion type, and dual extrusion. In the settings, you can hover over each topic to get more information about it.
Make sure to set the infill to something between 15 and 20 for a print that doesn't need to be crazy strong. The infill is the area of the print that just needs filled in but isn't visible everywhere in the finished product.
For help on the quality of your print, check out our Cyber Weapons Lab video above which covers some other dos and don'ts for these settings, including how high you want your bed and printing temperatures.
Preview & Save the Sliced Print
When you're satisfied, it's time to save the file as G-code, which is like GPS directions for the nozzle of the printer. Once we click "Slice" for the design, you should see a time estimate in the bottom right.
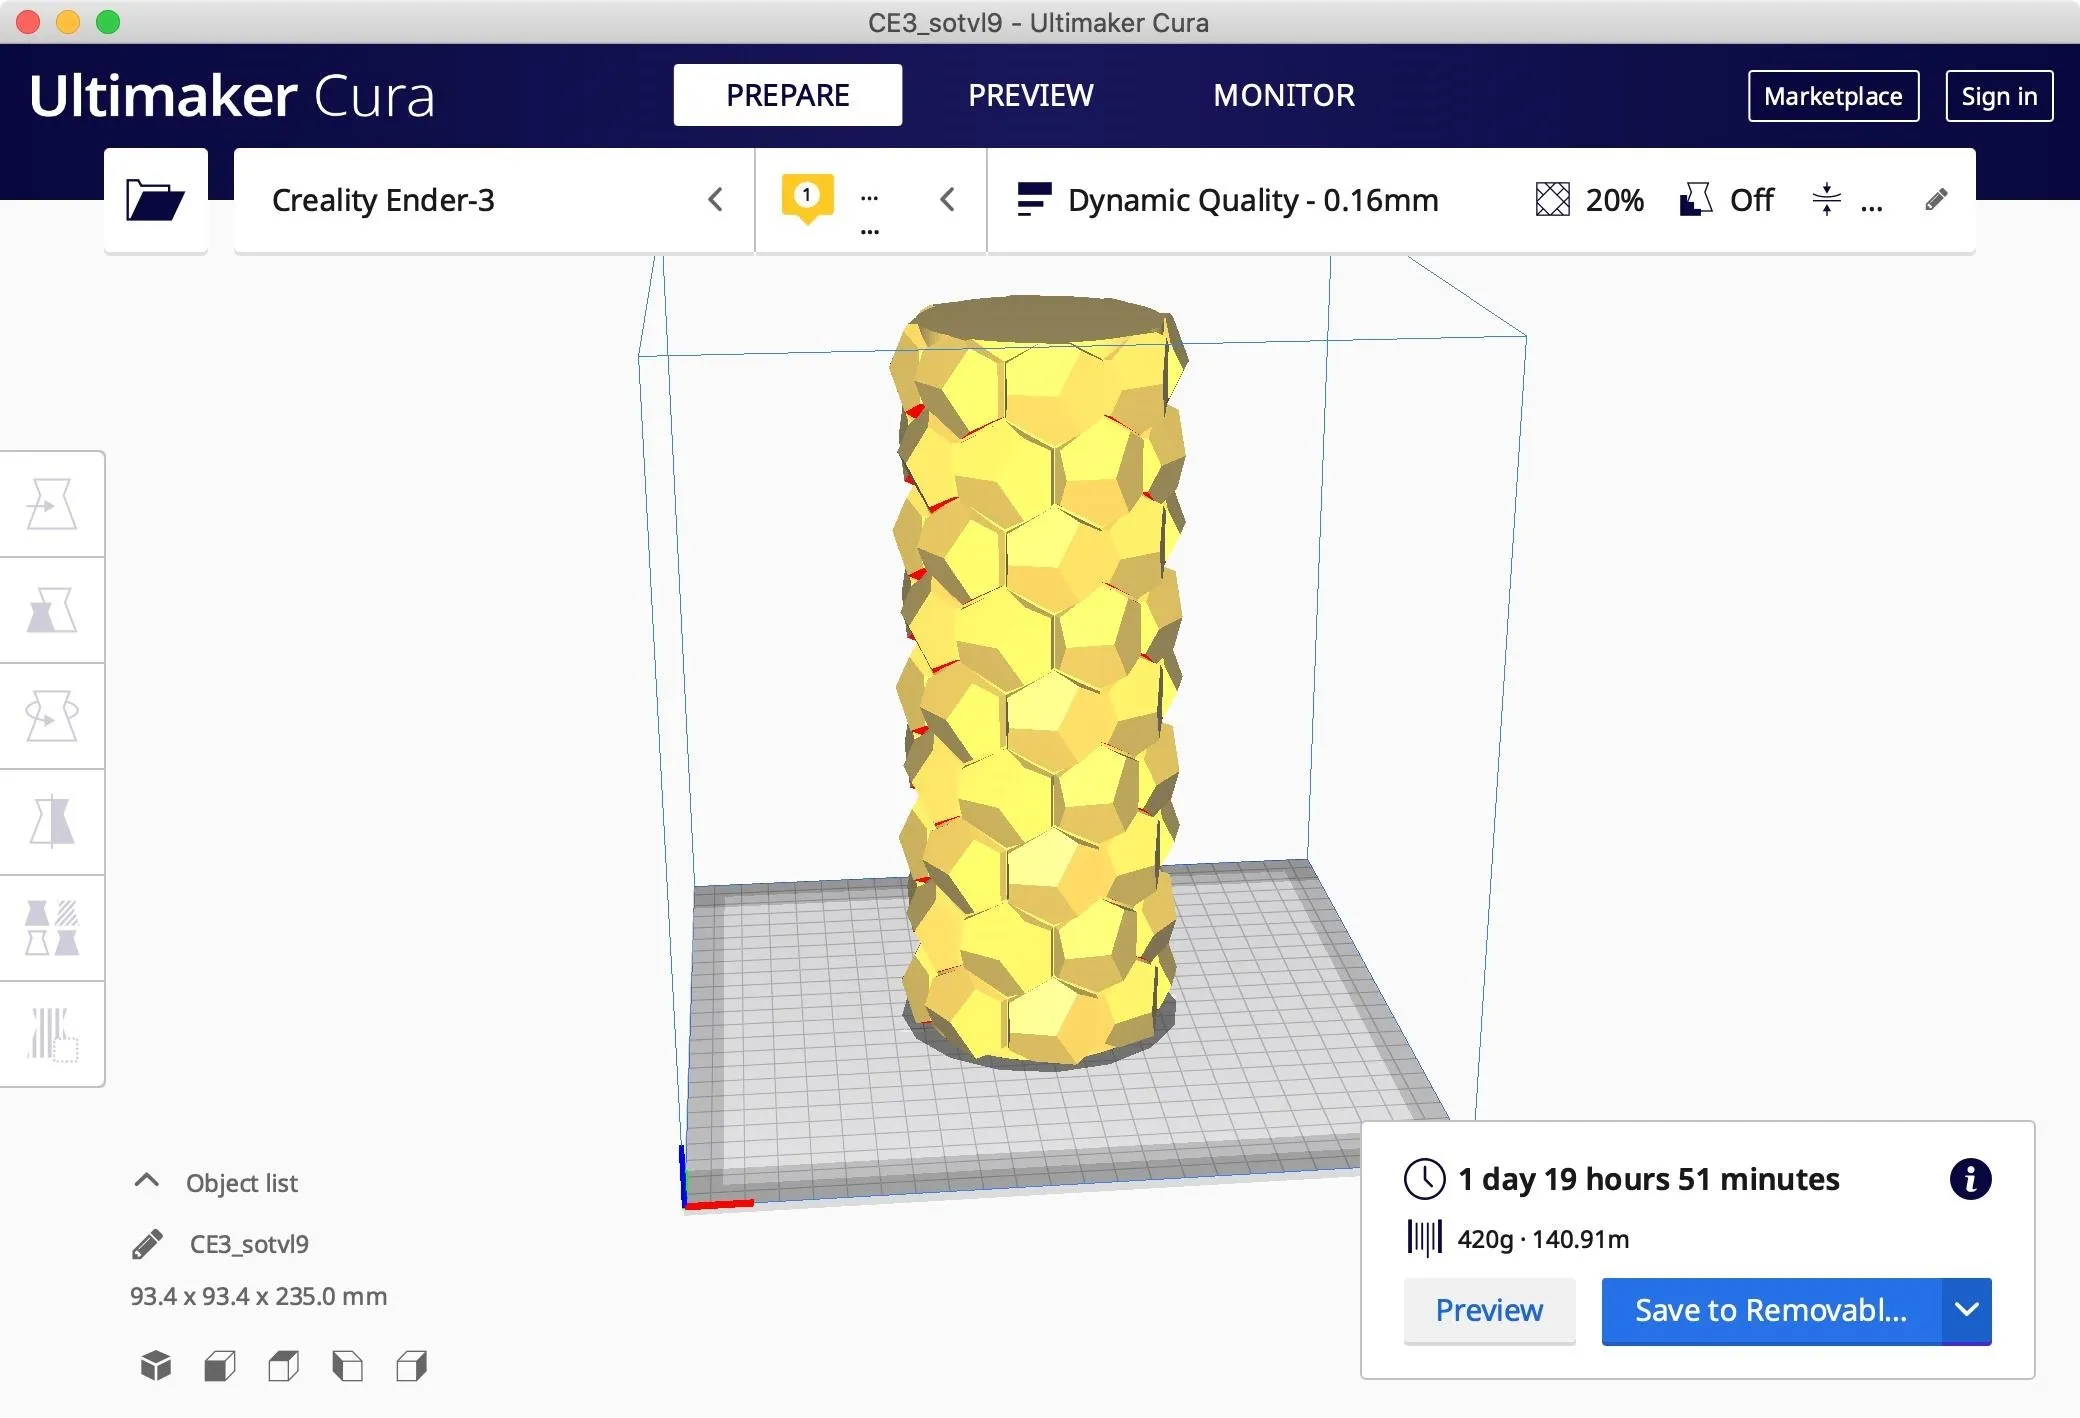
Whoa, that's a long time. That's way too long for my impatience, so I'm going to adjust some other setting to get it to something that can be quicker. I'm just going to make the whole thing smaller since it's a test.
Now, to see how it will do the printing, you can click on "Preview" in the bottom right in the time estimate or in the "Preview" tab up top. You can adjust the sliders on the right side and bottom to see how it'll work. You should also be able to see any supports that will be built.

If you're happy with how things look, save the file with either "Save to Removable Drive" or "Save to File" in the time estimate box. Save it to your microSD card for the printer.
Load Your Model on the SD Card
In the front of the printer, there should be a spot where an SD card goes. Load the G-code on there that you want to print, which should already be done, then put the SD card back in so that the machine can find it.
Print from Your G-Code
On the printer's menu, select "Auto home" again, then go to "Control." Here, you can preheat the bed and nozzle. Now, choose "Print from TF," and select the G-code you put on your card.
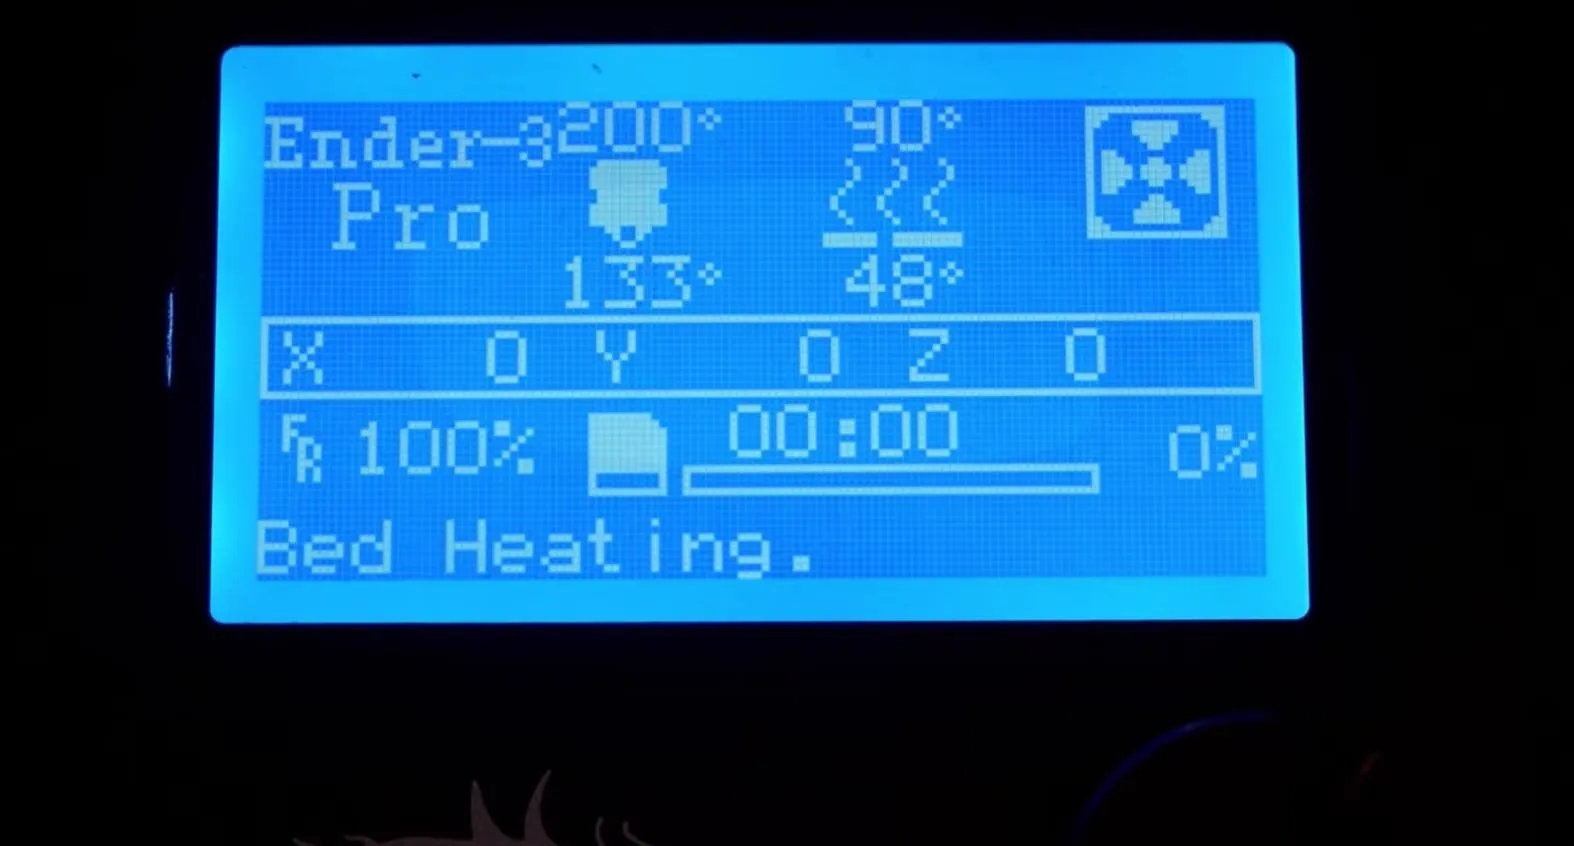
Your printer will heat up the bed first, then the extruder, and then begin printing. If you have problems, try making sure the bed is heated so that the plastic doesn't warp, clean the bed with alcohol, or try painter's blue tape with a thin layer of glue stick for adhesion.
Getting started with 3D printing is easy with printers like the Creality Ender 3 and other cheap open-source printers. Once you find other people's prints on the internet, you can try them out yourself, and then try scaling them and slicing them differently. Eventually, you can move onto doing your own prints.
Now, while this printer is incredibly versatile and can print a multitude of plastics, it doesn't mean it can print everything, so if you need a stronger engineering-style plastic, then you might want to look at a more expensive printer.
Before I sign off, make sure to never set your printer over 240 degrees Celsius or you will release cancerous fumes. Just had to say it.
Cover image and screenshots by Retia/Null Byte


Comments
Be the first, drop a comment!