Yesterday, I wanted to remove BackTrack from my system and install Kali, and at the same time didn't want to damage my Windows 7 or my hard drive. I searched a lot of articles, but almost all of them wanted me to have a backup Windows 7 CD, which I don't possess.
So, I decided to follow some parts of some articles and figure out the rest by myself. I have done this in Windows 7, but I am pretty sure it will work in other Windows operating systems, too.
Today, I will tell you all how to remove BackTrack and replace it with Kali without damaging your hard drive or Windows OS, and you probably won't require a Windows repair disk.
Back Up Files
I am sorry, but you have to back up all your files present in your BackTrack partition. You only have to back up the files present in your BackTrack partition (the space allocated to your BackTrack OS). You don't have to back up your Windows partition files and your additional hard drive files. You can copy your files to a USB, hard drive, etc.
Boot Up Your OS
First of all, let me tell you that you will do everything in your Windows OS. After the BackTrack OS files have been backed up, you don't need to use BackTrack anymore.
Download Kali
You can download Kali from its official website, or from any mirror website.
Install Kali to a USB Drive
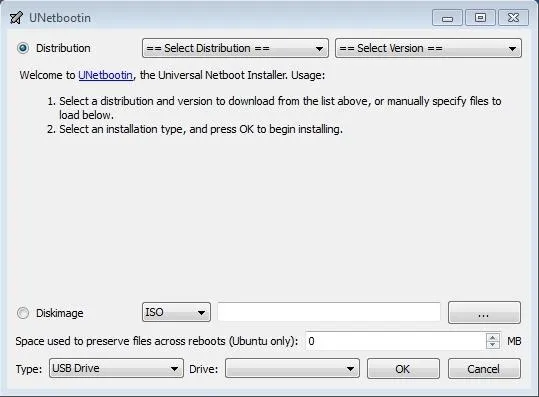
After you have downloaded the ISO file of Kali, you have to download UNetbootin (used for creating live OS and OS installers). You can download UNetbootin from SourceForge.

After you have downloaded UNetbootin, insert a USB/DVD and start UNetbootin. In the program, select diskimage, enter the location of your Kali ISO file, select your USB drive or DVD drive and select OK.
Empty BackTrack Partition & Delete BackTrack
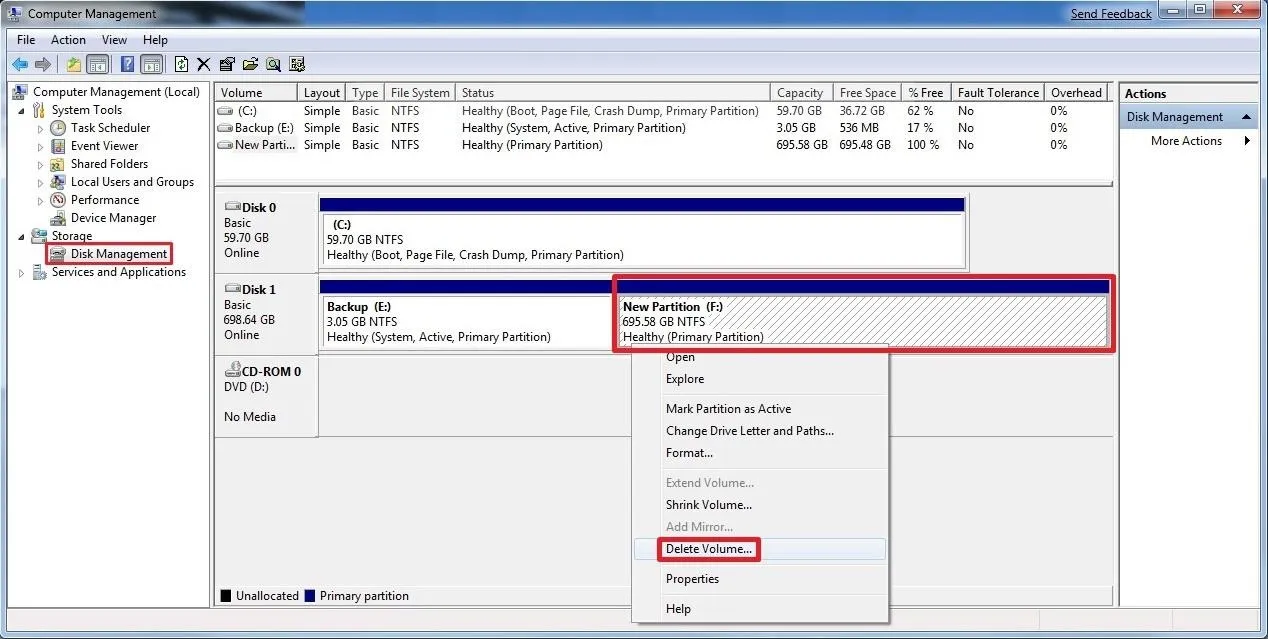
Now press the Windows+R button, which will open the Run window. In the Run window, type diskmgmt.msc, and press Enter. Then, in the middle pane, right-click on the partition of a disk that you want to delete, and click/tap on Delete Volume (see screenshot below).

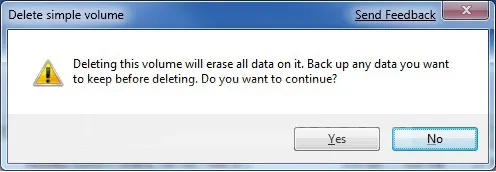
Now click on Yes to delete (see screenshot below).

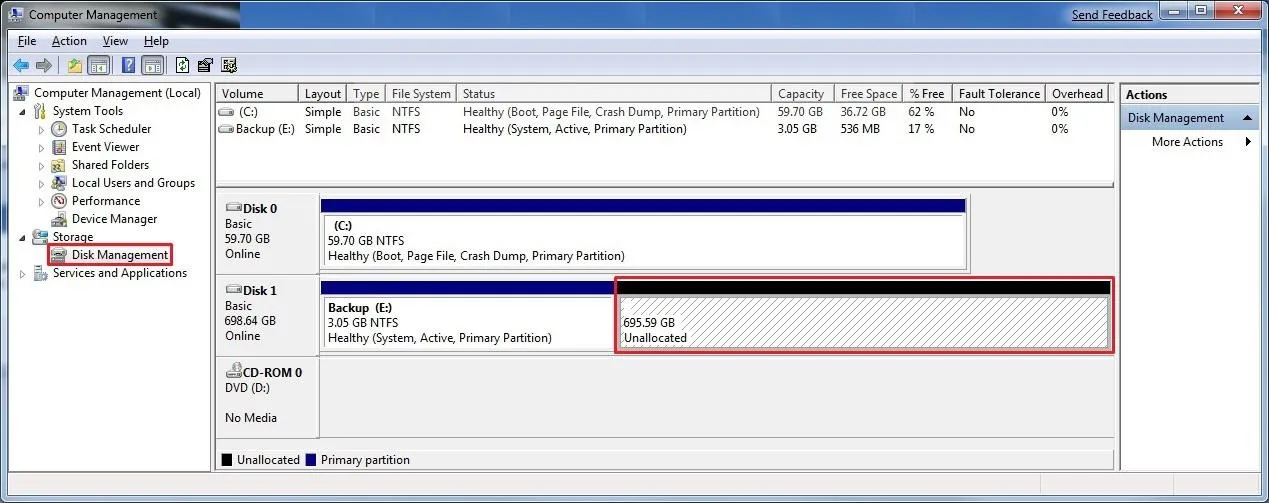
The selected partition should now be deleted and now unallocated space. If it's not, you'll have to delete the partition again until it displays as unallocated space (see screenshot below).

Install Kali to Your Computer
When you have completed Step 5, reboot your computer, and when you are in BIOS, press F2/F12 (or any other key in your case) which will make you go to boot options.
In the boot options, move to your USB and press Enter. Then in the UNetbootin menu, click on Install, after which you will be guided to the Kali installation process. Select the options you think will meet your requirements the best.
During the installation process, when you are asked where you want to put Kali, you can select the previous BackTrack partition (which will be a drive labeled with free/empty space). Now you should successfully install Kali without any problems , and without damaging your hard drive or Windows OS.
Friends in the coming future, I will share hacks and information about Kali with you. Until then, adios.


Comments
Be the first, drop a comment!