Fireworks are the best part about the Fourth of July and other celebrations, but they can easily cause accidental injuries. It's both safer and more fun to set them off remotely, so we'll hack some standard fireworks with nichrome wire, a relay, and an Arduino to ignite remotely over Wi-Fi using any smartphone or computer.
Why Launch Fireworks Remotely?
While fireworks are a lot of fun, they can also pose a real danger if they go off too early or in an unexpected fashion. By lighting fireworks remotely, a misfire shouldn't have any severe consequences aside from damaging your alligator clips or an inexpensive microcontroller.
Besides being safer to launch, remotely setting off fireworks allows anyone with a Wi-Fi-enabled device to take part in the launch without needing to be close enough to injure themselves. Even tiny children can tap on a tablet to set off massive fireworks, and the risk of messing things up would be merely inconvenient.
Finally, launching fireworks remotely also allows us to automate the launch by writing programs to do the firing for us. That means we can time when we want a firework to go off precisely or coordinate the launch for groups of different fireworks to create unique patterns and effects.
- Don't Miss: A Hacker's Guide to Programming Microcontrollers
While the process of modifying fireworks to launch electrically does come with some risks, such as measuring the connectivity and working with voltage, it also makes the process of launching fireworks more automated and less prone to error. While it's not faster due to the time needed to load a firework and test the conductivity, it does allow more control and flexibility with the type of firework used and their placement.
How Do We Launch Fireworks Remotely?
A relay works like a light switch that's controlled by turning a magnet on and off. When we power the electromagnet, a metal switch inside is attracted and flips, connecting the circuit. It's useful because we can switch a large power source used to heat our nichrome coil with a small, safe power supply to turn the relay on and off.
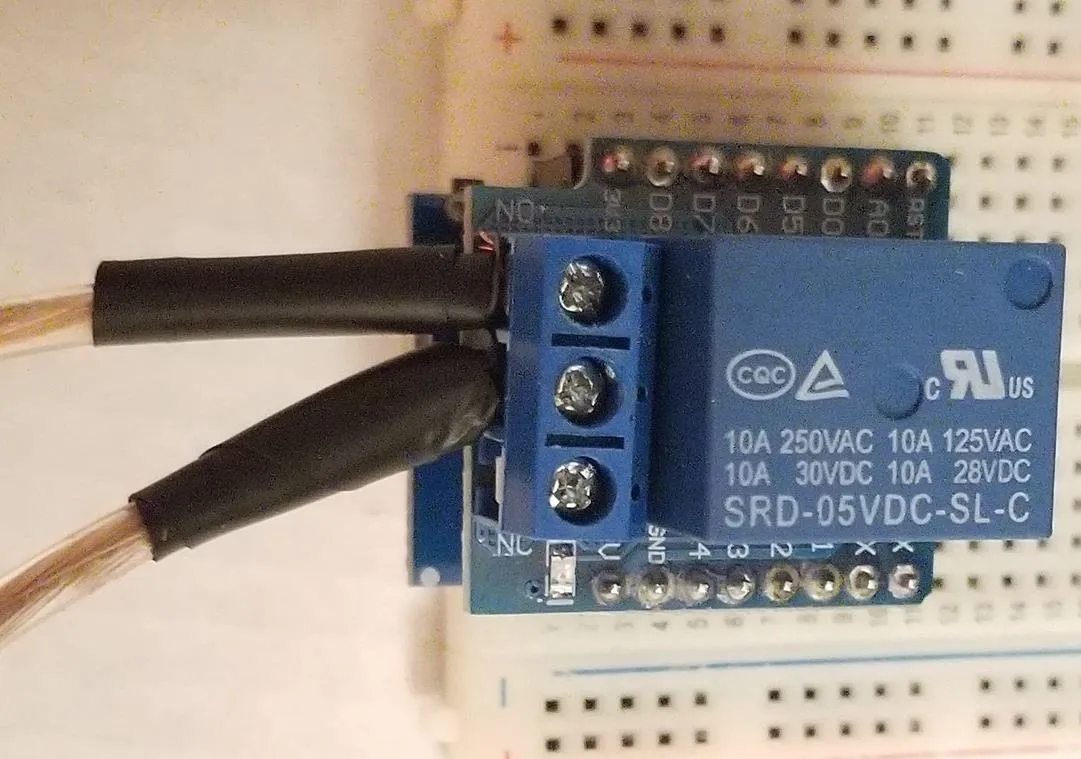
Kody/Null Byte
To get distance between us and the firework to be launched, there are a variety of different options to consider.
First, we could have a pair of very long wires run from our relay to some nichrome wire coiled around the fuse of the firework. We connect one of the long wires to the ground of the battery and the other cable to the normally disconnected terminal on the relay. With this simple setup, we can use the relay to switch on and off the current and manually trigger the battery power to make the nichrome wire hot and ignite the fuse.
A second option involving less wire is to use an ESP8266 to control the relay for us. After connecting an ESP8266-based board like the D1 Mini to a relay, we can create a Wi-Fi access point that lets us switch the relay on and off when we join it. Even better, we can script these actions by using a CURL request to quickly trigger pins on the D1 Mini, allowing us to control the relay automatically with a program.
What Do You Need for This Project?
To follow this guide, you will need the following:
- ESP8266 (preferably a D1 Mini)
- Micro-USB cable
- small relay (preferably a D1 Mini Relay Shield)
- breadboard
- breadboard jumper wires (if necessary)
- 9-volt battery
- jumper wires with alligator clips (at least three sets)
- wire (if alligator clips wire isn't long enough)
- 32-gauge nichrome wire
- aluminum tape
- electrical tape
- digital multimeter
- two ¼ bolts and ¼ nuts (optional, to create launcher contacts)
These supplies will give us everything we need to build a circuit that gets hot when we pass current through it. Using the aluminum tape and the nichrome wire, we'll be modifying fireworks to heat up and burn.
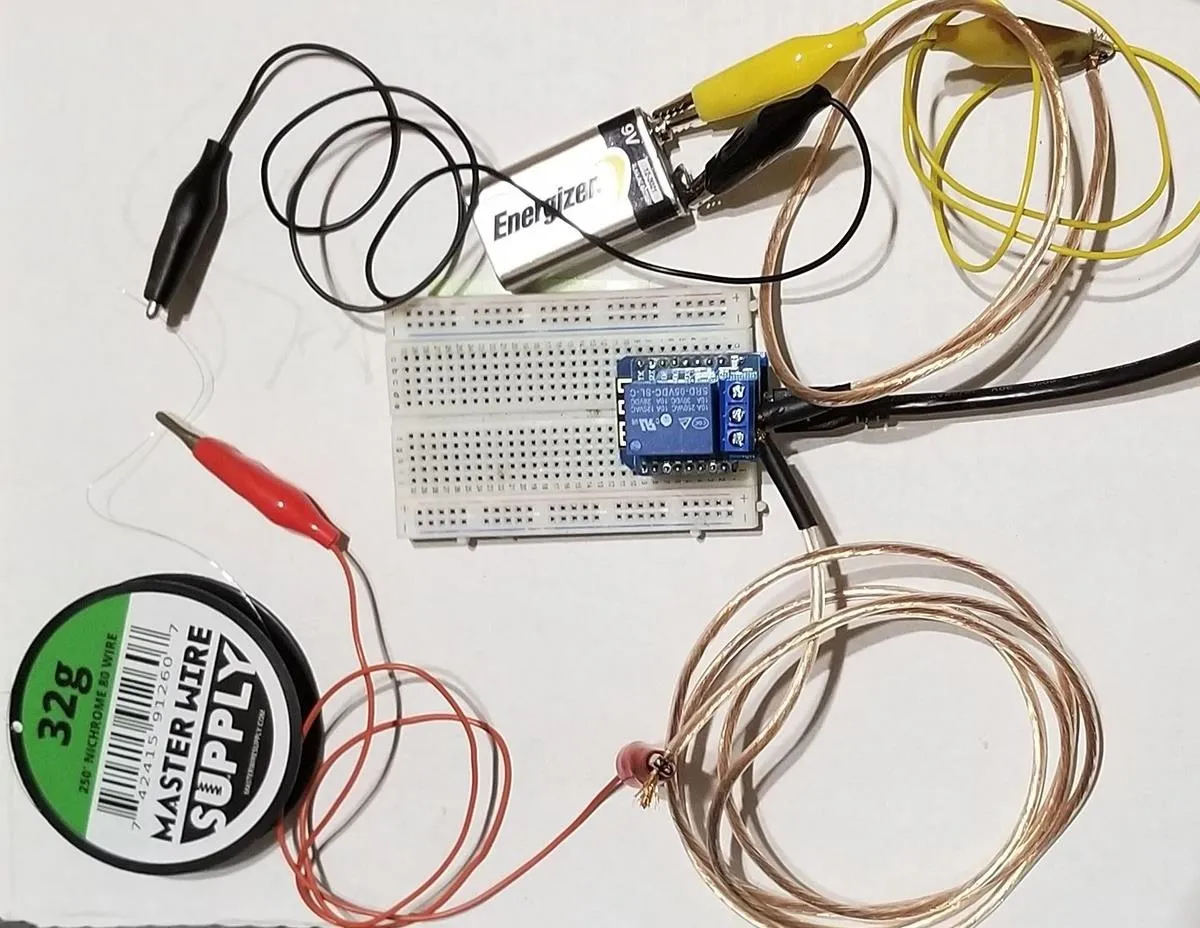
Kody/Null Byte
Connect the ESP8266 & the Relay
First, download the code for the project, available from my GitHub, by opening a terminal window and running the following commands.
~$ git clone https://github.com/skickar/AirduinoFireworks.git
~$ cd AirduinoFireworks
Now, you should have the sketch for controlling the ESP8266, as well as the firing bash script.
Next, connect the ESP8266 and the relay. You should have the pin on the ESP8266 you're going to use to control the firework, in this case, pin D1, connected to the D1 pin of the relay. If you are using a shield, you can drop the relay directly on top of the ESP8266, as shown below.
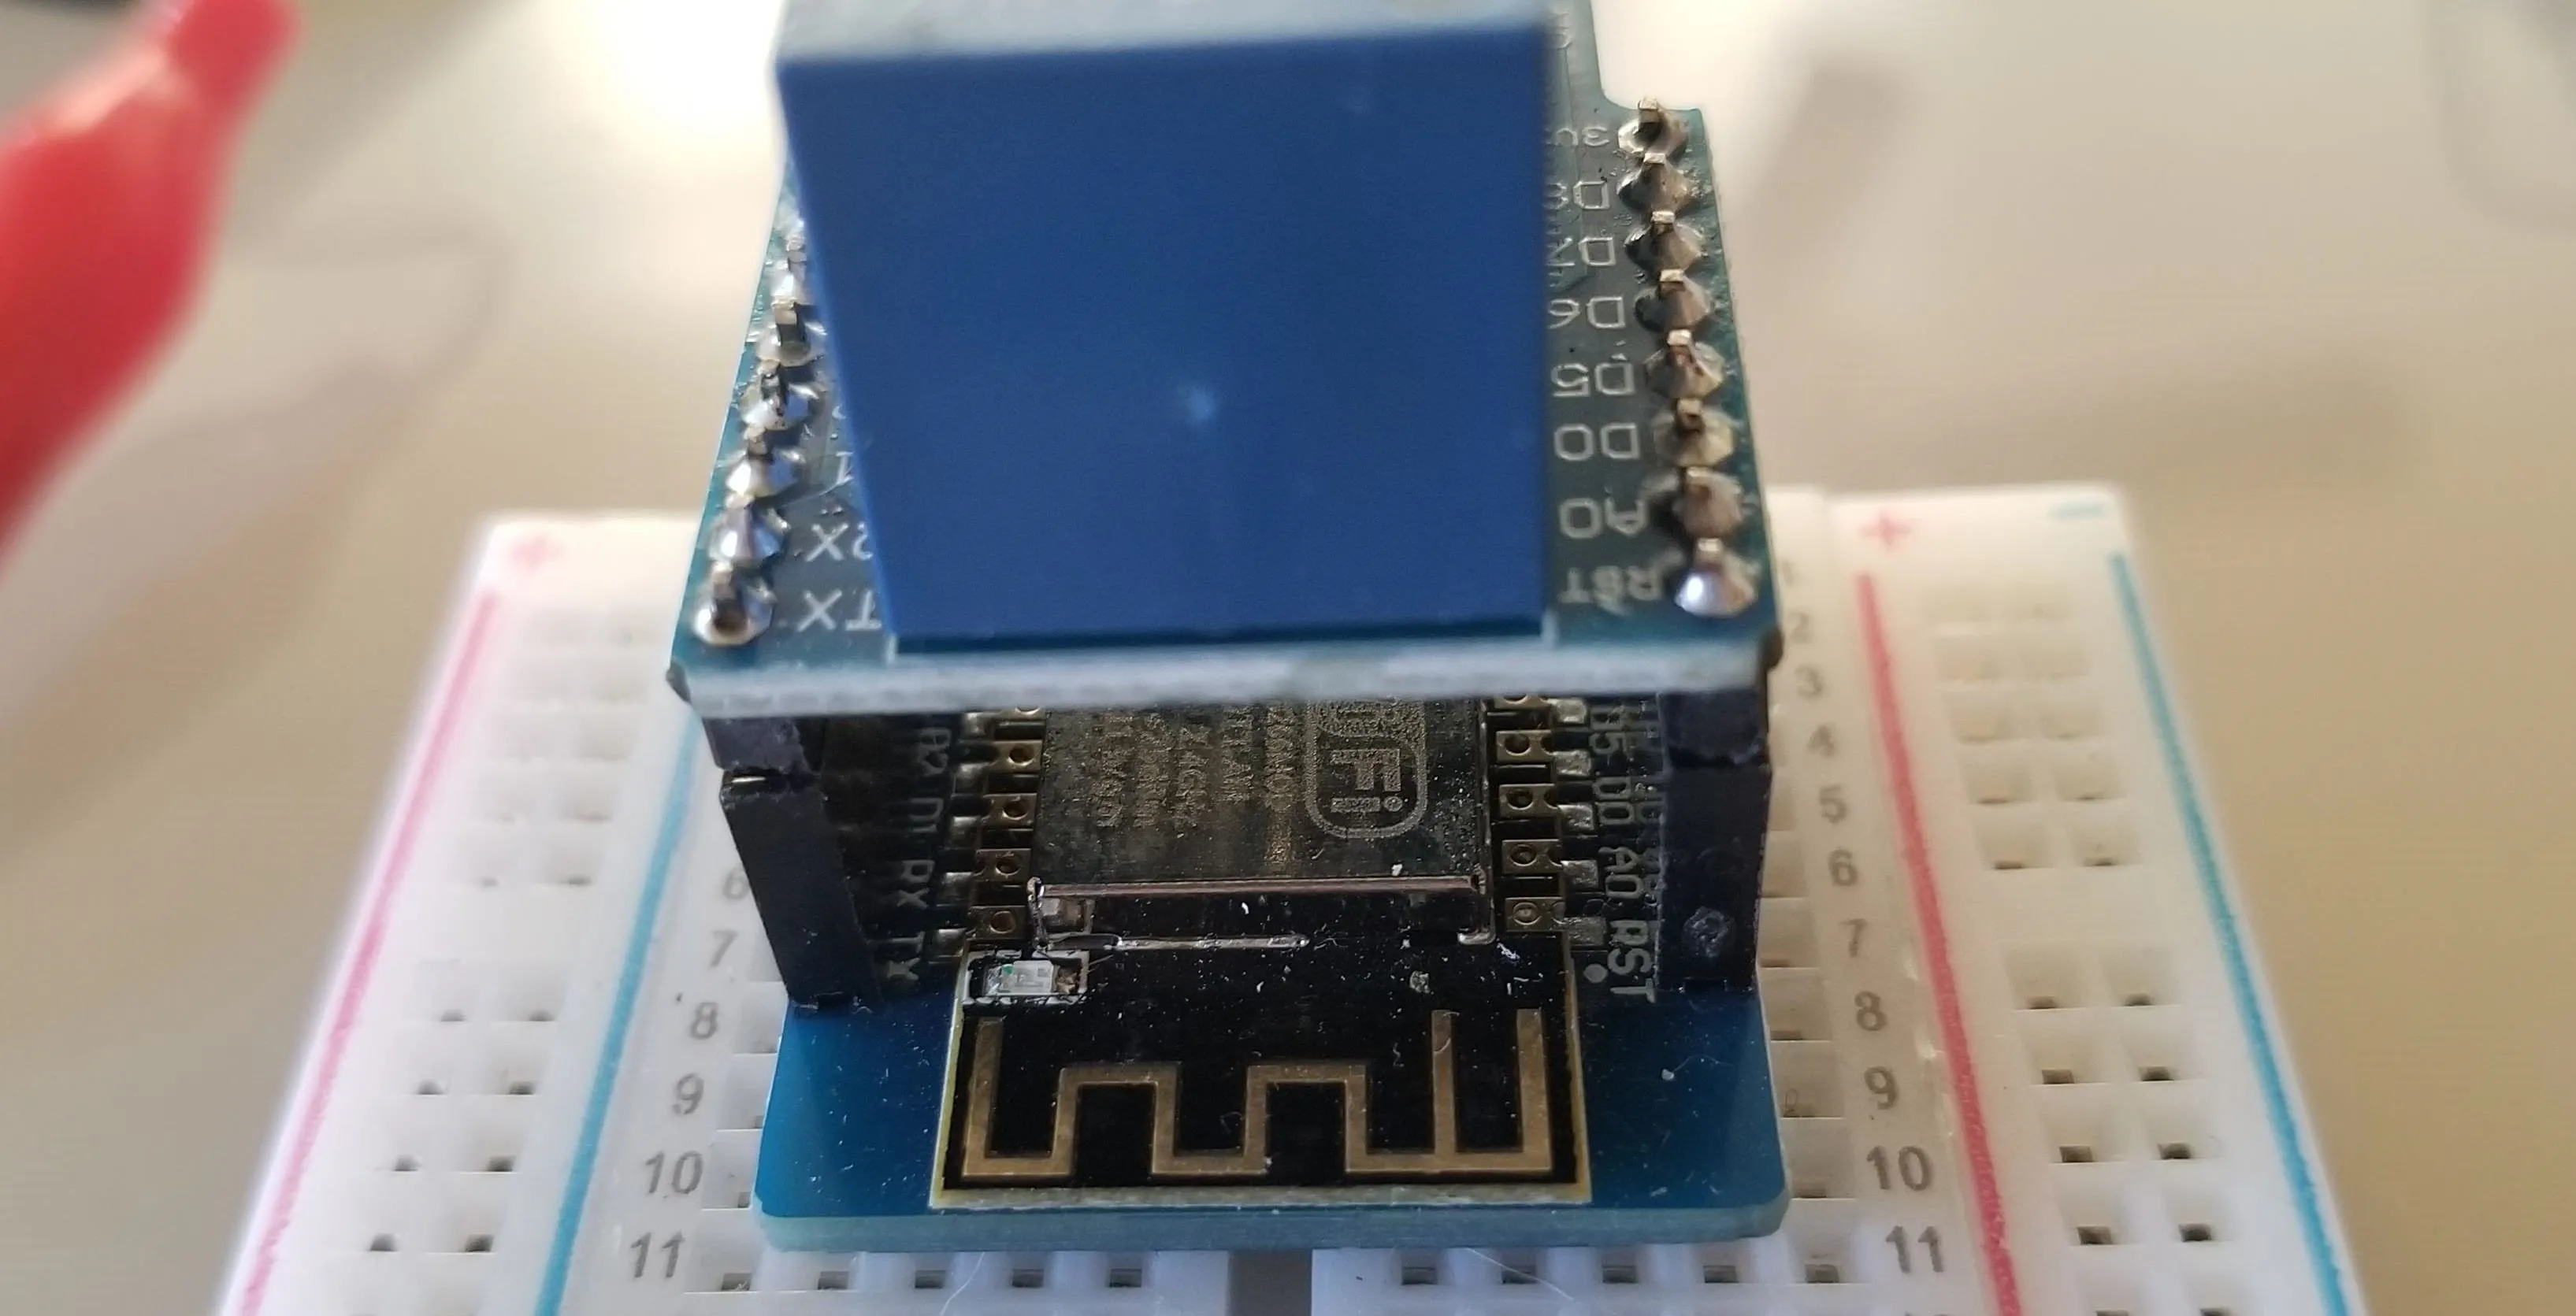
Kody/Null Byte
If you do not have a shield, you will need to connect the 5-volt pin of the ESP8266 to the 5-volt pin of the relay, and the ground pin of the ESP8266 to the ground pin of the relay. After that, you can connect pin D1 to the D1 pin on the relay, as shown below.
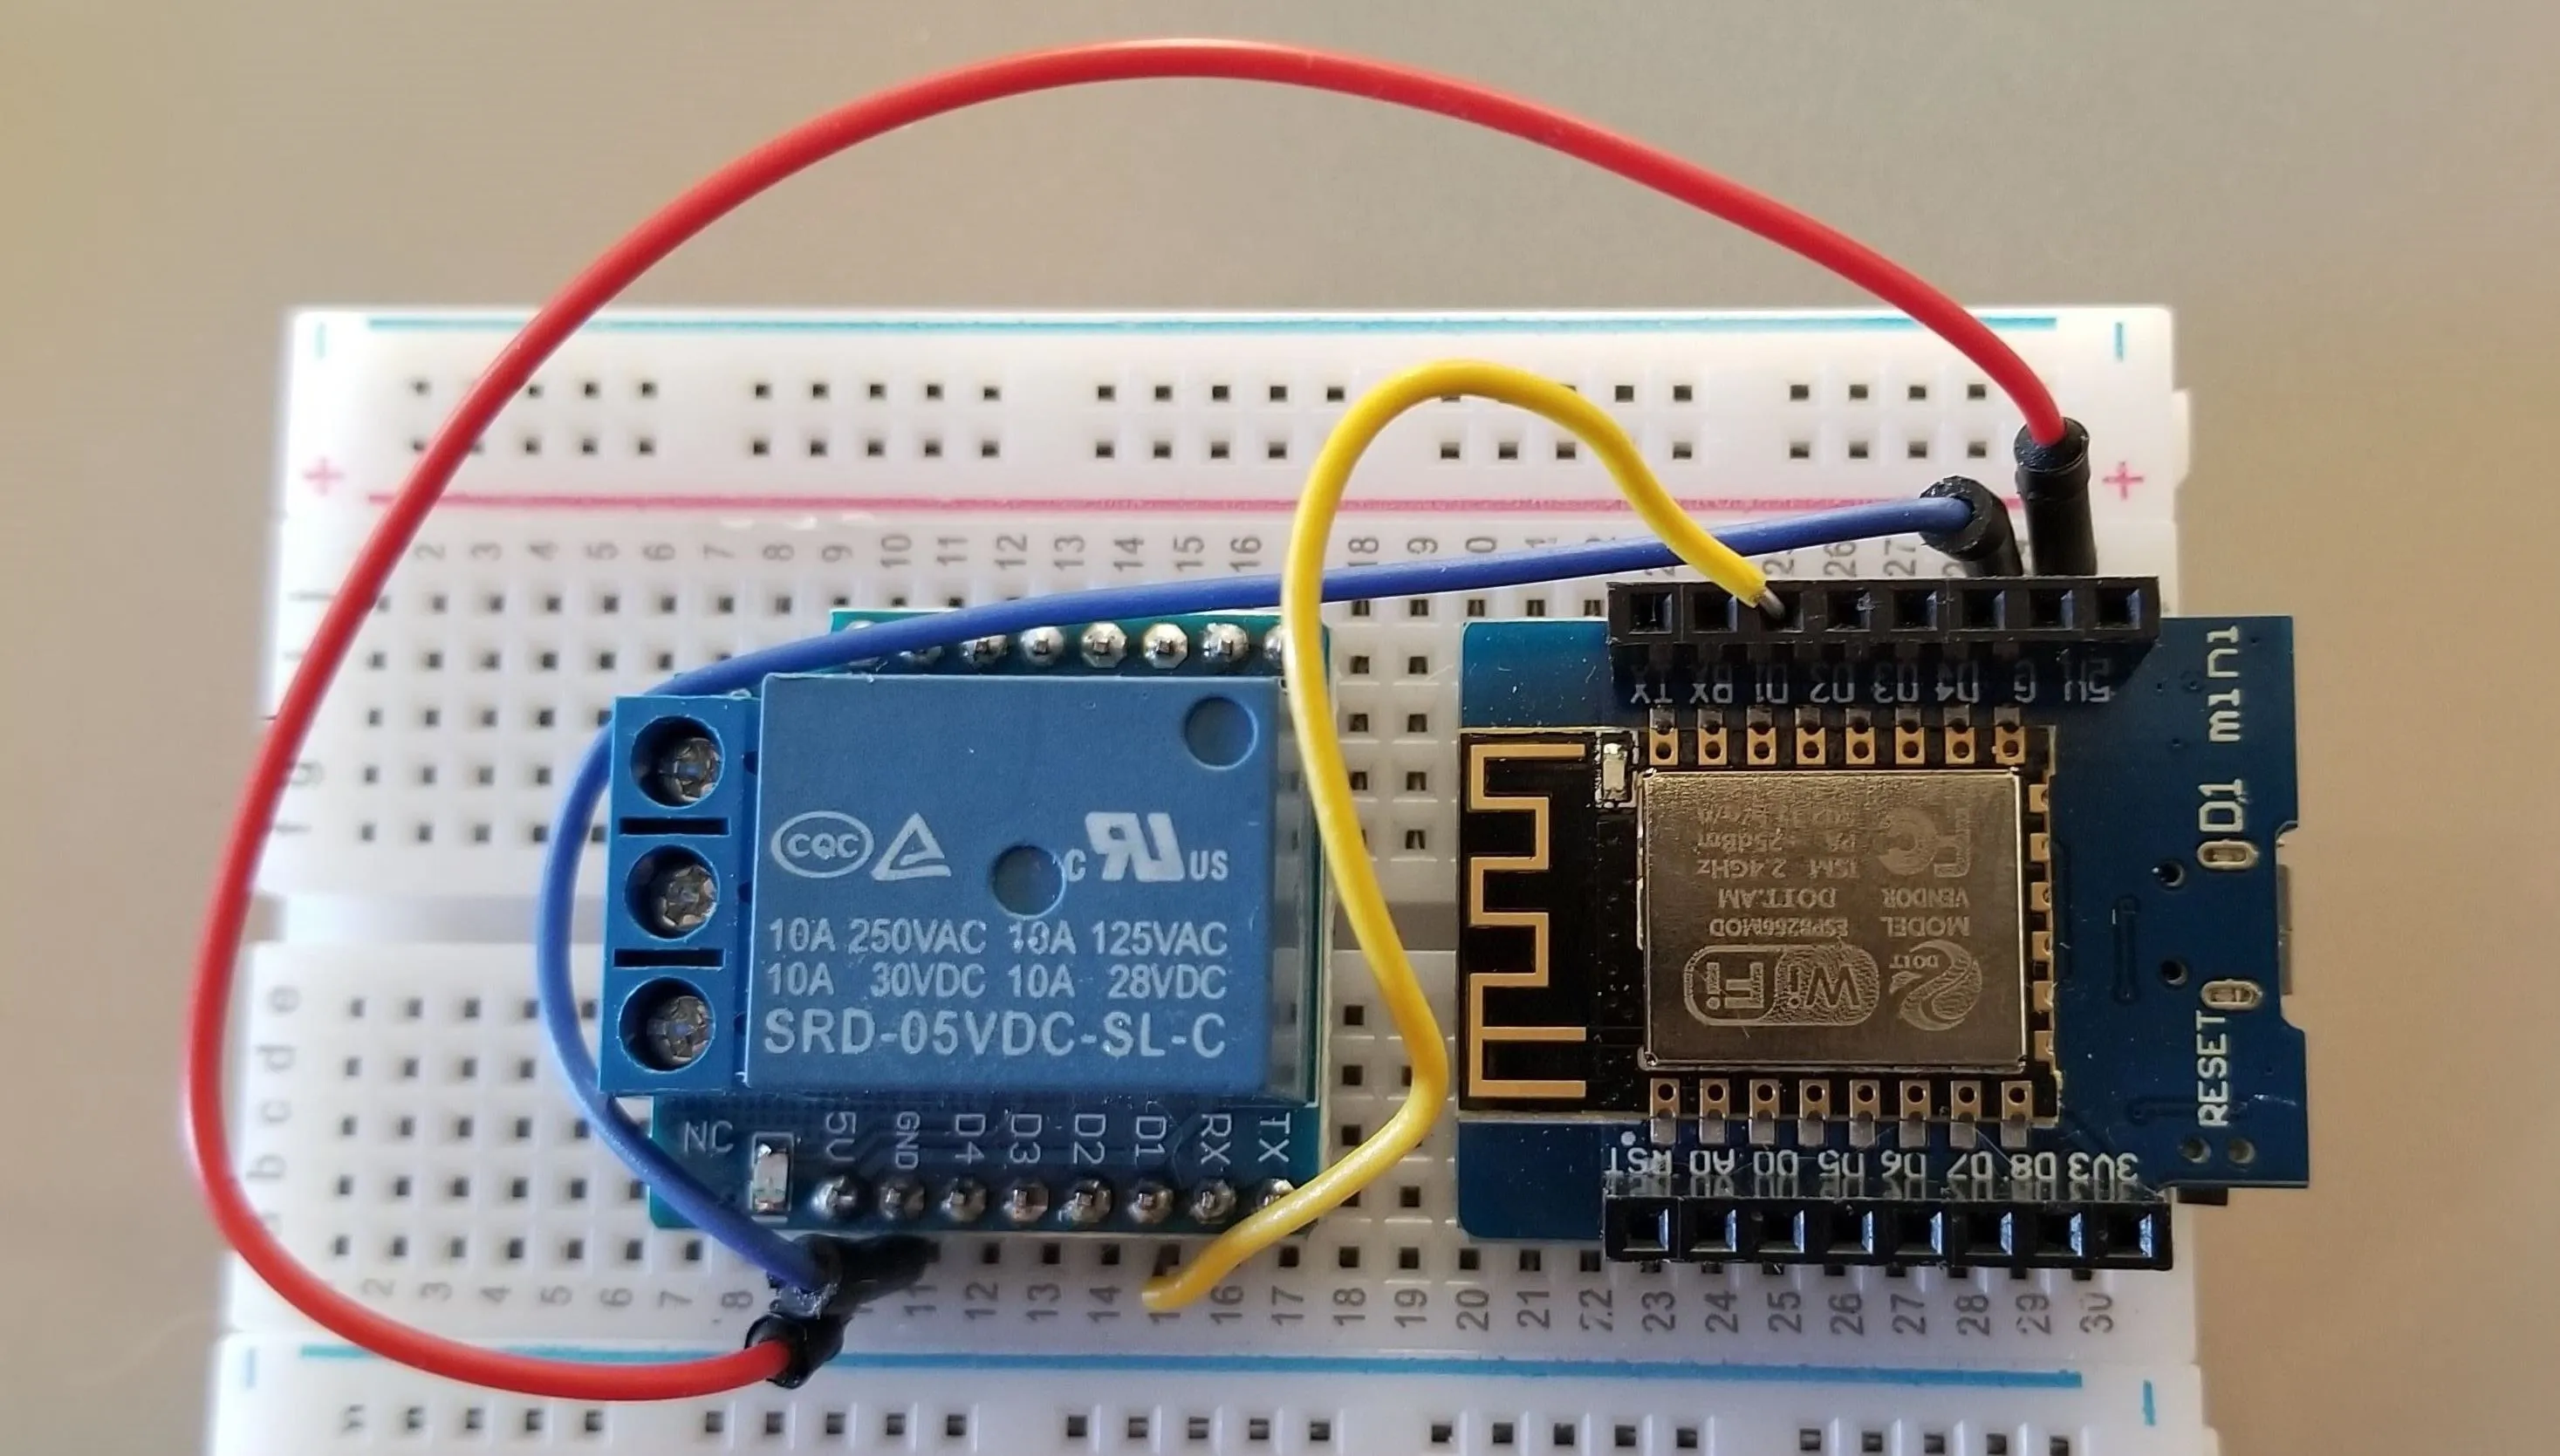
Kody/Null Byte
Access Your Board in Arduino IDE
Next, plug in the ESP8266 via a Micro-USB cable to your computer. In the Arduino IDE, which you can install from Arduino's site, you'll need to select the correct ESP8266 board from the "Tools" list for what you're using, which may not be possible right away.
If you don't see your board under Tools –> Board, in the Arduino IDE's "Preferences" menu, click on the "Additional Board Manager URLs" field and paste in the following address.
http://arduino.esp8266.com/stable/package_esp8266com_index.jsonOnce that's done, you should be able to select ESP8266-based boards in Arduino IDE from Tools –> Board.
Flash the Code to the ESP8266
In Arduino IDE, open the "AirduinoFireworks.ino" sketch that you downloaded from GitHub in Step 1. You should see the following code.
/*
  This a simple example of the aREST Library for the ESP8266 WiFi chip.
  See the README file for more details.

  Written in 2015 by Marco Schwartz under a GPL license.
*/

// Import required libraries
#include <ESP8266WiFi.h>
#include <aREST.h>

// Create aREST instance
aREST rest = aREST();

// WiFi parameters
const char* ssid = "Fudruckers";
const char* password = "00000000";

// The port to listen for incoming TCP connections
#define LISTEN_PORT           80

// Create an instance of the server
WiFiServer server(LISTEN_PORT);

// Variables to be exposed to the API
int temperature;
int humidity;

// Declare functions to be exposed to the API
int ledControl(String command);

void setup(void)
{
  // Start Serial
  Serial.begin(115200);

  // Init variables and expose them to REST API
  temperature = 24;
  humidity = 40;
  rest.variable("temperature",&temperature);
  rest.variable("humidity",&humidity);

  // Function to be exposed
  rest.function("led",ledControl);

  // Give name & ID to the device (ID should be 6 characters long)
  rest.set_id("1");
  rest.set_name("esp8266");

  // Setup WiFi network
  WiFi.softAP(ssid, password);
  Serial.println("");
  Serial.println("WiFi created");

  // Start the server
  server.begin();
  Serial.println("Server started");

  // Print the IP address
  IPAddress myIP = WiFi.softAPIP();
  Serial.print("AP IP address: ");
  Serial.println(myIP);
}

void loop() {

  // Handle REST calls
  WiFiClient client = server.available();
  if (!client) {
    return;
  }
  while(!client.available()){
    delay(1);
  }
  rest.handle(client);

}

// Custom function accessible by the API
int ledControl(String command) {

  // Get state from command
  int state = command.toInt();

  digitalWrite(6,state);
  return 1;
}
The code will create a Wi-Fi hotspot and allow you to send web requests to control the pins of the ESP8266 board. Click the right-arrow upload button to push the code to the ESP8266, and wait for it to finish. When it completes, we should be ready to test our relay control.
Connect to the Wi-Fi Relay Control Network
On the computer that you want to control the firing from, connect to the Wi-Fi firework control network called "Fudruckers," and enter the password 00000000 when prompted. After joining, verify you're on the correct network. At this point, we need to test to make sure the relay is functioning as expected. We'll use the automated firing program to send web requests that will test-fire the relay.
Run the firing.sh Script
In a terminal window on your computer, run the firing script to test the relay. Navigate to the folder the "firing.sh" script is in, which was downloaded in Step 1 from GitHub, and run it using the following command. If it's working, you'll hear a click when the relay turns on and off after a few seconds.
~$ bash firing.sh

{"message": "Pin D1 set to 1", "id": "1", "name": "esp8266", "hardware": "esp8266", "connected": true}
{"message": "Pin D1 set to 1", "id": "1", "name": "esp8266", "hardware": "esp8266", "connected": true}
{"message": "Pin D1 set to 0", "id": "1", "name": "esp8266", "hardware": "esp8266", "connected": true}
If this works, we're ready to connect the wires and start our live test.
Connect Two Wires to the Relay
Now, on the relay, screw in wires to the middle terminal, also known as the common terminal, and the normally open (marked NO) terminal. There will be no connection between these two until we trigger the relay.
Once they are connected, wrap the ends with electrical tape to make sure they don't accidentally touch each other. We'll be connecting the wire attached to the middle (common) terminal to the positive side of the battery later, and the wire attached to the NO terminal to the nichrome wire.

Kody/Null Byte
Half Wrap the Firework with Aluminum Tape
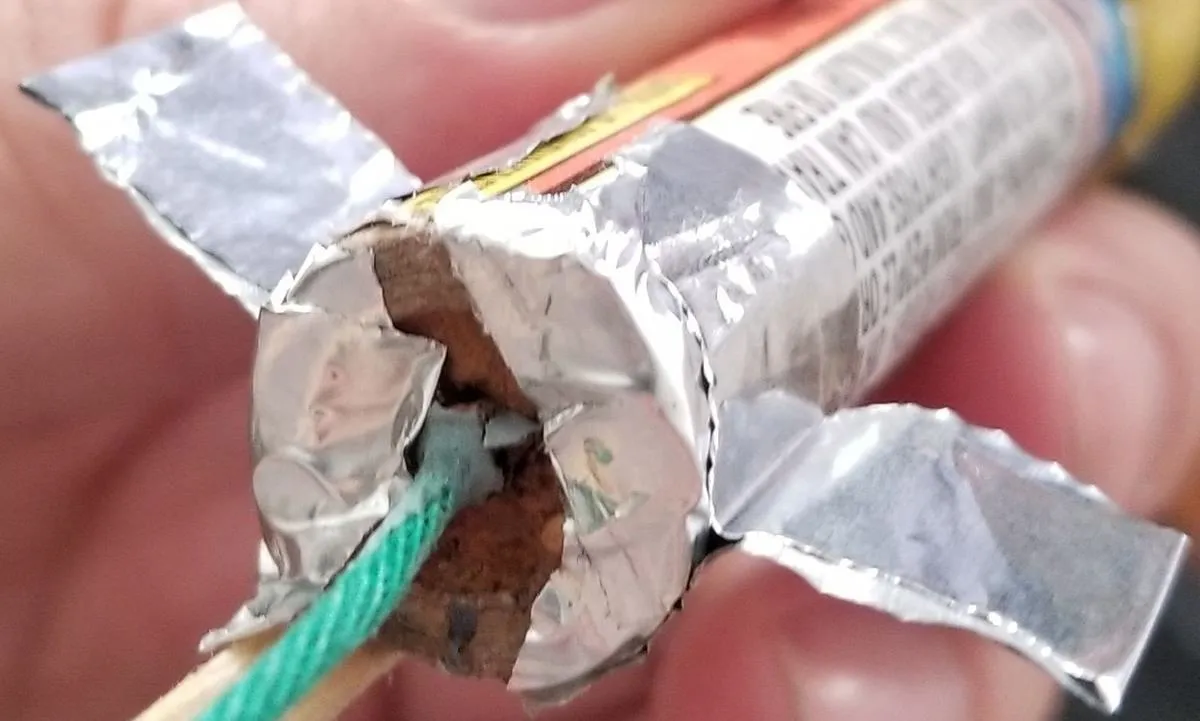
Where the fuse is, wrap one half of the bottom of the firework in aluminum tape, making sure not to cross over onto the other half. Then, making sure no part of the first aluminum half is touching, wrap the other side of the firework's bottom by the fuse in tape while leaving a line of no tape dividing them.
You can also add tabs here for stability, for when it stands upright, by pinching some aluminum tape and sticking it to each of the halves. Before adding the nichrome wire, test the connection by touching the multimeter to both halves. No electricity should flow between the two sides.
Kody/Null Byte
Cut & Mount the Nichrome Wire
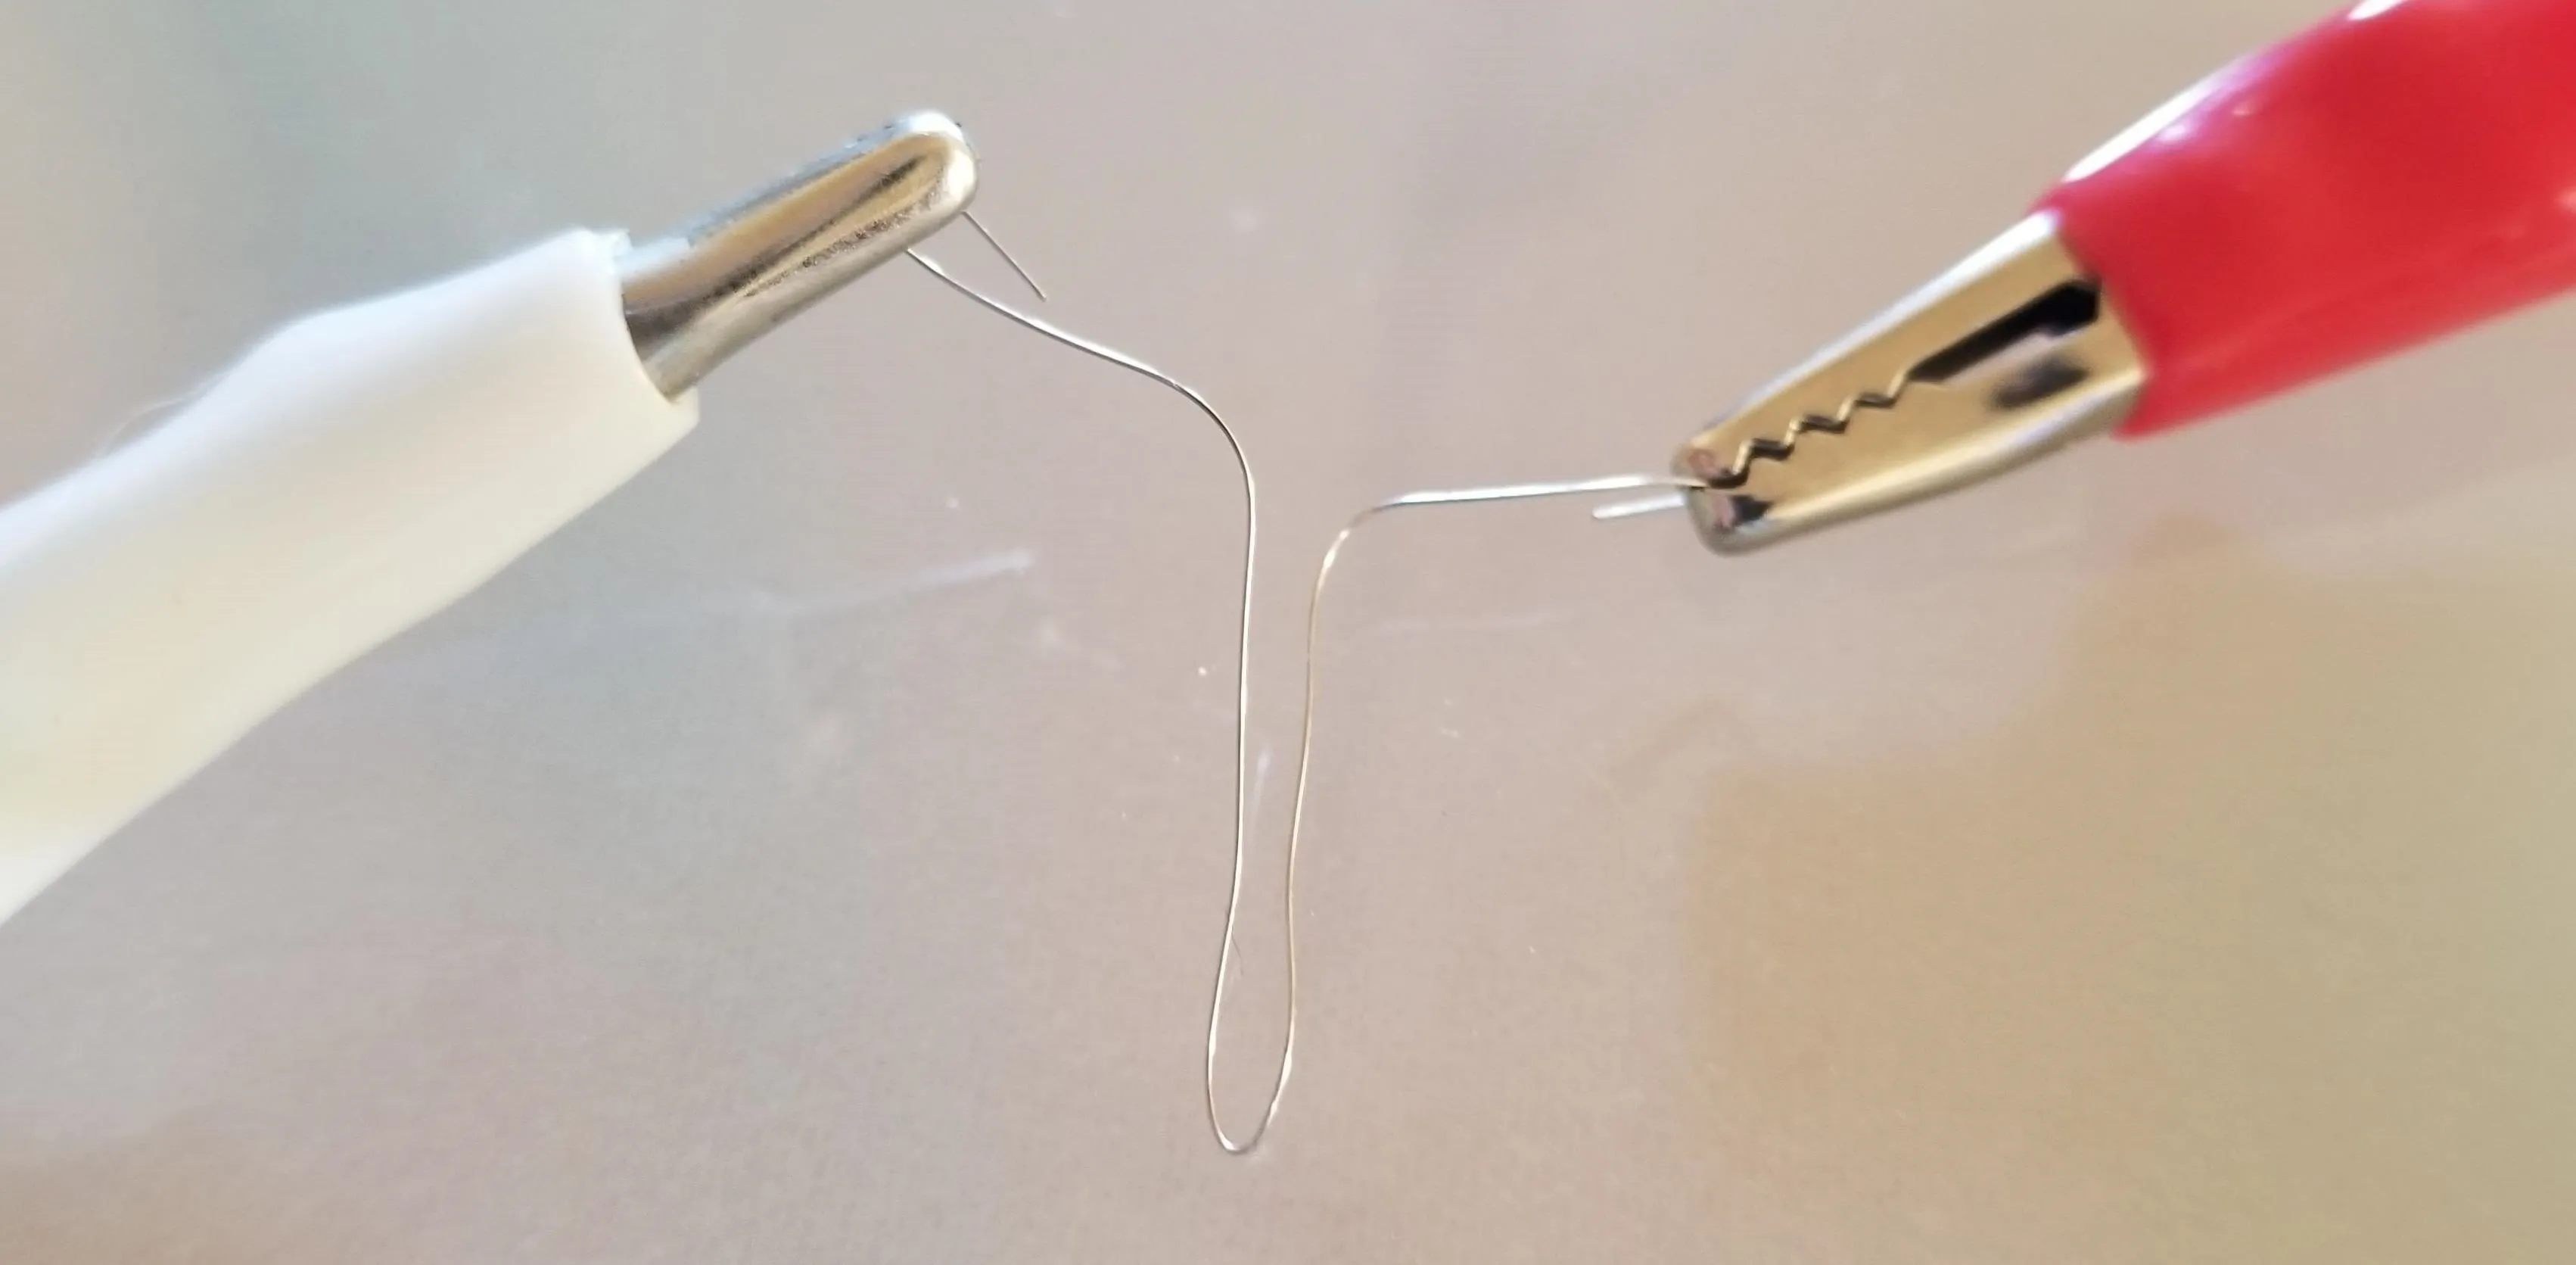
Cut a length of nichrome wire, and then fold it into a "V" shape. Bend the top part of the V shape out to look like below. If you're using thicker wire than 36 gauge, try wrapping a tiny amount around the fuse instead.
Kody/Null Byte
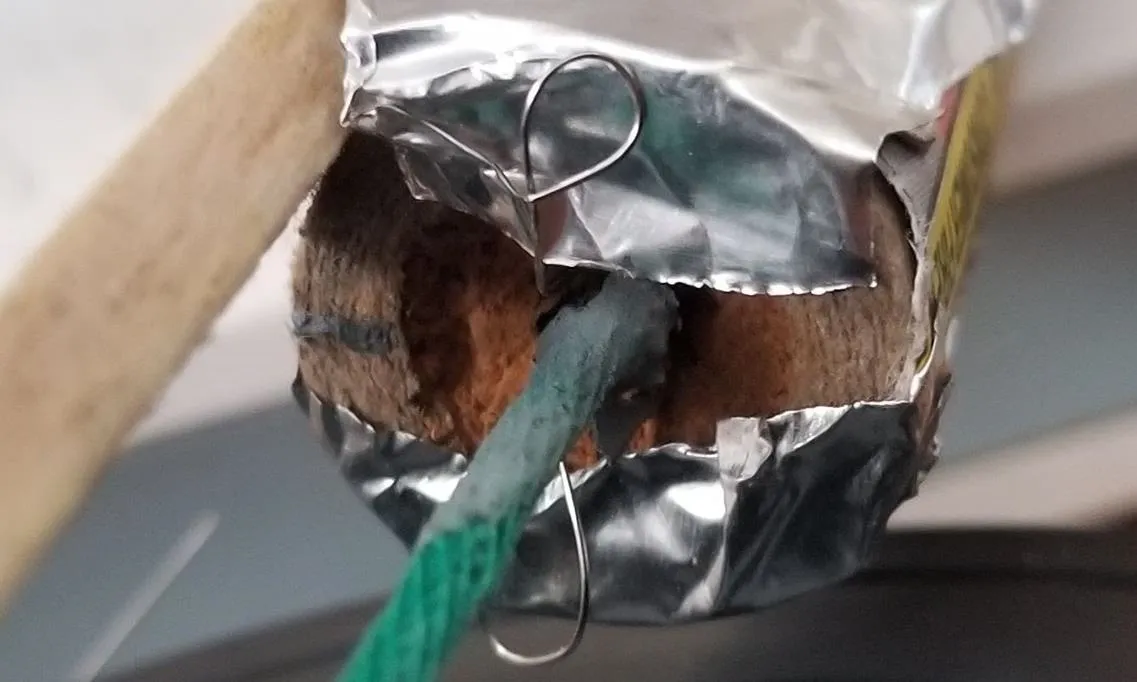
Now, put the bottom part of the "V" into where the fuse fits inside the firework.
Kody/Null Byte
Finally, tape down the nichrome wire to the firework, bridging the gap between the two aluminum sides. Use more aluminum tape to do so. Make sure that the aluminum tape doesn't bridge the space between the two halves — only the nichrome wire will do that.
Now, it's time to measure the connection between each half of foil — but take the firework outside before doing so. Measuring passes some current through the circuit, and while very unlikely, there is a non-zero chance it could go off.
Test the Connection & Mount the Firework
Place the firework in an area where it is secure and away from anything that could cause a fire. Make sure to support the base of whatever you are using to launch it well.
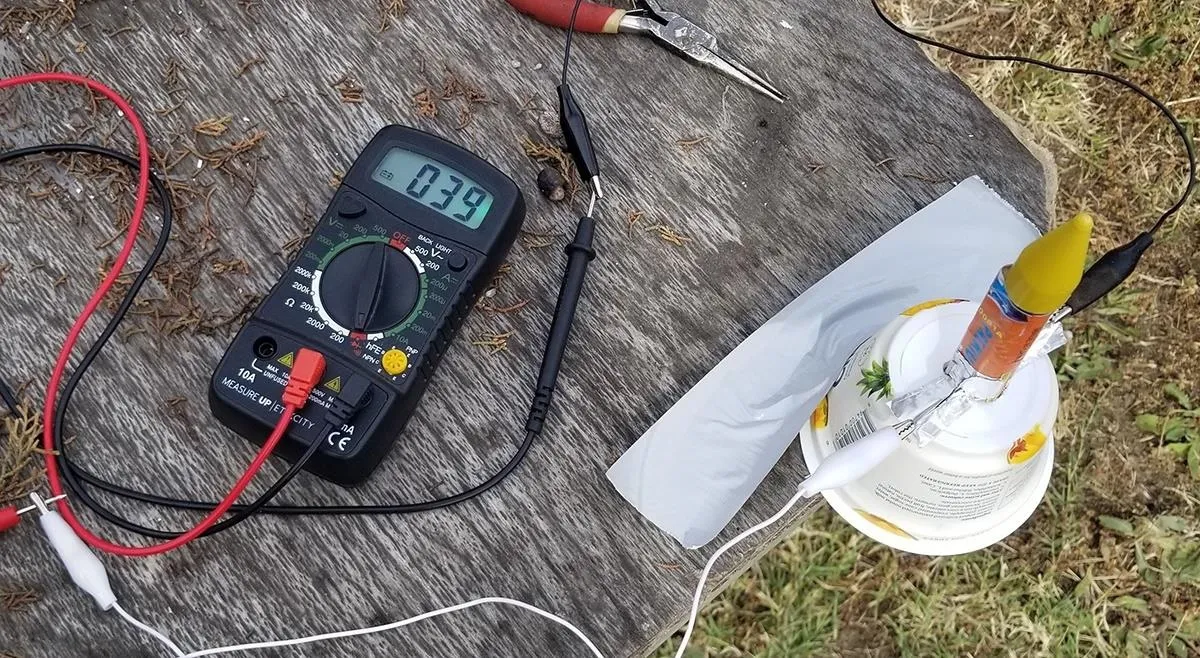
When the firework is secure, take your multimeter and test the continuity between either side of the firework using alligator clips. If electricity can pass from one side to the other through the nichrome bridge wire, then we're ready to launch.
Kody/Null Byte
If you see a "1" on the multimeter, the current is not going through. Try adding more aluminum tape with a small pad facing backward, as the adhesive that sticks the tape isn't very conductive and can block the connection.
When you have a consistently positive result, we can go into the final launch steps if you are launching a fountain or roman candle type firework.
If your firework is launching out of the tube like a mortar or rocket, you will need to make a snag-free design. You can check out the Github repo for ideas on building a launcher. As you can see in the photo above, creating slots of aluminum tape on the launcher to fit the aluminum tabs on the firework into can work fine.
Connect the Battery
The final step will be to attach the positive terminal of the 9-volt battery to the common port of the relay. Once we do this, the power is ready to flow out of the "normally open" circuit once we send it an instruction from the D1 Mini. The circuit should look something like this, minus the firework:
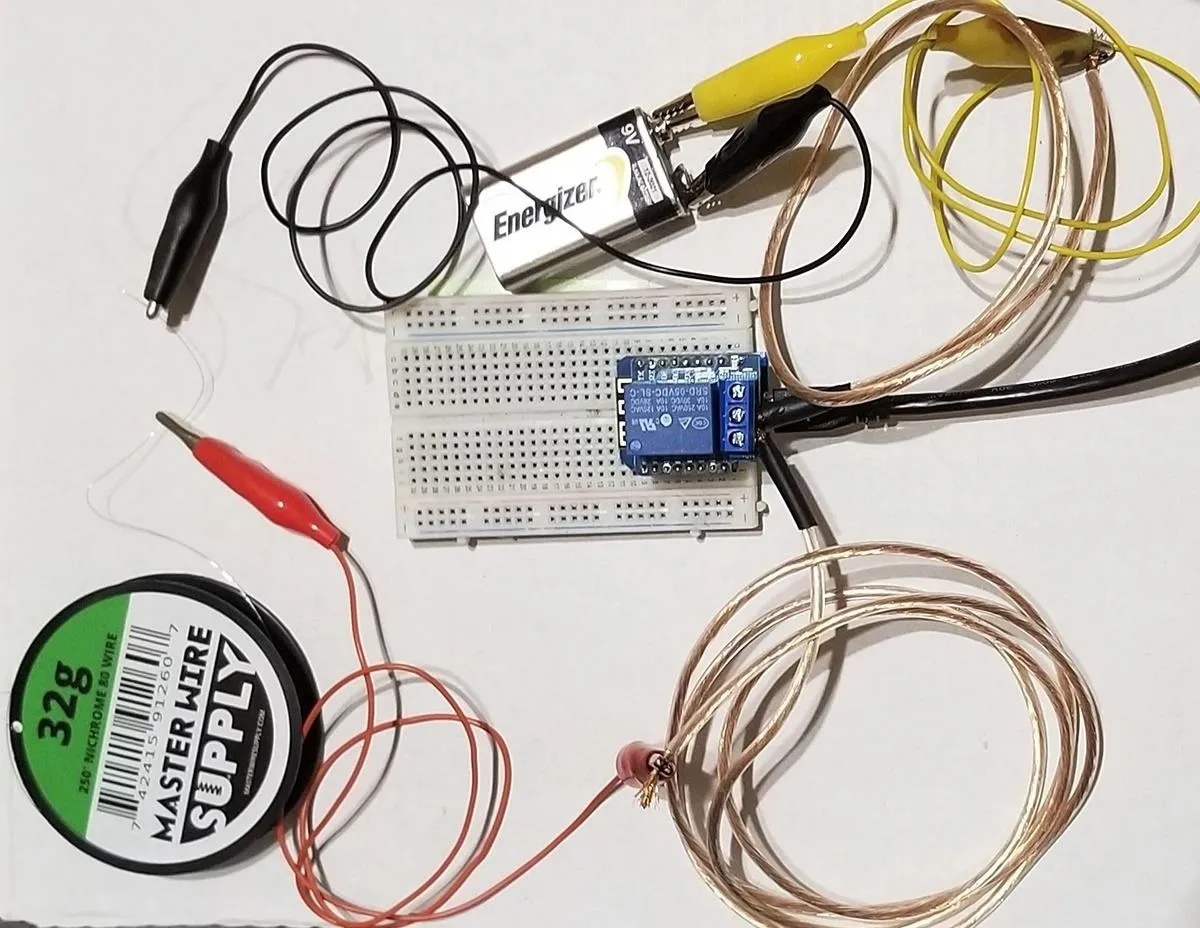
Kody/Null Byte
After you've connected the battery, move back to a safe distance, and get ready to begin the firing sequence.
Connect to the Control Network & Run firing.sh
Now, on your computer, connect back to the Wi-Fi network created by the ESP8266 called "Fudruckers," if you were disconnected at any point, and supply the password of 00000000 to join. In the AirduinoFireworks folder, you should see a bash script called "firing.sh" that controls firing the relay. You can see the contents of the script below.
#! bin/bash

sleep 5 && say "the computer has control, counting down from 5" && curl http://192.168.4.1/analog/1/1 && sleep 5 && say "firing" && curl http://192.168.4.1/digital/1/1 && sleep 5 && say "Safe" && curl http://192.168.4.1/digital/1/0
To fire the relay, clear the area and run the following command.
~$ bash firing.shThis will announce that the relay is going to fire out loud and then fire the relay for five seconds before shutting it off again.
Launching the Fireworks from Any Phone
To start the fireworks launch from a smartphone such as an iPhone or Android phone, connect to the "Fudruckers" Wi-Fi network with the password mentioned above. Then, run the commands below in the URL bar of any web browser, one by one. Alternatively, you can do this from your computer in a terminal window by putting curl and a space before the URL.
To arm the relay and allow it to be fired, send the command to turn on pin 1 to analog 1. This will turn it on enough to light up the relay LED, but not trip the coil.
http://192.168.4.1/analog/1/1To fire the armed pin, send the following command.
http://192.168.4.1/digital/1/1Finally, to turn off the firing pin, this request will tell the pin to return to digital 0, or off.
http://192.168.4.1/digital/1/0A word of warning: Anyone connected to the "Fudruckers" control network can do this. That can be a good thing or a bad thing, so keep that in mind while setting up or working around a setup that can be triggered remotely.
Stay Safe, Bytes!
Here are a few safety warnings for working around fireworks in this project:
- Never put your face over a firework!
- Do not test the connectivity of the modified firework indoors.
- Make sure to secure the based of your launcher!
- Do not unload a failed round immediately. Disconnect it and wait. Check the connection with a multimeter first.
- Disconnect the battery immediately after firing.
I hope you enjoyed this guide to launching fireworks over Wi-Fi! If you have any questions about this tutorial on WI-Fi fireworks or you have a comment, ask below or feel free to reach me on Twitter @KodyKinzie.
Cover photo by Kody/Null Byte


Comments
Be the first, drop a comment!