


Welcome, in this tutorial we shall we looking at creating a safe(r) way to back up your important files. The contents we will be covering are as follows;
- Creating a partition
- Updating the /etc/fstab file
- Mounting a file system with Python
- Copying the contents of a file system with Python
There have been numerous articles on here courtesy of members of the forum regarding python so if any of this goes over your head, I would recommend reading their posts, though I hope to write it in an understandable way.
To begin we must create a partition which we can mount and unmount during the execution phase of the script. To do this, we shall be using Gparted.
"The gparted application is the GNOME partition editor for creating, reorganizing, and deleting disk partitions."
Launch Gparted from the Command Line.
Noone@Home ~ $ gparted
Next, right click on the unallocated section and select new partition, as you can see in the upper right, we are working with /dev/sda
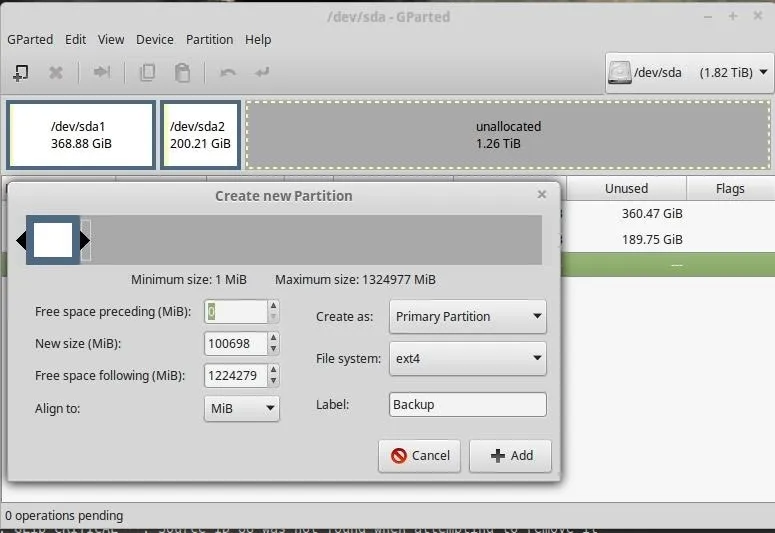
Once you are happy with your partition, click +Add.
Don't forget to apply your changes.
Add the Partition to /Etc/Fstab
Now that we have our partition, we must tell our system to recognise it, otherwise it will not mount and we will have issues further down the line. To do this, we must first find the identity of the partition using blkid.
"blkid - A command-line utility to locate/print block device attributes"
/dev/sda3: LABEL="Backup" UUID="27cc8547-1b5b-44b8-aee4-812d2b69a3a8" TYPE="ext4"
This is the new partition we just created, now we have this information, we should add it to the /etc/fstab file.
The fstab file takes this format;
So in our case, we shall append the following line to the file.
UUID=27cc8547-1b5b-44b8-aee4-812d2b69a3a8 /mnt/ ext4 noauto 0 0
Where UUID is the the Identity we recently discovered.
/mnt/ - Where we shall be mounting this partition to
ext4 - The file system we chose during Step 1
noauto - Indicates that we do not wish to mount the drive at boot time
0 - Used to determine which filesystems need to be dumped
0 - Used by fsck to determine order for filesystem checks at boot
Consult the man page for fdisk to make sense of this information.
Time to Awaken the Snake
Load up your favourite text editor and lets begin with the python script.
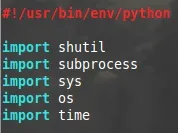
We need to import a couple of modules, the two primary modules are;
- Shutil - "The shutil module offers a number of high-level operations on files and collections of files. In particular, functions are provided which support file copying and removal"
- Subprocess - "The subprocess module allows you to spawn new processes, connect to their input/output/error pipes, and obtain their return codes"
Lets Add a Few Path Variables
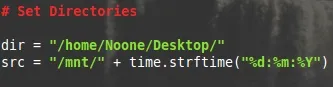
This should be fairly self explanatory, though it is worth noting the time.strftime() is part of the time module in python, using the current date, month and year as the format that is being appended to the src path. In other words we will be creating a new folder with this information.
Mounting the Drive Using Subprocess
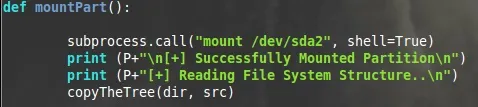
Starting with a function called "mountPart()", and as we know Python is about correct indentation. Subprocess can be used exactly how we would with the command line, so "mount /dev/sda2" should not be unfamiliar to most.
shell=True - "executable argument specifies a replacement shell for the default /bin/sh"
Print a couple of statements, then proceed to the "copyTheTree" function of our code, taking the arguments or dir, and src. It is perhaps worth mentioning that P+ is referring to a variable I created for a colour scheme to the script.
P = '\03335m' : Should anyone is interested / say it's not working.
Shutil in Action
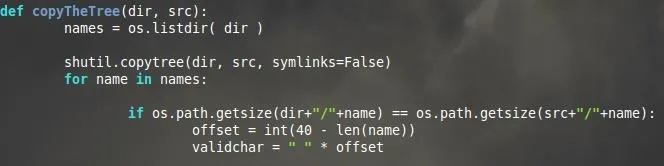
Here we are passing the variables dir and src to the function.
The os.listdir will hold in memory the names of all files and directories in the names variable for now.
shutil.copytree - "Recursively copy an entire directory tree rooted at dir. The destination directory, named by src, must not already exist; it will be created as well as missing parent directories." We are also declaring that we do not want to follow symbolic links.
We will come back to the If statement, as that will be clarified in the next screenshot. The next two lines were more OCD/formatting issues than anything, but I fancied aligning the standard output. Set a variable to the integer 40 minus the length of the name of the file being transferred. Next, set a variable that is equal to as many spaces the line above returns.
Formatting the Output

Referring back to the previous image;
For each name in the variable Names, if the size of the file held in "dir" is equal to that of the size of the file in "src" then we should print out this statement.
Each curly bracket {} will be replaced by the information passed by the program inside the parentheses (). So we are using;
- Name (Name in names)
- Validchar (Variable we just created)
- "Transferred"
Followed by the escape character \t which implies tab. Then;
- The string of the size of the output file using os.path once more
- "Bytes"
Continue this process for all names held in the variable. Otherwise, print the transferral failed.
Unmount the Partition
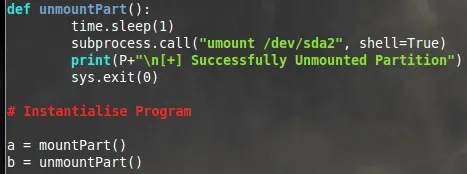
Finally we are going to set a final function called "unmountPart" where we shall repeat what we have previously learned to unmount the partition in question.
And outside of any function, we instantiate the program. Once 'a' has completed, progress to 'b'.
That's It!
Python really can be as simple as that. I'm still very new to programming as a whole and this was completed in just under two hours. Use the resources available online (docs.python.org), consult man pages, and just try read through other peoples code as often as you can, even if it does not make sense now, it will do in time. Perseverance is key.


Comments
Be the first, drop a comment!