


Imagine for a moment that a VPN is like putting on a disguise for your computer. This disguise works to change your IP address, secure your traffic with encryption, and mask your location to bypass regional restrictions. This makes it a helpful tool for both whistleblowers and journalists. VPNs are also built into the well-known Tor Browser.
VPN technology has been available for many years now, and many organizations in the government and private sector use it. These organizations use VPNs to access internal resources that are usually off-site and miles away from the user, keeping the information safe while in transit.
Different countries with strict rules against accessing content that is deemed inappropriate may place restrictions on what sites or services you can access. Using a VPN will help you get around censoring of access to free information. This tutorial isn't just about making data secure, it's also one of the most important sets of tools for an IT professional.
When looking for openly sourced VPN services, most people will find the popular software-based OpenVPN. However, after scouring the depths of the internet, I found what I consider to be a better, open-sourced VPN solution in SoftEther. Unlike SoftEther, OpenVPN's UI is rather cumbersome and confusing at times with both the server and client configurations. Also, while SoftEther has its own protocols and is faster, you can still use the familiar OpenVPN protocols as well, making this software-based VPN a universal tool.
Install the Software
While SoftEther works for any operating system, I will be demonstrating this installation process for Windows. The process may be slightly different if you decide to try this out on macOS or Linux.
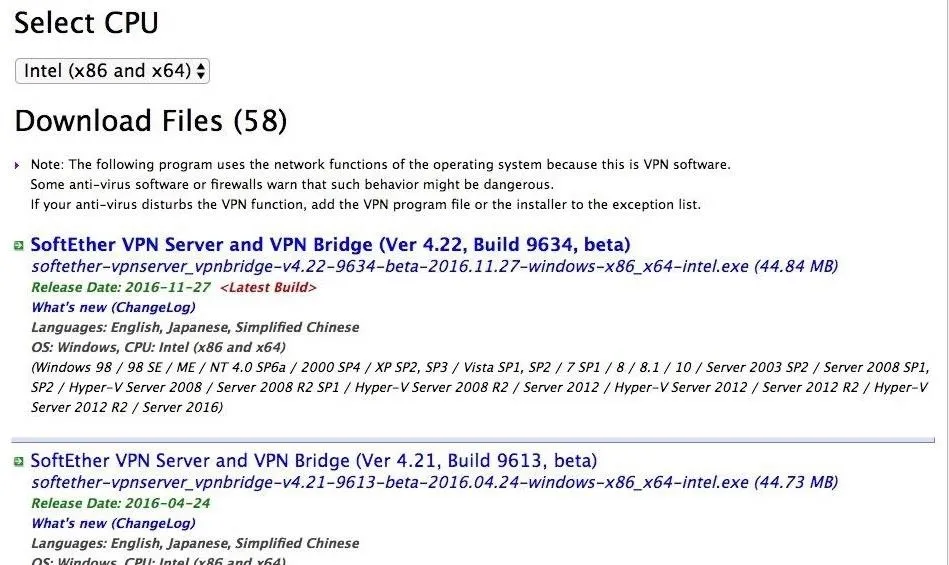
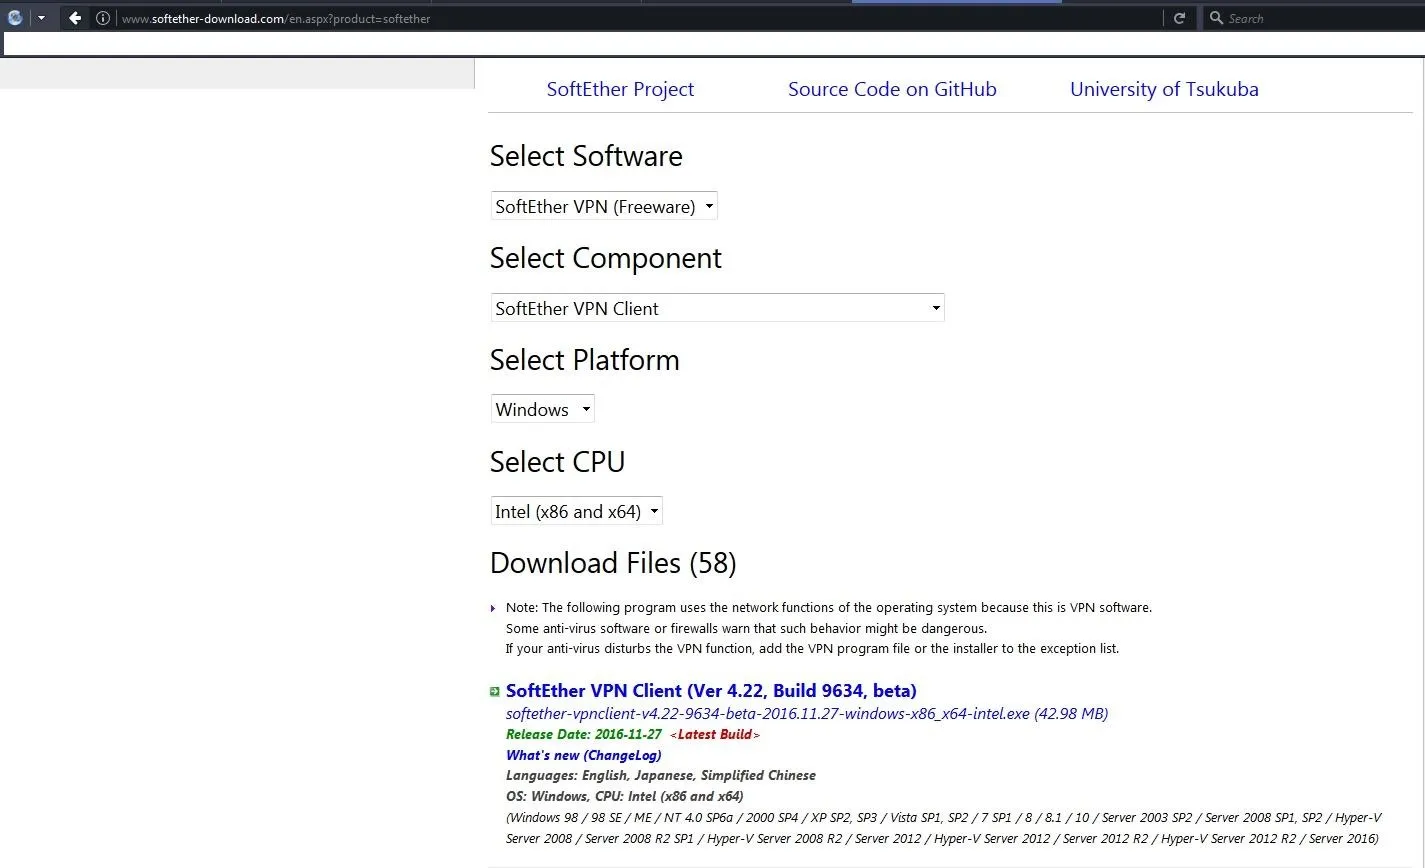
The first step is downloading the server software from SoftEther's site. You'll need to select "SoftEther VPN Server" under the Select Component drop-down list. Next, select "Windows" under the Select Platform drop-down menu. Finally, select your CPU under the Select CPU menu. For Windows, there should only be one CPU option to select.
When ready, click on the first link available to the most current version of the SoftEther VPN Server and VPN Bridge, which will be an EXE file.
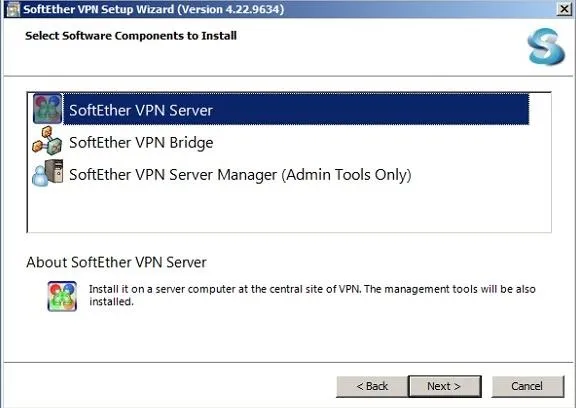
Open the EXE file and follow the prompts to install SoftEther. Once it is installed, it will automatically pop up and you'll need to select the "SoftEther VPN Server" option for the setup, then click "Next."
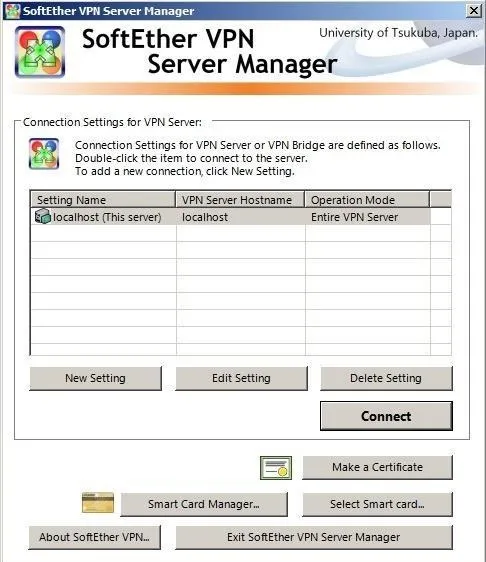
Once you select that option, the SoftEther VPN Server Manager will open. For now, we are working on the localhost (This Server), which is the default option. Hit the "Connect" button to continue.
After you connect to the server, it will prompt you to create an administrator password. This password is just for the localhost server.
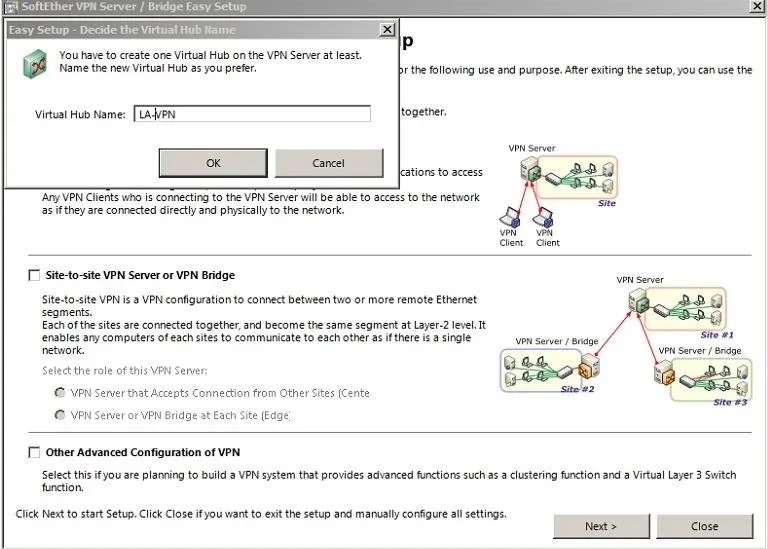
Once you've created a password, you're going to check the first box that says "Remote Access VPN Server," and then hit "Next." You are choosing this option because this tutorial requires a client-to-server build. The "Site-to-site VPN Server or VPN Bridge" and "Other Advanced Configuration of VPN" options go beyond the scope of this tutorial.

Configure the VPN
After hitting "Next," it's going to want us to name the Virtual Hub (VHub). The VHub is based on where the server is located, so you would want to name it that. If you have multiple VPNs, this is how to tell which VPN server you want to connect to. For this demonstration, I am naming mine "LA-VPN," since mine is in Los Angeles.
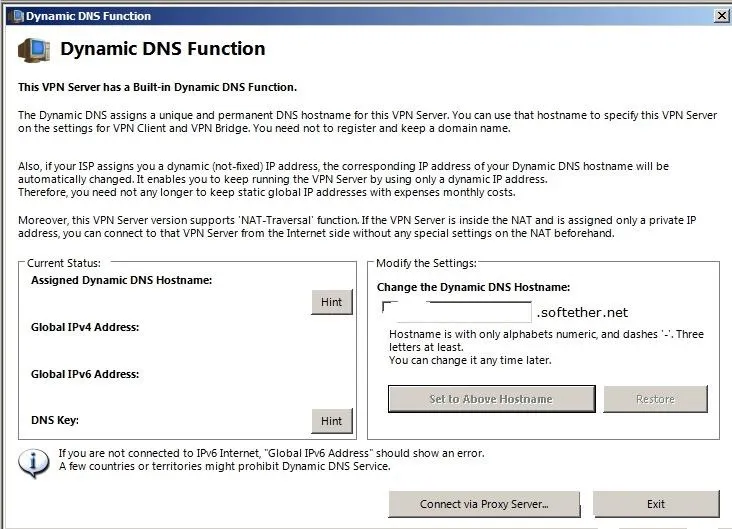
After you make a VHub name, a Dynamic DNS Function window will pop up. You can go ahead and click the exit sign on that window — you can just leave that window default.
Set Up the Encryption
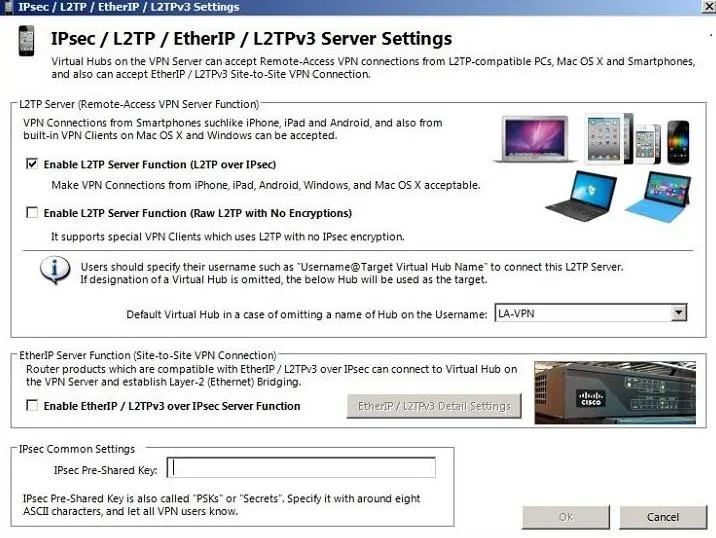
After closing the Dynamic DNS Function window, you will be automatically be brought in the IPsec / L2TP / EtherIP/ L2TPv3 Settings window. We are going to set up what would be the hardest part for other VPNs — the encryption. Fortunately, on SoftEther, the process is simple.
You are going to select "Enable L2TP Functions (L2TP over IPsec)." The L2TP protocol is a tunneling protocol that is a major part of all VPN services, and IPsec encrypts that tunneling traffic. Then, in the drop-down field, select the VHub you just created.
Next, you'll need to create an IPsec Pre-Shared Key, which is important because this is the encryption part of the IPSec. You can only input 8 ASCII characters, and make sure that the password uses letters, numbers, and special characters. Click "OK" when everything has been filled out.
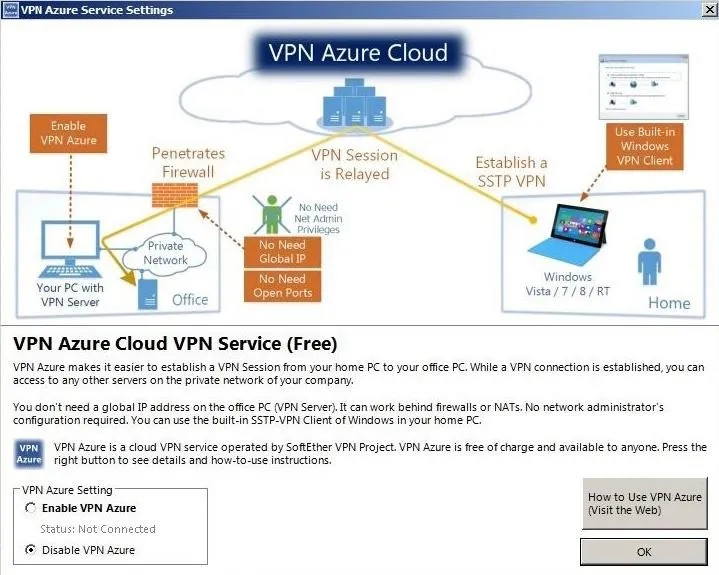
After that, another window will pop up asking to integrate your SoftEther VPN with Mircosoft Azure. We won't be using it, so you should skip this part of the setup.
Last Steps of the Easy Setup Tasks
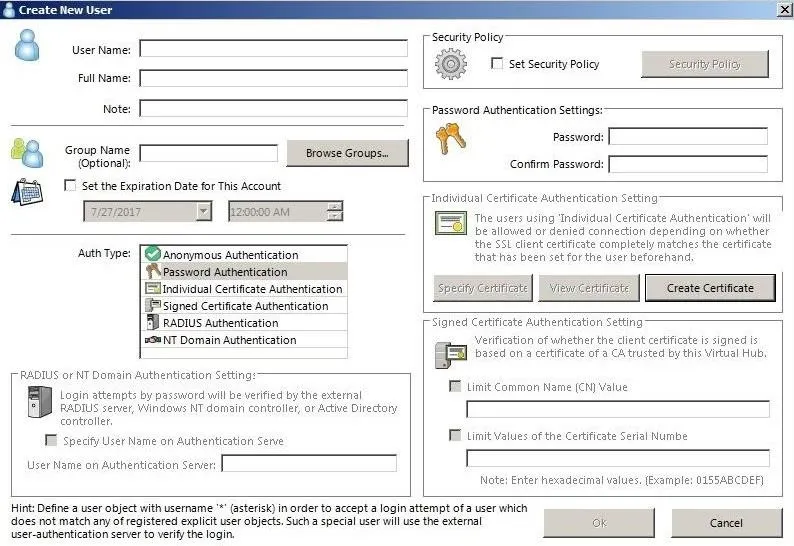
Once you exit from the Azure screen, you will be taken to the VPN Easy Setup Tasks window. You want to create a user by clicking on the "Create Users" button. This single user is used to establish the remote connection from wherever you are to the VPN server. At this point, it is important to make sure that the password is a complex one since the security of your VPN relies on this.
After you are done creating a user, press "OK," and you will be brought back to the VPN Easy Setup Tasks window. You want to select the Ethernet port for this VPN from the Set Local Bridge step. You can bridge with the one that you have, but it is recommended that you dedicate an Ethernet port for the VPN.
For example, let's say you have two Ethernet ports on your machine, one Ethernet port already uses its connection for other things like the operating system. You can use the theoretical secondary Ethernet port just for VPN traffic.
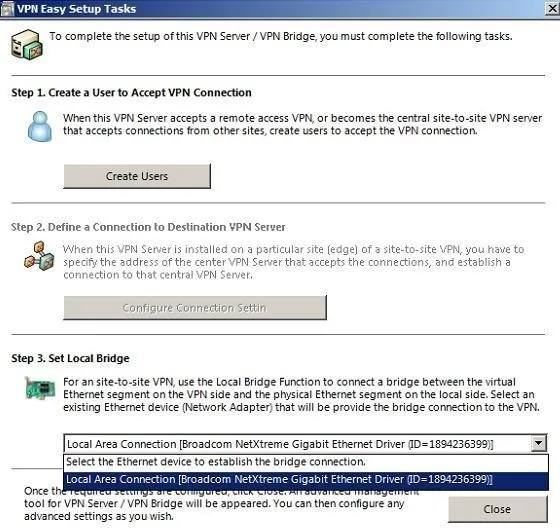
You're almost done now. After selecting a Local Bridge, go back into the localhost Manager by just clicking the "Close" button. Now click "Manage Virtual Hub."
Once you are in the Manage Virtual Hub menu, you want to click on "Virtual NAT and Virtual DHCP Function (SecureNAT) Setting." What SecureNAT basically means is that when the remote user connects successfully to the VPN, the user is not connected to the Local Area Network (LAN). Instead, you are using the remote's WAN address, which is all you need.
Then, click on "Enable SecureNAT" and agree with the prompts it gives you.
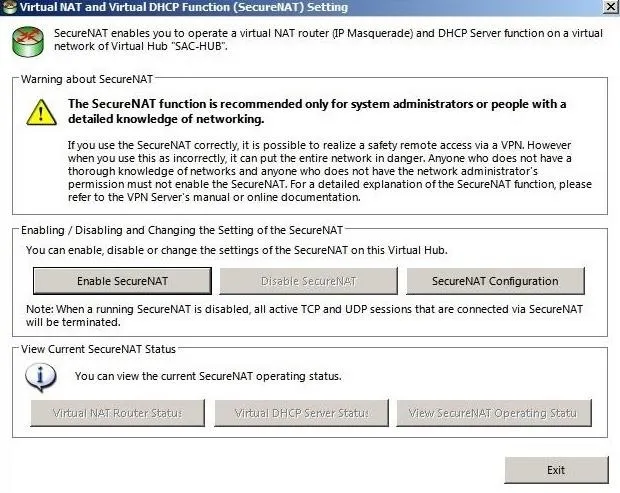
That's it for this NAT'd VPN. You don't need any port forwarding because the VPN server is not emitting any local services on the LAN.
Install the Client
To complete the setup, you need to install the client on a different computer and on a different network. Insert your credentials, and provide the server IP or DDNS. This is how you set that up.
First, download the client software from SoftEther's website. Make sure to select "SoftEther VPN Client" next to Select Component, then choose the correct options based on your operating system. For this demonstration, again, we are using a Windows platform. After downloading the file, open it up and follow the prompts to install it.
Configure the Client
After it's done installing, it should automatically pop up. You want to click on the "Add VPN Connection" option. You will be prompted to create a Virtual Network Adapter. A virtual adapter is just like your physical network adapter on your device, but a virtual adapter is based on the software that creates and configure the adapter virtually.
Don't worry, setting this up is not as difficult as it sounds. Just click "Yes" to get started.
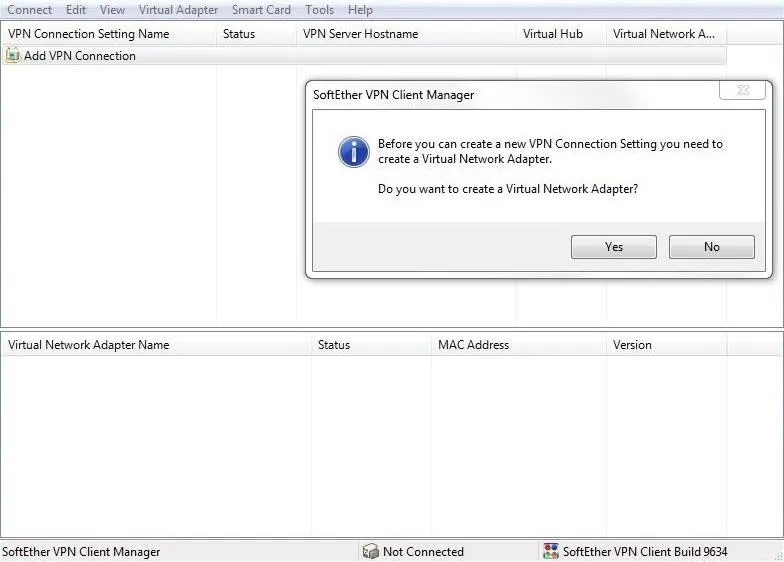
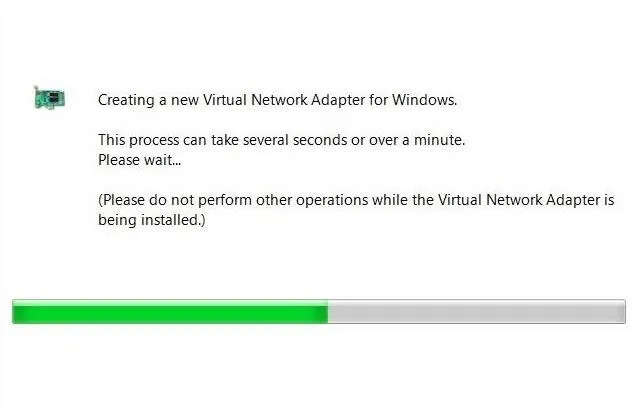
The next prompt will come up and ask you to name the Virtual Network Adapter. You can name it anything you want, but for our purposes here, we're just keeping it default.

Here is what it looks like when it is installing the Virtual Network Adapter:
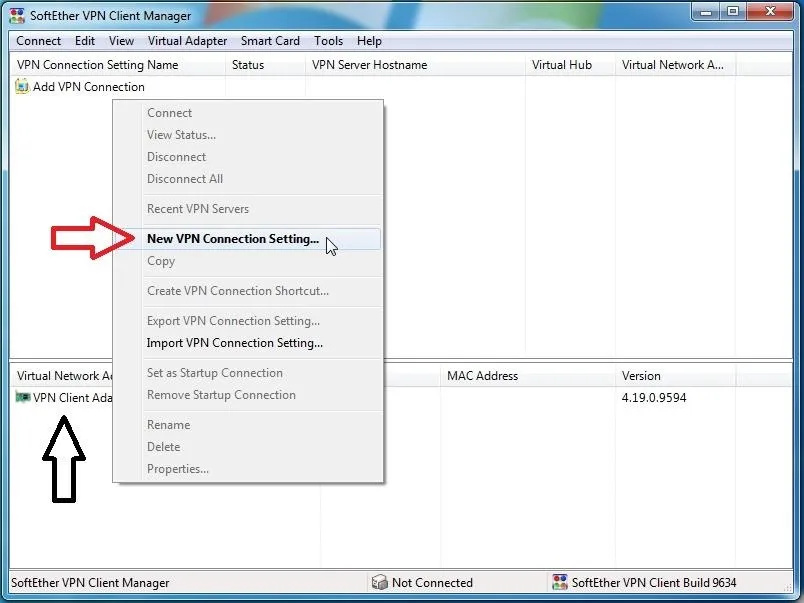
Now that you can see the VPN Client Adapter in the SoftEther VPN Client Manager, you are ready to actually make the VPN Connection. Right-click in the white space under Add VPN Connection and select "New VPN Connection Setting."
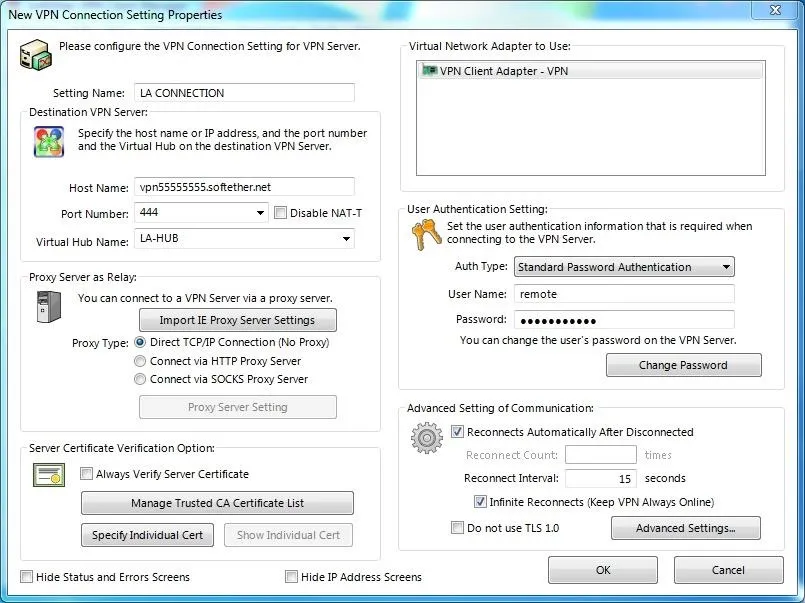
On the new window, name it next to Setting Name. Then, you either want the DDNS that SoftEther gave you or you can use a WAN IP by going to ip monkey and inputting that IP address. Once the Host Name is in the input field, the Port Number and the Virtual Hub Name will appear automatically. That is how you know that the VPN server is set up correctly.
Finally, insert the User Name and Password that you created beforehand, and hit "OK."
The newly created VPN will be under VPN Connection Setting Name column, so right-click on it and click "Connect." (Tip: the client will appear in the windows tray so you can quickly change to another VPN.)
If all is correct, you will get this window showing that everything was successful.
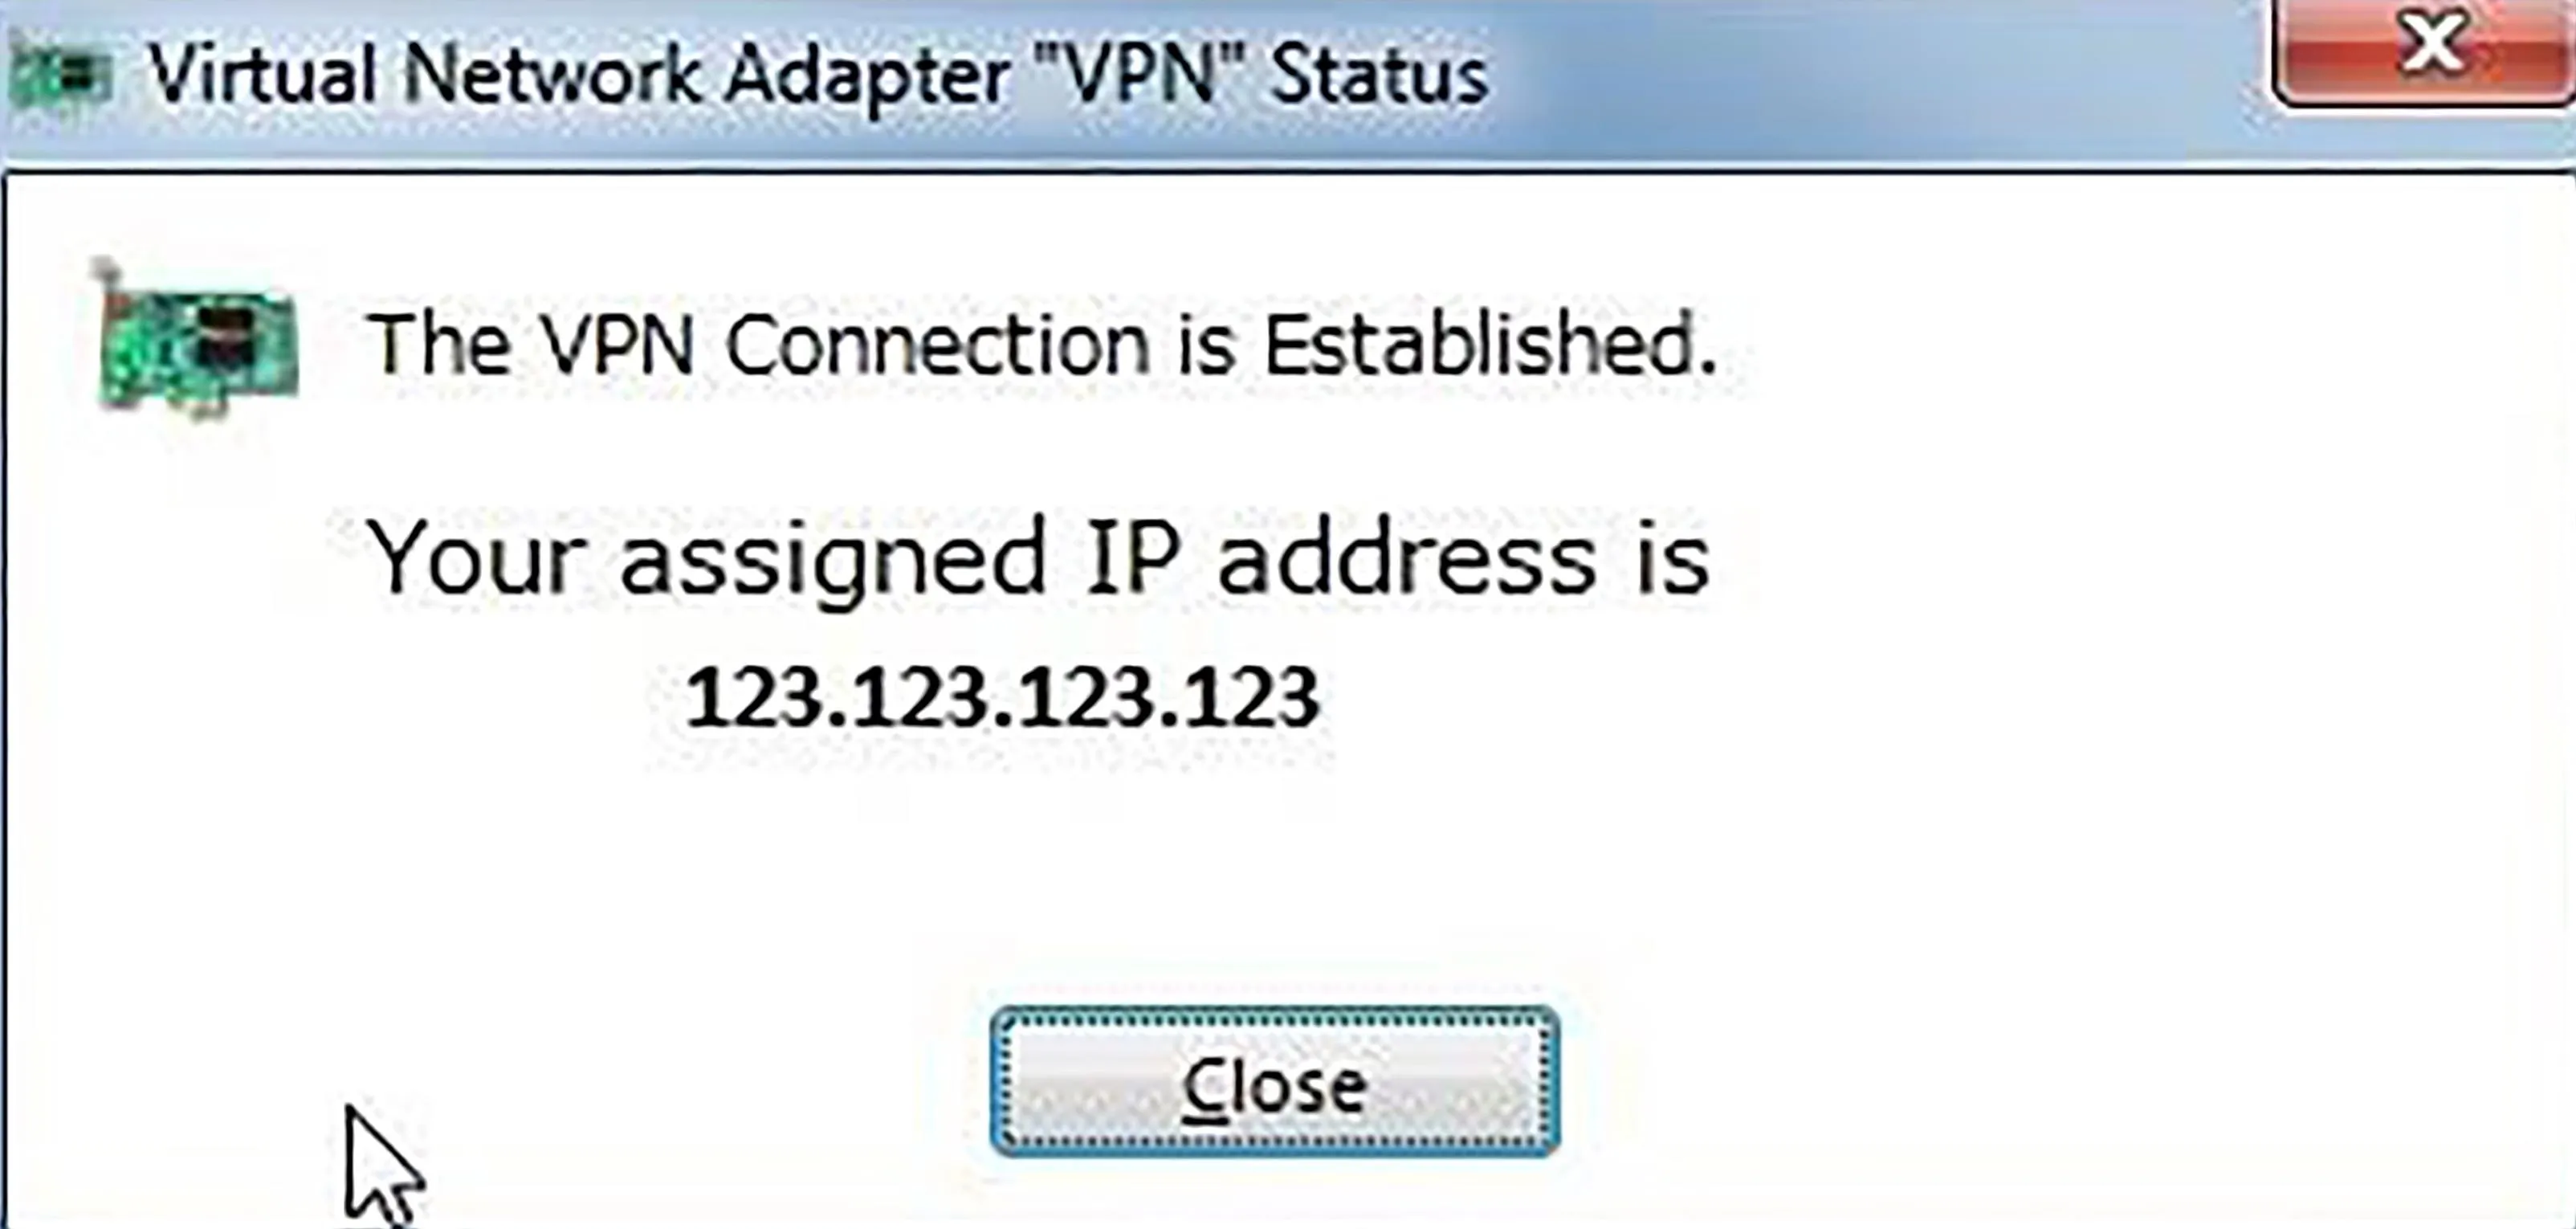
So in the end, you created a VPN server that can be used to change your IP address. Stay tuned for more information on VPNs and tutorials on client-to-site and LAN-to-LAN at a later time. You can leave a comment if you need any more help.
- Follow Null Byte on Twitter and Google+
- Follow WonderHowTo on Facebook, Twitter, Pinterest, and Google+
Cover photo by geralt/Pixabay; Screenshots by Nitrous/Null Byte


Comments
Be the first, drop a comment!