


Update
My sincere apologies guys, but I just got a call from Rackspace to set up my "managed account". After a long discussion, there is no longer an "un-managed" option. This means that there is a minimum support fee of 50 dollars USD tacked on to every account. The instructions below are still the same, but the cost has gone up. I was unaware of this change until the call I just received to verify my account. I've updated the pricing information below and understand this may price out those looking to add a virtual server to their lab. If you still have a First Generation Account (like I do), I can still log into it and create a server for 23 bucks USD per month, but all new accounts are now subject to the 50$ USD minimum.
Introduction
I have used Rackspace for years and the applications for your own Rackspace Cloud server are endless. It's an extension to your home lab that you can do next to anything with. I set a server up quite a few years ago and it's considered a "first generation server" but I still pay about 13$ USD for it. I stood a new server up today and the cheapest option looks to be about 74$ USD. Rackspace does have options to build servers in Europe and Asia also if you need a server outside the US.
In the past, I have used it for:
- Safely testing/hacking webapps that I host
- Testing security countermeasures
- Hosting websites and email servers for paying clients
- Booted a Thin Client at my house across the internet
You should NOT use a Rackspace server for any unauthorized hacking attempts.
This HOWTO is intended to get you to the point where you can login and build a box for your purposes. I will have future HOWTOs that will walk you though setting up the server. This is a relatively simple howto, but it may help those who have little experience standing up this kind of service.
Register an Account
Navigate to Rackspace.
Mouseover "Sign Up".
Click on "Cloud Sites".
This part of the process is fairly straight forward. Username, Address, Billing information, and submitting your information. They take security seriously and may call you to verify your identity, phone number and address.
Rackspace Cloud is a managed site similar to GoDaddy's managed hosting.
A Rackspace Cloud Site is a 'blank slate'. You start with a login that is a minimal server installation of your choosing. This is known as Infrastructure as a Service (Iaas) as opposed to Platform as a Service (PaaS) because it is providing the infrastructure for your needs vs. the fully installed and up and running Platform for your needs (much like what GoDaddy hosting is famous for.) Update: This is still a blank slate, but includes support for someone at Rackspace to login and add users or create a DB for you (which I don't recommend for your education's sake.)
Create a Server
Once you log into your Rackspace account, the next step is to create a server. In my example, I'll be creating a CentOS server.
First, Click "Create Server".
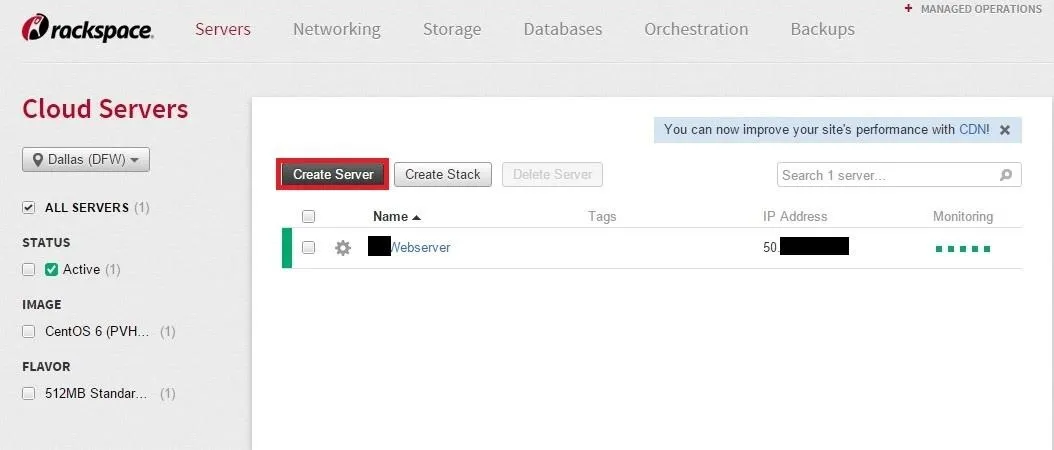
"Create Stack" creates a highly available virtual pair of servers that you can use for load balancing and redundancy. This isn't required for your lab, but it's definitely important to know if you're an aspiring system administrator. One application you might have from a security perspective is load balancing or parallel WPA cracking sessions.
Select Your OS
Rackspace gives you many choices to choose from. For the purposes of this tutorial, I'll be creating a CentOS 6 server. Select your OS from the menu on the left. Next choose the distribution/version. Options for windows are 2008 R2, 2012, and 2012 R2. Each Linux distro has multiple versions associated with it as well.
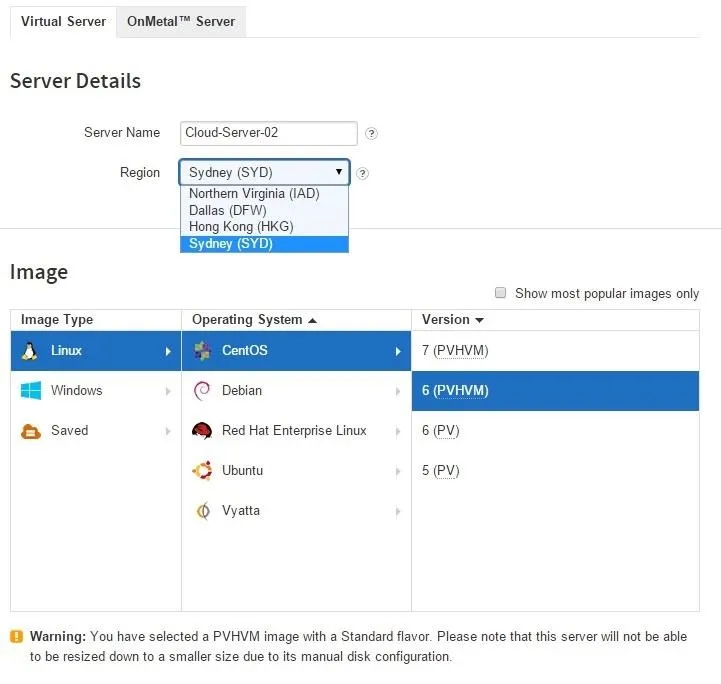
Most distros give you two choices of distro builds: PV and PVHVM. The differences between the two open a huge can of worms, but googling "PV vs HVM" will give you as much info as you can handle on the subject. In short, HVM uses hardware assisted virtualization extensions. Generally speaking, you'll want to use HVM from here on out but do yourself a favor and learn the difference and make your own decision.
Next (on the same page), you will select your hardware requirements. For our lab, we can stick with the smallest server size. The great thing about Rackspace (and likely other cloud server providers) is that you can scale your resources up or down as needed. If your webserver is grinding to a halt, you can login, click a few buttons, and your server will scale up to however many more GB of memory or number of CPUs or GB of disk space you need.
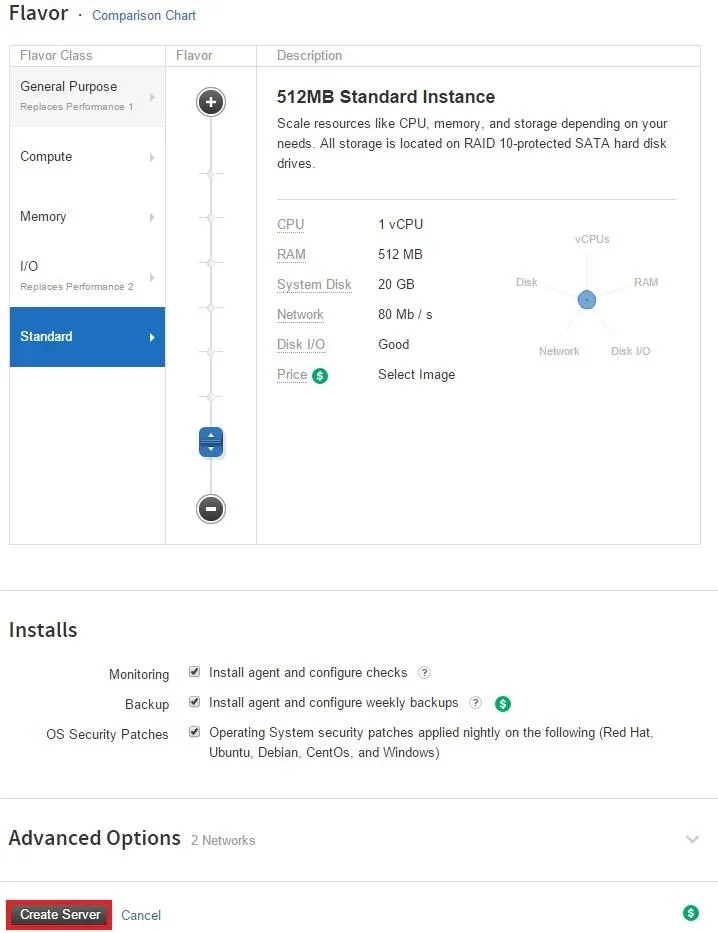
For the Flavor, I'll be selecting "Standard" and the smallest server size. This server will be plenty powerful for most of your lab studies. There are again many options for builds. Compute might be good for a large eCommerce website. I/O might be good for a large database server. Each Flavor has a vertical slider to the right of the option for bumping up pre configured server resource amounts. The next option up for Standard is 1CPU, 1GB RAM, 40GB Disk, 120mb/s, and "good" disk I/O. Update This option costs about 108$ USD per month.
A very important note here is the Warning message on the first Step 3 screenshot. If you select a PVHVM and "Standard" Server type, the warning tells you that you can only upgrade to better performance. Once upgraded, you cannot downgrade. To get around this, you could install a PV image and have a slight (potential) performance decrease.
The other items under "Installs" are optional in a lab environment. They are self explanatory. Monitoring will do basic server checks, backup will schedule automated backups of your server and OS Security Patches will allow Rackspace to manage your software security patches. Enabling these will depend on your server application but none are necessary in a lab environment.
Finally, click "Create Server". It will take a few minutes to build the server. The Rackspace Dashboard will alert you once your server is completed and it is ready for login. You will also receive an email notifying you that it is ready for login.
Conclusion
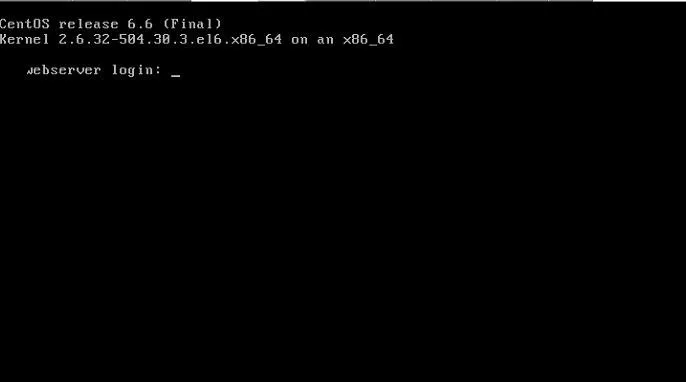
And, that's it. The next step is to log into your newly created server via the Rackspace Console and install sshd so you can access the server remotely.
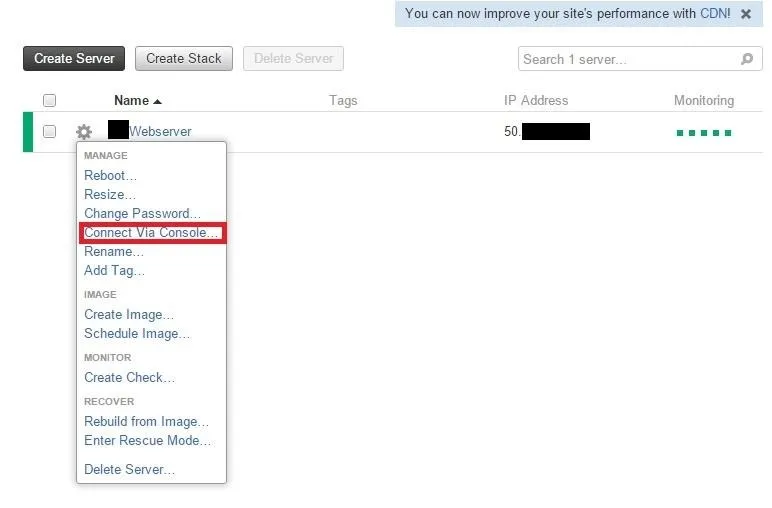
Stay tuned. In the next tutorial, we'll secure the newly installed CentOS server.
Hope this was helpful! Let me know if there are any questions. Update I updated this article as soon as I got off the phone with Rackspace. Rackspace was very cool about it and allowed me to cancel my account as I'll be rebuilding under my first gen account.
--Blindsight


Comments
Be the first, drop a comment!