Welcome back! Sorry I've been gone for so long, but if anyone has been keeping up with these articles, you'll know that when I get quiet, something is cooking under the surface. In other words, I've been working on a project lately, so I haven't had much time!
When I was thinking about the topic for this article, I realized that I've failed to cover actual scripting. We've only been covering the code, so today we're going to look at actually writing a script and how to execute it.
We'll start with file structure, how a script is laid out, and some tips that can help keep things organized. Then we'll move into how to execute our script, so, let's get started!
Creating the FIle
When we're scripting with Python (or any scripting language for that matter) we don't need to do anything fancy in order to write scripts. Scripts are stored as regular text files, these files are handed to the interpreter for execution.
What this means is that the only thing we need to write our scripts is a text editor! You can use whatever text editor you like, but I'll be using gedit.

The reasoning behind this is that gedit has multiple highlight modes specifically for scripting.
The first thing we'll need to do is create a text file and give it a name. We can do this by simply launching gedit from the command line and giving our filename as an argument, like so:

You may notice that we've ended our filename with the .py extension. This isn't necessary, but we'll explain deeper when we cover execution.
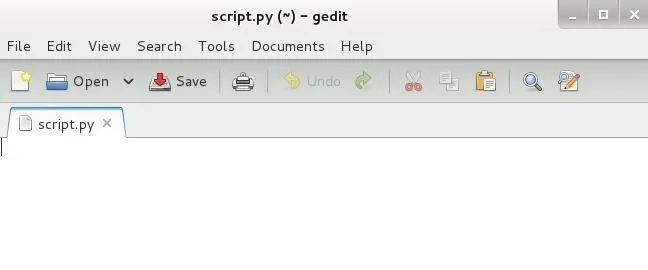
Now that we've opened a new text file, we should see the gedit window appear with our filename at the top, it should look something like this:

Since we've ended our filename with the .py extension, the Python highlight mode has been chosen for us. If you did not use the .py extension, this highlight mode can be enable by the following:
View -> Highlight Mode -> Scripts -> Python
Once you have the Python highlight mode enabled, you're ready to start scripting!
Writing the Script
For this example script, we'll be writing a simple greeting script. This script will take some input from the user, and say hello to them.
Since this article isn't really about the code itself, we won't dwell on it, here's the code for our example:

You may have noticed that there is an extra space between our input and our output. Don't be afraid to add blank lines, it help to keep things organized! Also, be very careful of spacing, Python is sensitive to white space. A good practice is to simply use tab instead of pressing space 4 times.
Now that we have our code, we can save our file and move on to executing it!
Executing the Script
There are two ways to execute our script. We'll be covering both of them. The first way is using the python method, the second way is using the shebang method. We'll start with the python method.
The python method simply means that we need to use the python command in order to specify that we want to run the file as a script. This is the easiest way of execution, but not the most convenient. Let's try executing our script using this method:

As you can see, this method is simple, but not very convenient. The second method is bit more complicated, but is much more convenient for the user.

The shebang method simply means that we'll mark the file as a python script from within the file. When we do this, we won't have to keeping pointing the script to the proper interpreter. In order to use this method, we need to set the interpreter path inside of our script.
In order to set the interpreter path, we need to mark it with the shebang. The above image is a shebang, it is simply a pound sign and an exclamation point. When we're setting our interpreter path, it must be on the first line of the script. Let's open up our script and add our interpreter path:

Our interpreter path consists of two elements, the shebang (#!) and the path to our interpreter (/usr/bin/python). Now that we have the interpreter path, we need to give our file permission to be executed. Now that we're not pointing to the interpreter ourselves, we need to treat this as an executable file.
Once we navigate to our script in the command line, we can give it execute permission with the chmod command. (For more information on this command, look here) Let's run the command needed to give our script execute permission:

Now that we've made our script executable it will appear in green as an executable. Now we can run it by entering ./ followed by the filename. Let's run our file using our new method:

There we have it, our two file execution methods. Let's wrap this whole thing up shall we?
Wrapping It Up
We covered some very basic (but insanely useful) things here. Now that we actually know how to write a script, we can start putting our knowledge to use!
We covered making scripts, some tips on writing them, and how to execute them, all very useful things!
I apologize again for being so quiet lately, but I've recently hit some employment issues that I've been working through, plus this project on the side.
Thank you for understanding, and more importantly, thank you for reading! I'll see you for your python's next training session!
-Defalt


Comments
Be the first, drop a comment!