


Welcome back everyone. As many of you know, reconnaissance is extremely important in any successful hack. Without proper reconnaissance, we won't know what we're about to get into, literally.
Among the vast ocean of information we need about our target, operating system is definitely required. If we don't know the OS, we're half blind! The process of identifying our targets operating system is known as OS fingerprinting.

There are many tools capable of OS fingerprinting, such as p0f and nmap, but today we'll be using a tool that isn't built specifically for recon, BeEF.
BeEF stands for Browser (Other e) Exploitation Framework. It allows us to "hook" into the victim's browser and cause all sorts of mayhem. You may remember that we've previously used BeEF to take photos through a webcam. This is just a taste of what BeEF is capable of.
The second part of today's recon is JavaScript, a powerful web development language. We'll be executing some JavaScript on our victim today. This will yield their OS. We'll simply be using BeEF as a means of execution. We'll be attempting to fingerprint a victim running Windows 10, so, let's get cooking!
Launch and Log into BeEF
If we're going to use BeEF, we might want to start it first! For those of you using Kali 2.0, BeEF is conveniently located on the dock to the side of the desktop:
For those of you still using Kali 1.X, you can start BeEF with the following:
- Start BeEF with this command: service beef-xss start
- Navigate to the login page at 127.0.0.1:3000/ui/authentication
Now we all should be at the authentication page for BeEF, which should look something like this:
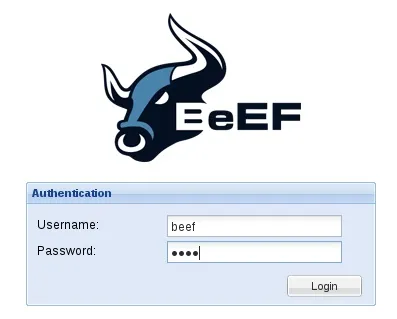
Now, the default user name and password are both beef, let's log in with these credentials and start our recon!
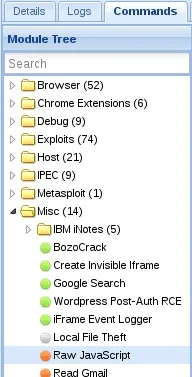
Hook the Victim
In order for us to be able to execute our JavaScript, we need to "hook" the victim. Once we hook the victim, we'll be able to control their browser. BeEF has it's own demo hook page for testing, we'll be using this today. Let's start by looking at what browsers we currently have hooked:
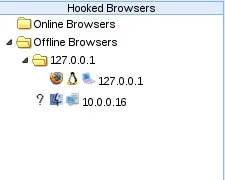
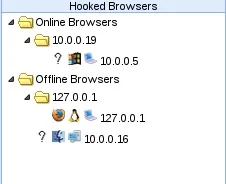
Alright, we can see here that we only have one victim, this was the victim from our last BeEF tutorial. Now let's go ahead and navigate our victim to the BeEF demo page:

Now that we've loaded the demo page, we should see our victim appear under "Hooked Browsers" in our BeEF window:
Now that we've successfully hooked the victim, we can control their browser. This includes the ability to execute JavaScript.
Execute the JavaScript
Now that we have our victim hooked, we can execute JavaScript against their browser. BeEF has many modules to control the victim, we'll be using the "Raw JavaScript" module, let's go ahead and navigate to it in our BeEF window:
We've found our desired module, now let's take a look at the description:
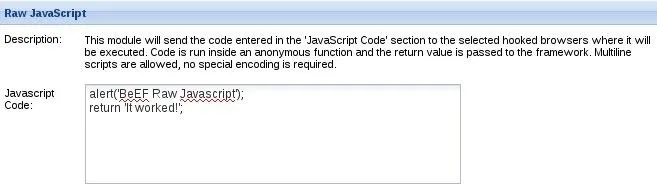
It simply tells us that whatever we script into the text field will be executed against the victims browser, it also comes with some sample code.
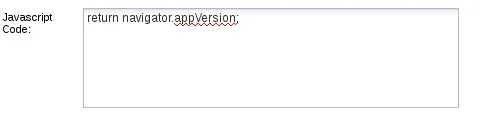
Time to get a little technical; Most browsers support a JavaScript object called the "navigator", this object contains information about the browser and some information about the host, including operating system. We're simply going to be returning some information out of this object. More specifically, we're going to be reading the appVersion property, which will return our victims OS type. Let's go ahead and switch the sample code with the script to accomplish this:
Now that we've added our little snippet of code, let's press the "execute" button at the bottom right of the BeEF window and evaluate our result!
Evaluate the Result
Now, we have our execution result, we just need to evaluate it. Let's select the command we just ran from the menu to the left and take a look at the returned result:

In our result we can see the words "Windows NT 10.0". This is our user-agent string. It is normally used to properly respond to a host, but in our case, it tells a different story.
We can do a very quick search for user-agent strings, and cross reference our result with what we find. When searching for "Windows NT 10.0", we can easily discover that this is the user-agent string for Windows 10! We've successfully identified our victims OS! Now, let's wrap all this up, shall we?
Wrapping It Up
There we have it! We were first able to hook our victim with BeEF's demo page. Then we executed some JavaScript on their browser, which gave us the information we needed to make a conclusion about what OS they're using! We did it!
There are far better ways to fingerprint a victims OS, but this just shows that we can get creative with it. Creativity is essential in the mind of a hacker!
Leave any questions and/or concerns you have in the comments below and I'm positive they'll be addressed.
Thank you for reading!
-Defalt


Comments
Be the first, drop a comment!