Welcome back, my greenhorn hackers!
This tutorial will be the fourtenth in the Linux for hackers series and will focus on the MySQL database. Although this is not strictly a Linux tutorial, MySQL is the database of choice on most Linux distributions. In addition, it is the most widely used database behind database driven web applications. This installment is critical to understand before we progress to hacking MySQL databases and before we hack web applications that use MySQL (which there are literally thousands).
MySQL is an open source, GPL licensed database. That is probably the primary reason you will find it on nearly every Linux distribution. As you know, Linux is also open source and GPL licensed. First developed by MySQL AB of Sweden in 1995, it was purchased by Sun Microsystems in 2008 and Sun Microsystems was then purchased by Oracle in 2009.
As Oracle is the world's largest database software publisher, the open source community has significant trepidations about Oracle's commitment to keep MySQL open source. As a result, there is now a fork of the MySQL database software called Maria that IS committed to keeping this software and its subsequent versions open source.
Because it's free, MySQL has become the database of choice for many web applications. Sites and apps that use it include:
- WordPress
- Kayak
- Walmart.com
- Wikipedia
- YouTube
Other popular Content Management Systems(CMS) such as Joomla, Drupal, and Ruby on Rails all use MySQL. You get the idea. If you want to develop or attack web applications, you should know MySQL. So, let's get started.
Step 1: Start MySQL
Luckily, BackTrack has MySQL already installed (if you are using another distribution, you can usually download and install MySQL from the software repository) and has a graphical start and stop. Let's start our MySQL service.
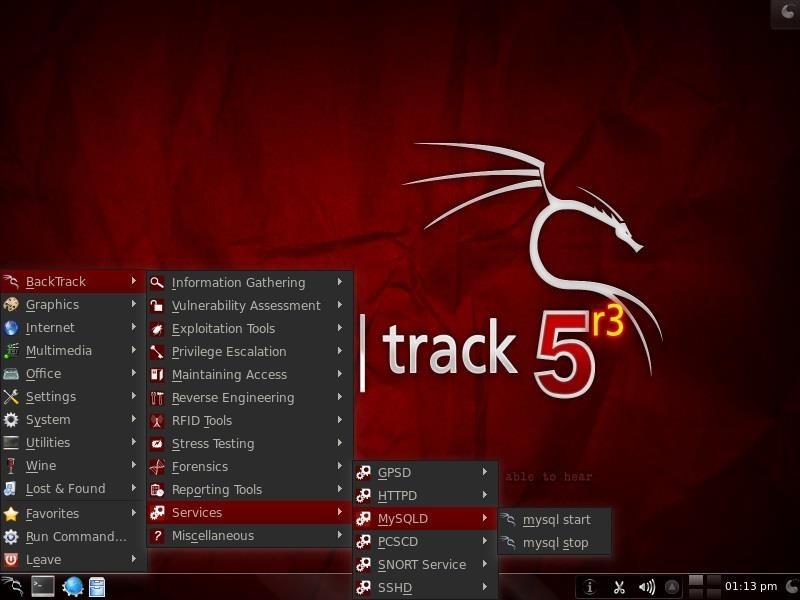
When we do so, we should see a screen like that below pop up briefly and then disappear.

Step 2: Logging in to MySQL
Now that our MySQL service is started, we can begin to use it. First, we need to authenticate ourselves by logging in.
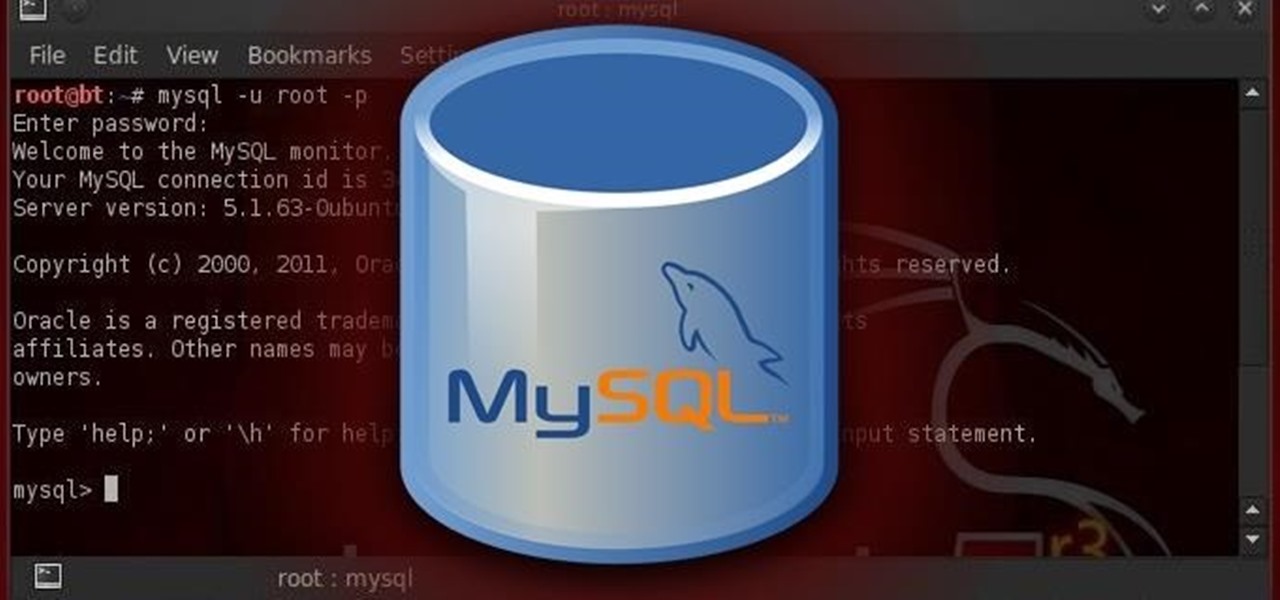
Open a terminal and type:
- mysql -u root -p
You will be prompted for your password, which is "toor" in BackTrack. It may be different on other systems. Please note that although the username and password for MySQL is the same as the BackTrack username and password, that is not necessarily so on other distributions of Linux and MySQL. Usernames and passwords for the operating system (here is it Linux Ubuntu) and MySQL are separate and distinct.
This syntax, mysql -u <username> -p, works if we are trying to access a MySQL database on our localhost. This command defaults to using the MySQL instance on the localhost, if not given a hostname or IP address. For remote access (and that will likely be the case as a hacker), we need to provide the hostname or IP address of the system that is hosting the MySQL database, such as:
- mysql -u root -p 192.168.1.101
This will connect us to the MySQL instance at 192.168.1.101 and prompt us for a password.
This opens up the MySQL command line interface that provides us with the mysql> prompt. Like Microsoft's SQL Server, MySQL has a GUI interface both native (MySQL Workbench) and third party (Navicat and TOAD for MySQL). Let's look athe command line interface first and then will will advance to the GUI interface
As a hacker, the command line interface may be our best opportunity for exploiting the MySQL database, so we should focus on it. It's unlikely that as an unauthorized entrant to the database you will be presented with an easy to use GUI.

Please note that this screen reminds us that all commands end in " ;"or "\g" (unlike Microsoft's SQL Server) and that we can get help by typing help; or \h.
As we are now logged as the systadmin (root), we can navigate unimpeded through the database. If we had logged in as a regular user, our navigation would be limited by the permissions provided us by the system administrator for that user.
Step 3: Show Databases
Now that we are logged in to the MySQL database as root, our next step is to find out whether there are any databases worth hacking. The command to find databases is:
- show databases;

Ah Hah! We found a database worth exploring here named "creditcardnumbers".
Step 4: Connect to a Database
Once we have logged into the MySQL instance, our next step is to connect to a particular database. In MySQL, like other database management systems, we can connect to the database we are interested in by typing use <databasename>. Since we now know that the database we are interested in is named "creditcardnumbers", we simply type:
- use creditcardnumbers;

As you can see, MySQL responds with "Database changed", indicating that we are now connected to the "creditcardnumbers" database.
Of course, I hope it goes without saying, that you should use the appropriate database name in place here of "creditcardnumbers". Its unlikely that a database admin will be so kind and accommodating as to name a database with such an easily recognizable name, so you may need to do a bit of exploring to find the database of interest.
Step 5: Finding the Tables
Now we are connected to the "creditcardnumbers" database and we can do a bit of exploring to see what might be in that database. We can find out what tables are in this database by typing:
- show tables;

In the screenshot above, we can see that this database has just one table in it called "cardnumbers". Generally, databases will have numerous tables in them, but we are fortunate here as we can focus our attention on this single table to extract the hackers "golden fleece"!
Step 6: Describe the Table to Discover Its Structure
Since we can focus our efforts on this single table, we will need to understand the structure of that table. In subsequent tutorials--when we are hacking this database--we will see that understanding the structure is critical to a successful hack.
We can see the structure of the table by typing:
- describe cardnumbers;

MySQL responds with the critical infornation on the structure of our table of interest. We can see each of the fields and their data type (varchar or int), whether it will accept NULL's, the key, the default values and extra.
Step 7: SELECT Data
To actually see the data in the table, we can use the SELECT command. The SELECT command requires to know:
- The table we want to view
- The columns within that table we want to view
Using the format:
- SELECT <columns> FROM <table>
As a handy shortcut if we want to see data from all the columns, we can use the asterix ("*") as a wildcard instead of typing out every single column name. So, to see a dump of all the data from the cardnumbers table, we type:
- SELECT * FROM cardnumbers;

As we can see, MySQL displayed all the information from the cardnumbers table to our screen.
Step 8: Export Data
Now that we know where the data is, we need to export it so that we can use it. MySQL has a command called mysqldump. Generally, it is used to create a backup copy of the data. You can run it from any command prompt, but you will need:
- A username (root)
- The password for that username (toor)
- The name of the database you want data from (creditcardnumbers)
- The table within the database you want (cardnumbers)
- The directory you want to dump to (/tmp)
So, to "dump" the data from command line we simply type:
- mysql --tab = /tmp --user root -p creditcardnumbers cardnumbers;
This will send the data to the directory we designated, in this case /tmp.
Success!
As we can see below (after we changed to the /tmp directory and then listed that directory) we have created two files, cardnumbers.sql and cardnumbers.txt. The first, cardnumbers.sql, contains a script to create the table necessary to hold the data and the second, cardnumbers.txt, contains the data.

Now, we have successfully acquired the key and valuable information from this database, essentially having found the golden fleece of hacking!

Since MySQL is SO critical to web apps, we will be spending a few tutorials on understanding it, then how to find it and finally how to hack it, so keeps coming back my greenhorn hackers for more adventures in Hackerland.
Just updated your iPhone? You'll find new emoji, enhanced security, podcast transcripts, Apple Cash virtual numbers, and other useful features. There are even new additions hidden within Safari. Find out what's new and changed on your iPhone with the iOS 17.4 update.








38 Comments
'for more adventures in Hackerland' is an awesome (if slightly cliche) tagline.
Thanks Nemesis. I'll take that as a compliment.
That's coming up soon.
Thanks for your great tutorial.
You say in your tutorial:
So, to "dump" the data from command line we simply type:
mysql --tab = /tmp --user root -p creditcardnumbers card numbers;
I thought you must replace mysql for mysqldump. So it will be:
mysqldump --tab = /tmp --user root -p creditcardnumbers card numbers;
Is that right?
How far into hacking are you gonna go? Where is the border to illegal?
Anthony:
I just have also added that there is a profession called "penetration testing" that is growing rapidly. Companies pay "hackers" to try to break in to their systems to expose potential security threats. In this way, they can repair those vulnerabilities before the malicious hackers find them.
Hacking is a rapidly growing, well paying profession. No longer is it just the realm of the cyber crime gangs.
OTW
Since you are new here, you may not be aware that hacking is a legal and legitimate profession. Every military on the planet as well their spy agencies are engaged in hacking.
Yes, I actually did know about that already but isn't it something else if you allow everyone around the world, included little kiddo's like me, to hack themselves into the actually private systems of their friends. I probably won't start a career as a programmer and so I'm not interested in helping any company with my hacking skills.
Please don't get me wrong, I love what you are doing and every new bit I'm learning amuses me more because in every lesson I learn a bit more about this awesome and so fluently working network. It's really fascinating, but I don't know if a 13 year old minecraft playing kid should learn how to crack a Wifi password just because he crashed into this site by googling. I just started to read your series so I don't really know easy your going to make it for us but please keep this in mind (if you get what I mean). :D
Greetings "The Antagonist"
Along with information security being second only to Business Intelligence in ICT expenditure. Every company in the world is mindful of infosec. It's a little hard to protect information if you don't know its being accessed to start with.
Good point.
The monkey is worried about the machine gun. There's something that doesn't happen very often.....
Anthony, I think the key point to make here is all of these tutorials are displayed INSIDE YOUR OWN NETWORK, and all of these tools are readily available.
As to your reference to you being a 13 year old minecraft playing kid, its much better to follow these guides by someone like OTW that has no nasty intentions. Rather than some idiot on the web who is going to get you to point your tools at a FBI server as part of the tutorial! Jus'sayin
It just occured to me how nasty that sounded. The monkey thing is a long running joke relating to Backtrack (the linux distro most of us use)
Personally i say good on you for having a curious mind. Learning > playing mindcrafter anyday. :-)
haha I'm 18 and don't play Minecraft anymore mainly just because of those kiddies and because there is no sense at all. I rather play games like "The Stanley Parable" :D Hope you know it, otherwise you should check it out, even though you maybe don't play games anymore. It's more than a game..
I just wanted to say, I didn't get the monkey joke at all but I guess that will come with time. :)
Has it something to do with the abilities that are given with Backtrack?
Sir
Sorry for pointing out mistake but...
In the Export Data command Shouldn't the command be mysqldump instead of mysql.
Hope you will change it soon to avoid confusion for readers.
Thank you
Pranav
mysql won't starting
FAIL Starting MySQL database server: mysqld . . . . . . . . . . . . . . failed!
Maybe(not in order):
Start Apache
Start mysql
root to localhost
What Linux are you running and what command did you run?
OTW
os - kali linux
and
i used to start it from - 'application menu.kali linux .system services.mysql.mysql start'
now its one week i can't strat mysql
service --status-all
If you could run it before , What changed that it can not run now? Sys update? Custom pkg? You tweaked something? etc? or you just woke up and it refuses to run anymore?
i cannot get my MySQL to start, when i go to the option on the GUI it will bring up the bash shell and say "sh: 1: service: not found"
But when i use the bash shell it says "Starting mysql database server: mysqld already running"
I spent too much time on it and tried a few things to rid of mysql to start new, to no success.
When i do mysql -u root -p it says - Access denied for user 'root'@'localhost (using password: YES)' - without the dashes of course, just was trying to distinguish the command from my statement.
If anybody has a suggestion i'd appreciate it, worked on it for a while as i try avoiding asking questions in forums as the answer takes time.
To stop mysql, just type "service mysqld stop".
Initially, mysql's root account has no password.
Hope that helps.
There should not be a > after mysql.
yes i got that now. Thank you, got it all set up but i'll do it again sometime later to get a better idea of it.
I'm having trouble when it comes to entering the password I type in toor and it doesn't work. I get:
ERROR 1045 (28000) : Access denied for user '-root'@'localhost' (using password: YES)
What do i do in this situation
The default setup does not have a password for root in mysql.
I'm not well with mysql but did you set up a password at the system set up for mysql? if so use that
Edit: That part has been tripping me up, i swear for one distro i made a password for mysql at system start up.
sometimes i forget to put ; after a command. Is there a way to revert back without starting the whole thing all over again?
No matter what password I try or leave it blank I'm still denied access....
And when I try to reset it, after typing
mysqlsafe -skip-grant-tables
I get:
150911 13:51:47 mysqldsafe Can't log to error log and syslog at the same time. Remove all --log-error configuration options for --syslog to take effect.
150911 13:51:47 mysqldsafe Logging to '/var/log/mysql/error.log'.
150911 13:51:47 mysqldsafe Starting mysqld daemon with databases from /var/lib/mysql
150911 13:51:49 mysqldsafe mysqld from pid file /var/run/mysqld/mysqld.pid ended
does this work on kali 2.0 also ?
How could a hacker dump gbs of gbs data unnoticed?
Help
So I guess I'll start by saying that I am on a virtual machine running Kali. When I try to start the mysql service with, "service mysql start" it won't give me any kind of response at all. I've been waiting pretty long now. I am 100% sure that I have the msql-server and not the client installed. When I try to type just mysql to bring up the mysql monitor it gives me the error, "ERROR 2002 (HY000): Can't connect to local MySQL server through socket '/var/run/mysqld/mysqld.sock' (2)" I'm assuming this is because that the service isn't running in the first place. I've even used the old method of starting the mysql service by typing, "/etc/init.d/mysql start" and it gives me, ".... Starting mysql (via systemctl): mysql.service" with the same blinking prompt as before.
Same problem - Any solutions?
cmd - service mysql start
cmd - service mysql status
cmd - mysql -u root -p
then password for press enter button(mysql has no password in kali)
Dear OTW,
1) Whose mysql database are you hacking here? Is it your website or someone else.
2) If it is someone else's how to know their Address of mysql server.
3) When you typed "mysql -u root -p 192.168.1.101" , what password did you put in?
I don't think we would have the password of the mysql server.
Been going through this in order, don't recall creating a creditcard DB.....do you have a link to that one or are we supposed to create our own? DVWA doesn't have that, just a user DB.
OTW dear!
how to do this and stay undetected?
proxychains mysql -u root -p 192.168.1.101 or how to cover ass in such performance?
Thank you!
great tutorial!
tks!
Share Your Thoughts