


Surveillance is always a useful tool in a hacker's arsenal, whether deployed offensively or defensively. Watching targets yourself isn't always practical, and traditional surveillance camera systems can be costly, lacking in capabilities, or both. Today, we will use motionEyeOS running on a Raspberry Pi Zero to create a small, concealable Wi-Fi connected spy camera that is both affordable and easily concealed.
What Do I Use It For?
What couldn't you use a 1 inch, sub $40 spy camera for? Really though, sophisticated surveillance has traditionally been out of reach to most people, and it's only been recently that boards like the Pi Zero W have been powerful enough to make these cool devices. Thanks to the almost plug-and-play nature of the Raspberry Pi, throwing together a customizable day or night vision camera is cheap and easy.
So now that you can make one easily, there are two main ways a hacker can use a spy camera. The first is to help secure a compound from physical entry with the classic CCTV setup. This is what the build we are making today is best configured for.
Prior to launching an attack, the camera can also be used to perform stealthy recon to observe target behavior in an area, as well as any security measures. If put in place within the target area, it could be used to gather information, like watching targets type their passwords, taking pictures of keys, and observing how users respond to attacks.
MotionEyeOS
To make this build as quick and simple as possible, we will be using a custom image for the Raspberry Pi called motionEyeOS.
MotionEyeOS is a Linux distribution that turns a single-board computer into a video surveillance system. The OS is based on BuildRoot and uses motion as a backend and motionEye for the frontend.
To put it in simple terms, this will let us set up as many Raspberry Pi cameras as we want, all connected on a single pretty web interface that we can forward to the internet, and view anywhere in the world. Additionally, we will be able to set up motion detection, so that we don't have to watch hours and hours of nothing happening.
Regular Camera vs NoIR Camera
There are two types of camera boards that we can use for the Pi. Both are 8 Megapixel, and shoot in 1080p. The standard camera is just like the camera you have on your smartphone, but not quite as high quality. The NoIR camera is a little different. As the name implies, it has no IR (infrared) filter. This means it can see more of the light spectrum than a standard camera, giving it the major advantage in night vision, but at the cost of appearing washed out during the day.
You can see the differences more clearly in the video below, skip the first 40 seconds to get right to the action.
In general, the standard camera will work great indoors when you expect the environment to be lit at the time you want to observe it. An example would be if the room always has lights on, such as a lobby.
If you'll be shooting in the dark, use the NoIR camera instead so you have the power to see in the darkness. Don't forget that you'll still need an IR light source, such as this IR LED illuminator or this IR LED rack in order for the camera to see. Human eyes can't see in the IR spectrum, so there is no need to worry about such a light alerting the average person to the presence of the camera.
Another factor to consider is that the motion detecting for this build is software-based, so if the camera can't see, then it won't detect movement, even if there is something actually there.
If you are thrifty, or can only afford one of the two types, I suggest you buy buy the NoIR camera. It is a few dollars more, but it comes with a piece of IR filter, so you can modify it to be a standard camera when you need it.
Buy the cameras on Amazon:
All the Cases
The case you use is very important for this build, and there are a lot of choices out there. Some of the things you may want to consider are:
- Are you using a Raspberry Pi or Pi Zero?
- Is the camera going to be placed outside or inside?
- How durable does it need to be?
- How conspicuous do you want it to be?
- Do you need an IR light source? If so do you want it in the case or somewhere else?
With those questions in mind, you can search Google for the perfect case for your needs. The default choice would be a generic camera case from Amazon. If you have access to a 3D printer, then Thingiverse is a good place to look for other options.
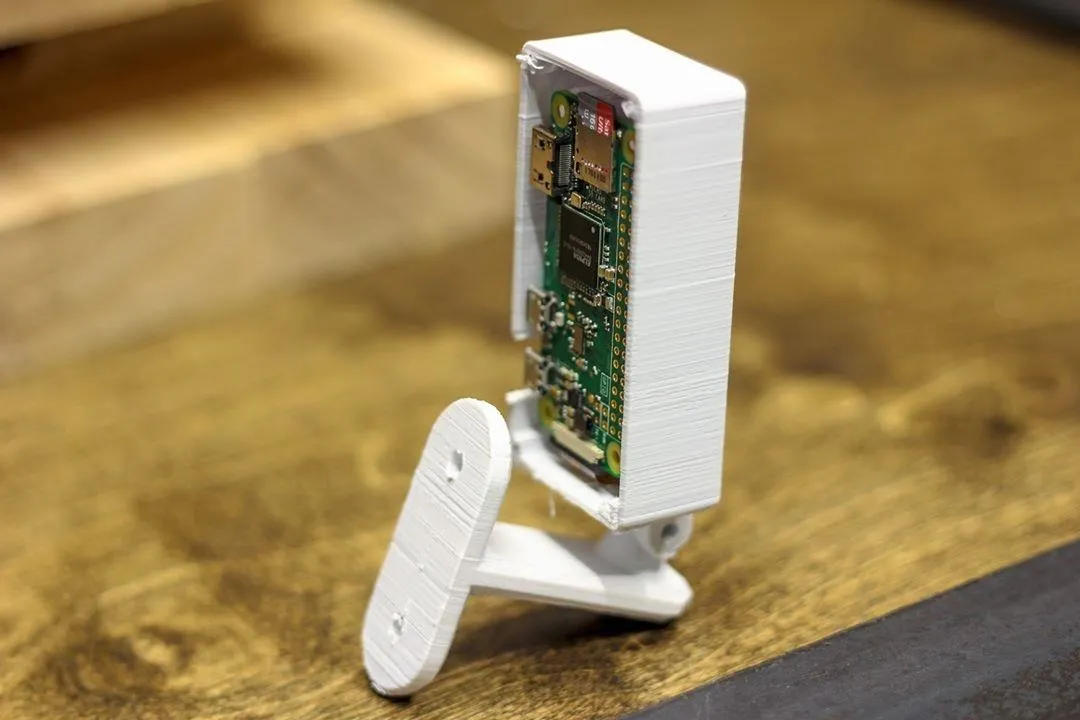
Or you can 3d print your own case.

3d printing a case for the Pi Zero W spy camera.
Or you can 3d print your own case.
3d printing a case for the Pi Zero W spy camera.
If you are using a Pi Zero, the ZeroView and Pigeon are both good choices.
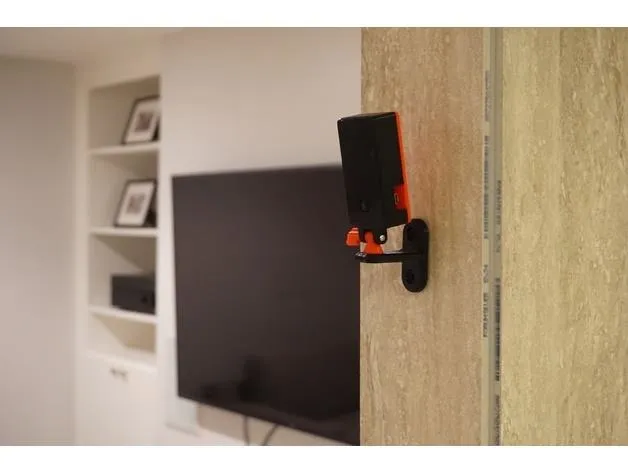
The open source Pigeon PI Zero W case.
All the Rest You'll Need to Get Started
If this is your first time buying a Raspberry Pi, then a Canakit kit is a generally great choice and has everything you need. The most cost-effective will always be the Pi Zero CanaKit and the Pi 3 CanaKit. Otherwise here is what you need for this build:
- Raspberry Pi: While any of the Pis would work, the real choice here is between the Pi 3 and Pi Zero W. The built-in Wi-Fi makes them super easy to set up, the difference is in the performance and size. If size is more important, use the Zero but it may have performance issues such as slower frame rates. Keep in mind, you can use a longer ( 2 meters) camera ribbon cable, which would make it easier to hide the Pi, as only the camera Module itself would need to be visible.
- microSD card
- microSD card reader
- power supply
Download the motionEyeOS Image
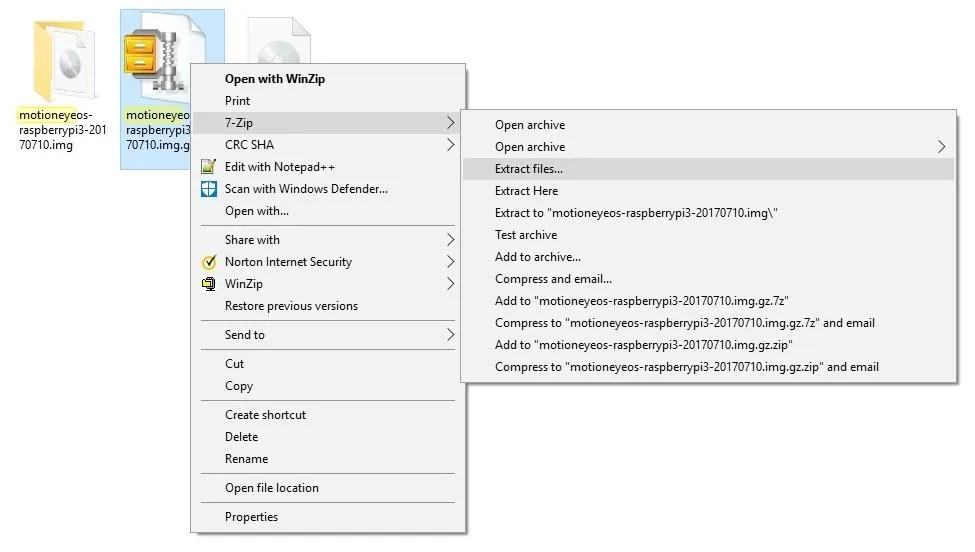
First, we need to download the custom Raspberry Pi image from motionEyeOS' Github release page. Once you navigate to the website, download the latest version for the type of Pi you are using. Remember that for the Pi Zero, you need to download the original Pi version.
The download is in archive format, so we need to extract the image from it before we can flash it. On Windows, you can use 7-Zip, and on a Mac, you can use Keka. You can also use WinZip on both. WinZip costs money, but you can usually get away with using the free trial. Once you have one of those on your computer, click on the archive and extract the files.
Flash the Image to the MicroSD Card
Now, we need to write the image to your microSD card. Best practice is to unplug any external hard drives or other USB devices you have, and then insert your microSD into its adapter and plug it in. This is important because you don't want to accidentally flash the wrong device.
If you already have a program to flash the image to the card, then you can use that. Otherwise, download Etcher, as it's the easiest to use. It works on Windows, Mac, and Linux while also having the simplest user interface. Etcher should detect what operating system you are using, but if not, make sure you download the correct version based on your operating system (OS) and follow the on-screen installation directions. Open Etcher (if it doesn't automatically after installation), and select the image you just downloaded.
Next, be sure the proper drive is selected and flash the image. Once it's done, it will safely eject the SD card. There is a rare chance that Etcher will cause an error. If that does happen, you can use ApplePiBaker for Mac or Win32 Disk Imager for Windows.

Configure Wi-Fi
We can use ethernet to connect our Pi to the network. That will give us the fastest and most stable connection that can't be jammed by a simple Wi-Fi Deauth attack, but sometimes we want or need to use a Wi-Fi connection, so let's take a quick look at how to do that.
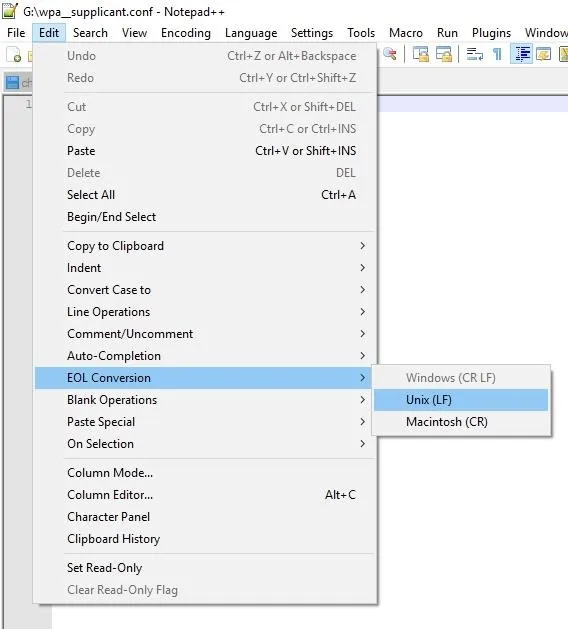
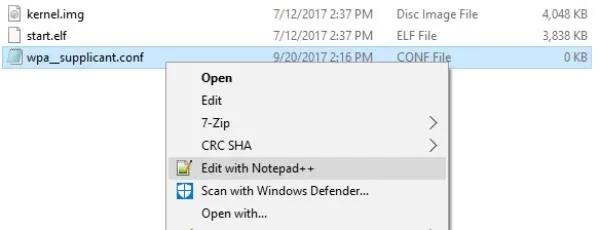
If you are using windows download Notepad++ or else you will have problems with how it saves line breaks. Once you download it, open it and go to "Edit" then "EOL Conversion" and click on "UNIX"
To have the Pi connected to the network on boot, we need to give it the network credentials. We can do this with a file called "wpa_supplicant.conf" which we add to the boot partition of the SD card. Etcher will have ejected the SD card, so physically remove it and reinsert it. In Windows, you will need to enable File name extensions under the view tab of File Explorer so that you can edit the file type.

Then, using a text editor such as Notepad++, create a file named "wpa_supplicant.conf". Here, I first made a new text document, then renamed it.
Copy in the following, replacing the SSID and PSK with your information, but don't remove the quotes. If you live outside the US, you can look up your country code and replace that too.
country=us
update_config=1
ctrlinterface=/var/run/wpasupplicantnetwork={
scan_ssid=1
ssid="MyNetworkSSID"
psk="YourPassword"
}
After that is done, save the file and safely eject the SD card. If you do a lot of Pi builds, this can be a useful file to keep on your desktop and copy over to every new Pi you set up to quickly connect it to the Wi-Fi network.
Putting Together the Device
The most important part of the assembly is to connect the camera. Let's look at how it should be done on the Pi and Pi Zero.
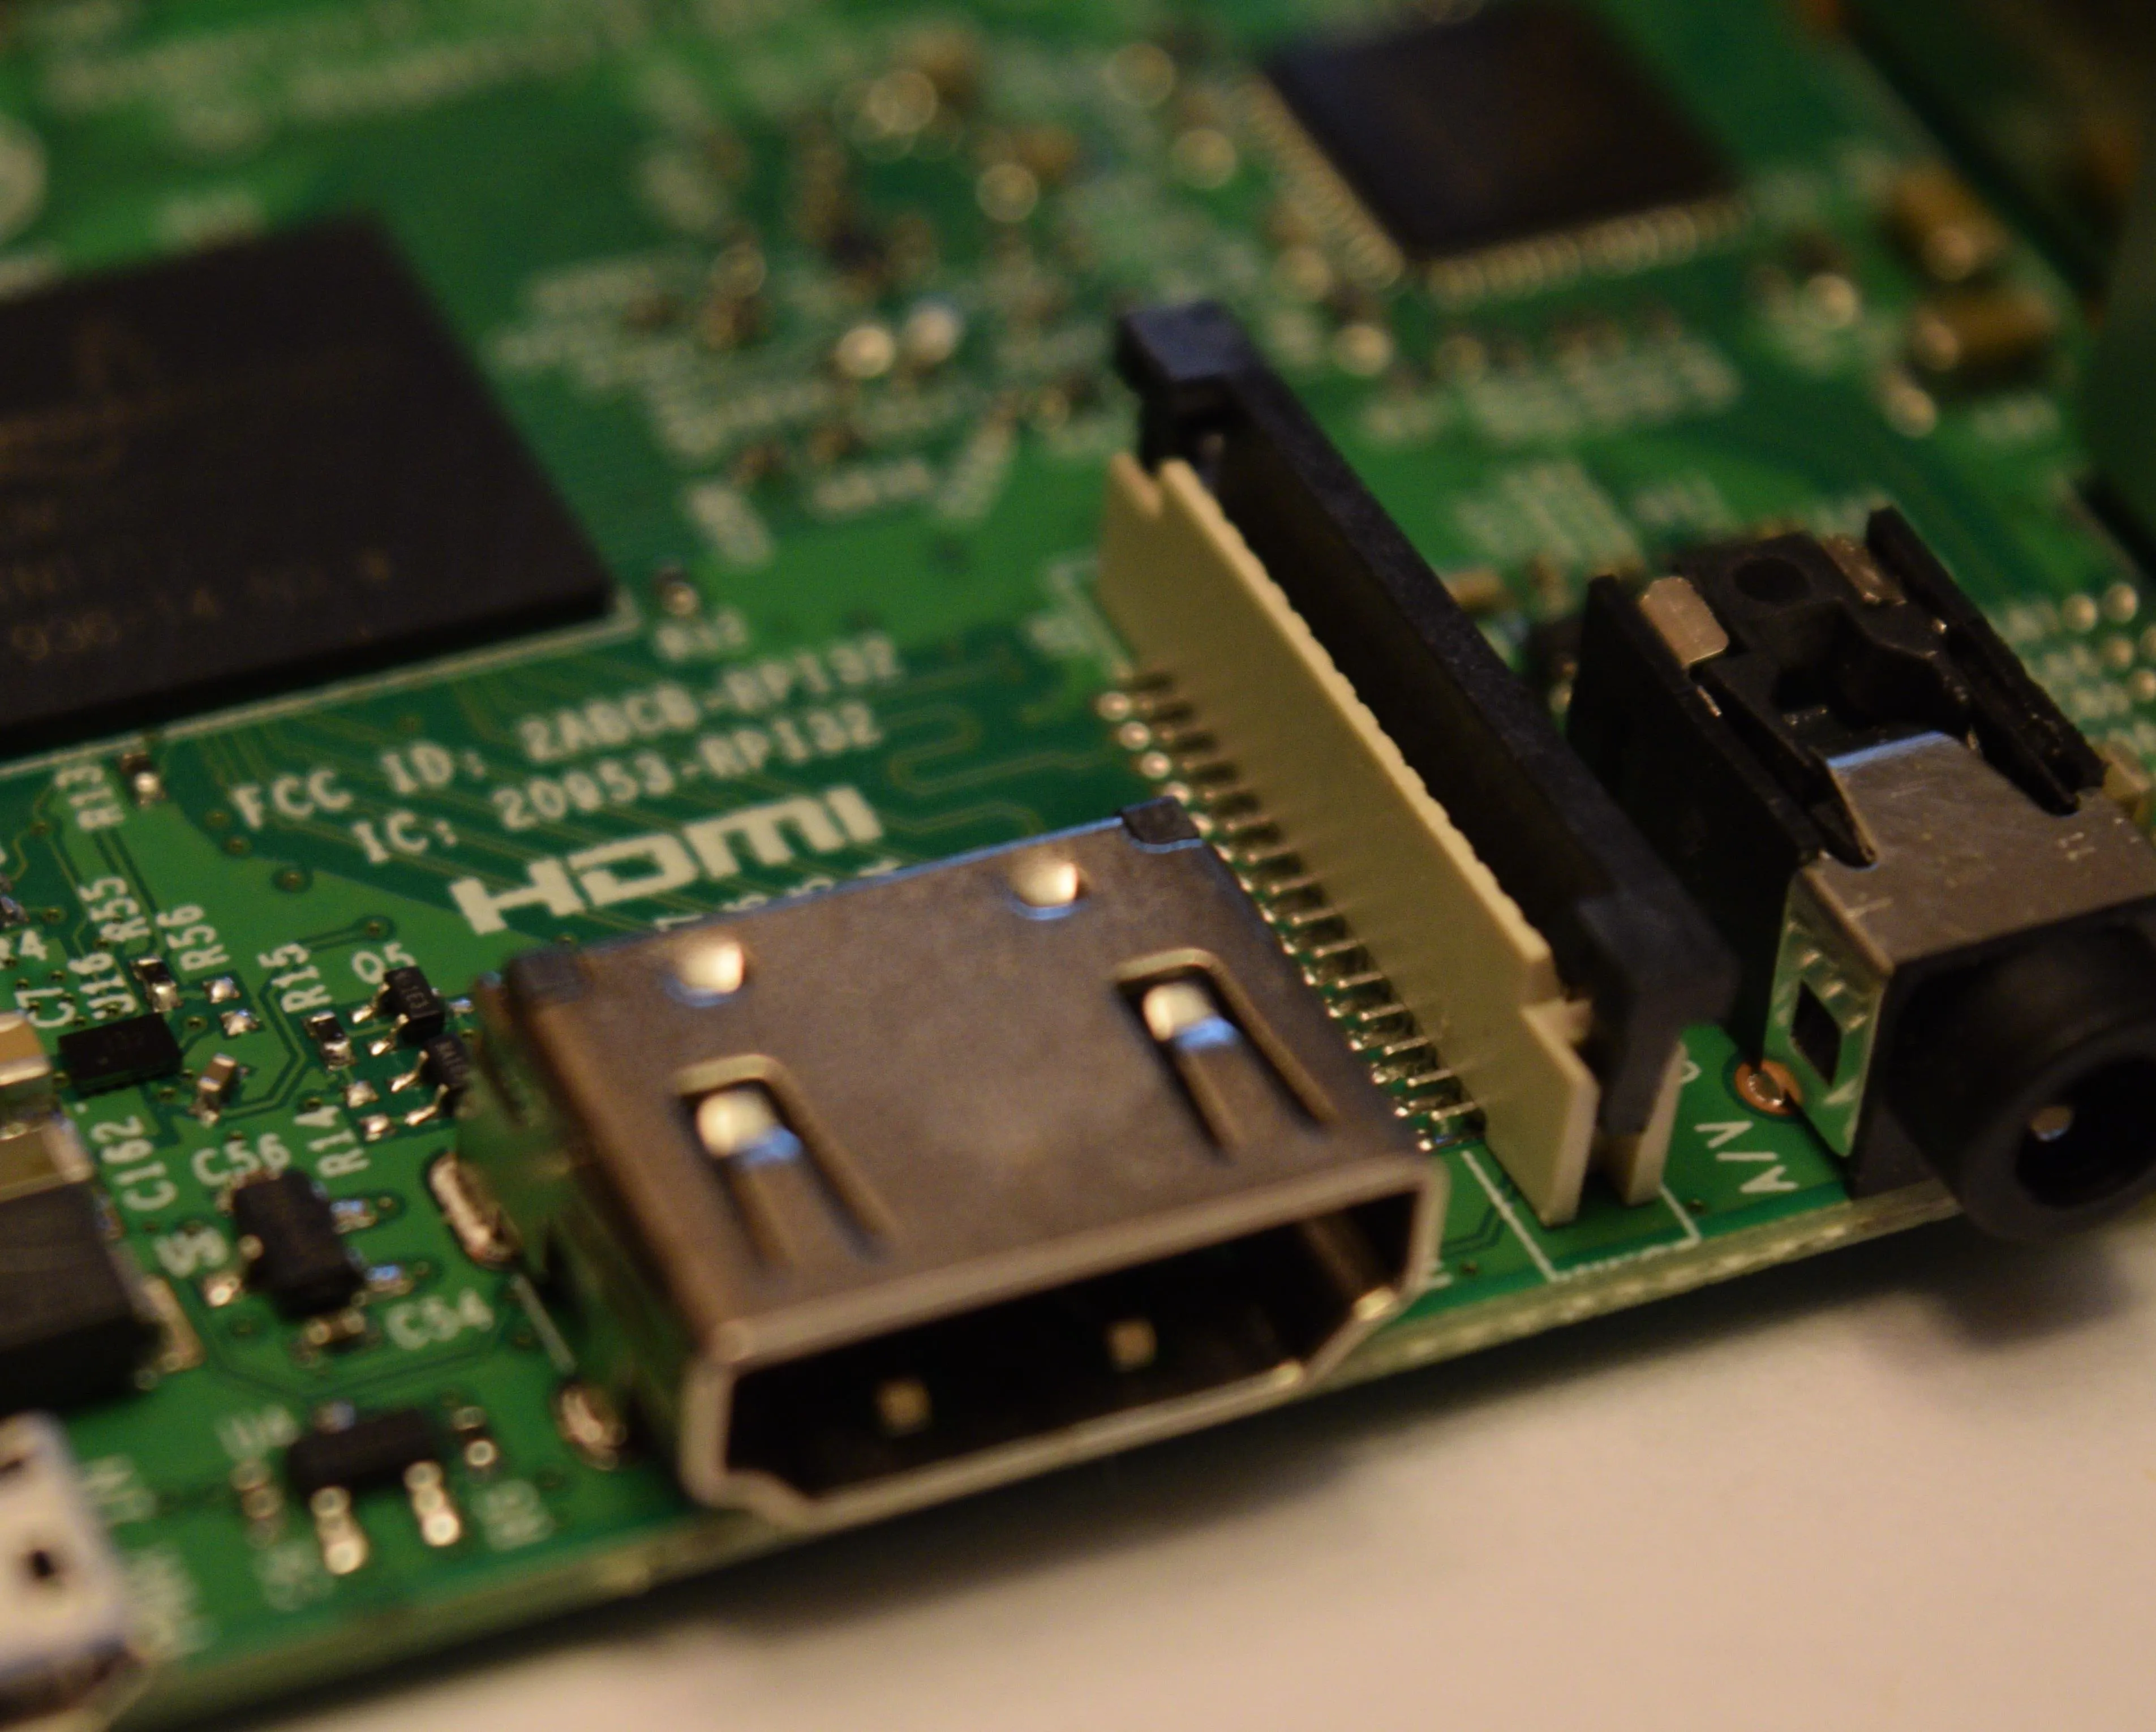
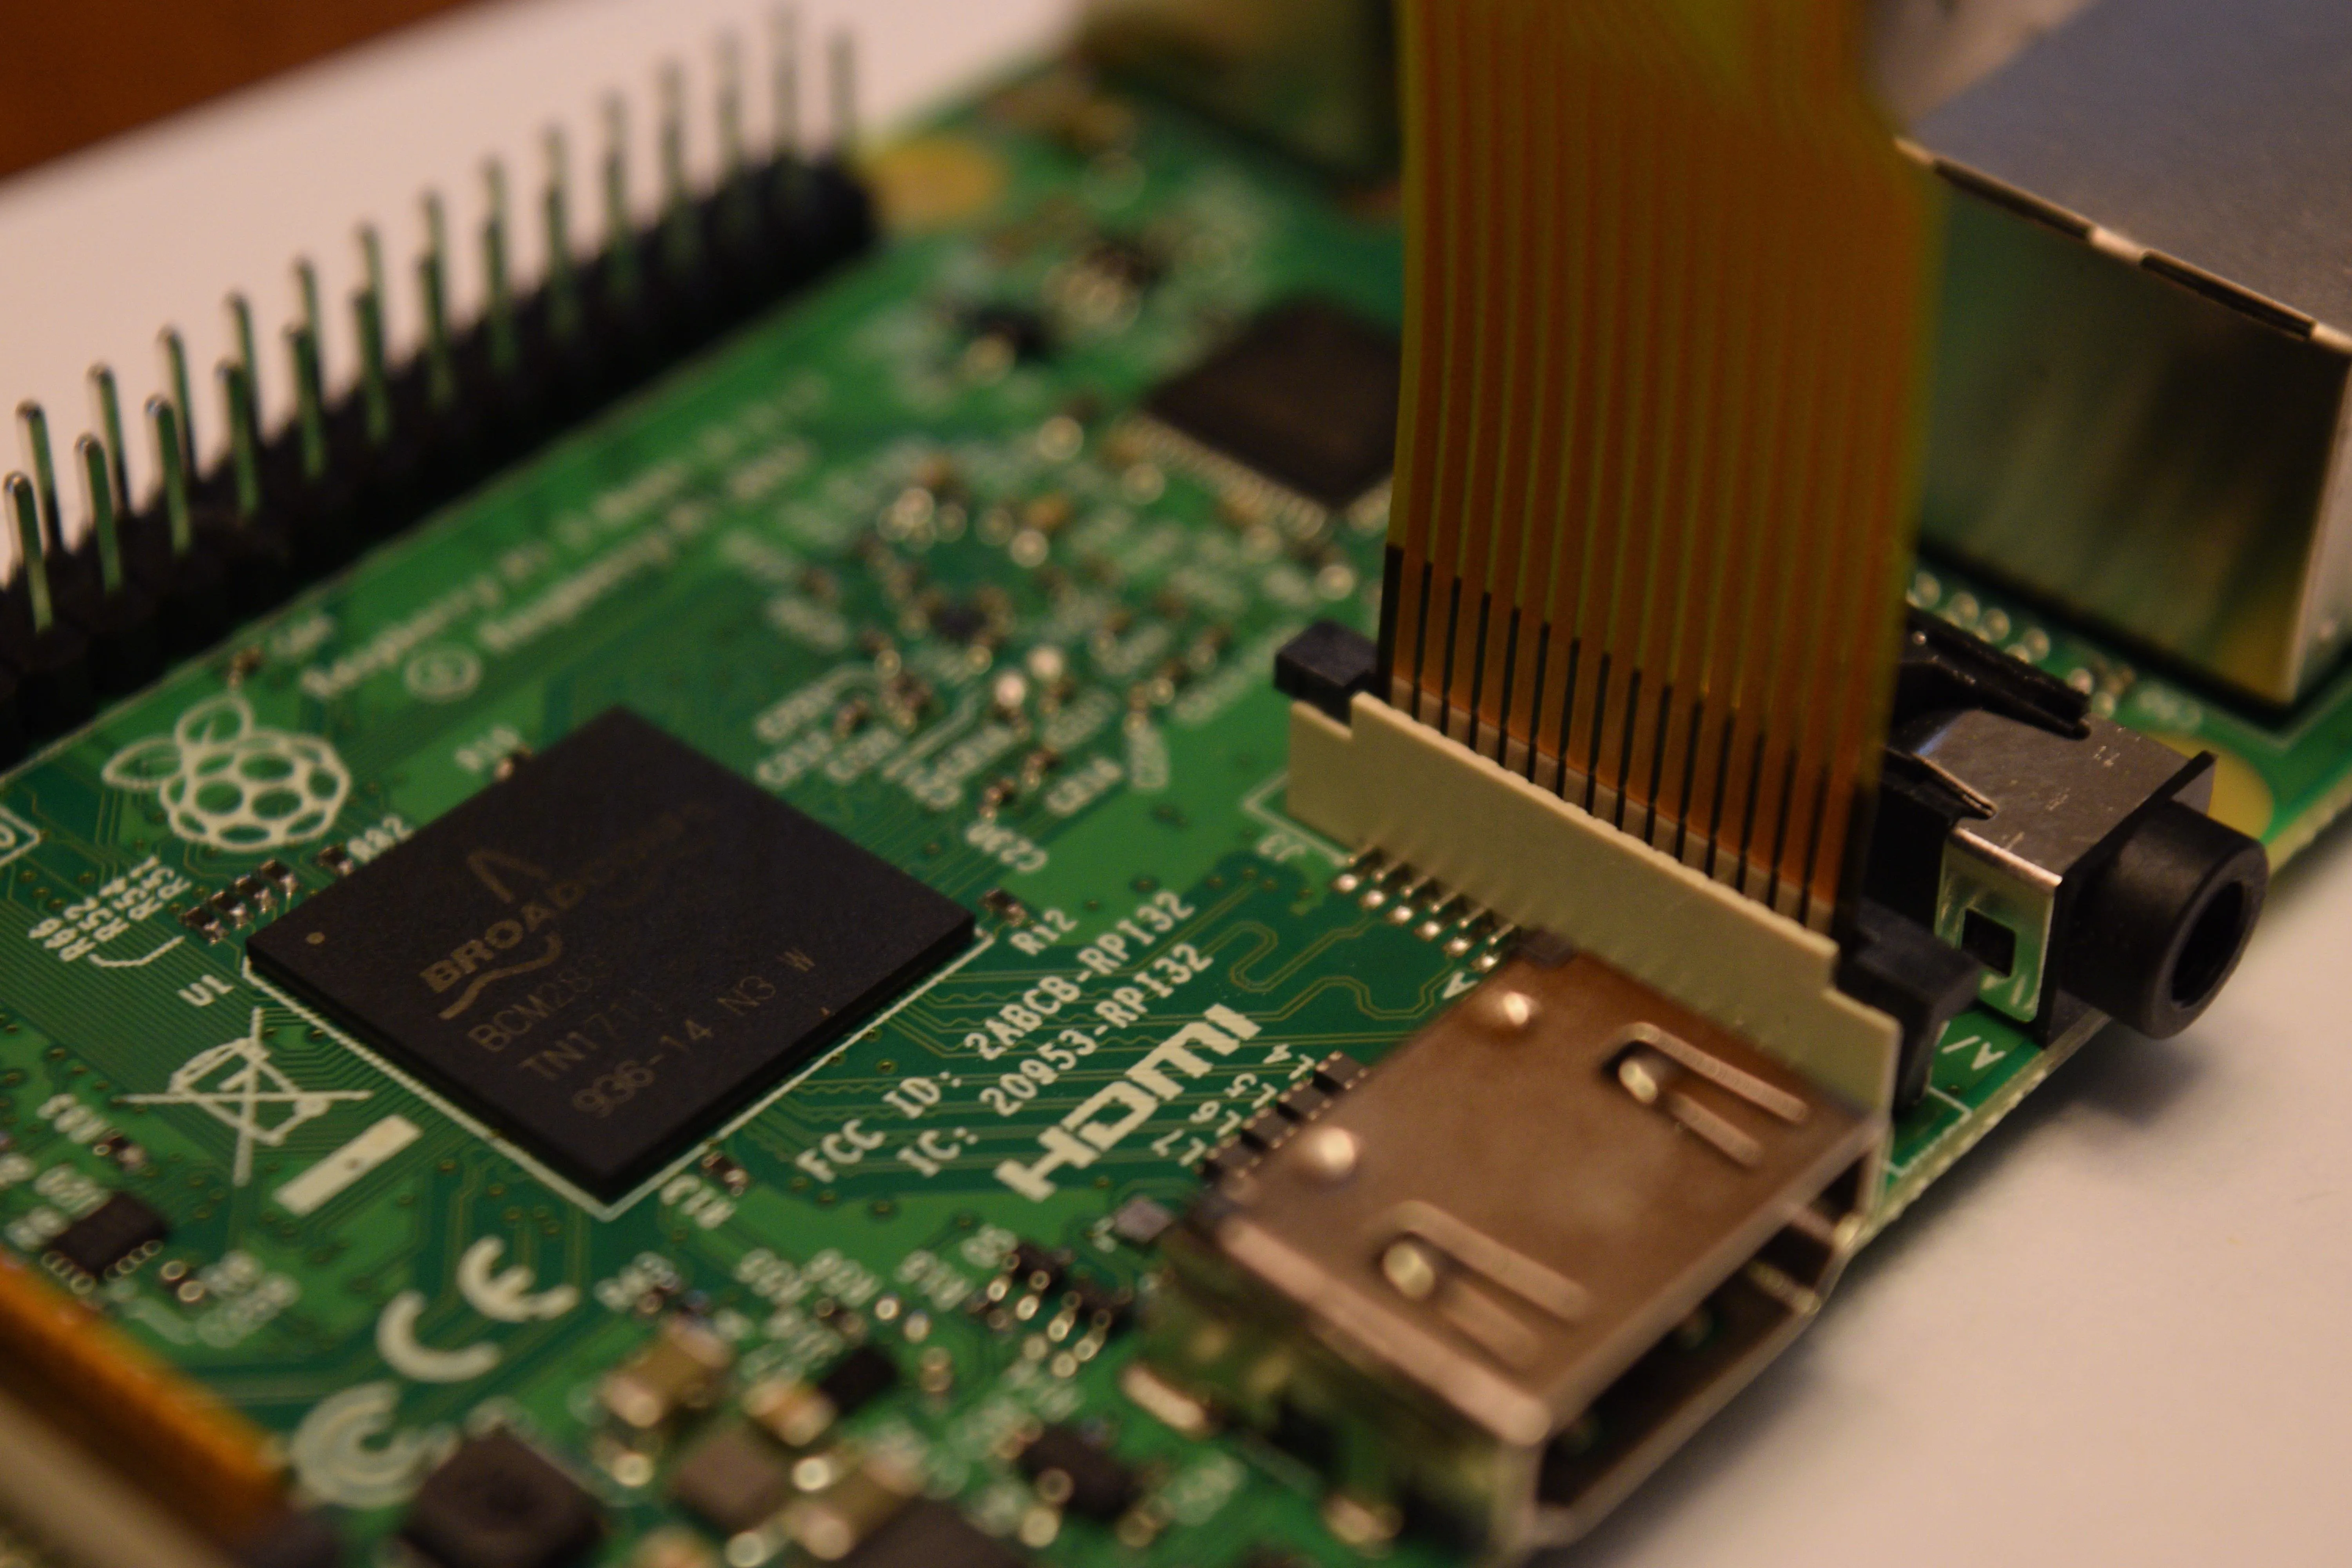
First, lift up the black plastic part of the ribbon connector, found between the HDMI and audio ports on the Pi 3.
Hoid/Null Byte
Then, insert the ribbon cable with the copper connectors facing the HDMI port and press the black piece back down.
Hoid/Null Byte
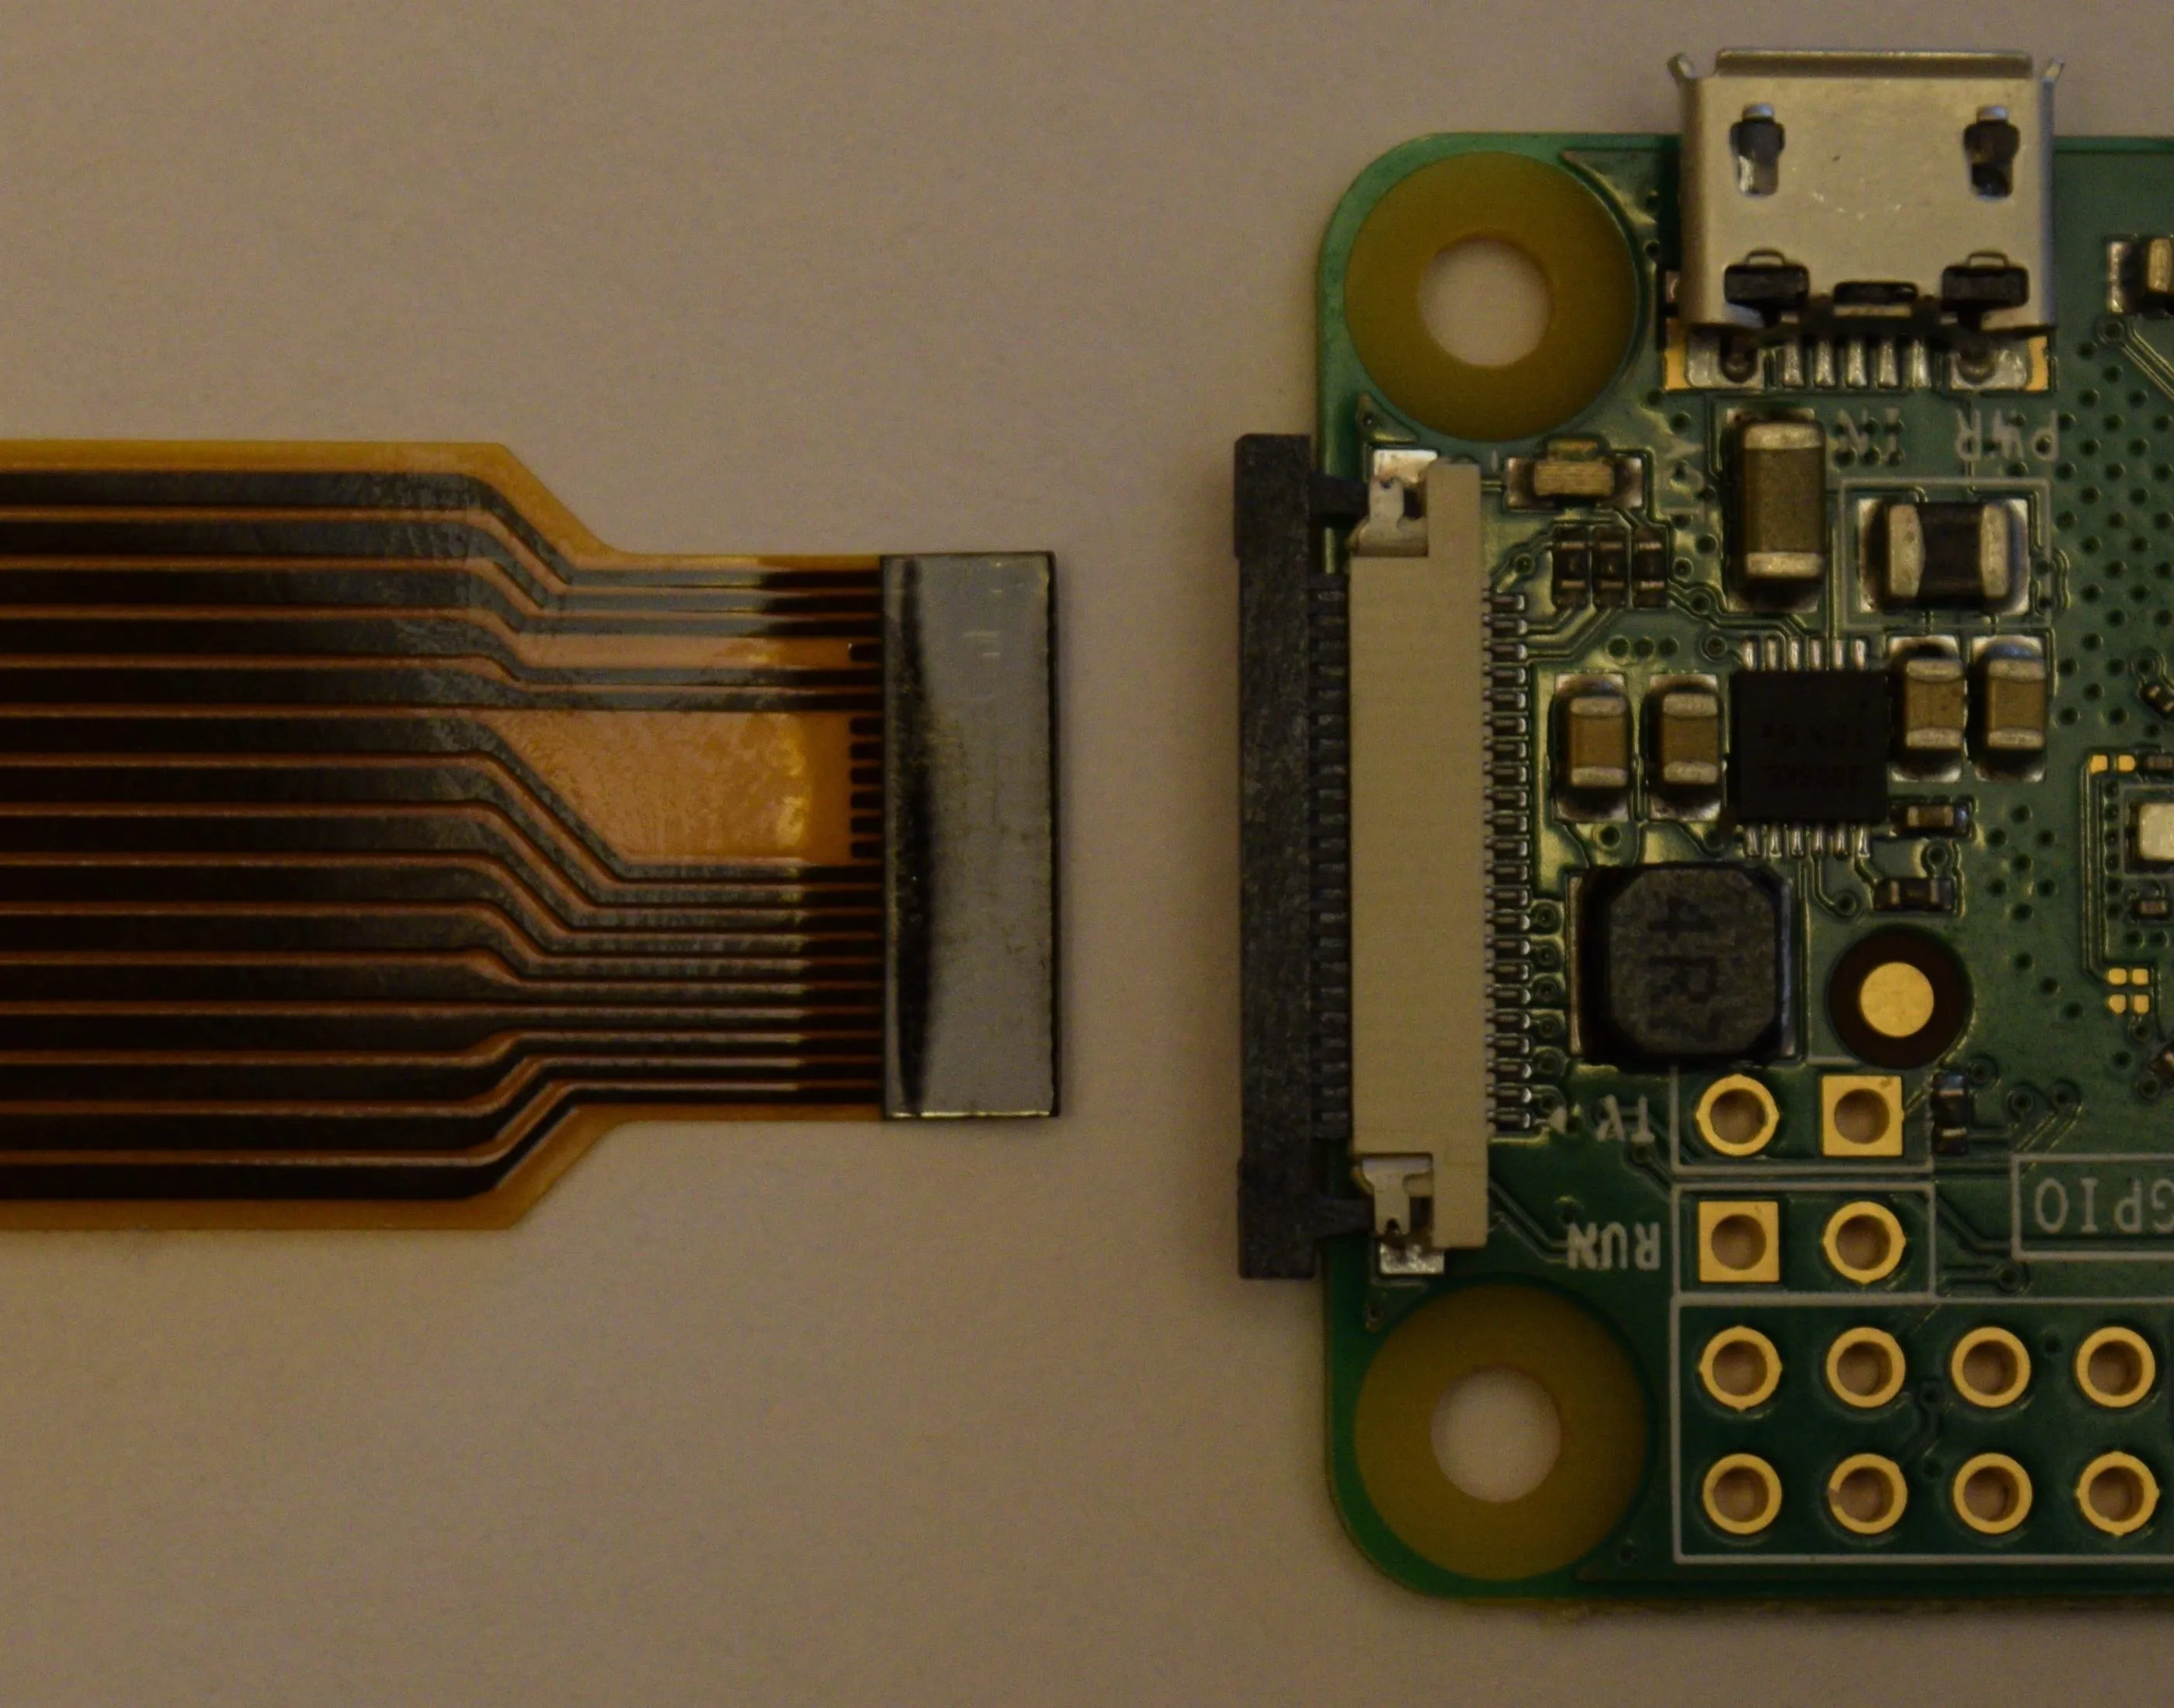
On the Pi Zero, it is very similar. Pull out the black plastic part of the ribbon connector.
Hoid/Null Byte
Now, insert the ribbon with the copper leads facing the PCB and press the black piece back in.
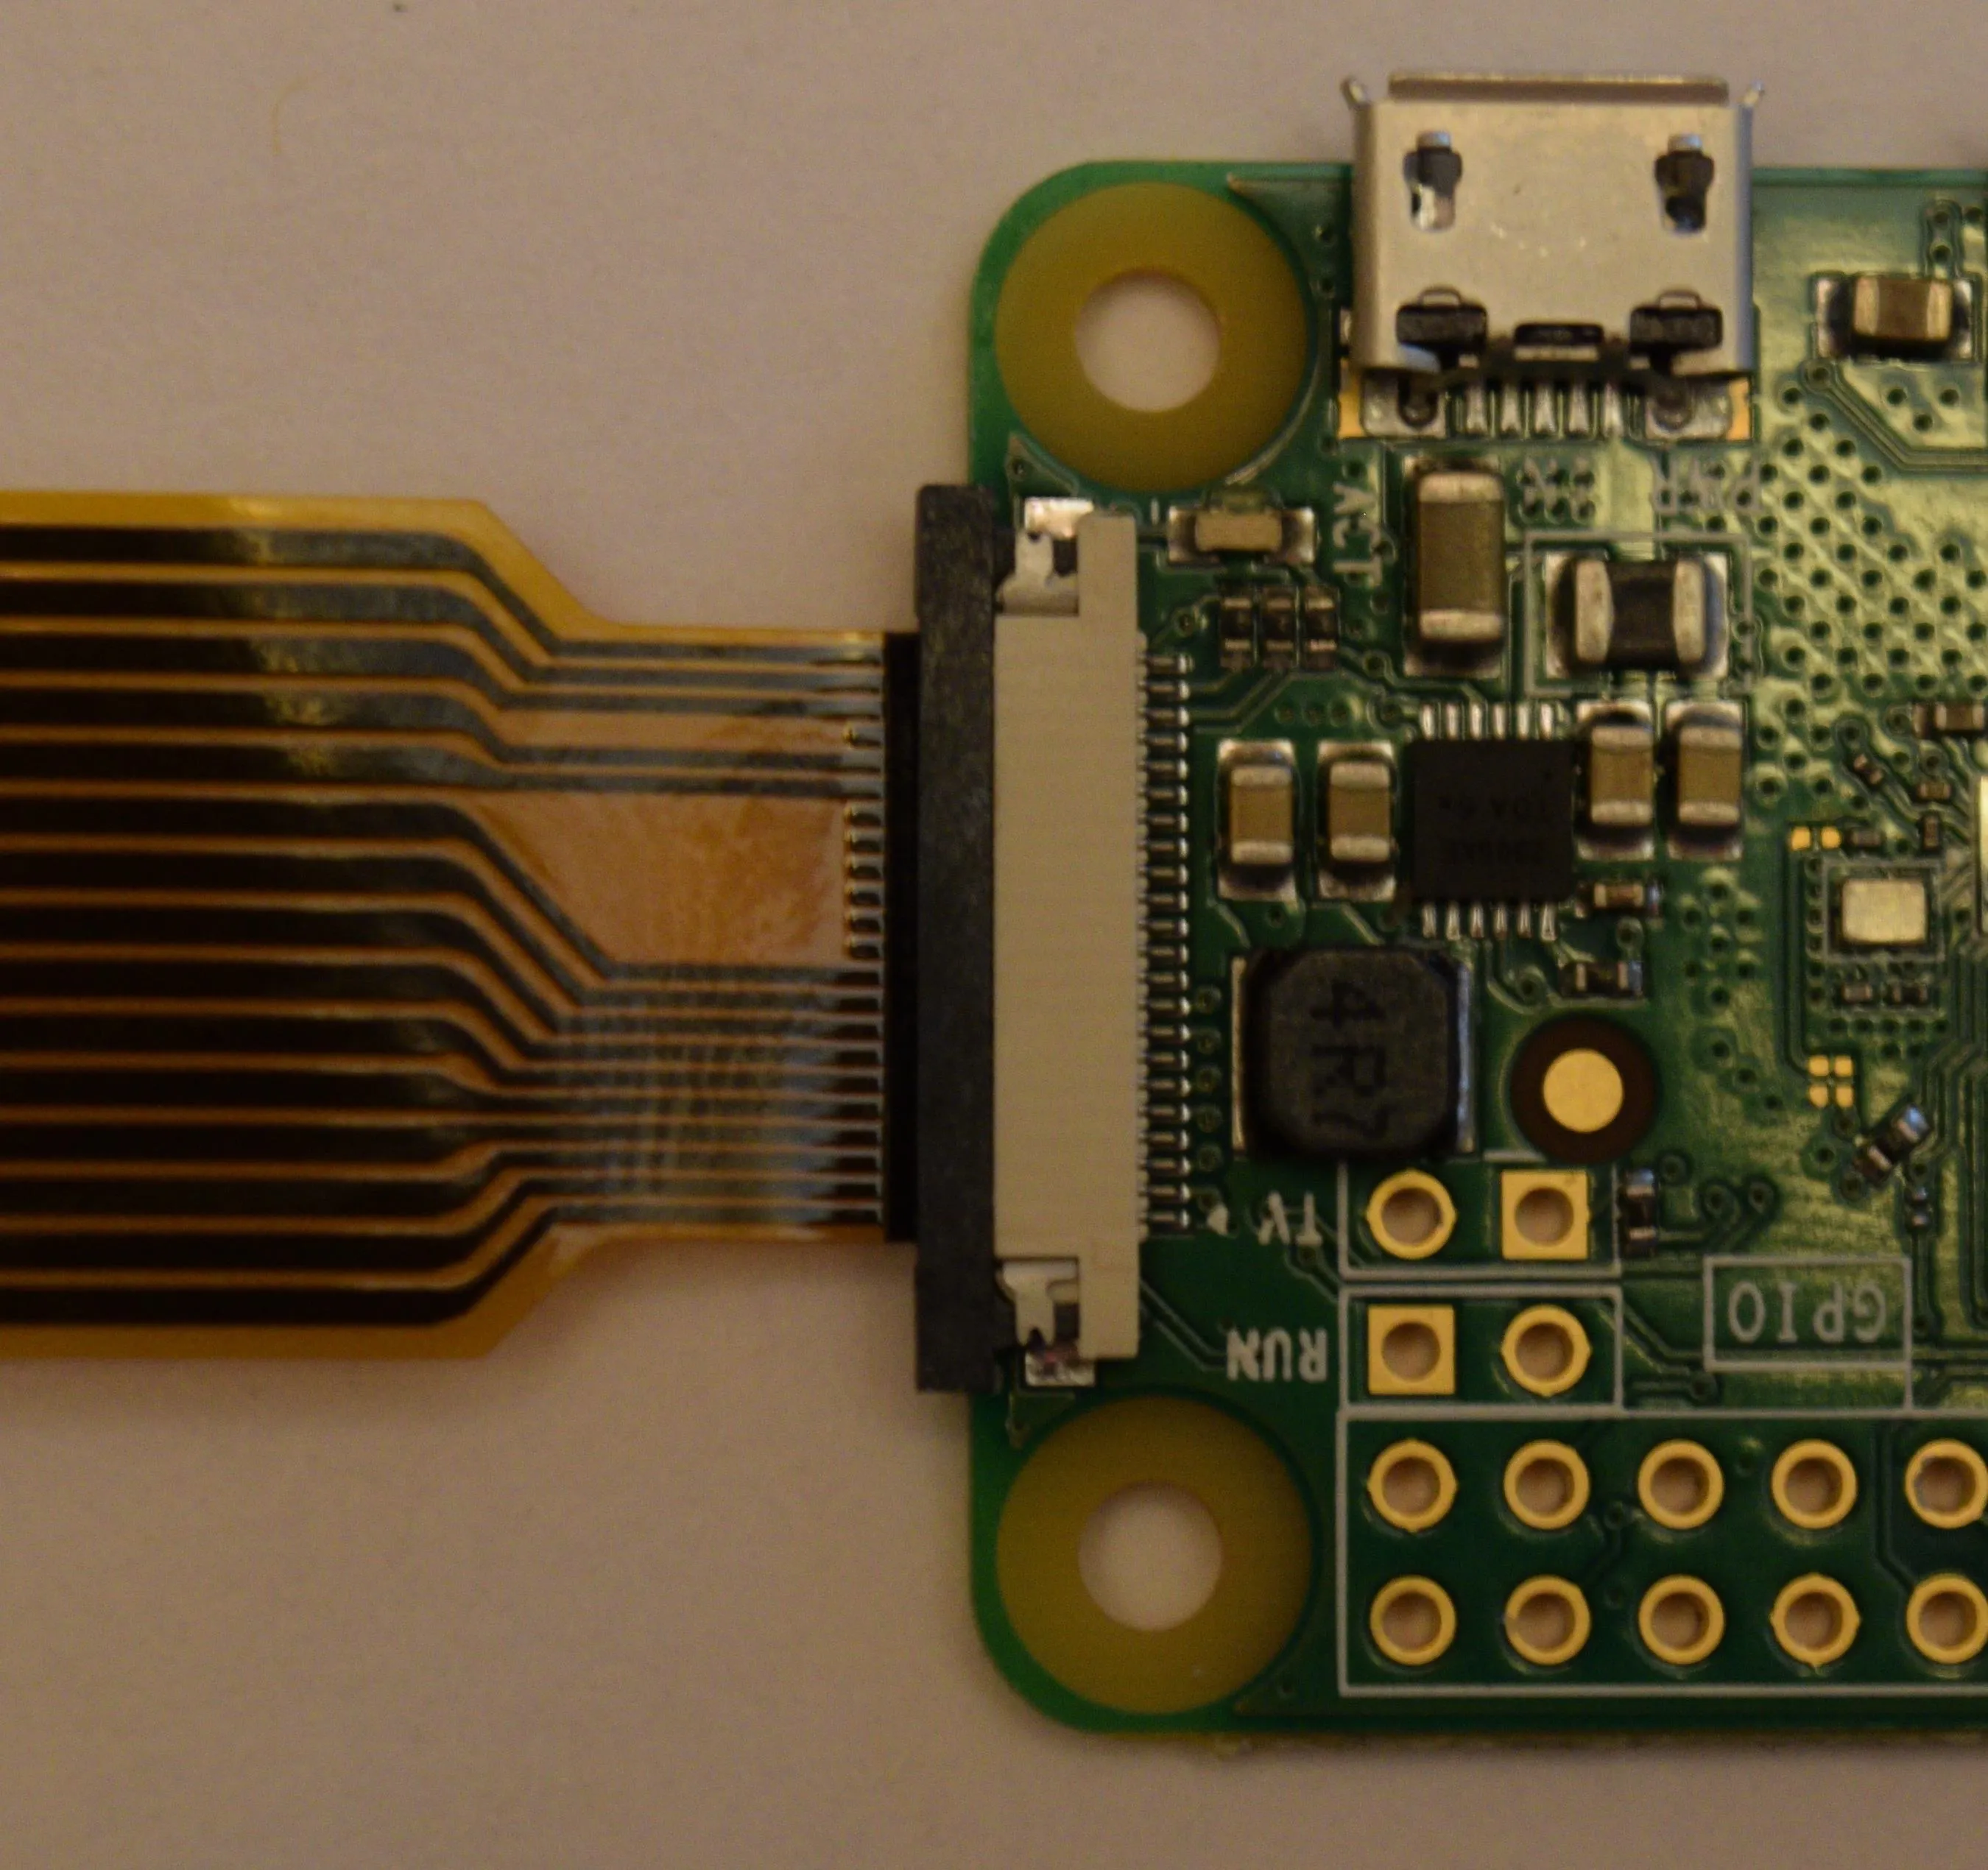
Hoid/Null Byte
After that, you should do the same with the other end of the cable and the camera module, with the copper leads facing the PCB.
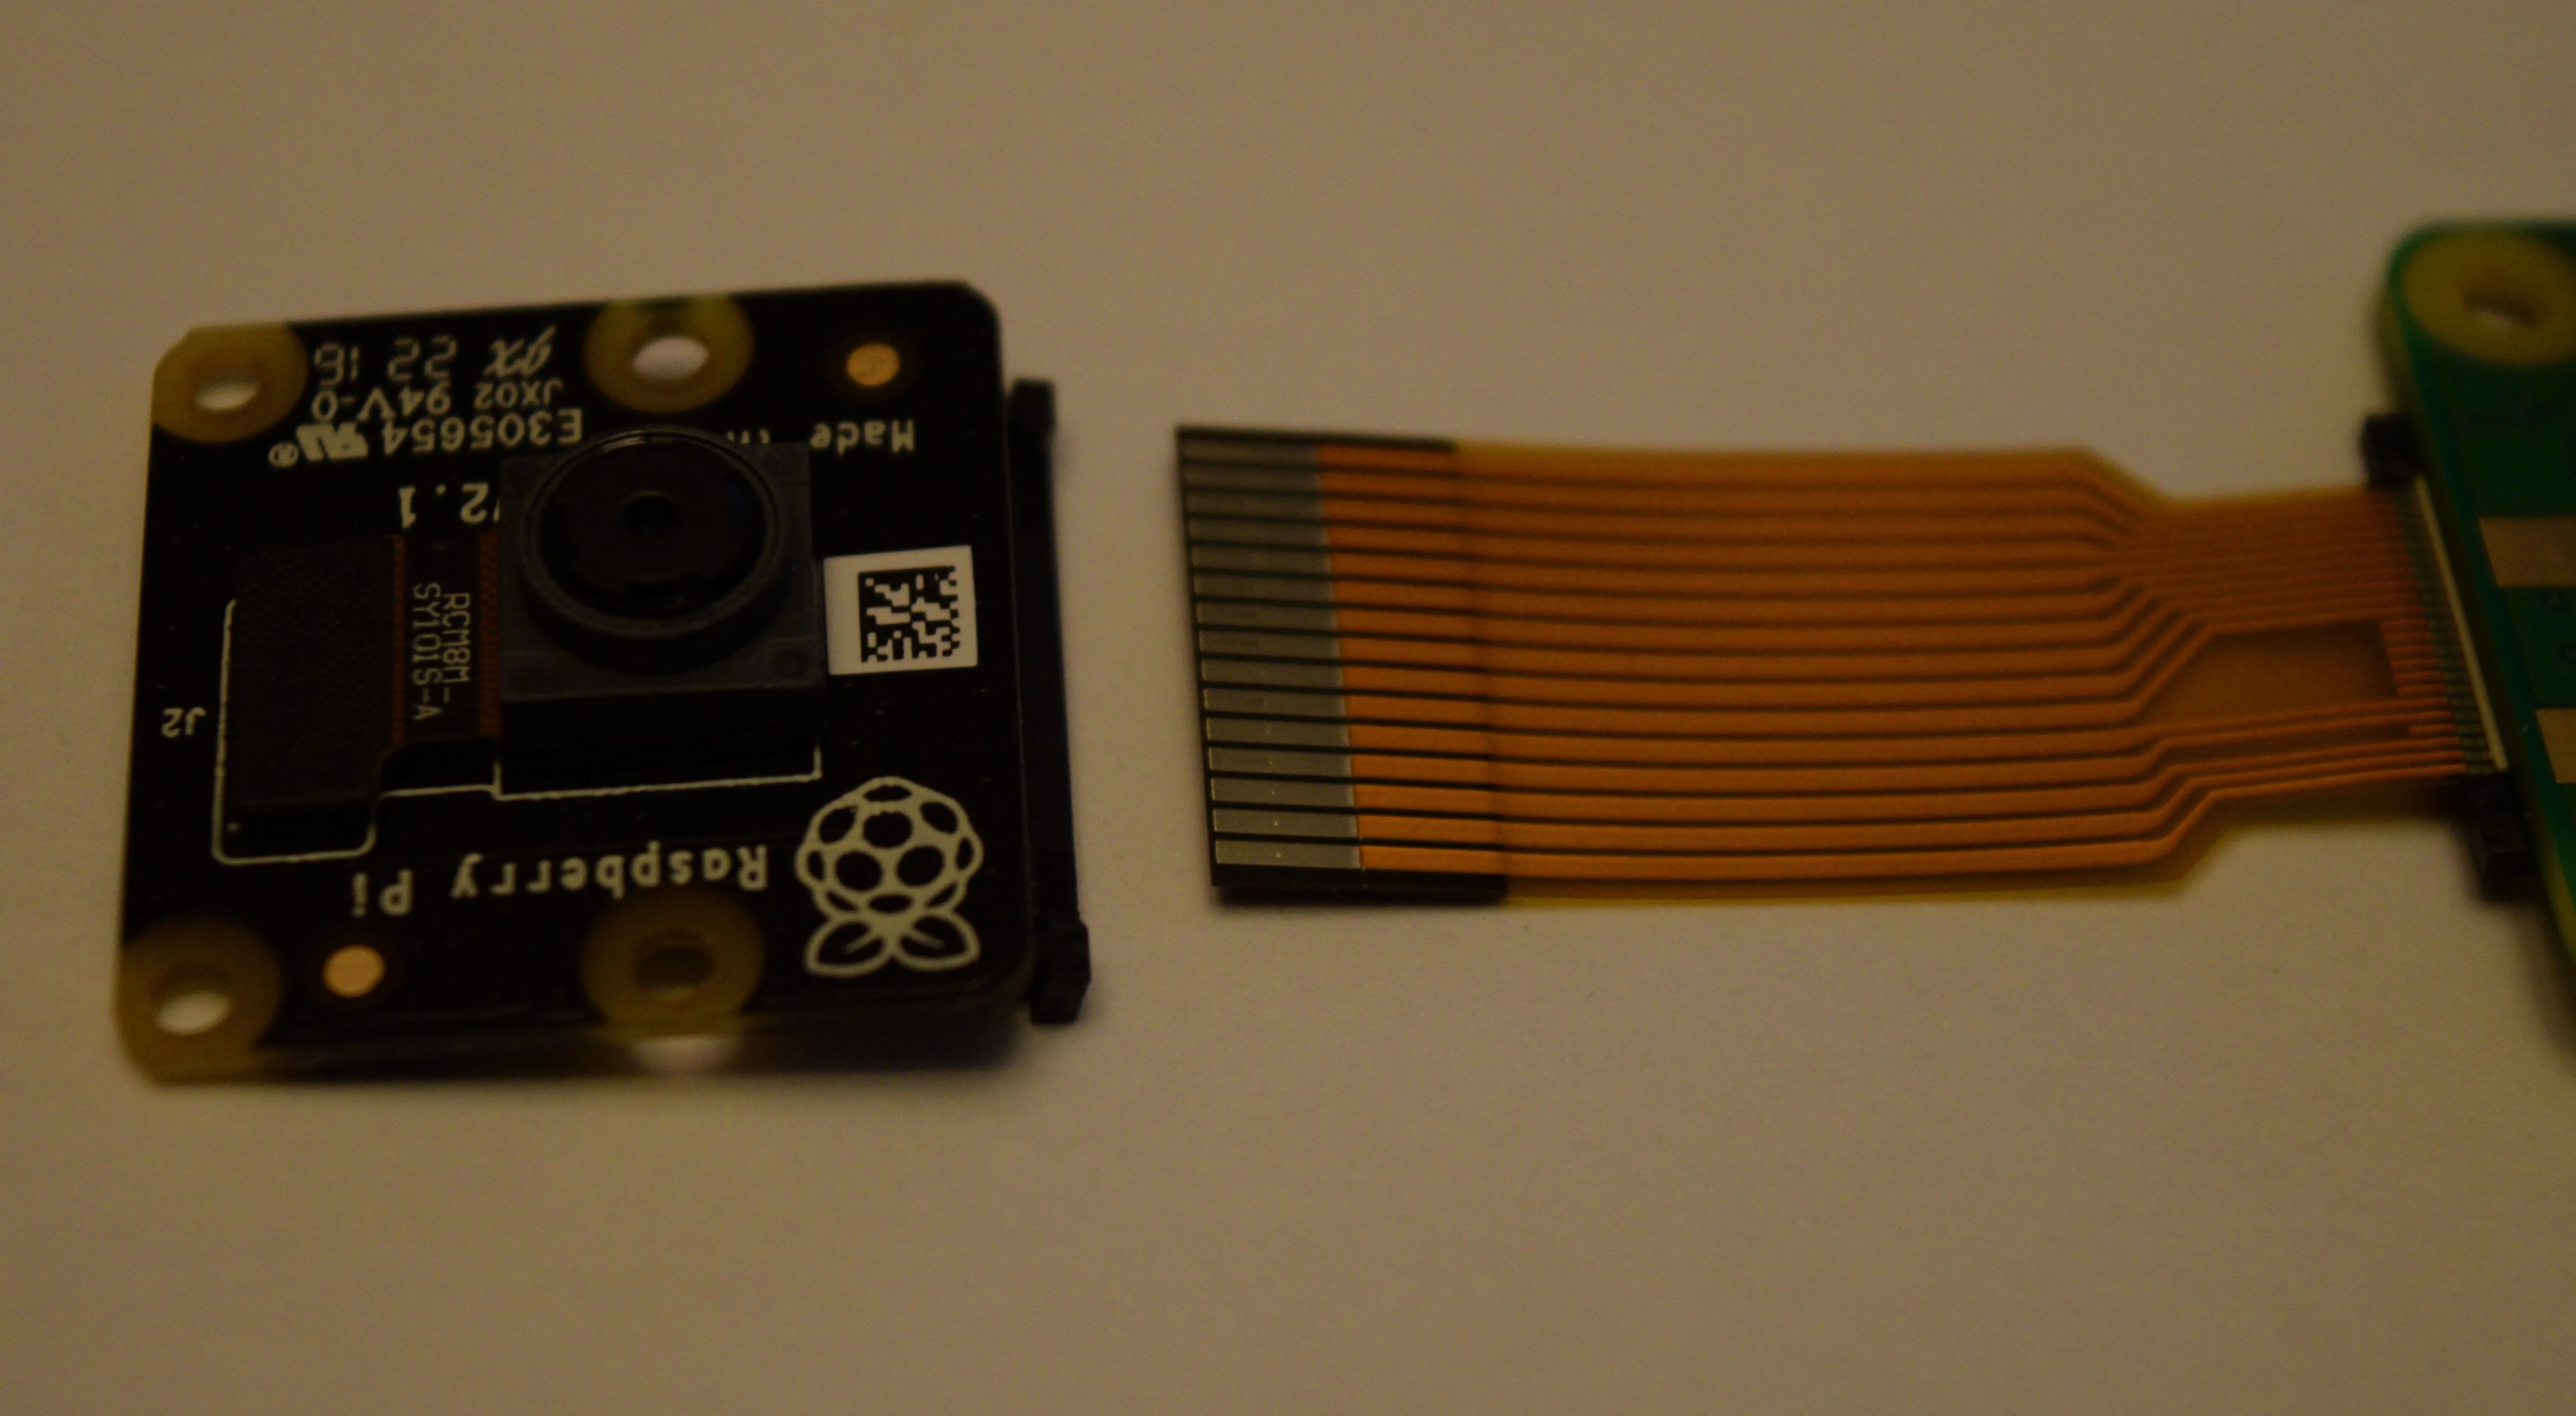
Hoid/Null Byte
Insert the SD card into the slot at the bottom of your Raspberry Pi. The last stage is to put it all in whatever housing you have chosen. Here, I have the Pi Foundation case that comes in the CanaKit.
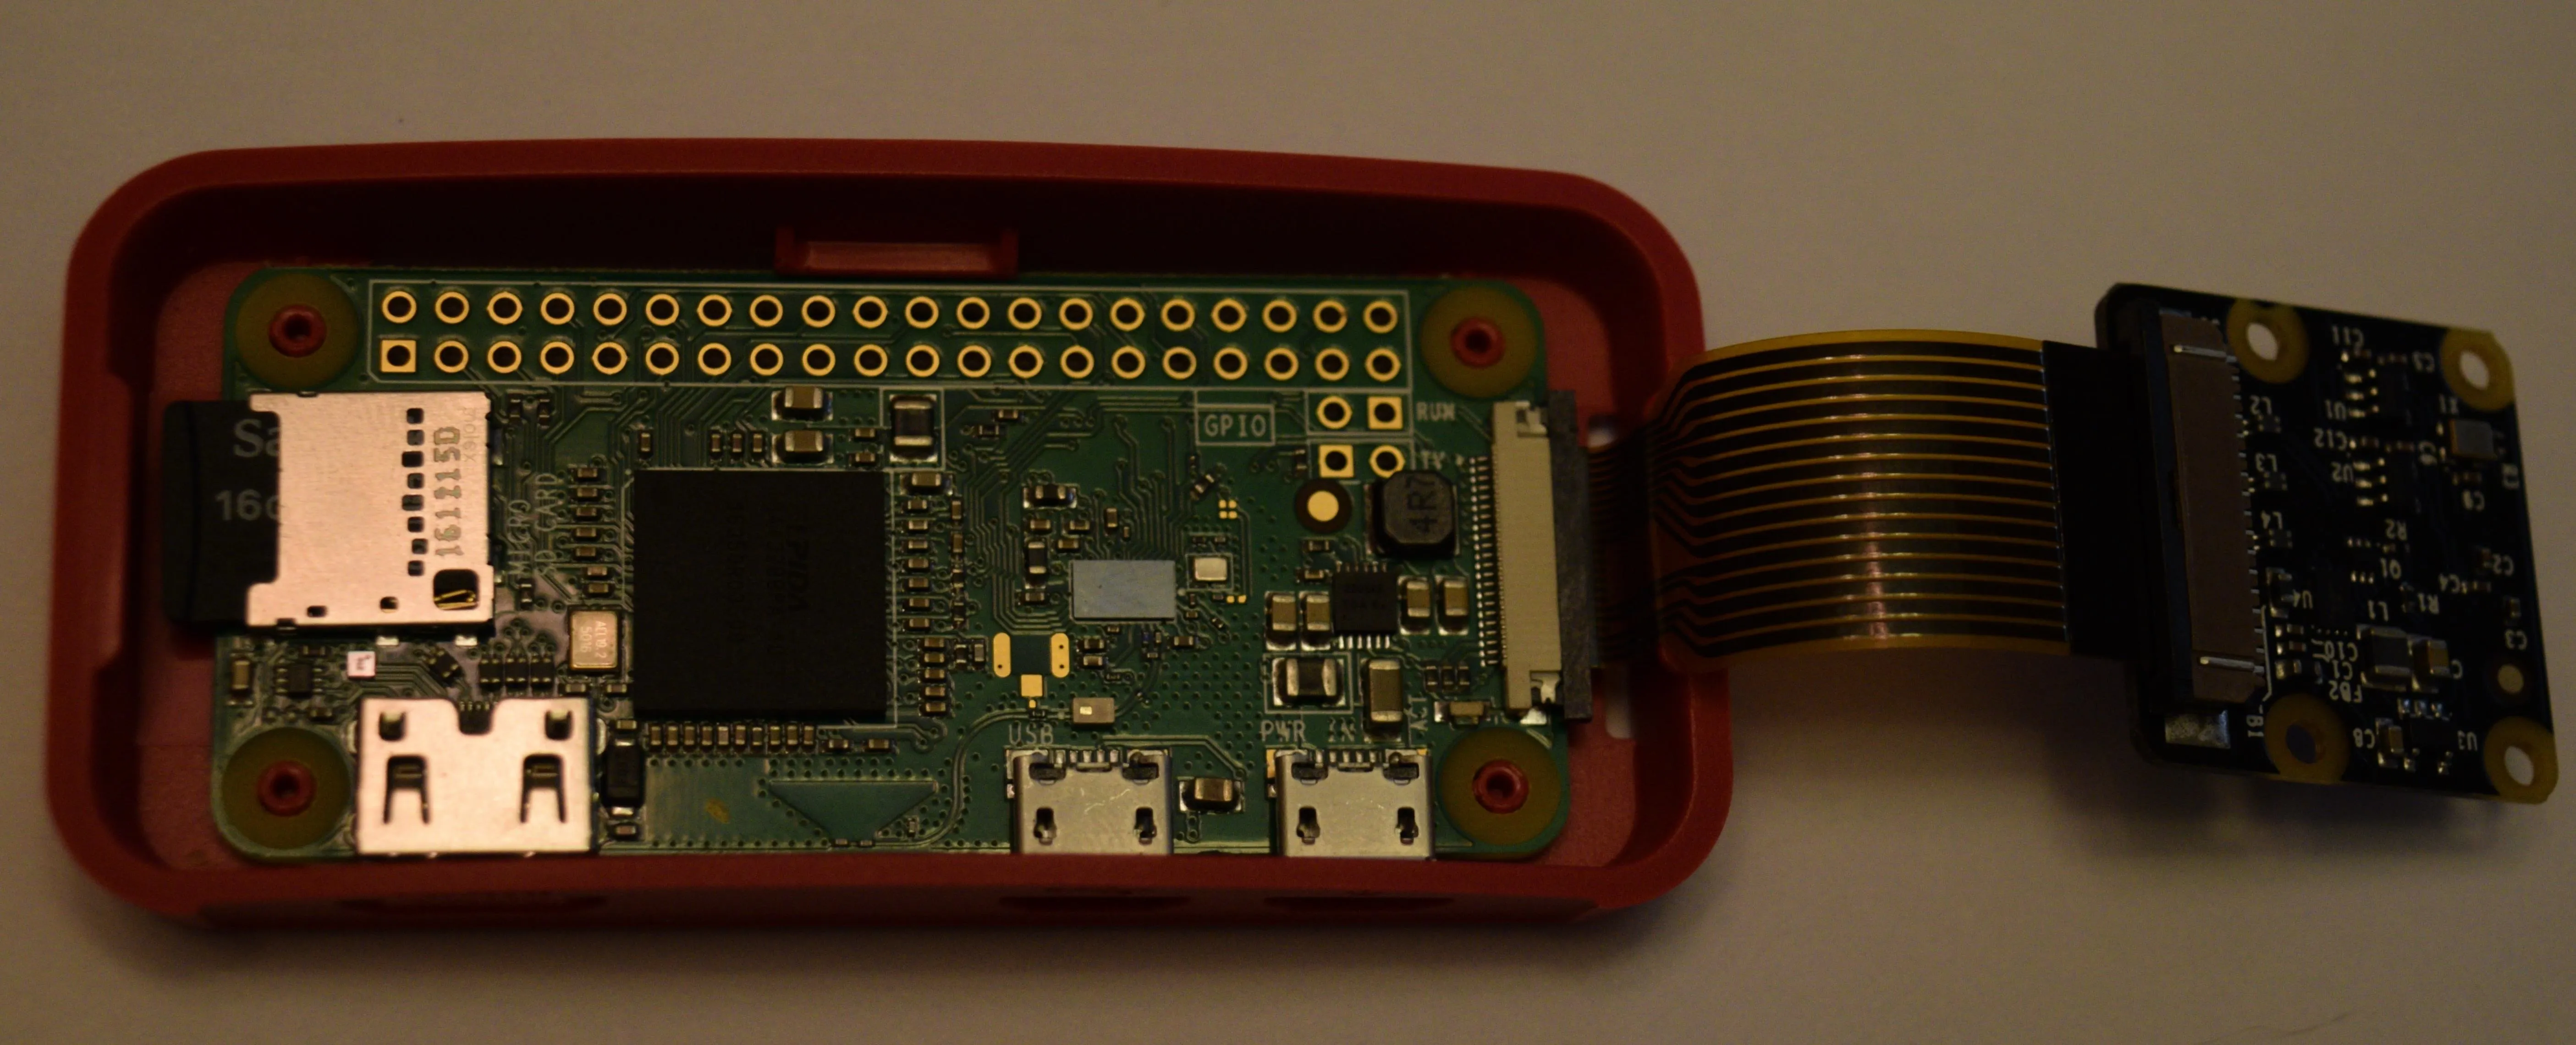
Hoid/Null Byte
Remember not to bend the cable too much, particularly at too sharp of an angle. It can take a bit of force to snap the camera in place, so don't worry too much about breaking it.
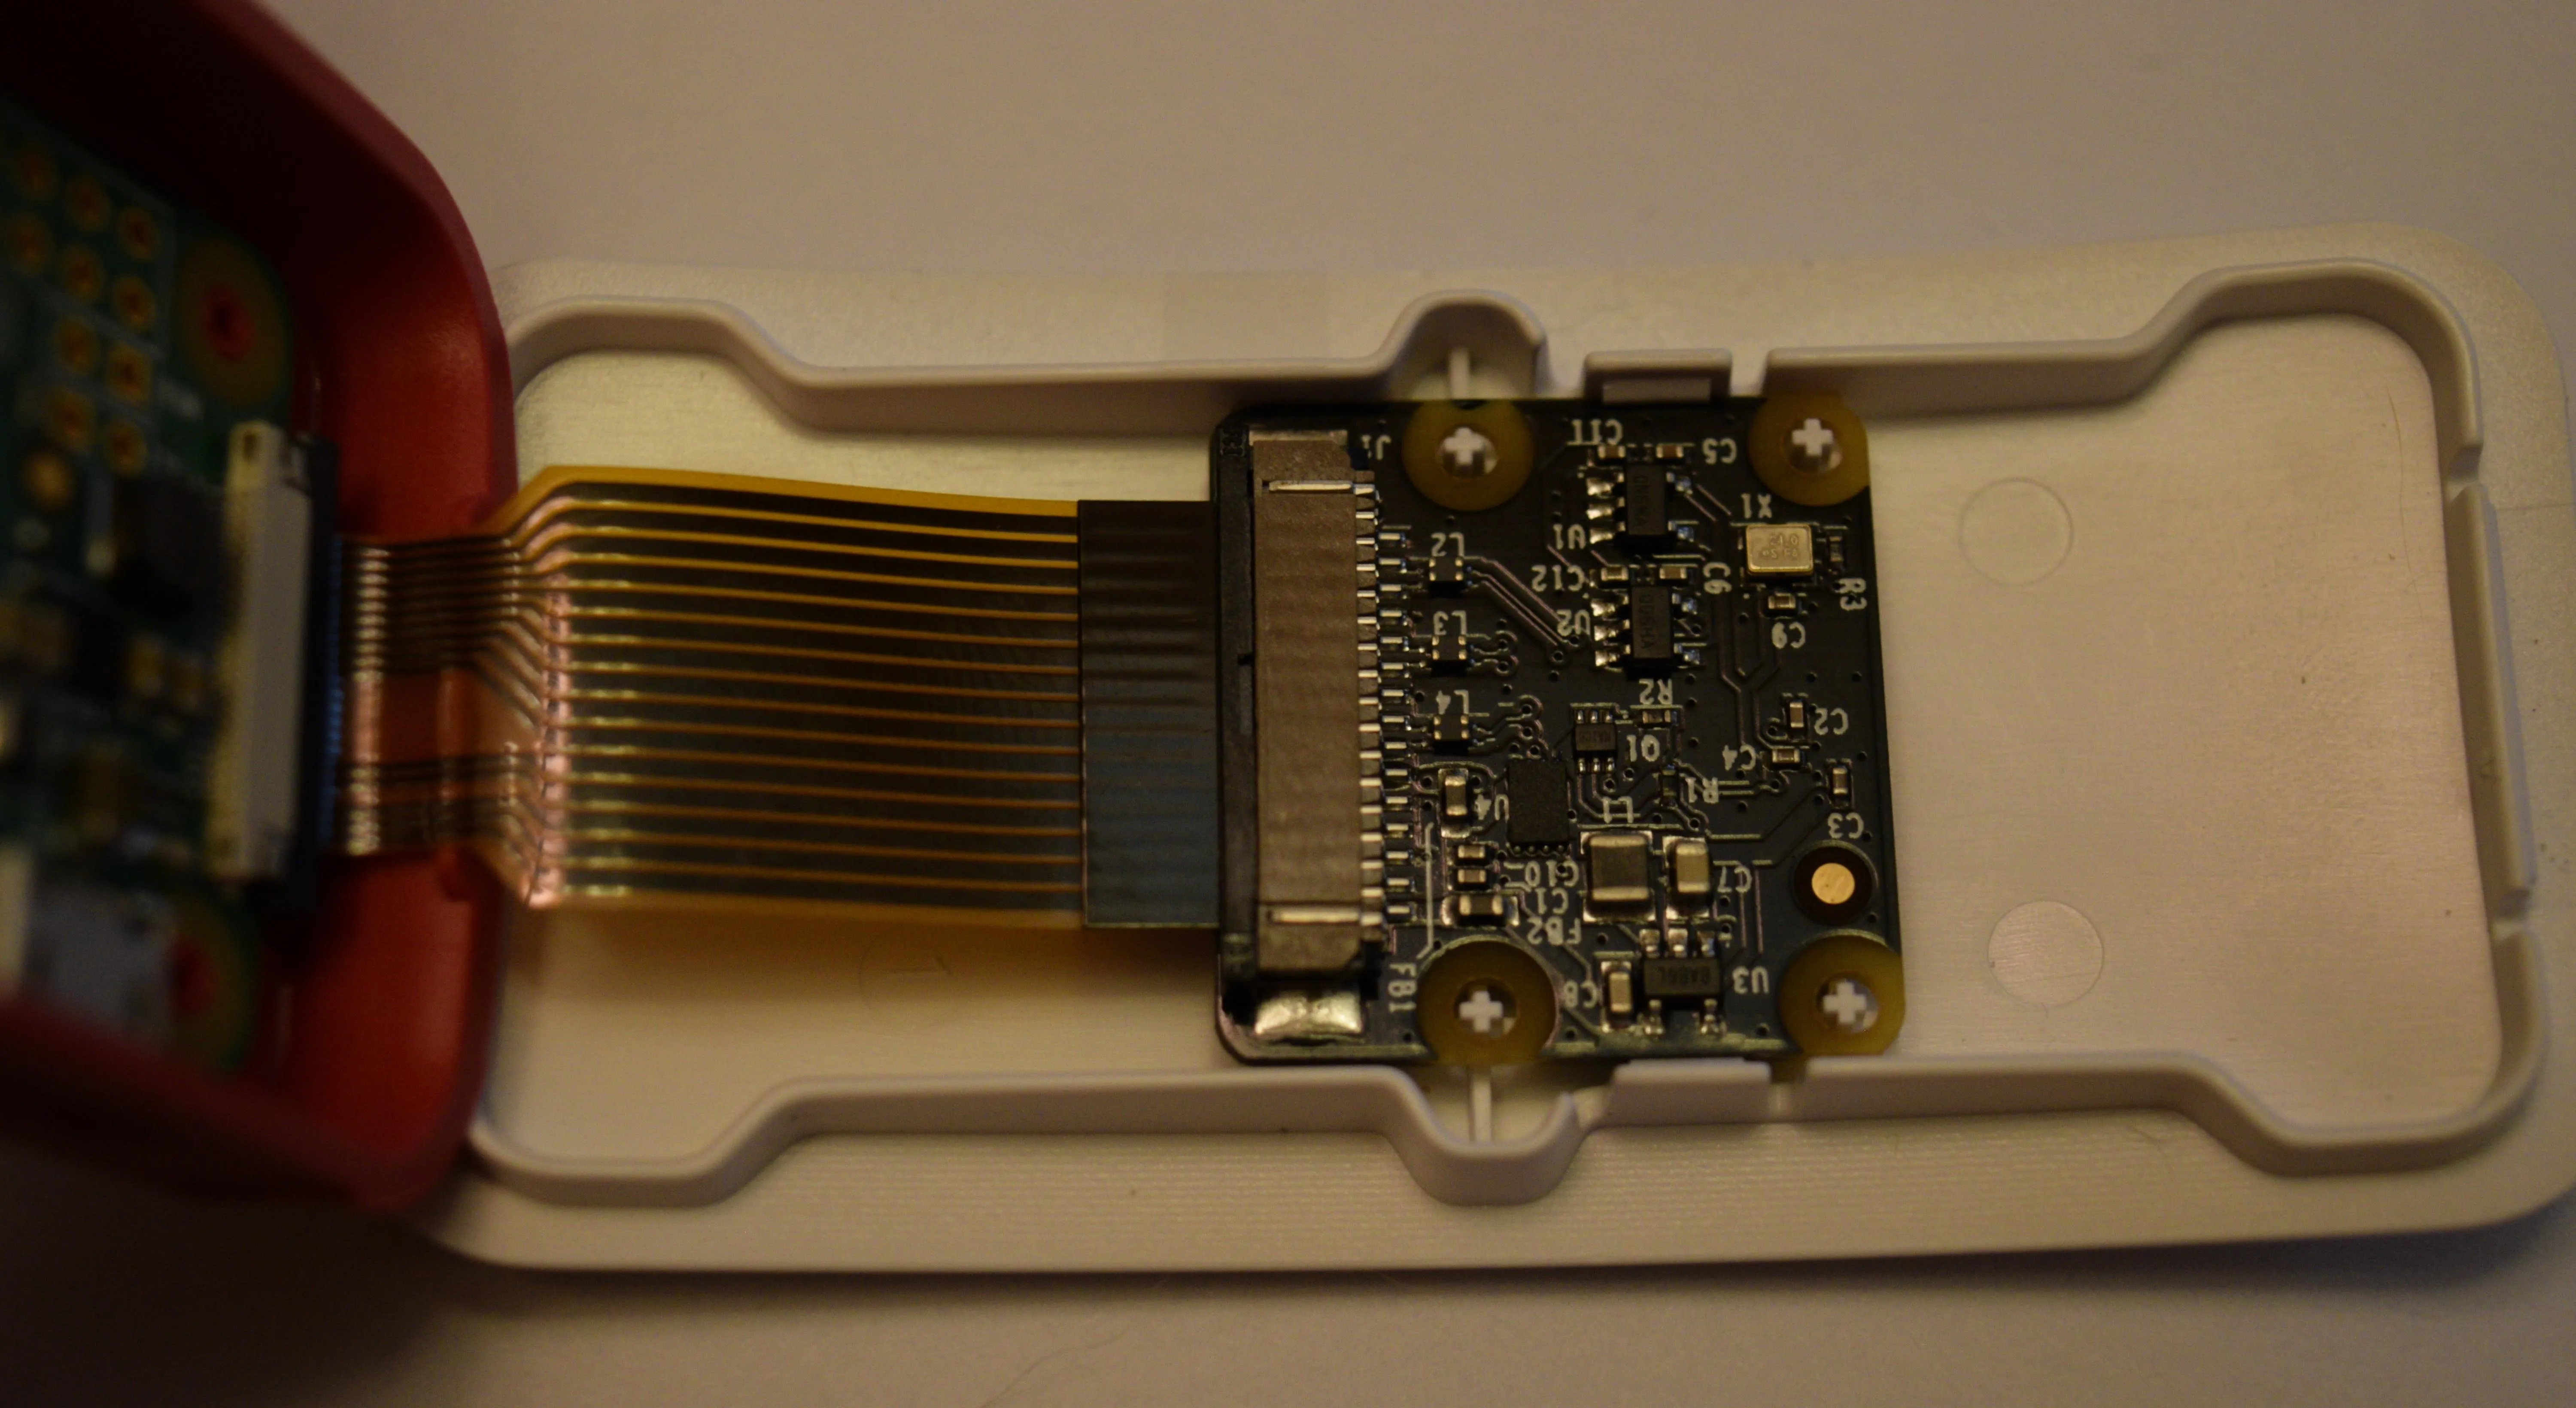
Hoid/Null Byte
Finally, plug the Pi into power.
Start Your Pi
The Pi can take a few minutes to boot up the first time so you can go grab some coffee or get started flashing another SD card if you are making more than one. After three to five minutes it should have booted, so we need to find it on our network.
The IP address can be found a number of ways, including opening your router's admin page and looking at connected devices or using a program like Nmap, Fing, or Angry IP Scanner. If you can't locate it, then the most likely problem is the "wpa_supplicant.conf" file. Double check it and make sure the info there is correct.
Once you find the Pi's IP address, plug it into your browser of choice. You will be taken to the login page for the camera. The default username is admin and no password.
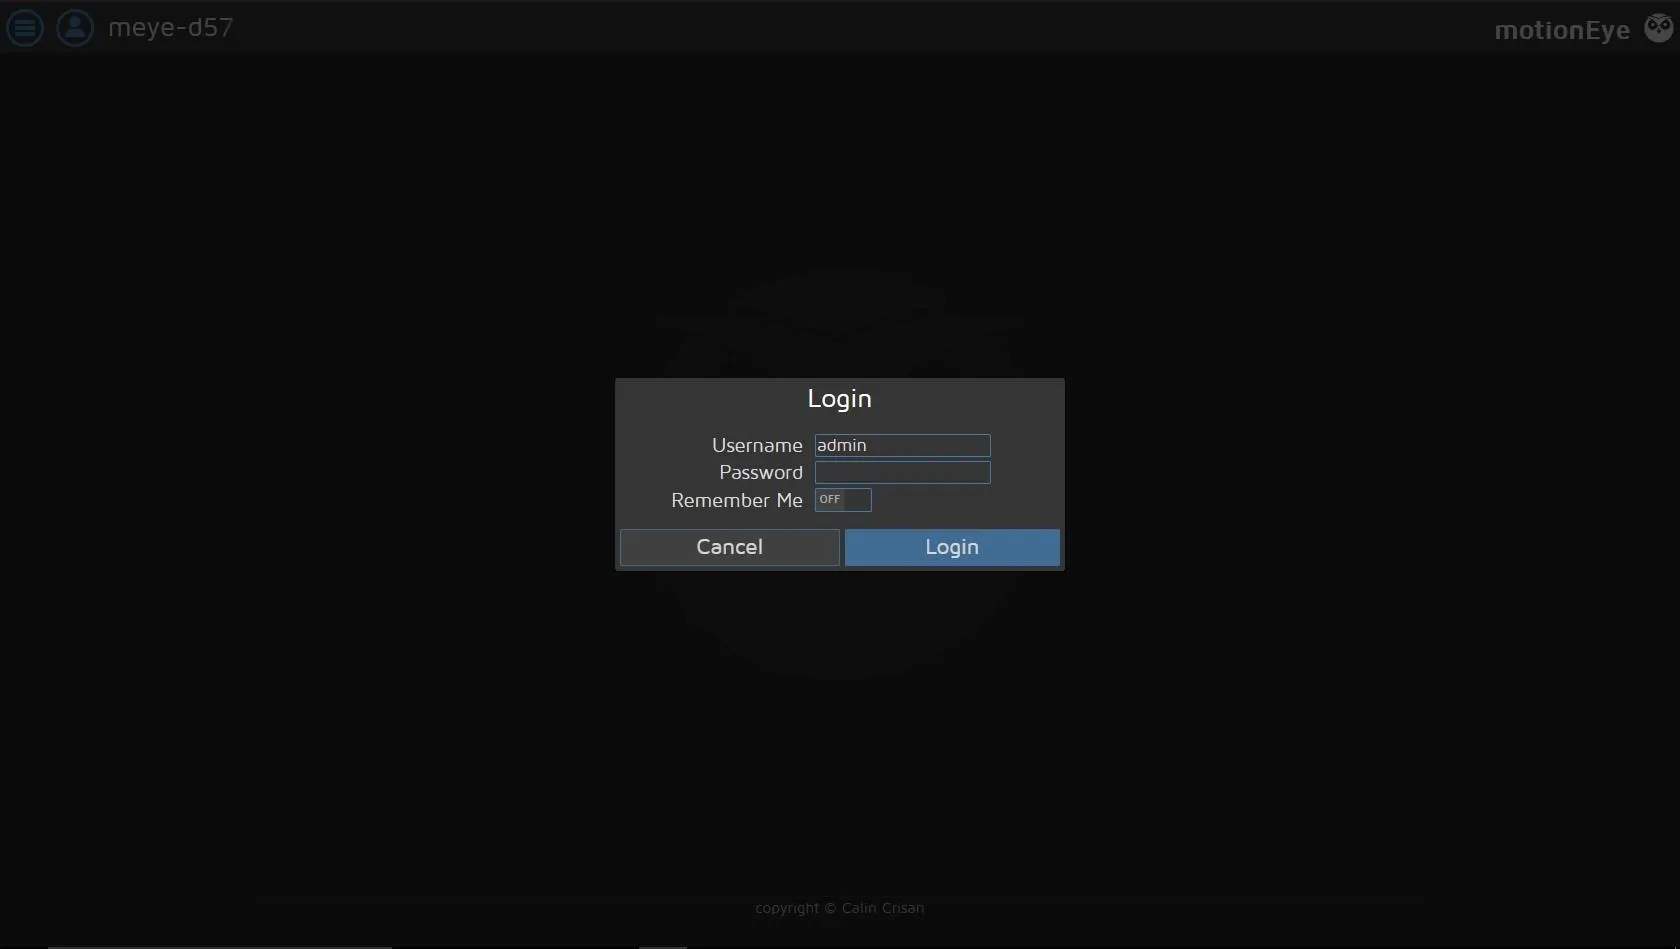
If everything has been done correctly, then in the top left corner we should see the live video feed now.

It may be necessary to physically rotate the camera to get the image to be upright.
For obvious reasons, the first thing we need to do is set an admin password and user password. Click the three horizontal bars on the top left of the screen, and then click "General Settings".
Unfortunately, you can't change the admin username, but you can change the "Surveillance Username." As the name implies, this user can only view the cameras but has no power to change settings. Go ahead and set passwords for both of these accounts.
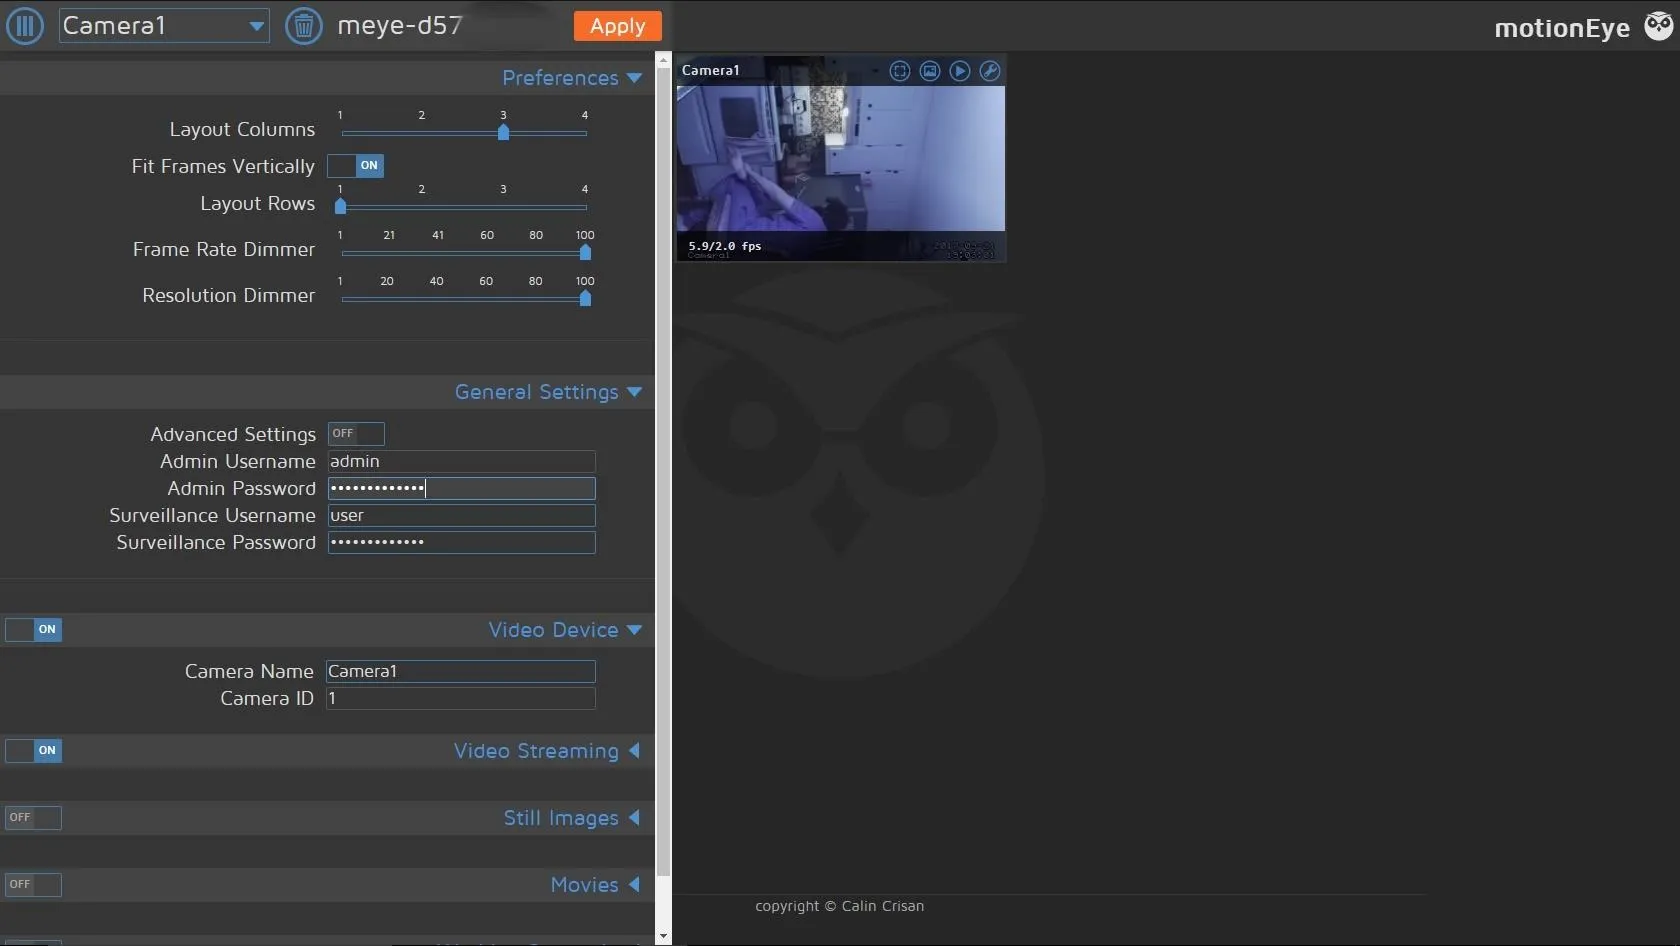
While you are in the menu, you may also consider changing the "Camera Name" under "Video Device". This is very helpful when you have a lot of cameras or, you have someone unfamiliar with the camera setup watching. After that, click "Apply" on the top bar, and the camera will restart.
When it's done restarting, we need to check for updates. Go to the "General Settings" tab and click on "Advanced Settings." The tab will then expand, and then click "Check" beside "Software Updates." You should get in a regular habit of doing this.
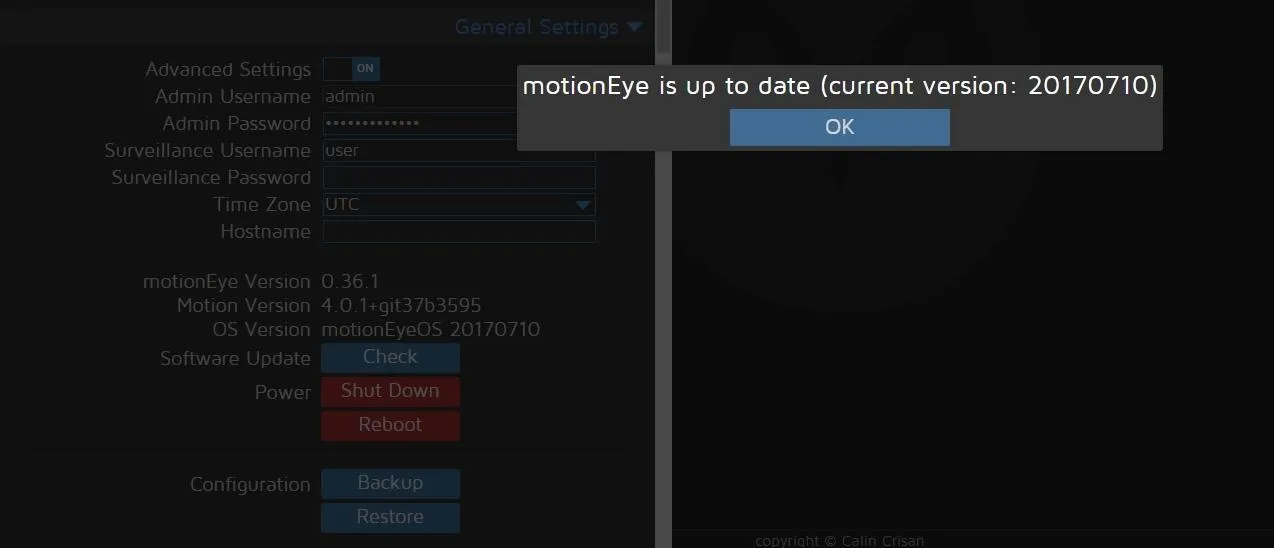
You may want to change the timezone and Hostname. This is also where you should go to shutdown the Pi safely.
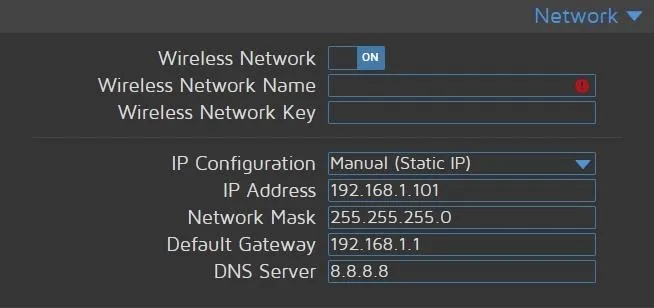
Fix IP Address
To make it easy to add cameras and find the web page in the future, it is nice to set a static IP address. Find the Network tab in the settings and open it. Then, change IP configuration to static, setting the IP to the one it currently has.
Adding Cameras
In any type of real-world usage, more than a single camera will be needed. Our current setup can be visualized like this.

However, this won't work well, as we would have to visit a different web page for each new camera. We have two options for adding cameras. The first is to have the Pi host more than one camera, which could be done by adding web cameras to the Pi. This can be useful if one area needs several cameras to cover all angles, but is limited by the processing power of the Pi. Depending on how you set the resolution and frame rate settings, you might get away with this on the Pi 3, but not on the Pi Zero.

To add to the network this way, go to the top left of the page and open the "Settings" tab then click on "Camera 1" and "add camera."
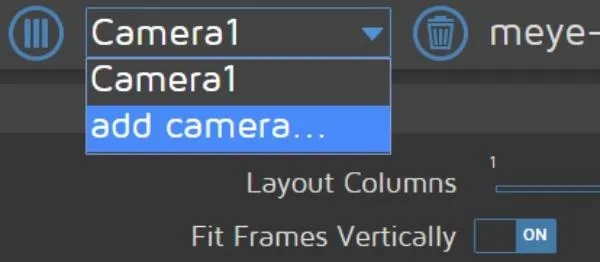
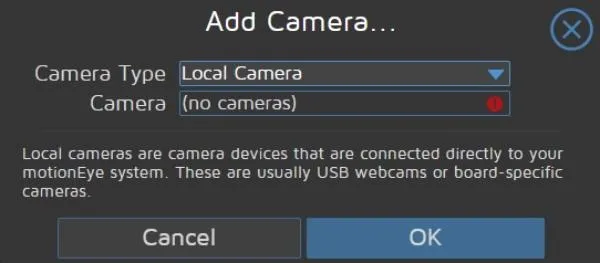
Then a window will appear, by default, it will look for any more local cameras on the Pi. I didn't have any but if you do there will be a drop-down menu beside "Camera." Select the one you want to add and click "OK."
The second way we can set this up is to have one motionEye remotely control another motionEye camera. We can even designate one of the motionEye devices as a hub and add all of the other motionEye-based cameras to this hub as remote motionEye cameras. This works best for our Pi based build, because of the limited CPU power of each individual Pi. Pi Zeros make great remote cameras with a Pi 3 acting as a hub.

Go to the "Add Camera" menu as before, but this time select "remote motionEye." You will then need to provide the information, with the URL being the static IP address we set. If that Pi has more than one camera, then you can pick which one to add.

Set Up Motion Detection
Now that we have the cameras up and running, we need to select our motion detection settings. These are some general starting points, but you will have to experiment with these until it works the way you want.
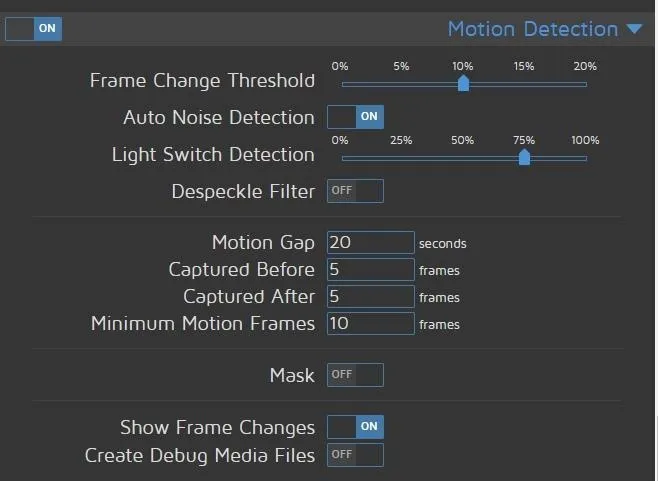
If you have problems with false positives, then turn "Mask" on, and you will be able to select portions of the camera frame to have the software ignore. This is really useful if you have trees that move in the wind, or cars driving by on a street.
Putting It All Together
Today we have learned how to set up one or many Raspberry Pi cameras running motionEyeOS, and form them into a network.
There are far more settings we can look at, such as port forwarding so we can see the camera from anywhere on the internet, triggering scripts based on motion events, and employing the GPIO pins. We will look at some of these features in a future article. Until then, explore the rest of the settings on your own, and don't forget about the tooltips that will pop up to the right of each setting as you mouse over it.
If you have any questions, feel free to leave them in the comments or on Twitter!
- Follow Null Byte on Twitter and Google+
- Follow WonderHowTo on Facebook, Twitter, Pinterest, and Google+
Cover Photo by Kai Hendry
Screenshots by Hoid/Null Byte


Comments
Be the first, drop a comment!