Welcome back, my aspiring hackers!
One of those areas of Linux that Windows users invariably struggle with is the concept of "mounting" devices and drives. In the Windows world, drives and devices are automatically "mounted" without any user effort or knowledge. Well, maybe a bit of knowledge. Most Windows users know to unmount their flash drive before removing it, but they usually think of it as "ejecting" it.
The mount command has a history back to the prehistoric days of computing (the 1970s) when computer operators physically mounted tape drives to the the behemoth, gymnasium-sized computers. These tape drives were the storage medium of choice (as hard drives had not been invented yet) and the operator had to tell the machine that they were mounting the tape before it could be read.

Windows generally auto-mounts drives and devices with the PnP service, so users don't need to think about mounting. Each drive or device then is assigned with a letter mount point such as C:, D:, E:, etc.
In more recent distributions of Linux, auto-mount is often enabled as well, but the true Linux admin needs to understand the mount command and the mounting process as they will someday need to mount a device or drive that does not auto-mount. This is true for the everyday ordinary sysadmin in Linux and especially true for the digital forensic investigator and hacker as many times the devices will not be automatically mounted.
File Structure
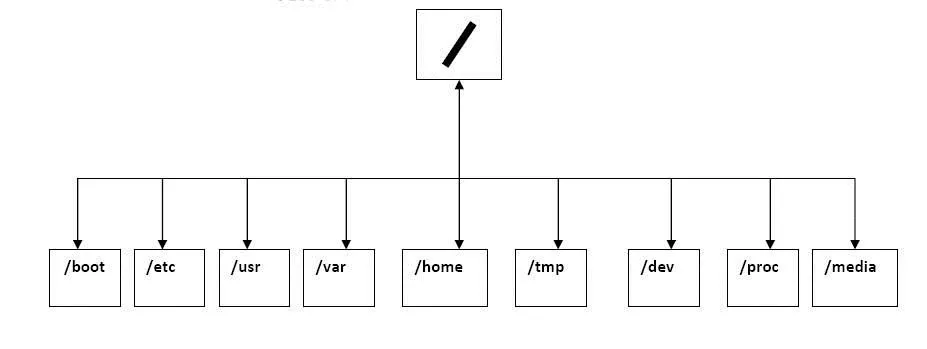
Remember, Linux has a single tree structure for its file system (unlike Windows) with a root for every drive and device. This means that all drives and devices are part of a single filesystem tree with / at the top. Any other drives must be "mounted" to this tree. We can do this with the mount command.

When we mount a device, we mount it to a directory and it becomes part of the tree. We can mount a device to ANY directory, but when we do so, that directory that we mount our device to is "covered" and unavailable to us. This means we can't access any of the files in that directory. It goes without saying—I think—that's not good. That's why we have special, empty directories for mounting devices. These will vary by distribution of Linux, but generally they are /mnt and /media.
Mount Command
Let's take a look at the mount command. Type in:
- mount -h
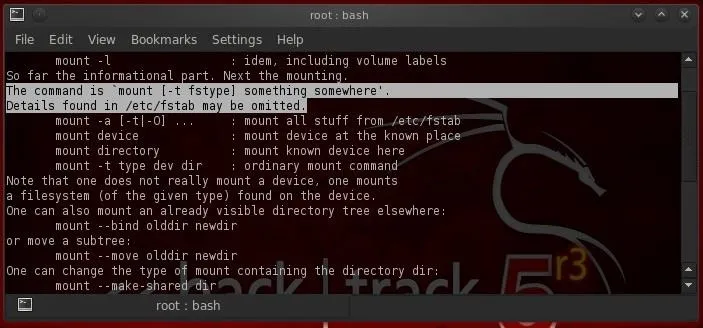
This brings up the help screen displayed below.

I have highlighted the crucial part regarding the syntax of the command. Basically, it is:
- mount -t filesystemtype location
This command will "mount" a filesystem of the type (-t) at the location specified. So, for instance, we could mount cdrom at the media directory by typing:
- mount -t /dev/cdrom /media
This will mount the cdrom device at the /media directory on the filesystem tree.
We also have numerous options we can use when mounting a device including:
- rw - mount read/write
- ro - mount read only
- user - permit any user to mount
- auto/noauto - file system will or will NOT automatically mount
- exec/noexec - permit or prevent the execution of binaries on the mounted device
As always, you can check the man page for mount to learn all the options:
- man mount
Setting Up Automounting with Fstab
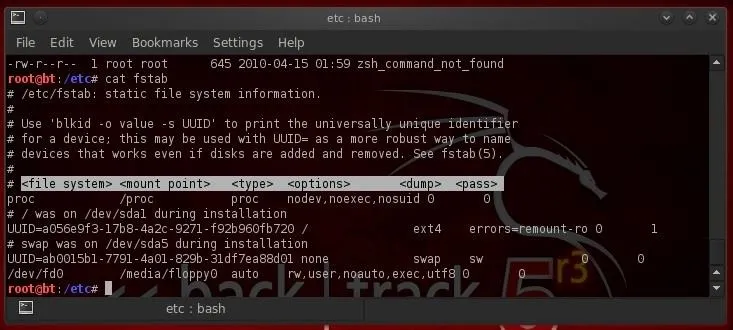
The fstab is the "File system table". It a system configuration file in Linux. The mount command reads the fstab to determine what options to use when mounting a filesystem. In this way, it defines the options automatically when we mount the device. It simply reads the entry in the fstab table for that device and applies those options defined there.

As we can see in the screenshot above, we have simply displayed the contents of fstab with the cat command.
- cat fstab
The fstab table is comprised of six (6) columns. These are:
- Device - the UUID
- Mount point - the directory where we want to attach the device
- Type - the filesystem type such ext2, ext3, swap, ISO9660, etc.
- Options - these rw (read/write), auto, nouser, async, suid, etc
- Dump - indicates how often to backup the device
- Pass - specifies the pass when fsck should check the filesystem
Umount
When want to unmount a drive or device, the command we use is umount (that's right. I didn't spell it wrong. It is umount, not unmount).
To unmount our cdrom device that we mounted above, we type:
- umount /dev/cdrom
You can NOT unmount a drive or device that is currently being used by the system.
Keep coming back to Null Byte, my hacker apprentices, for more tutorials on hacking and the basics of Linux that you need to know to "Hack Like a Pro."
Cover image via University of Auckland


Comments
Be the first, drop a comment!