Welcome back, my aspiring hackers!
Many of you have installed Kali Linux as a virtual machine (VM) using VMware or VirtualBox, while others have installed Kali (or BackTrack) in a dual-boot system. The drawback to installing these hacking systems as a VM is that it then requires an external wireless adapter (your wireless adapter is piped through the VM as a wired device, eth0), but it makes for a great place to test your hacks while honing your skills.
Using Kali in a dual-boot system doesn't require another wireless adapter and enables you to use the full resources of your physical system without having to go through a hypervisor. In this way, when you need your Windows, you boot into Windows, and when you need Kali, you boot into Kali.
The Bootloader
To be able to run a dual-boot system, you must have a bootloader, and therein lies the issue. The bootloader enables us to choose which operating system we want to boot into. To be comfortable with this arrangement, we need to understand a bit about this thing called a bootloader.
Historically, Linux has used two bootloaders, LILO and GRUB. You may find LILO on some older, legacy systems, but it has largely been replaced by GRUB. GRUB has two versions, the original GRUB and now the new improved GRUB2! Our Kali system comes with GRUB2 by default, so I will focus my attention on this newer version here.
To help you better understand how GRUB works and to help you configure and troubleshoot GRUB, I dedicate these next two Linux tutorials, so stay tuned for Part 22 in my Linux Basics series.
A Little Background on GRUB
GRUB is an acronym for GRand Unified Bootloader. It largely replaces the legacy bootloader found on many older Linux version, LILO. GRUB works by intercepting control of the boot process when the BIOS transfers control to the Master Boot Record (MBR) in the first sector of the primary hard drive. Rather than the MBR then finding the first active partition, GRUB replaces the MBR with its own code that controls which partition is booted.
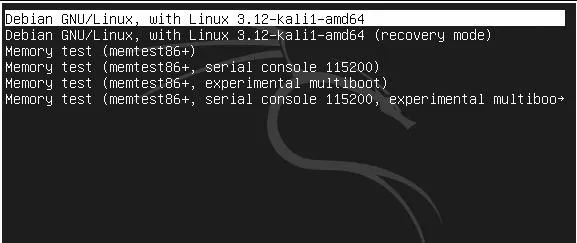
Exploring GRUB
Let's take a look at GRUB2 as it is installed on Kali. GRUB2, unlike the original GRUB, has all its files installed into three main locations. These are:
- /boot/grub/grub.cfg - this is the main configuration file (replaces menu.lst)
- /etc/grub.d - this directory contains the scripts that build the grub.cfg
- /etc/default/grub - this file contains the GRUB menu settings
Now, let's begin by navigating and looking inside the GRUB directory.
kali > cd /boot/grub
kali >ls -l
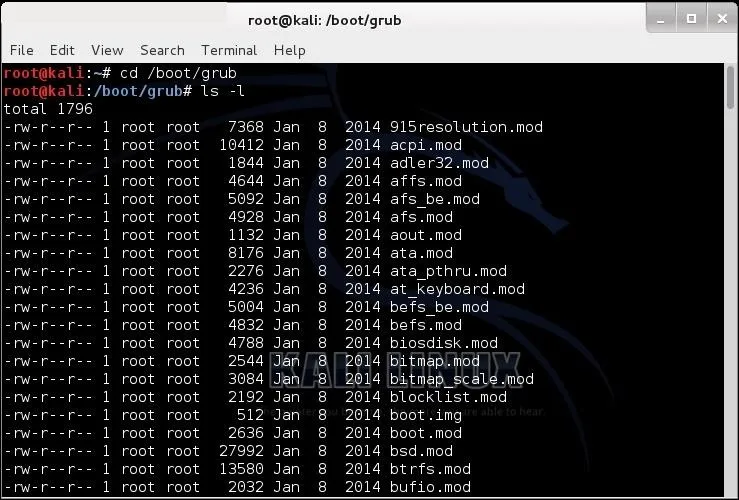
As you can see, there are many files in this directory, but the one we want to focus on here is the grub.cfg. This is the configuration file in the new GRUB2 that comes with Kali. It replaces the old menu.lst that you will find on the original GRUB. Let's open it with the more command and examine it.
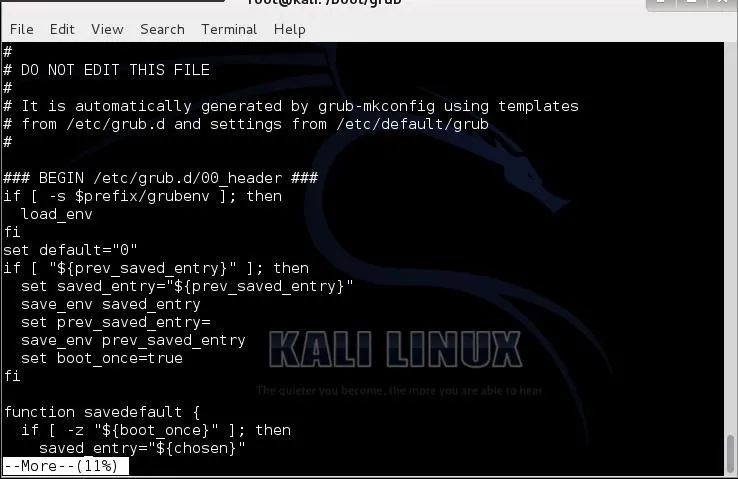
Grub.cfg is basically a script for running and configuring GRUB2. It is generated by the scripts in /etc/grub.d and you generally should NOT try editing it directly (note the warning on the second line of the file).
The /Etc/grub.d Directory
Next, let's look at the /etc/grub.d directory.
kali > cd /etc/grub.d
kali > ls -l
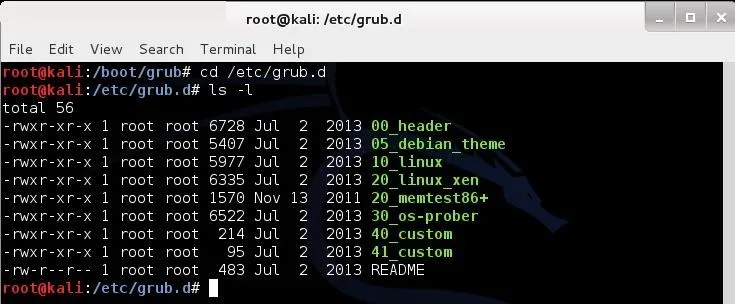
As you can see in the screenshot above, this directory has a number of scripts that are run to create the grub.cfg file. Let's look at the key entries here.
- 00_header - this script loads the settings from /etc/default/grub
- 05_debian_theme - this script defines the colors, background, etc.
- 10_linux - this script loads the menu entries
- 20_memtest86 - this script loads the memory tester
- 30_os-prober - this script scans the hard drives for other operating systems
- 40_custom - this is a template for manually adding other menu entries
Exploring /Etc/Default/Grub
Now, let's go to the /etc/default directory and look to see what is in this directory.
kali > cd /etc/default
kali > ls -l
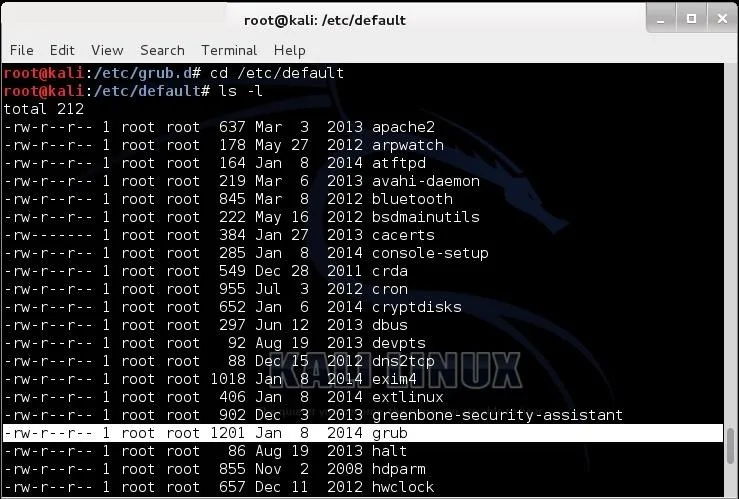
This directory contains many files and scripts that configure various daemons or services in Linux. The only one we are interested here is the grub file that I highlighted in the screenshot above. Let's open that file with the more command.
kali > more /etc/default/grub
When we do so, we will see the following output.
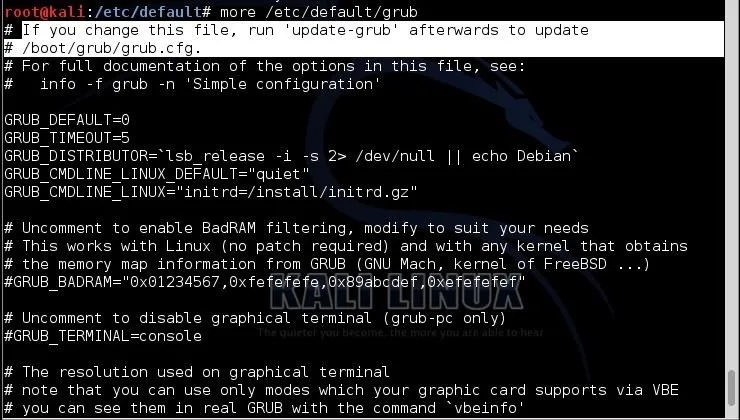
This file contains many of the customization parameters for GRUB such as the TIMEOUT and other parameters. If you change anything it this file, you must run "update-grub" for those changes to take effect as it then makes changes to the grub.cfg file.
How GRUB2 Works
Before we go any further, I want to take a moment to detail how GRUB2 works. It's quite different than the original GRUB and you need to understand this before you attempt any edits or changes to GRUB2.
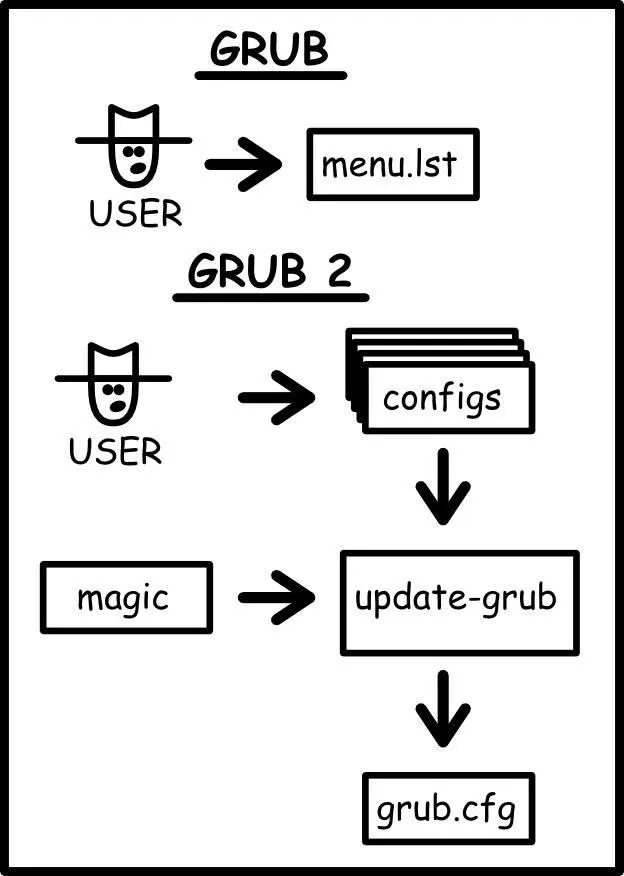
The differences in configuring GRUB and GRUB2.
The /etc/default/grub file contains customization parameters.
The /etc/grub.d/ directory contains scripts for the GRUB menu information and the scripts to boot the various operating systems. When the update-grub command is run, it reads the contents of the grub file and the grub.d scripts and creates the grub.cfg file.
To change the grub.cfg file, you need to edit the grub file or the scripts under grub.d.
Stay Tuned for More on GRUB...
In my next tutorial in my Linux Basics series, I will show how to edit your GRUB bootloader, so keep coming back, my aspiring hackers!


Comments
Be the first, drop a comment!