Welcome back, my aspiring hackers!
Those of you who use Windows in a LAN environment understand that Windows machines can share directories, files, printers, etc. using "shares." This protocol dates back to the 1980s when the then dominant computer firm, IBM, developed a way for computers to communicate over the LAN by just using computer names rather than MAC or IP addresses.
Eventually, Microsoft and Intel developed a similar protocol for file sharing, originally named NetBIOS, and eventually renamed Server Message Block (SMB). By 1992, Andrew Tridgell, reverse-engineered SMB for Linux/Unix (including Apple's Mac OS X) and named it Samba. It is a server-side implementation of SMB and requires no software to be installed on the client. Samba provides:
- File sharing
- Network printing
- Authentication and authorization
- Name resolution
- Service announcement (browsing)
Samba functionality is implemented by two daemons, smbd and nmbd. These daemons (services) are installed and run on nearly every distribution of Unix and Linux. Samba, like Windows NetBios/SMB, runs on ports 135, 137, and 445.
Just like Window's SMB, Linux's Samba has been one of the weakest and most often exploited protocols. There is a long list of vulnerabilities and exploits that take advantage of Linux's Samba, and when I want to exploit a Linux system, one of the first things I test is Samba. Samba 3.6.3 and earlier versions allow anonymous users to gain root access through Samba 's remote procedure call.
The more we know and understand Samba, the better network admin's we will be and the better Linux hackers we will be. Let's take a little time to understand this essential and, often, very vulnerable protocol in Linux.
Locate Samba
To find Samba files in our Kali, let's just type:
- locate smb
When you do so, you will see dozens of files with SMB or Samba in their name, including numerous Metasploit modules for exploiting Samba. Near the top of that list is the main configuration file for Samba, /etc/samba/smb.conf. Like nearly every application or daemon in Linux, there is a configuration file located in the /etc directory. These are simple text files that can be edited and saved to alter the configuration of the application or daemon. Samba is no different.
Let's open that now with the text editor of your choice. In this case, I'll use Leafpad in Kali.
- kali > leafpad /etc/samba/smb.conf
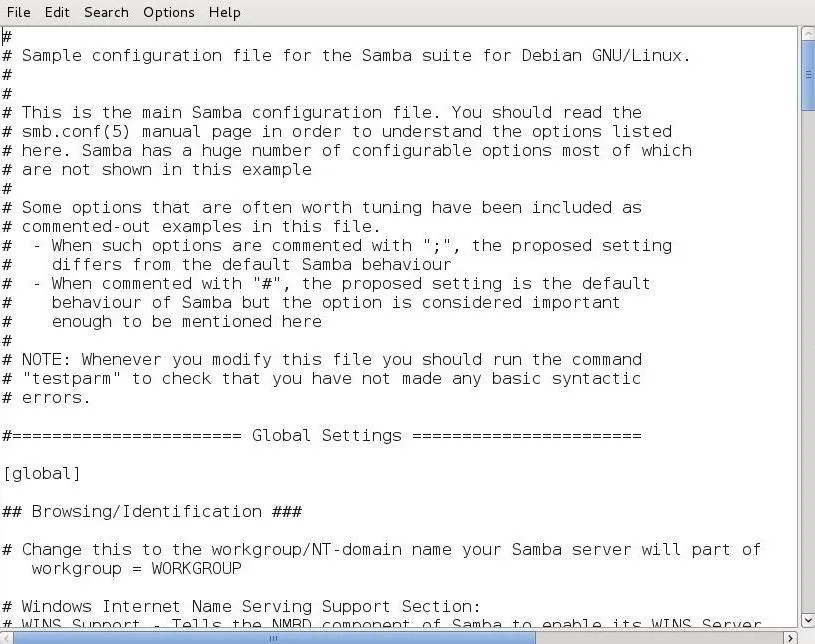
As you can see, this configuration file is well commented. For more information on configuring Samba, you can also type:
- kali > man samba
I should point out now that this configuration file uses two different types of comments. The first is the all familiar "#" , but it also the uses ";" too. You will see both in this configuration file.
Configure Samba
Samba has a command that allows you to test the syntax of your configuration file. This is:
- kali > testparm -v
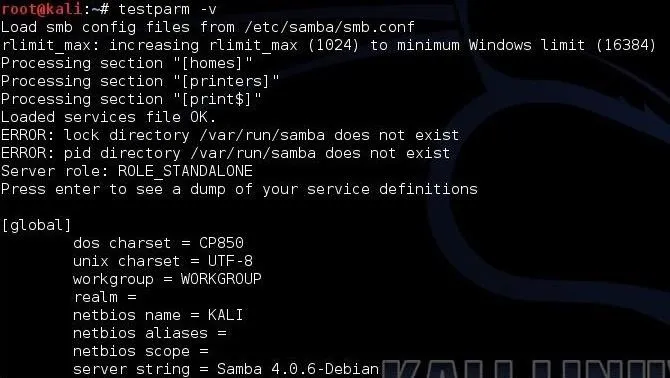
When you type this command, it checks your parameters and syntax to see whether they are workable.
It is important to note that whenever you make changes to this configuration file, you must restart Samba for them to be implemented. You can do this with:
- kali > service smb restart
Create a Samba User
Samba has its own password authentication system. You can create users with access to Samba, if they exist, in the /etc/passwd file (in other words, they are a user on the system) with the command:
- kali > smbpasswd -a

As you can see, I have added myself, OTW, to the Samba user list with my password.
Setting the WorkGroup
If you want to connect to the workgroup from a Windows machine, you will need the name of the Windows workgroup. In the "Global Settings," you can see the default is set to workgroup but, of course, this should set to the name of the Windows workgroup that Samba will be connected to.

Accounting/Logging
Next, let's navigate down within the Global Settings to the "Debugging/Accounting" section.
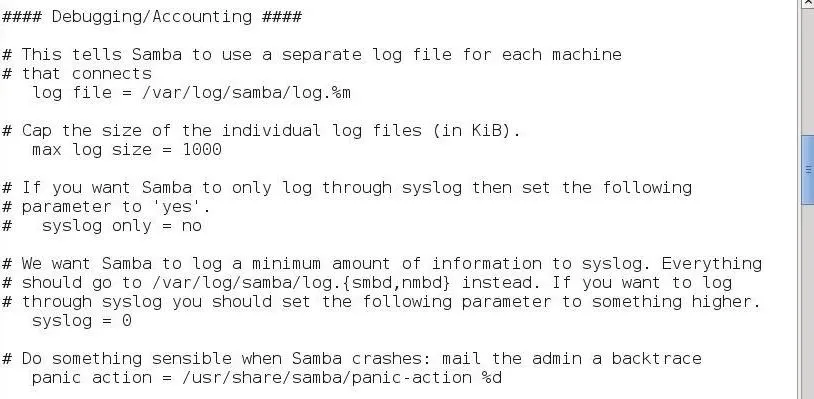
Here you can see we can set the location of the log file:
- log file = /var/log/samba/log.%m
The maximum log size (KB):
- max log size = 1000
And whether to only use syslog to centralize our logging to a dedicated logging system:
- syslog only = no
Among many other things.
Authentication
If we navigate a bit lower in the Global Settings, we come to the "Authentication" section.
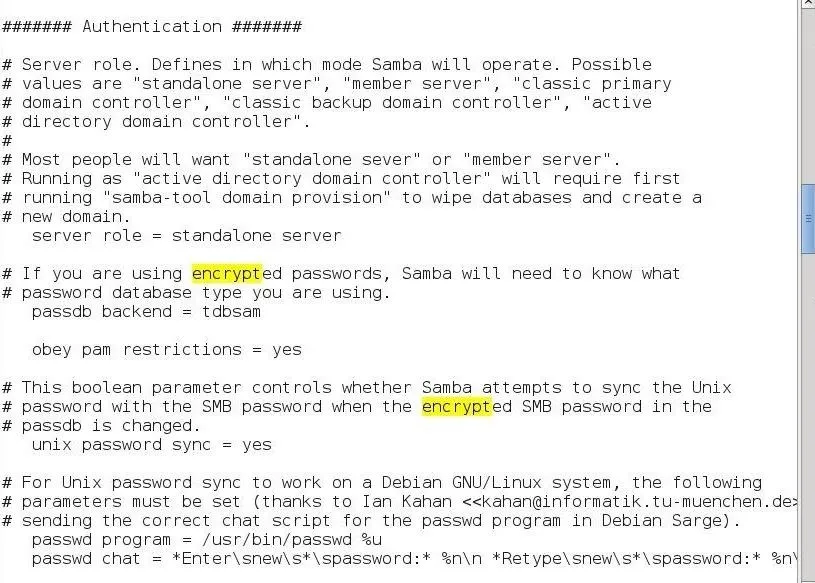
Here we can set what type of server Samba will be:
- server role = standalone server
Whether Samba should obey/use pluggable authentication modules (PAM):
- obey pam restrictions = yes
Whether Samba syncs passwords with the Linux/Unix password system:
- unix password sync = yes
And finally, how Samba handles password setting.
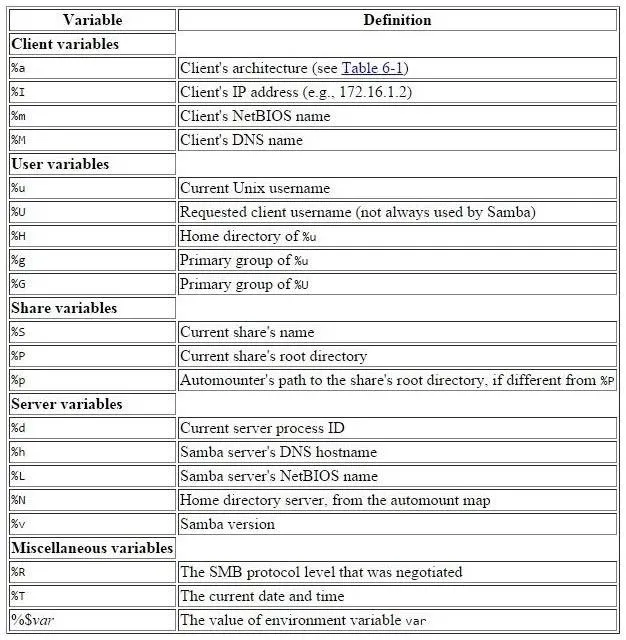
Samba Variables
You will notice that throughout the Samba configuration file, variables are used that begin with "%". For instance, in the logging section above, we saw this line:
- log file = /var/log/samba/log.%m
The "%m" at the end represents a variable. If we use the table below, we can see that the "%m" represents the "The client's NetBIOS name." If the NetBIOS name of the computer were "NullByte," this would mean that the logs would be found for that system at:
- log file = /var/log/samba/log.NullByte
When we replaced the variable with the value of the NetBIOS name.
Although there are far more changes we can make to this configuration file, in many cases the default setting will suffice in most circumstances, although not optimally. I'll be doing a second Samba tutorial in the near future where we will configure Samba for optimal file sharing, so keep coming back, my aspiring hackers.


Comments
Be the first, drop a comment!