Welcome back, my aspiring hackers!
Those of you who've been reading my tutorials for some time now know that I am adamant regarding the necessity of learning and using Linux to hack. There is no substitute, period.
In this tutorial, though, we will be setting up a system to attract hackers so we can catch or study them. Since nearly all of the hackers around the world are targeting Windows servers for all of their known flaws and vulnerabilities, we will be setting up a Windows system to do just that.
A honeypot is a computer system that looks enticing to a hacker. It looks important and vulnerable, enough that the hacker attempts to break in. It is used to entrap hackers and as a way to study the techniques of hackers by the security community. As a hacker, it is important to know that these exist and the risks one bears if you get entrapped in one.
Here, we will be setting up a honeypot. If you leave it up and running, you can observe others hackers practicing their art. In addition, we will do some recon on the honeypot to see what it looks like from the attacker's perspective.
It's important to the hacker to know what these honeypots look like from the outside in order to avoid them and avoid a long prison sentence of hard labor and living on gruel three times a day.
Install KFSensor
There are a number of honeypots on the market including honeynet, honeyd, Tiny Honeypot, NetBait, and ManTrap, but we will be using a commercial honeypot, KFSensor, for Windows.
KFSensor will enable us to have an authentic Windows system hosting it and we can use our Kali Linux system to do recon on it. One of the things we want to accomplish in this tutorial is to identify ways to detect a honeypot and then run far, far away.
Let's open a browser and navigate to www.kfsensor.com, then download and install the software. It's a 30-day trial, so we have a month to play with it for free.
Once it is installed, right-click on the KFSensor icon and "run as administrator". You should get a set up wizard like this.

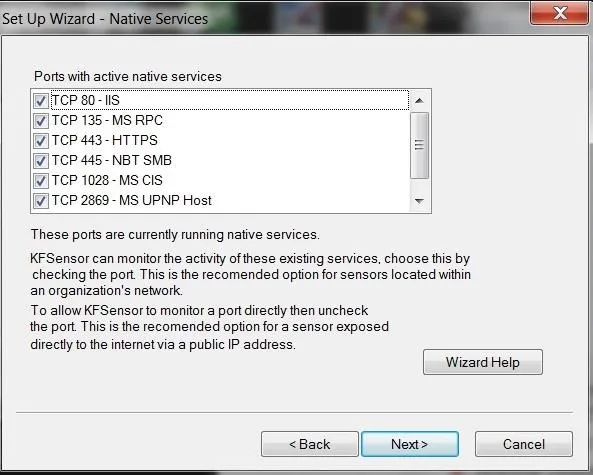
After going through a few more screens in the wizard choosing the defaults, you come to the screen below that allows you to choose the native services. Let's choose all of them.
Then, choose your domain name. You might want to make it sound enticing. The default is networksforu.com, but I made mine firstfinanacial.com hoping to make the hacker think it's a financial website.
Next, you can choose an email address where you want to send the alerts.
Choose Options
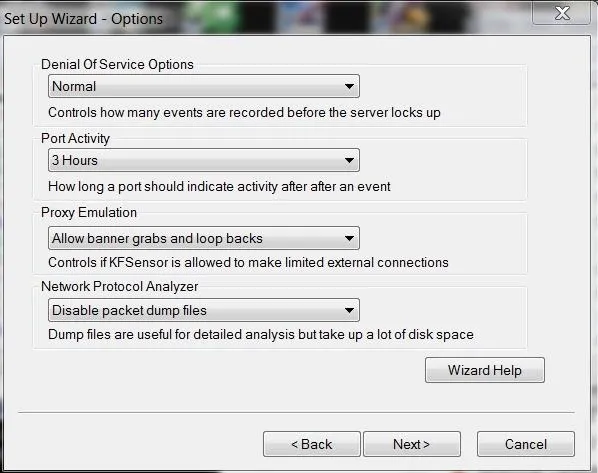
Finally, we have a few options to choose. Let's go with the defaults, but note the final option. Here it allows us to capture the packets so that we can analyze the attacks with a tool like Wireshark or other protocol analyzer. It warns you, though, that packet captures can take up a lot of disk space; if you're trying to catch or study a hacker, it's necessary. We'll leave it disabled for now.
Set Up Your Honeypot and Watch
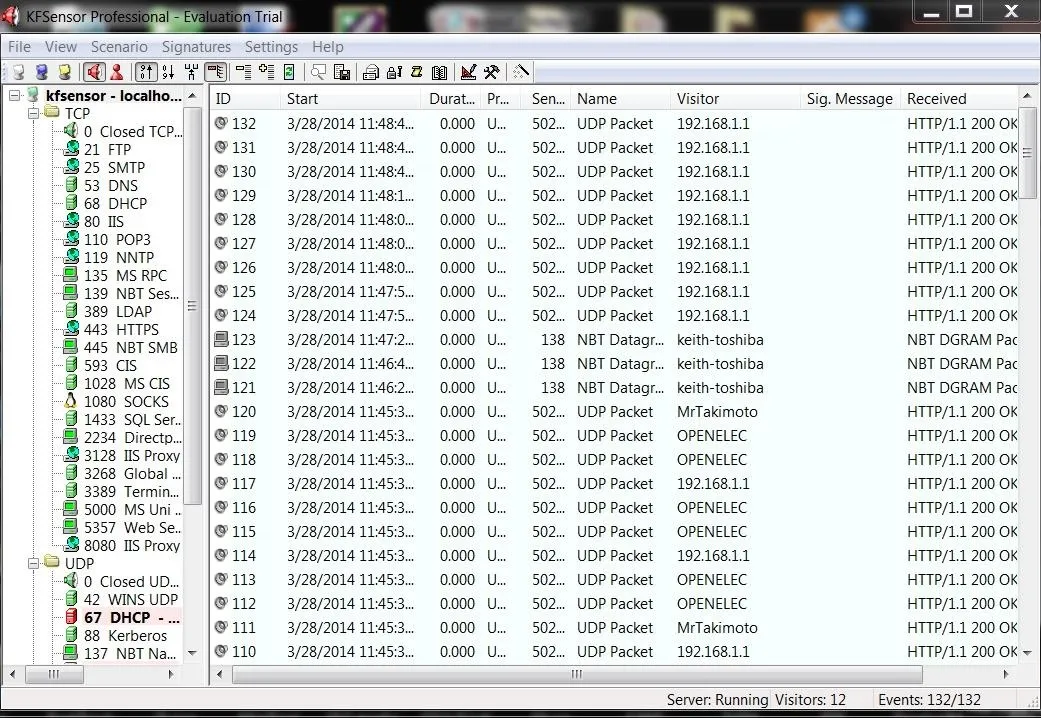
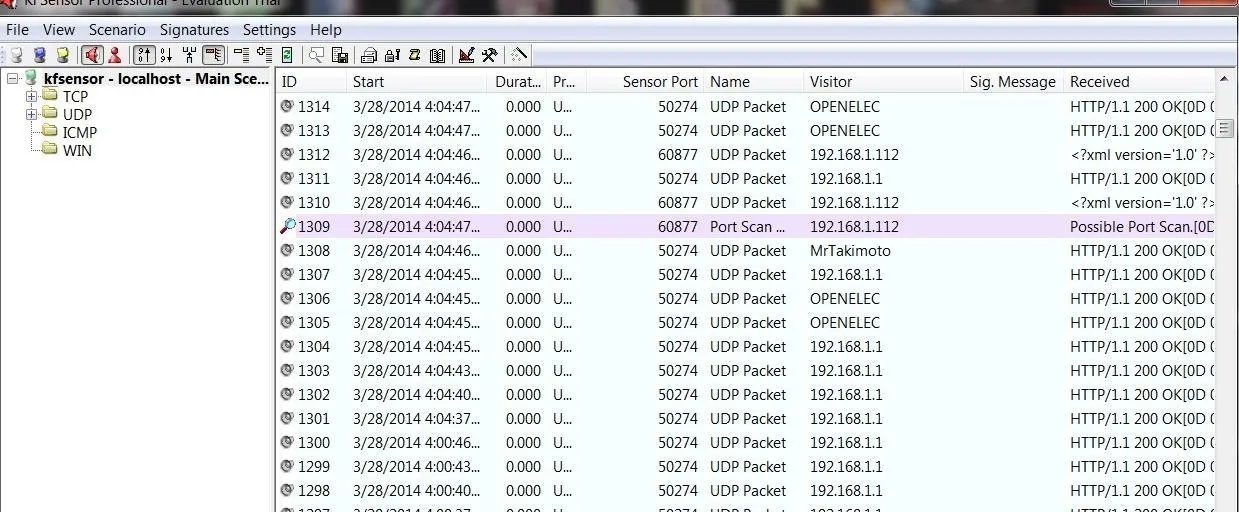
When you have completed the wizard, click Finish and you should have an application that looks like this.
Sacn with Nmap
Now that we have our honeypot setup, let's take the approach of the hacker. Just as if we were doing recon on a potential target, let's use nmap to scan that system. Let's do a SYN scan:
- nmap -sS 192.168.1.102
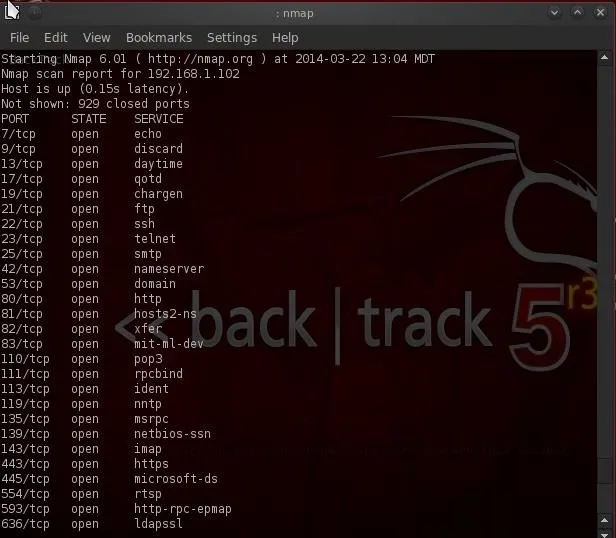
As you can see, we find numerous ports open. As a hacker, this is a big RED FLAG. Few commercial web servers would leave all these ports open. Not in 2014!
If we go back to the honeypot, we can see that we set off an alert for a port scan in the purple highlighted area. Remember that a SYN scan does not complete a 3-way handshake, but most intrusion detection systems consider many packets coming in rapid succession from one IP to be a "possible port scan". This is one reason why it is often advisable to slow your scan down with nmap's built-in speed controls.
Scan with Nikto
In an earlier guide, I showed youhow to use nikto to find vulnerabilities in web servers. Let's use it here against this honeypot.
- ./nikto.pl -h 192.168.1.102
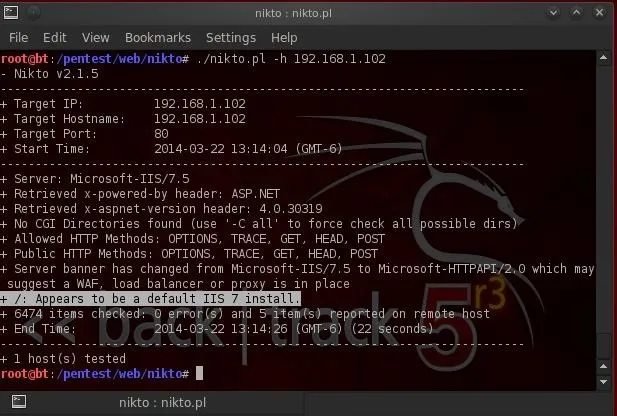
Our results tell us that this system is a default install of Microsoft's IIS 7 server. Another RED FLAG that this might be a honeypot.
Banner Grab
Lastly, let's try a banner grab. We can connect with netcat to port 80 and then try to grab the web server banner, if there is one.
- nc 192.168.1.102 80
- HEAD / HTTP/1.0
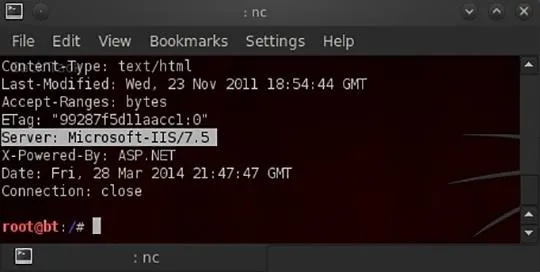
As you can see, we were able to grab the banner identifying the web server as Microsoft's IIS 7.5.
Some Telltale Signs of a Honeypot
There is NO single telltale sign of a honeypot, but there are few things to keep in mind.
- The age-old adage, "if it is too good to be true, it probably is", applies as well to hacking. Those sites that seem extraordinarily easy to hack are likely traps.
- Look for unusual services and ports open. Most internet-facing systems are stripped of any unnecessary services. If it has lot of unusual services and ports open, these are meant to attract attackers and it may be a honeypot.
- If it is a default install, it may be a honeypot.
- If there is little or no activity, it may be a honeypot.
- If you see directories with names such a "social security numbers" or "credit card numbers", it may be a honeypot.
- If you see very little software installed, it may be a honeypot.
- If there is a lot of free space on the hard drive, it may be a honeypot.
Be careful out there, my aspiring hackers, as I want to to keep coming back to Null Byte to refine your skills, rather than sitting in a concrete room. Keep in mind that honeypots are meant to be enticing, but it may be a trap!
Original honeypot image via Cokeisit7/Flickr, Green code image via Shutterstock


Comments
Be the first, drop a comment!