


Welcome back, my tenderfoot hackers!
As you should know from before, Snort is the most widely deployed intrusion detection system (IDS) in the world, and every hacker and IT security professional should be familiar with it. Hackers need to understand it for evasion, and IT security professionals to prevent intrusions. So a basic understanding of this ubiquitous IDS is crucial.
In my previous tutorial in this series, I showed you how to install Snort either by using the packages stored in the Ubuntu repository or from the source code directly from Snort's website.
Now, I will show you the basic configuration so you can get started Snorting right away. In later tutorials, we will tweak the configuration to optimize its performance, send its output to a database, and analyze the output through a GUI interface.
Get Snort Help
Before we configure Snort, let's take a look at its help file. Like with most commands and applications in Linux, we can bring up the help file by typing the command or application's name followed by either -? or --help.
kali > snort --help
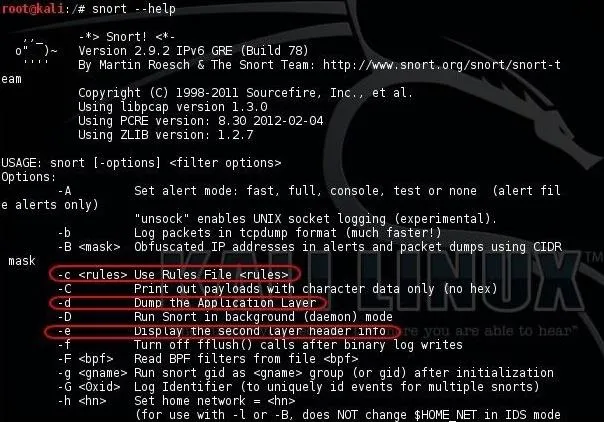
As you can see in the screenshot above, I have circled several key switches.
- The first is -c, along with the location of the Snort rules file, tells Snort to use its rules. Rules in Snort are like virus signatures; they are designed to detect malicious packets and software.
- The second is -d, which tells Snort to show the application layer of data.
- The third is -e, which tells Snort to display the second layer information, or the Data-Link Layer, which contains the MAC address.
If we scroll down a bit, we can see even more switches.
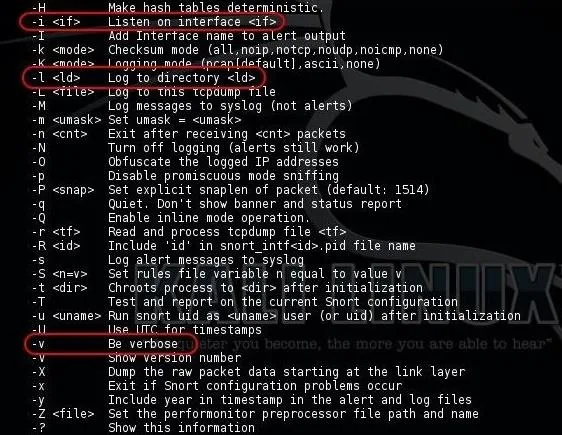
- The -i switch allows us to designate the interface that we want to use. Snort defaults to using the eth0 interface, so we only need to use this if we want to use a different one, such as wlan0.
- The -l switch will tell Snort where to log the data. As we will see, depending upon the configuration, Snort logs to /var/log/snort by default, but we can designate a different location here by placing the path after the -l switch.
- The -v switch tells Snort to be verbose, i.e., wordy, to provide us with all its information.
Start Snort
Now that we know the basics of some of its switches, let's try running Snort; It can be run as a sniffer, packet logger, or NIDS (network intrusion detection system). Here, we'll just take a look at the sniffer (packet dump) and NIDS modes.
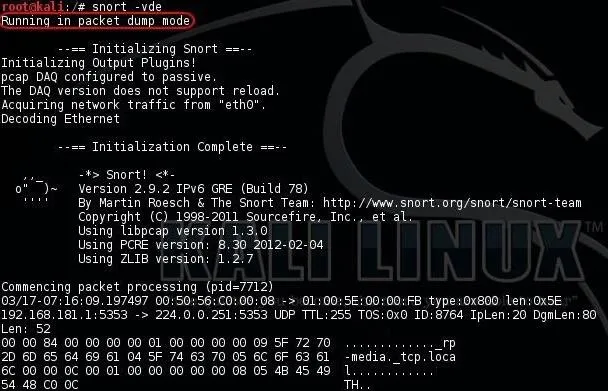
To run Snort in packet dump mode, type:
kali > snort -vde
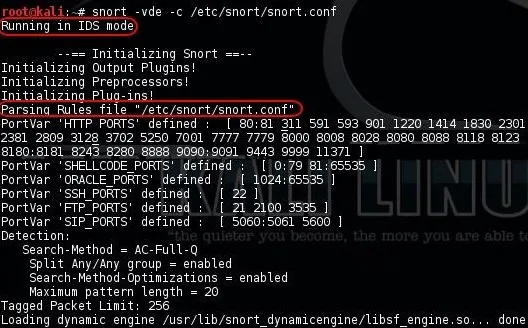
To run Snort as an NIDS, we need to tell Snort to include the configuration file and rules. In most installations, the configuration file will be at /etc/snort/snort.conf, and that file will point to the Snort rules. We need to the -c switch and then the location of the configuration file.
kali > snort -vde -c /etc/snort/snort.conf
Open the Config File
Like nearly every Linux application, Snort is configured using a configuration file that is a simple text file. Change the text in this file, save it, restart the application, and you have a new configuration.
Let's open the Snort configuration file with any text editor; I will be using Leafpad. Again, the configuration file is located at /etc/snort/snort.conf.
kali > leafpad /etc/snort/snort.conf
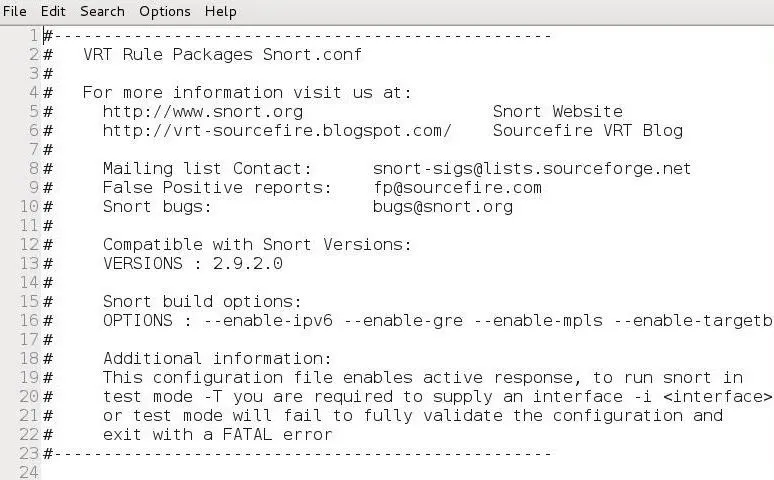
When the snort.conf opens in your text editor, it should look like the screenshot above. Note that many of the lines are simply comments beginning with the # character. If we scroll down to lines 25-37, we can see in the comments that the configuration file has nine sections.
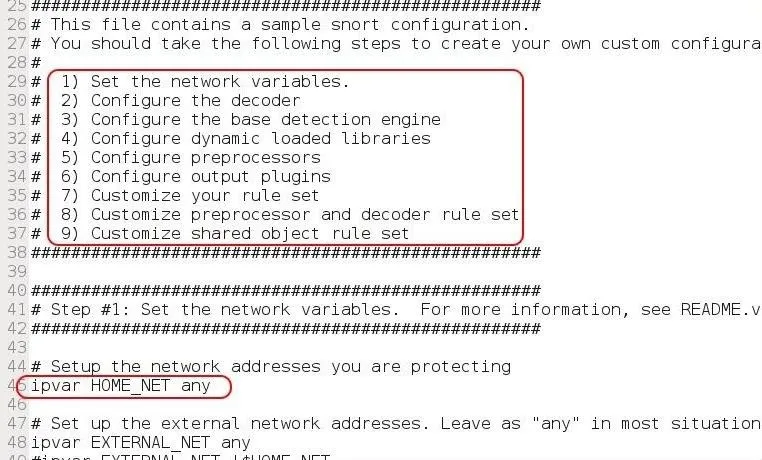
- Set the network variables
- Configure the decoder
- Configure the base detection engine
- Configure dynamic loaded libraries
- Configure preprocessors
- Configure output plugins
- Customize your rule set
- Customize preprocessor and decoder rule set
- Customize shared object rule set
In this basic configuration, we will only address steps 1, 6, and 7 in that list (bolded above). With just these three, we can get Snort running effectively in most circumstances. As we get to more advanced configurations, we will address the others.
Set the Variables
On line 45 above, we can see "ipvar HOME_NET any." This sets the IP addresses of your network to be protected. The HOME_NET is the variable that you assign IP addresses to, and it can be a single IP, a list of IPs separated by commas, a subnet in CIDR notation, or simply left as any.
The best practive here is to set the HOME_NET to the subnet you are protecting in CIDR notation, such as:
ipvar HOME_NET 192.168.181.0/24
Check the Output
If we scroll down to lines 464-485, we can see the output plugins section. Here is where we tell Snort where and how to send us logs and alerts. By default, line 471 is commented out and 481 is active.
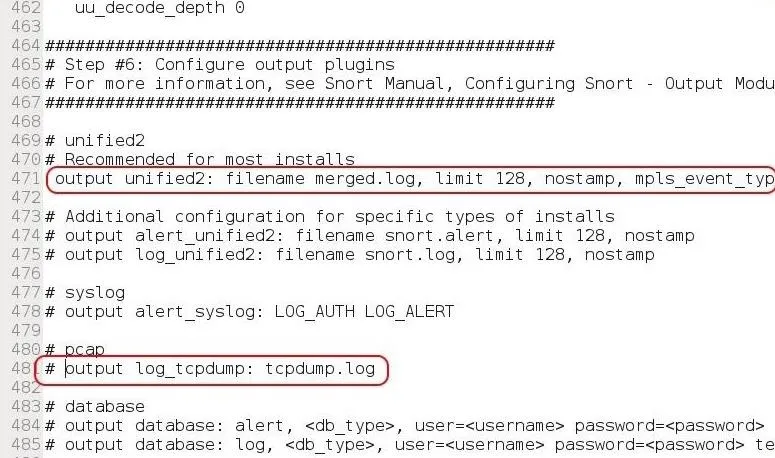
In this default configuration, Snort sends logs in tcpdump format to the /var/log/snort directory. Line 471 enables what Snort calls unified logging. This type of logging logs both the complete packet and the alerts. For now, let's uncomment this type of output (unified2) and comment out line 481. Eventually, we will configure the output to go to a database of our choice (MS SQL, MySQL, Oracle, etc.).
Disable Rules
Many times, to get Snort to run properly, we need to adjust the rules that it relies upon. Sometimes a rule or rule set will throw errors, so we need to comment out a rule or rule set temporarily. If we scroll down to line 504, this begins the "Customize your rule set" step of the configuration file.
Notice line 511 for local rules. These are rules that we can add to Snort's rule set in our customized configuration.
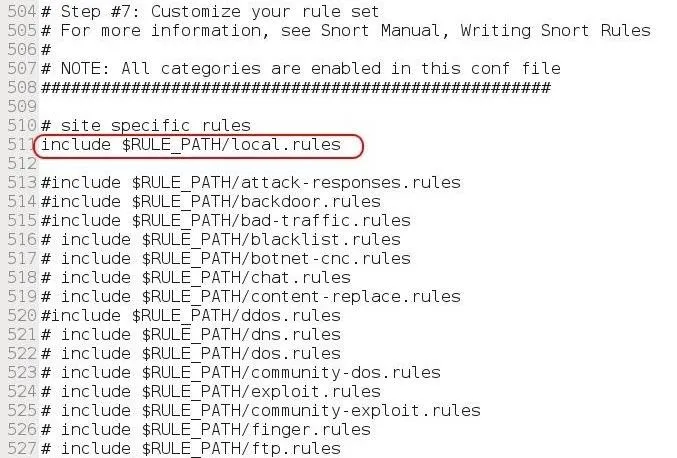
To keep Snort from using a rule set, simply comment out the "include" part. Notice that there are many legacy rule sets that are commented out, but can become active simply by removing the # before them.
When we are done making our changes to the configuration file, we simply save the text file.
Test the Configurtaion
Before we put Snort into production, let's test our new configuration. We can use the -T switch followed by the configuration file to test our Snort configuration.
kali > snort -T -c /etc/snort/snort.conf
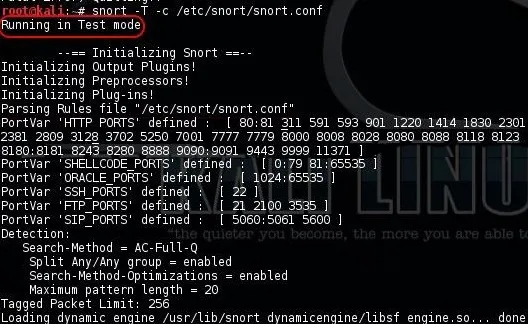
Note that Snort has started in Test mode.
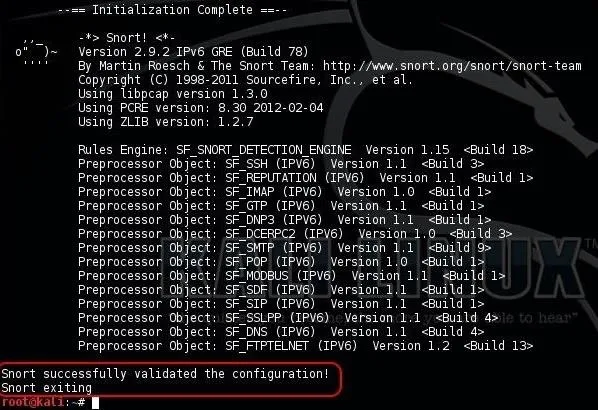
As we can see, Snort tested our configuration and validated it. We can now go into production!
Now you have a Snort application that is ready for intrusion detection. We still need to configure Snort to automatically update its rule set each day, send its output to a database of our choice, write our own rules, and then analyze the output through a GUI. So keep coming back, my tenderfoot hackers.


Comments
Be the first, drop a comment!