


Managing hard drives in Linux is crucial to understanding your system and its operation as well as understanding the system you are exploiting or conducting a forensic analysis on. Linux has numerous commands that can provide us with information, control, and management of hard drives, and in this tutorial, we will examine a number of the most important ones.
Hard Drive Designations in Linux
Unlike the C: drive in Windows, Linux does not have a physical drive at its root. Instead, it has a / (slash) at the top (root) of its file system. It then mounts physical drives to this file system either at /mnt or /media.
Linux uses a logical label for the drives that are then mounted on the file system. These logical labels will vary depending upon when and where they are mounted. This means that the same hard drive might have different labels at different times.
Generally, the system for labeling drives starts with:
- hda
- hdb
- hdc
- etc.
The letters "hd" stand for hard drive, and the following letter is the order with which they are mounted. With newer hard drives (SATA), Linux designates them with:
- sda
- sdb
- sdc
- etc.
The "s" is a legacy from SCSI drives. Partitions within those drives are then designated with numbers after the letters such as sda1, sda2, sda3, etc.
Df
Among the most basic commands in Linux is df. When we type it, it will provide us with basic information on any hard disks or mounted drives such as CD, DVD, or flash drives. It is usually used to quickly glance at the available space on your drives; that's why "df" stands for disk free.
kali > df
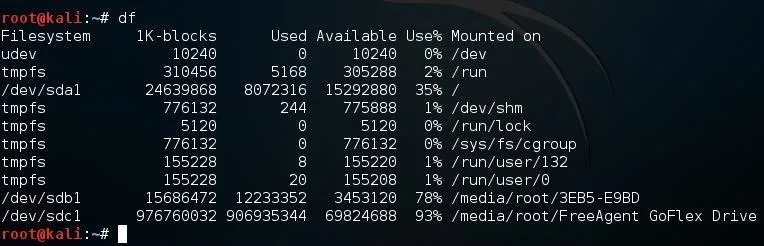
Note that my virtual disk on this system was designated sda1.
- sd = SATA drive
- a = first hard drive
- 1 = first partition of that drive
And my 16 GB flash drive was sdb1 and my external hard drive sdc1.
Fdisk
The fdsisk command is often used to determine the partitions on the disk. If we use the -l switch, it will list all the partitions of all of the drives.
kali > fdisk -l
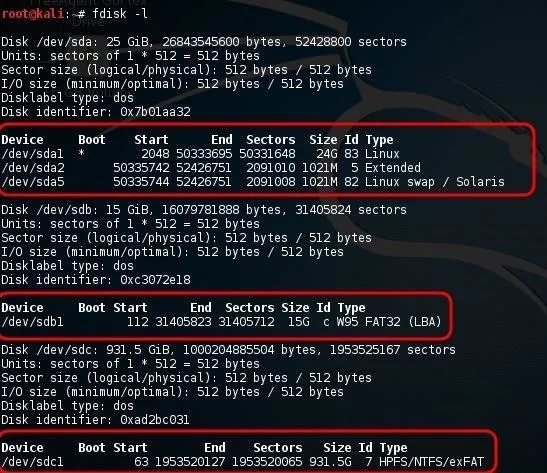
As you can see in the screenshot above, it lists sda1, sda2, and sda3 in the first circled stanza. This is the virtual disk from my virtual machine that this Kali Linux is installed on. Note that it is 25 GB with three partitions including the swap partition (sda3).
If we scan a bit down the screenshot to the second stanza, we see a second device output designated sdb1. This is my 16 GB flash drive. Note that fdisk indicates that it is a FAT32 filesystem type.
Lastly, we see sdc1 in the third circled stanza. This is my external 1 TB hard drive. Note that fdisk indicates that it is a NTFS file system.
Lsblk
In Linux, devices are categorized as either block or character devices. Character devices are such devices as keyboards and printers. Block devices are hard drives, DVD devices, and flash drives, among others.
We have a command, lsblk (list block), that will list some basic information about each of the block devices. It will also display the devices in a kind of tree, showing each device with branches of its partitions. An example would be sda with the branches of sda1, sda2, and sda3.
kali > lsblk

Note in the output above, it also includes fd0 (floppy drive) and sr0 (DVD drive). Additional information included here is the mount point of the drive. Note that both of my external USB devices are mounted at /media/root.
Parted
The parted command is capable of displaying your partitions and editing them. We can start by simply typing:
kali > parted
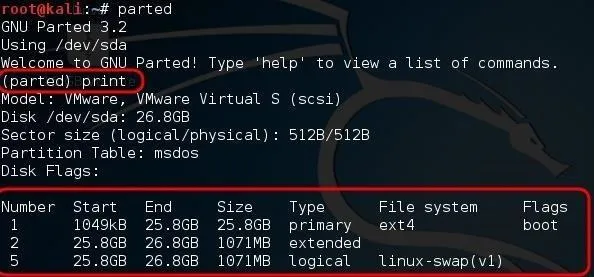
When we do so, it returns an interactive prompt beginning with (parted). From that prompt, we can provide further options and information to parted. For instance, if we wanted to see all the partitions like above, we can type:
(parted) print
If we wanted to see the specific information on a single partion, we can use select followed by the partition. For instance:
parted select /dev/sdb
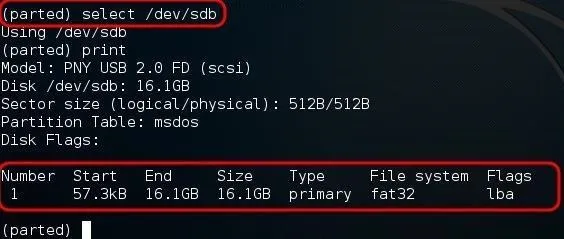
As you can see, parted then provided us with just the information on that single partition, my FAT32 16 GB flash drive.
To remove a partition, simply type rmpart followed by the number of the partition such as:
(parted) rmpart 5
We can use parted to create and edit partitions, but I don't recommend it for beginners—without knowledge and experience, one is likely to cause more damage than good.
Finally, to leave the interactive mode of parted, type:
(parted) quit
Hdparm
hdparm is a powerful utility that enables us to change and edit the parameters of the hard drive. This can be useful in applications such as forensics, but can be very dangerous without sufficient knowledge. I introduce it to you here as we will be using it in my forensics series in the near future.
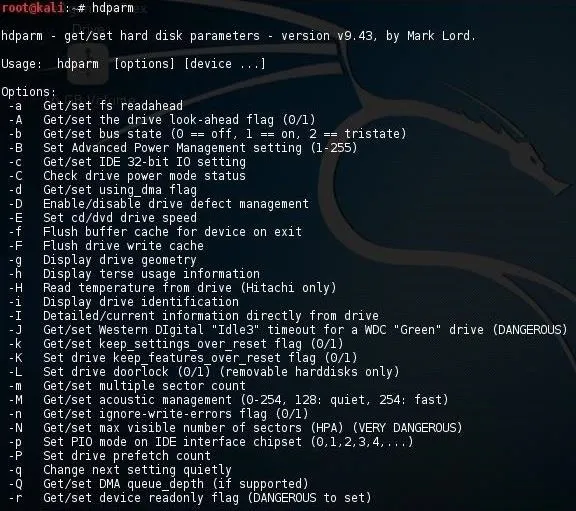
As you can see from the voluminous help page above, hdparm is capable of altering and editing just about any parameter of your hard drive.
To become a professional hacker, you must be competent in Linux. I hope this series will continue to develop your Linux skills, thereby assisting you in your goal of becoming a professional hacker.
Keep coming back, my neophyte hackers!
- Follow Null Byte on Twitter, Flipboard, and YouTube
- Follow WonderHowTo on Facebook, Twitter, Pinterest, and Flipboard
Cover image by kozirsky/Shutterstock; Screenshots by OTW/Null Byte


Comments
Be the first, drop a comment!