In my previous article, I discussed installing and configuring OpenVAS on Kali Linux. Now it's time to start using OpenVAS with the Greenbone Security Assistant to audit networks for security issues. This can be extremely helpful when you are looking for vulnerabilities or misconfigurations in a large number of hosts.
When dealing with any form of mass scanning utility, there are some drawbacks. This type of scanning is noisy. In this context, "noisy" means active scans are being conducted which may be logged or detected. If you want to keep your presence a secret, this is not the tool to use. This type of scanning is also prone to false positives. You will need to confirm that what the tool is reporting is correct before taking it as an absolute fact.
With that said, let's have a look at the Greenbone Security Assistant, a web-based GUI for OpenVAS. If you installed and configured OpenVAS and GSA to operate on a headless machine, you can access it at https://YourMachineAddress:9392 . If you configured it to operate locally, you can access it at https://127.0.0.1:9392.
You may also need to bring the associated services up with the command openvas-start. You will need to log in with "admin" as the username. The password for the admin account is generated during the setup process for OpenVAS. If you haven't run openvas-setup, see my previous article linked below.
After logging in, you will be presented with the Greenbone dashboard.
Use the Automated Task Wizard to Scan for Vulnerabilities
GSA's Task Wizard is the easiest way to get up and running with scanning. It requires very little setup and has sane defaults to get started quickly. When we first access GSA, we are presented with the dashboard which gives us some statistics related to our usage.
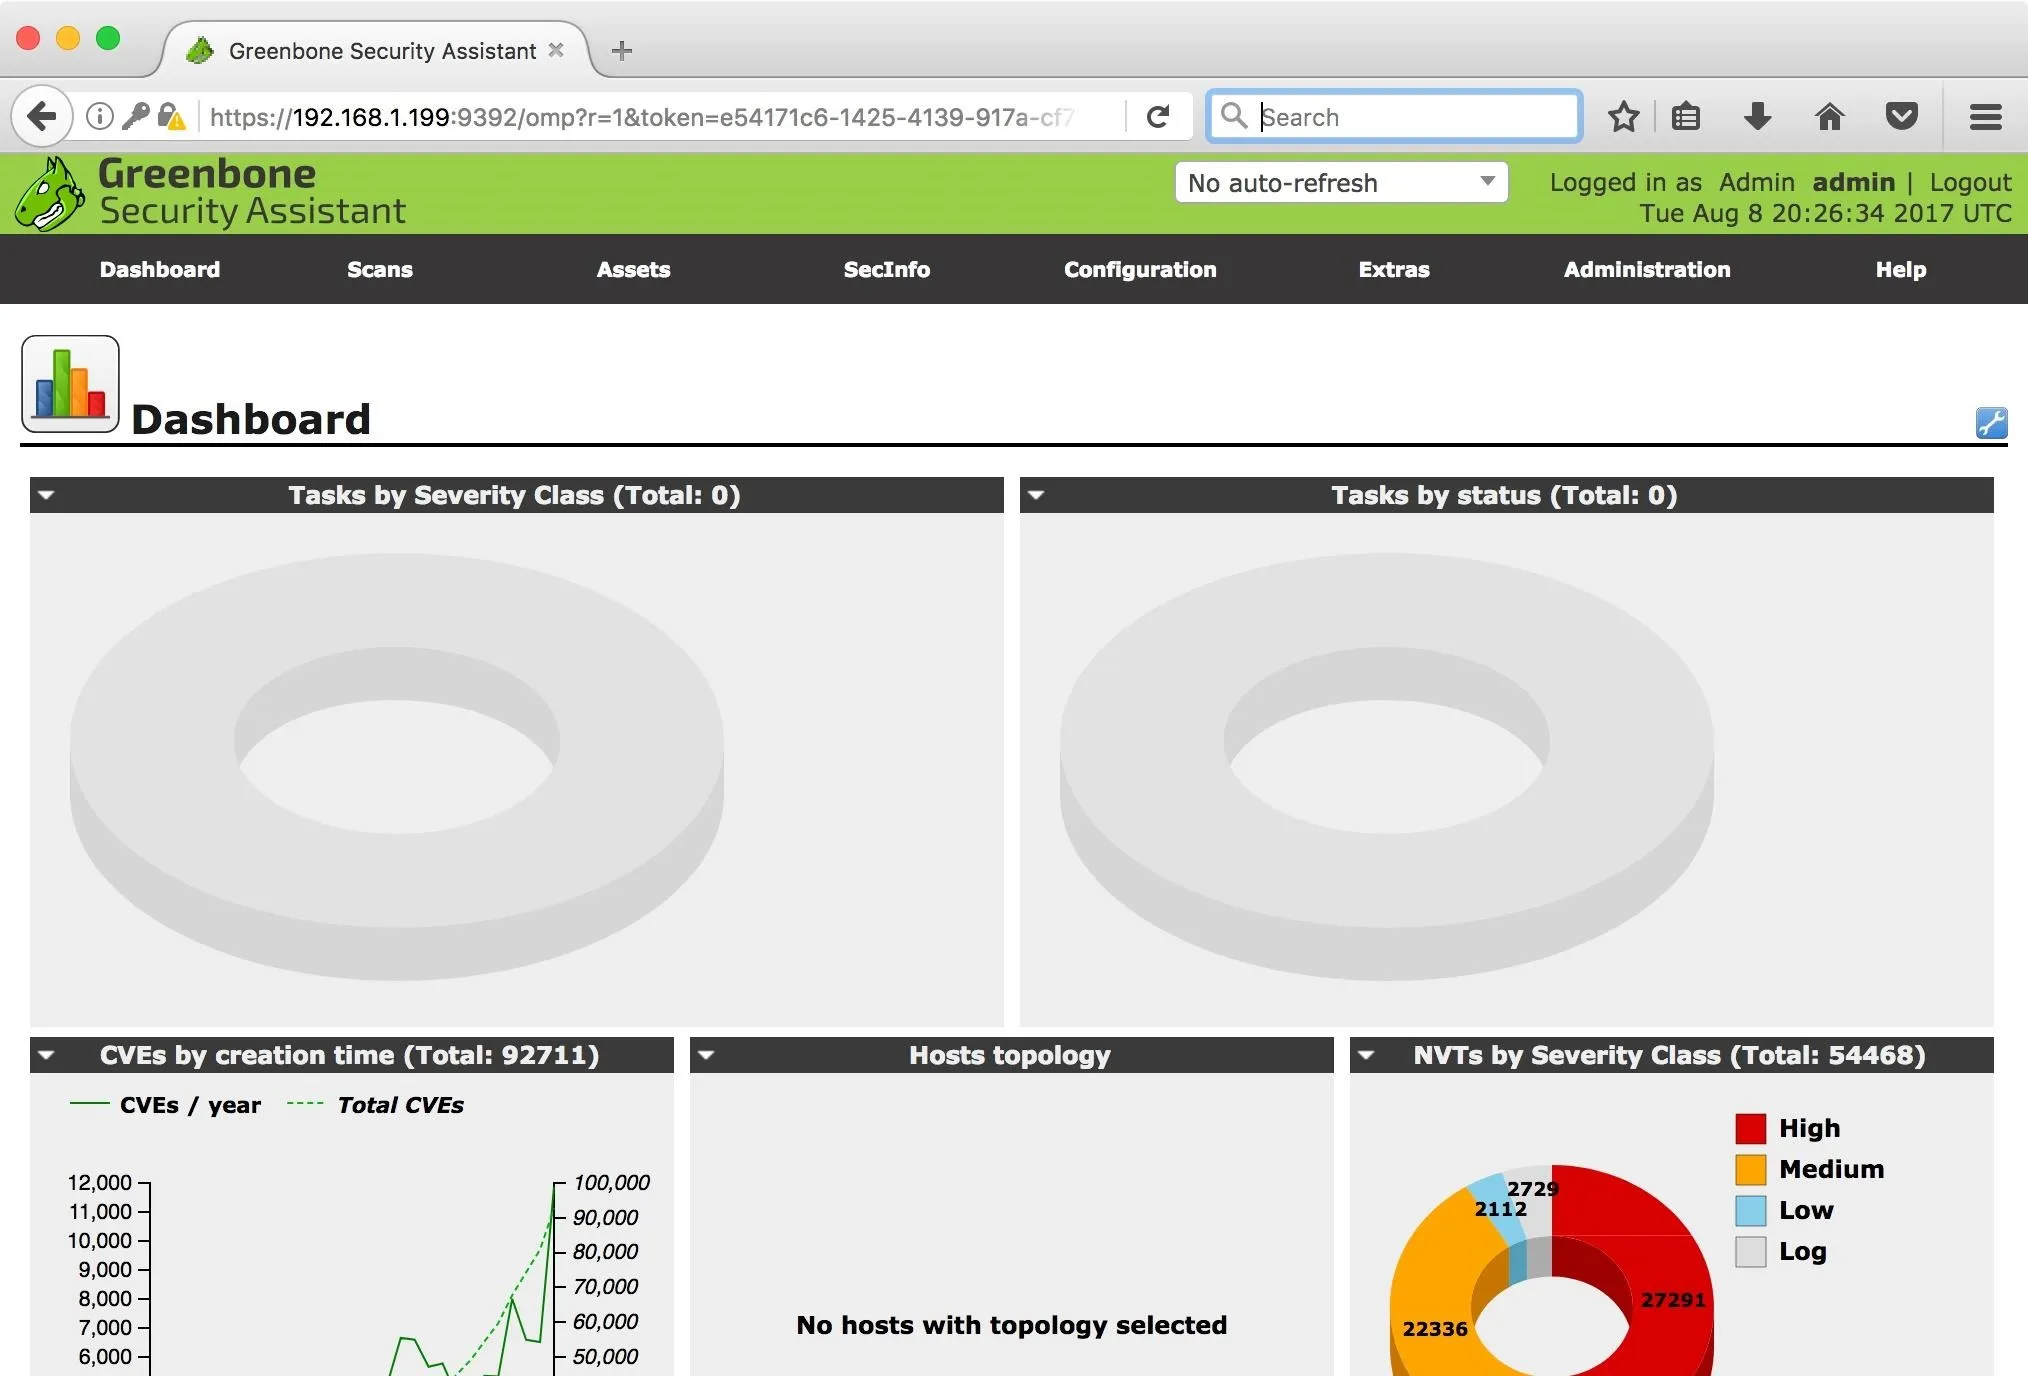
On the first run, there's not a lot going on. Let's start by running a scan against my Metasploitable 2 virtual machine (VM). Before we start the scan, I'd like to talk a little bit about Metasploitable 2.
Metasploitable 2 is an intentionally vulnerable Linux distribution. It allows testing of vulnerability assessment tools in a safe and, most importantly, legal environment. The version of Metasploitable that I am using is not the most recent version. Running a modern, up-to-date vulnerability scanner like GSA against it should produce quite a few interesting results.
If you want the most recent version of Metasploitable, version 3 can be found on GitHub. You can download version 2 (which I'm using) from SourceForge. For a Raspberry Pi-based version of a vulnerable machine, check out our guide linked below.
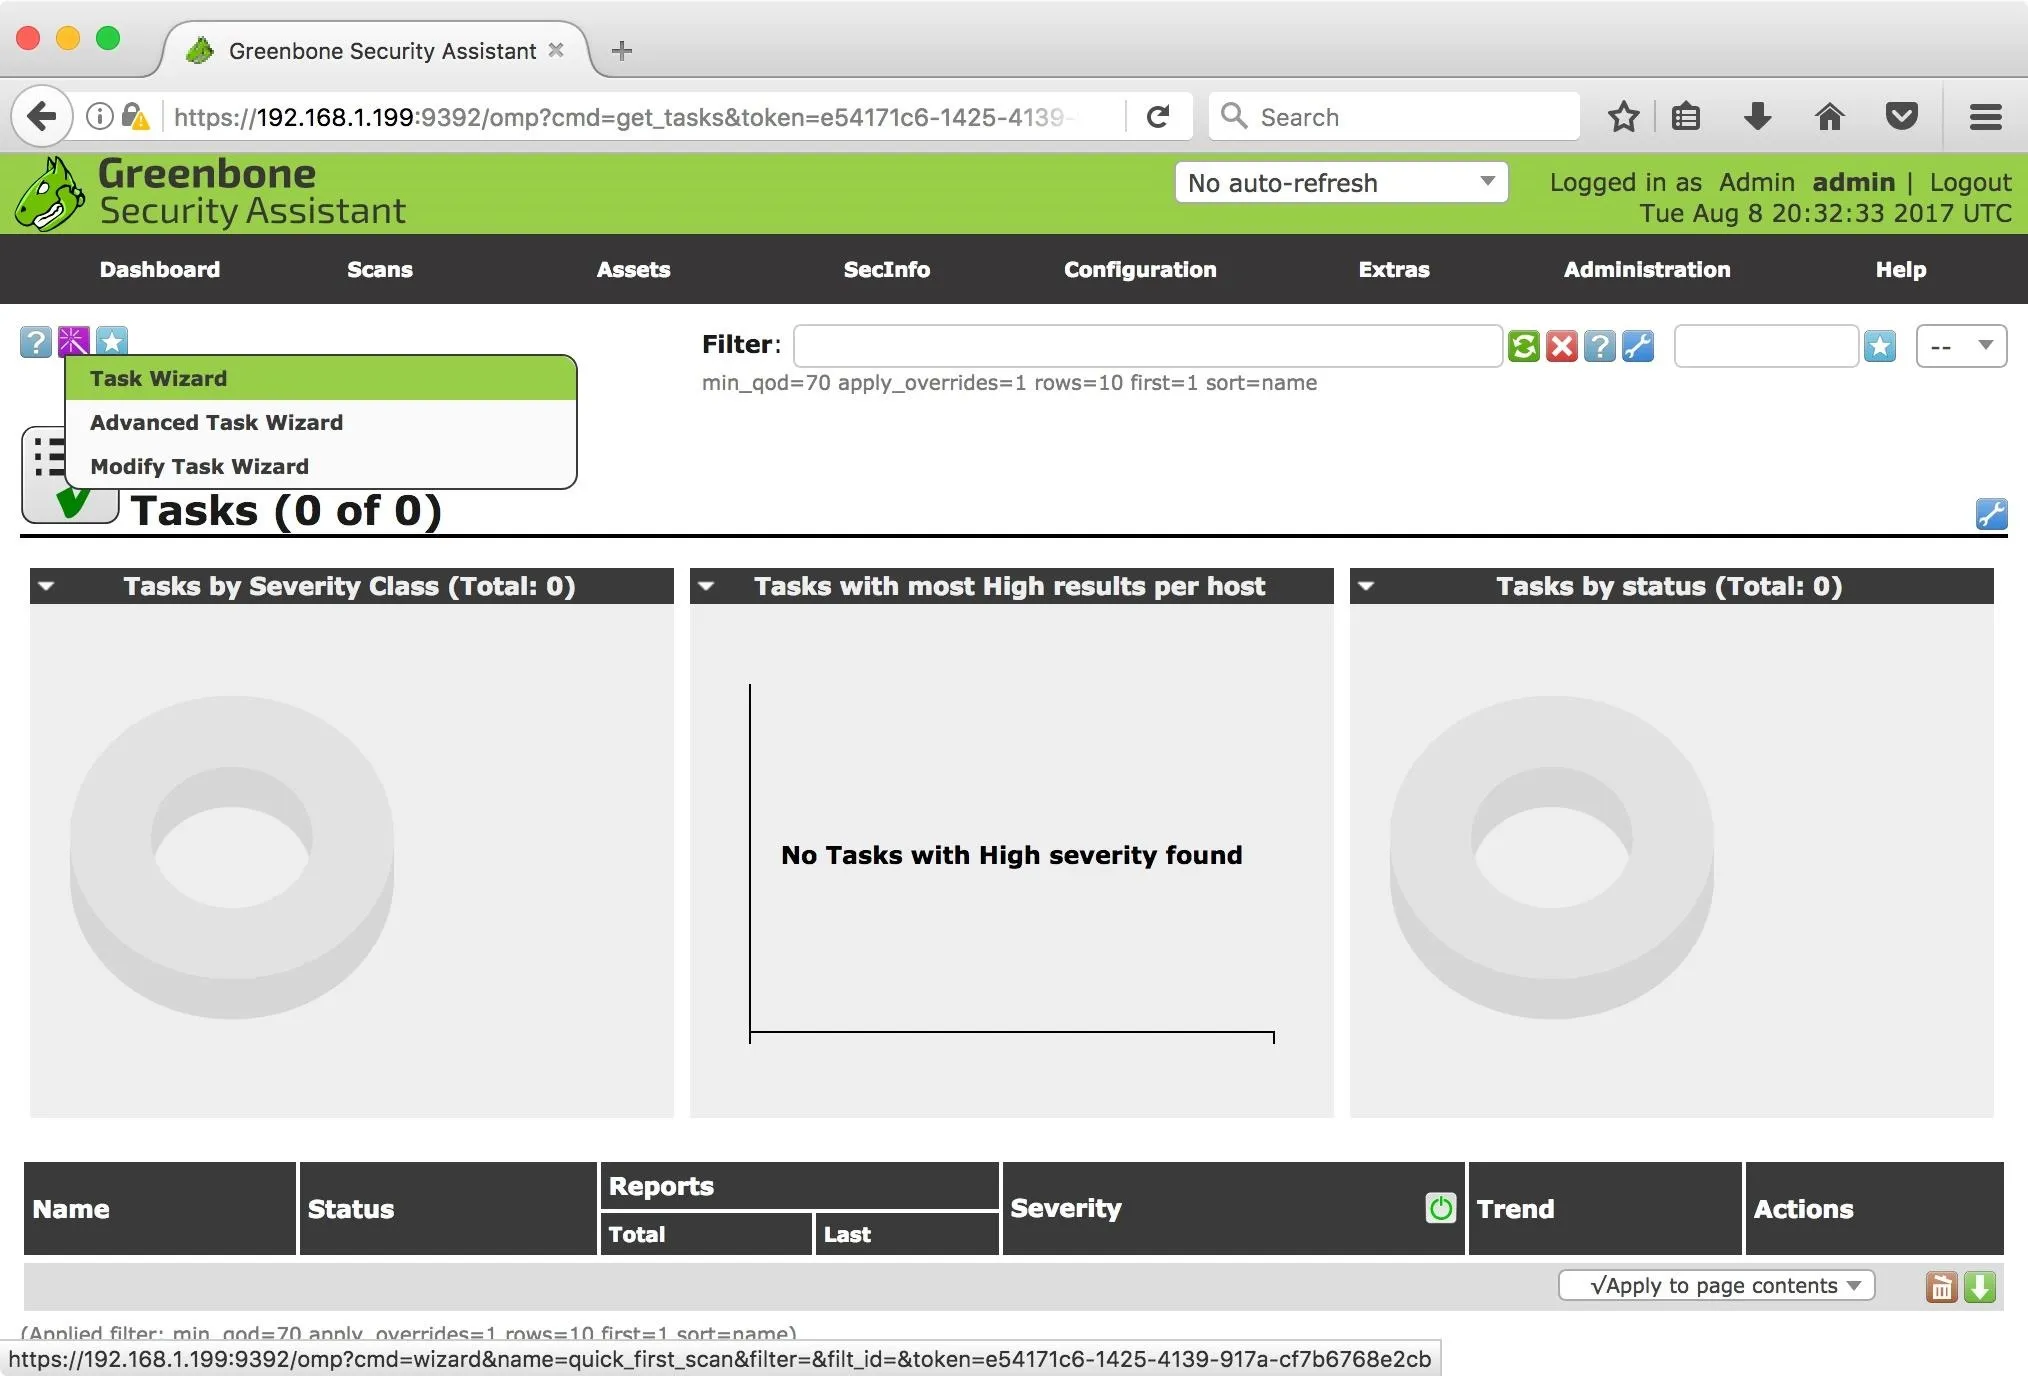
Now that that's out of the way, select the "Scans" tab on the dashboard, a drop-down menu will appear — select "Tasks." For this guide, we'll use the wizard to set up our scan, so click on the wand icon in the top left to select the "Task Wizard."
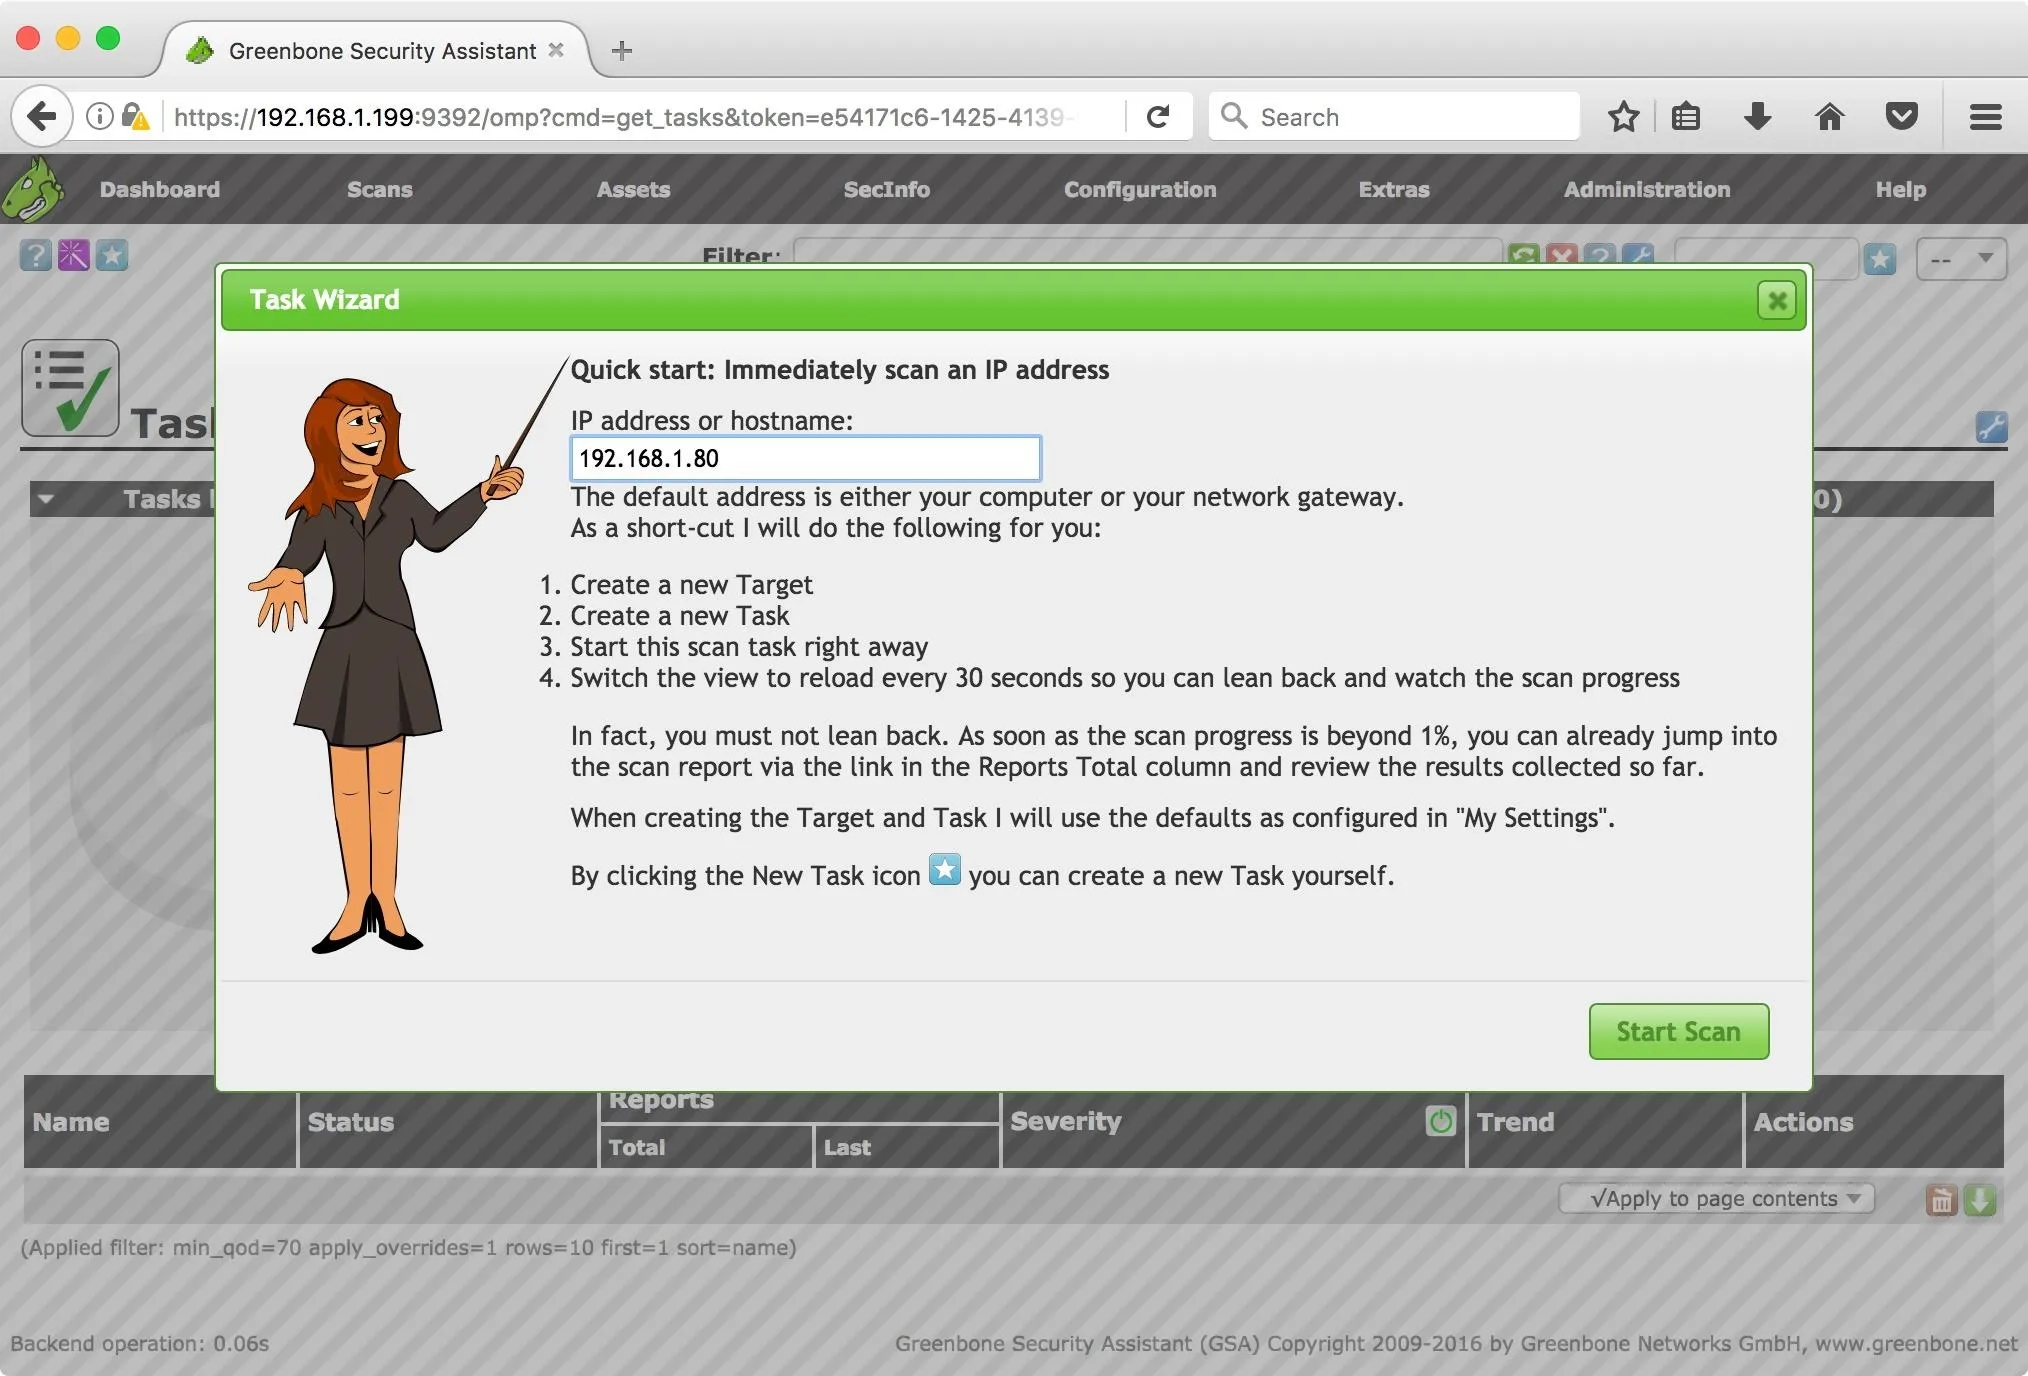
I will be scanning a single host on my network. However, GSA accepts CIDR notation, making it incredibly easy to scan an entire subnet. Once you are satisfied with your target, click "Start Scan."
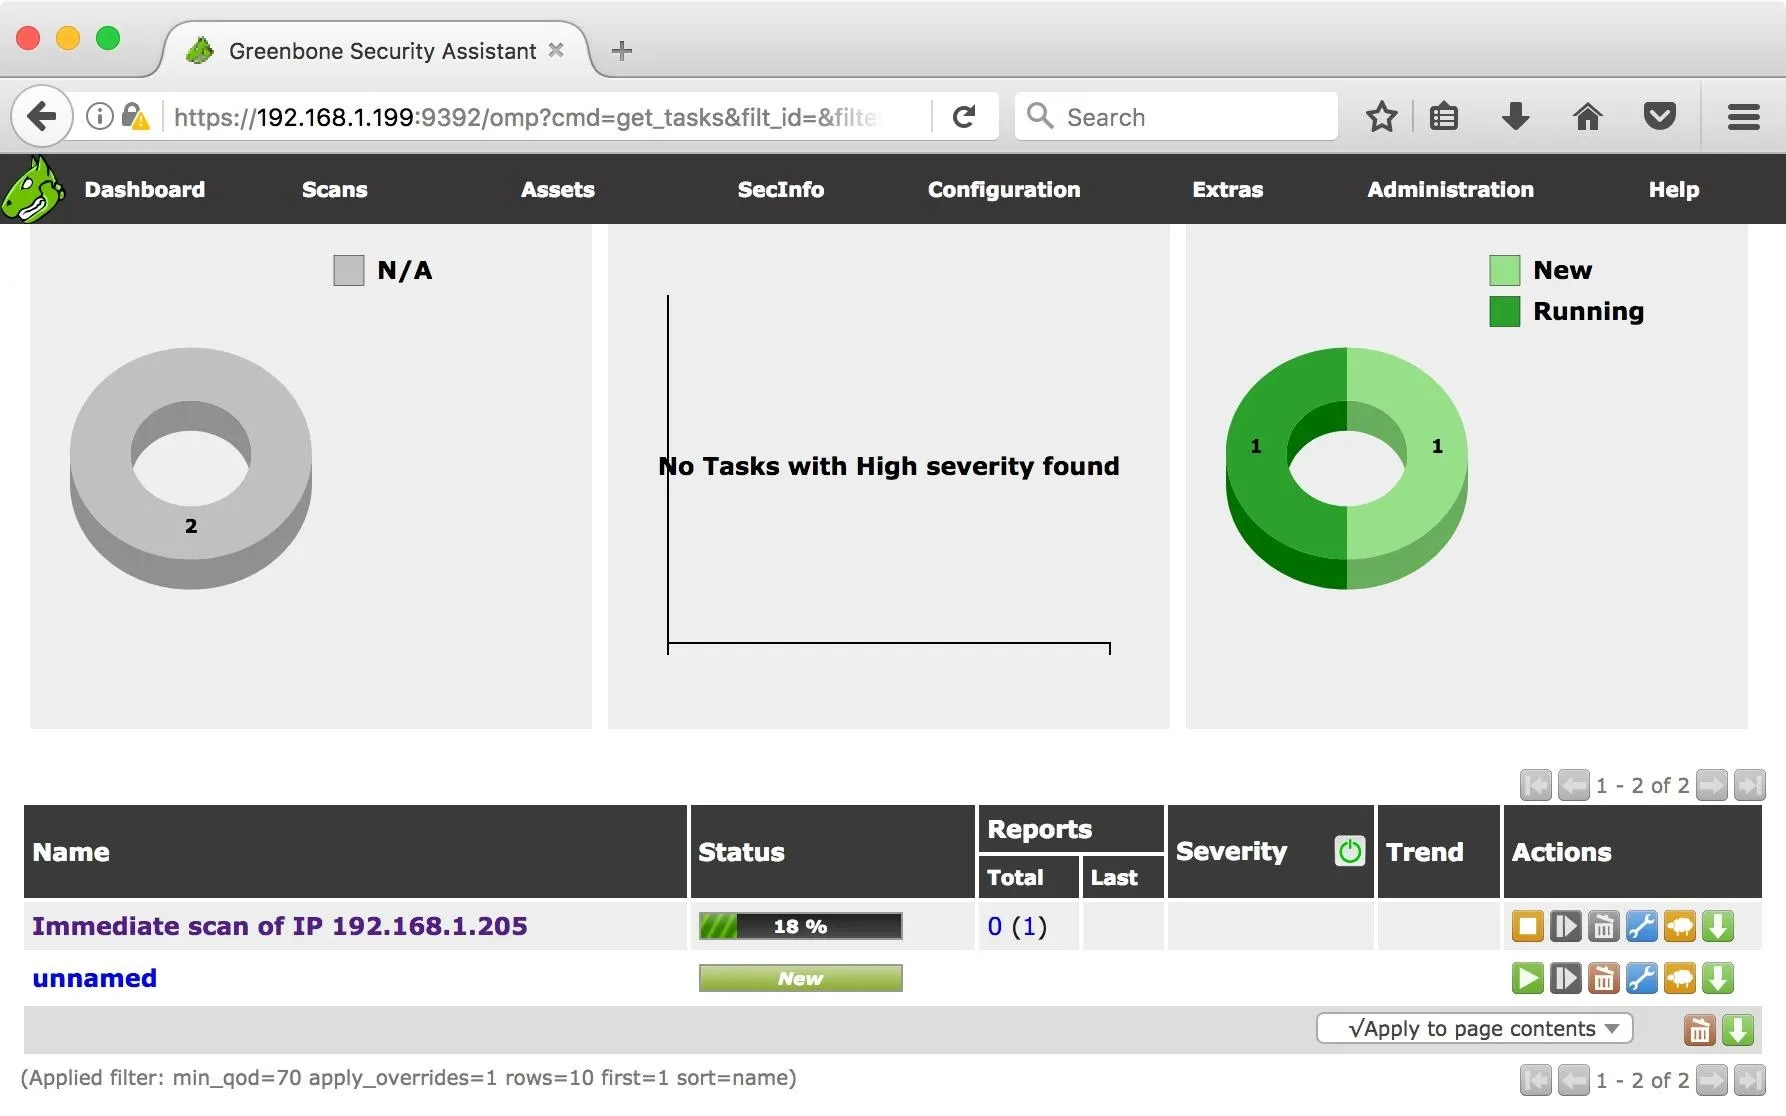
We can see the status of the scan under the Status column. At this point, I've had the scan going for around 20 minutes.
When the scan is complete, my vulnerable machine receives a 10 out of 10 for severity.
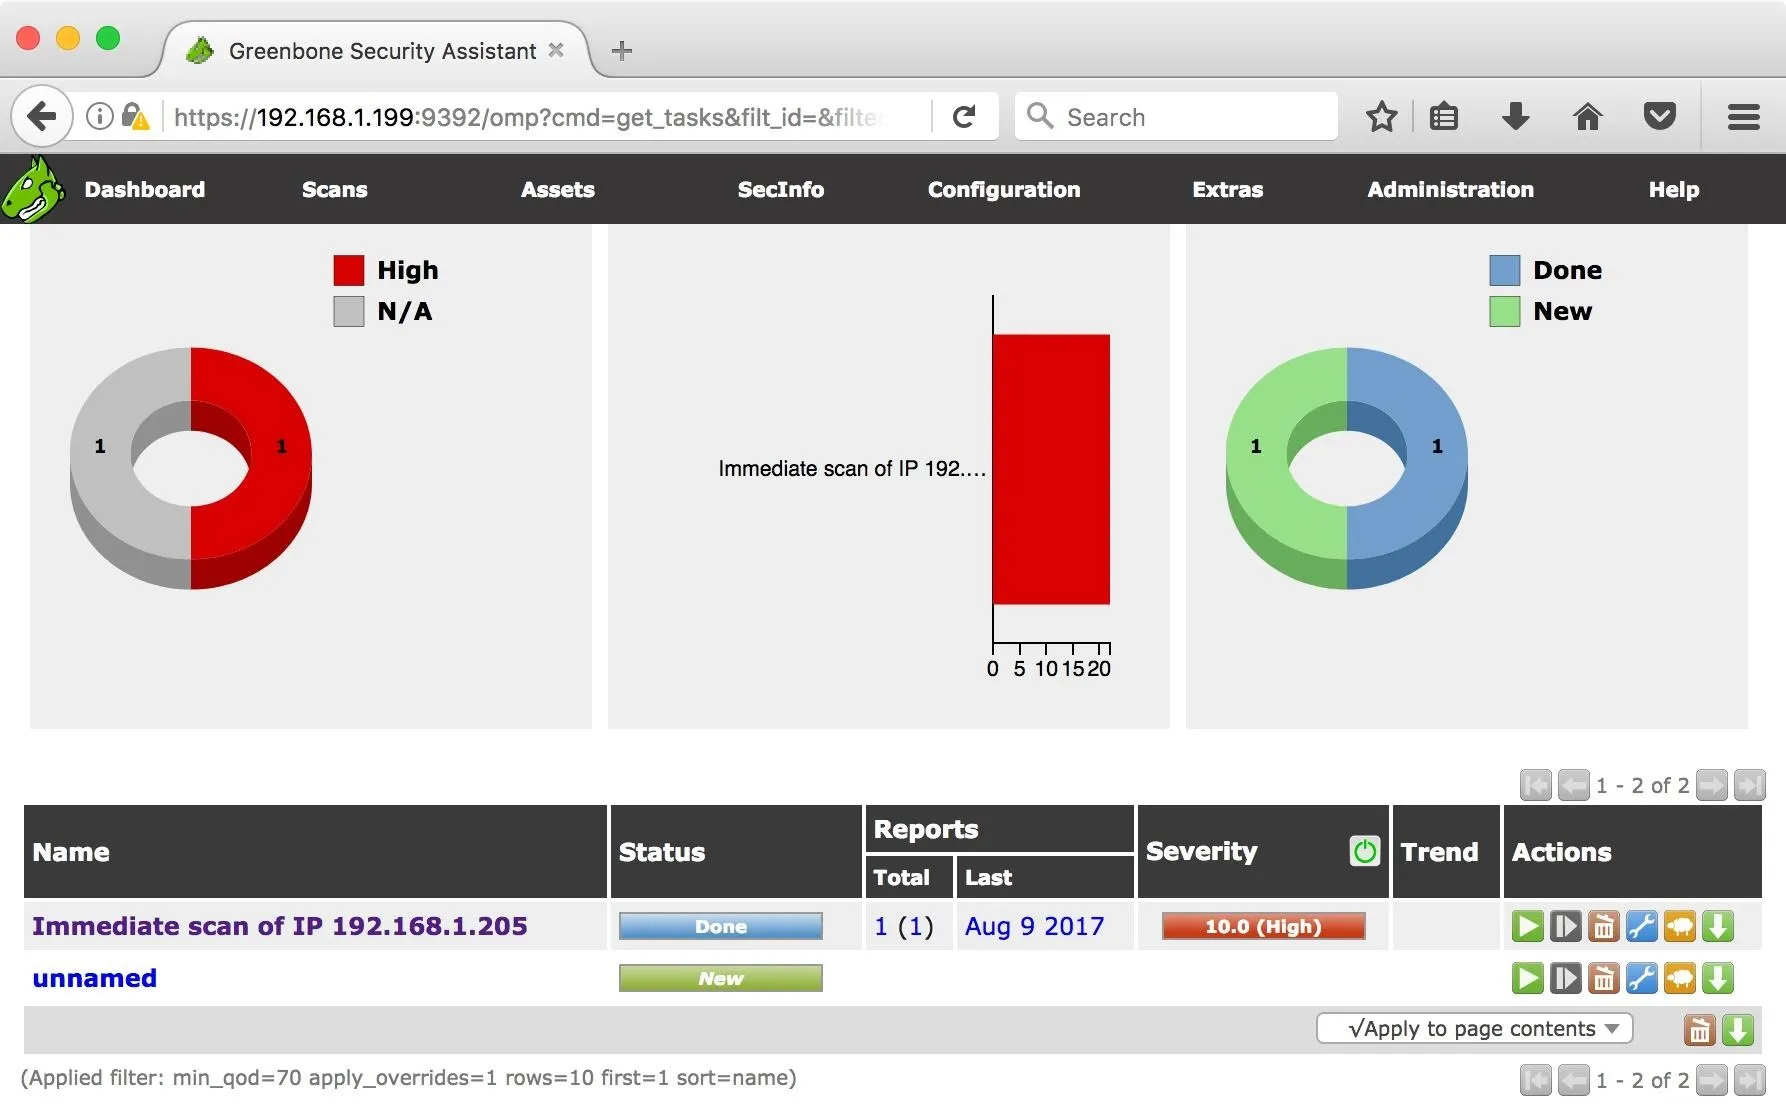
Let's have a look at some of the issues Greenbone Security Assistant has found. In the Reports column, under the Last sub-column, click on the date. This will bring up the report's results page.
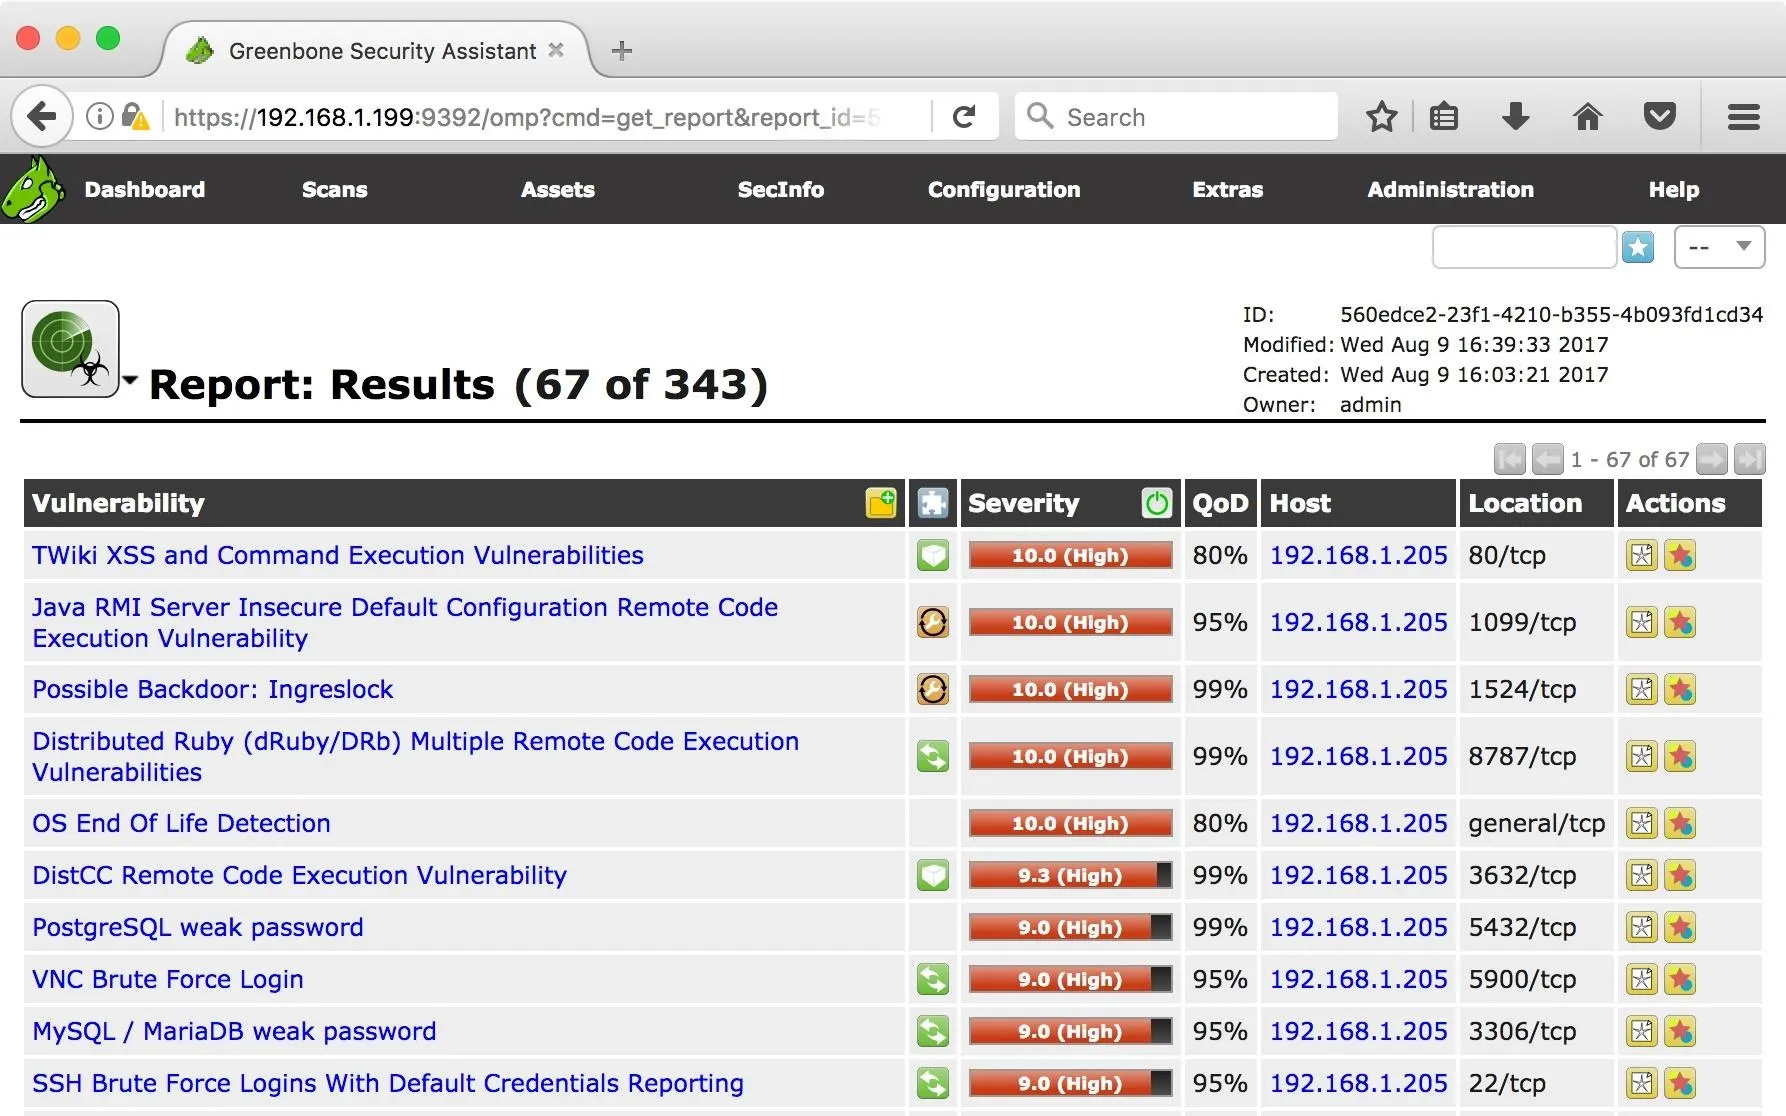
We got a lot of hits! Of course, not all of these will lead to ingress, but it gives an excellent starting point to assess high-level problems. Clicking on a vulnerability will give a summary of the issue detected.
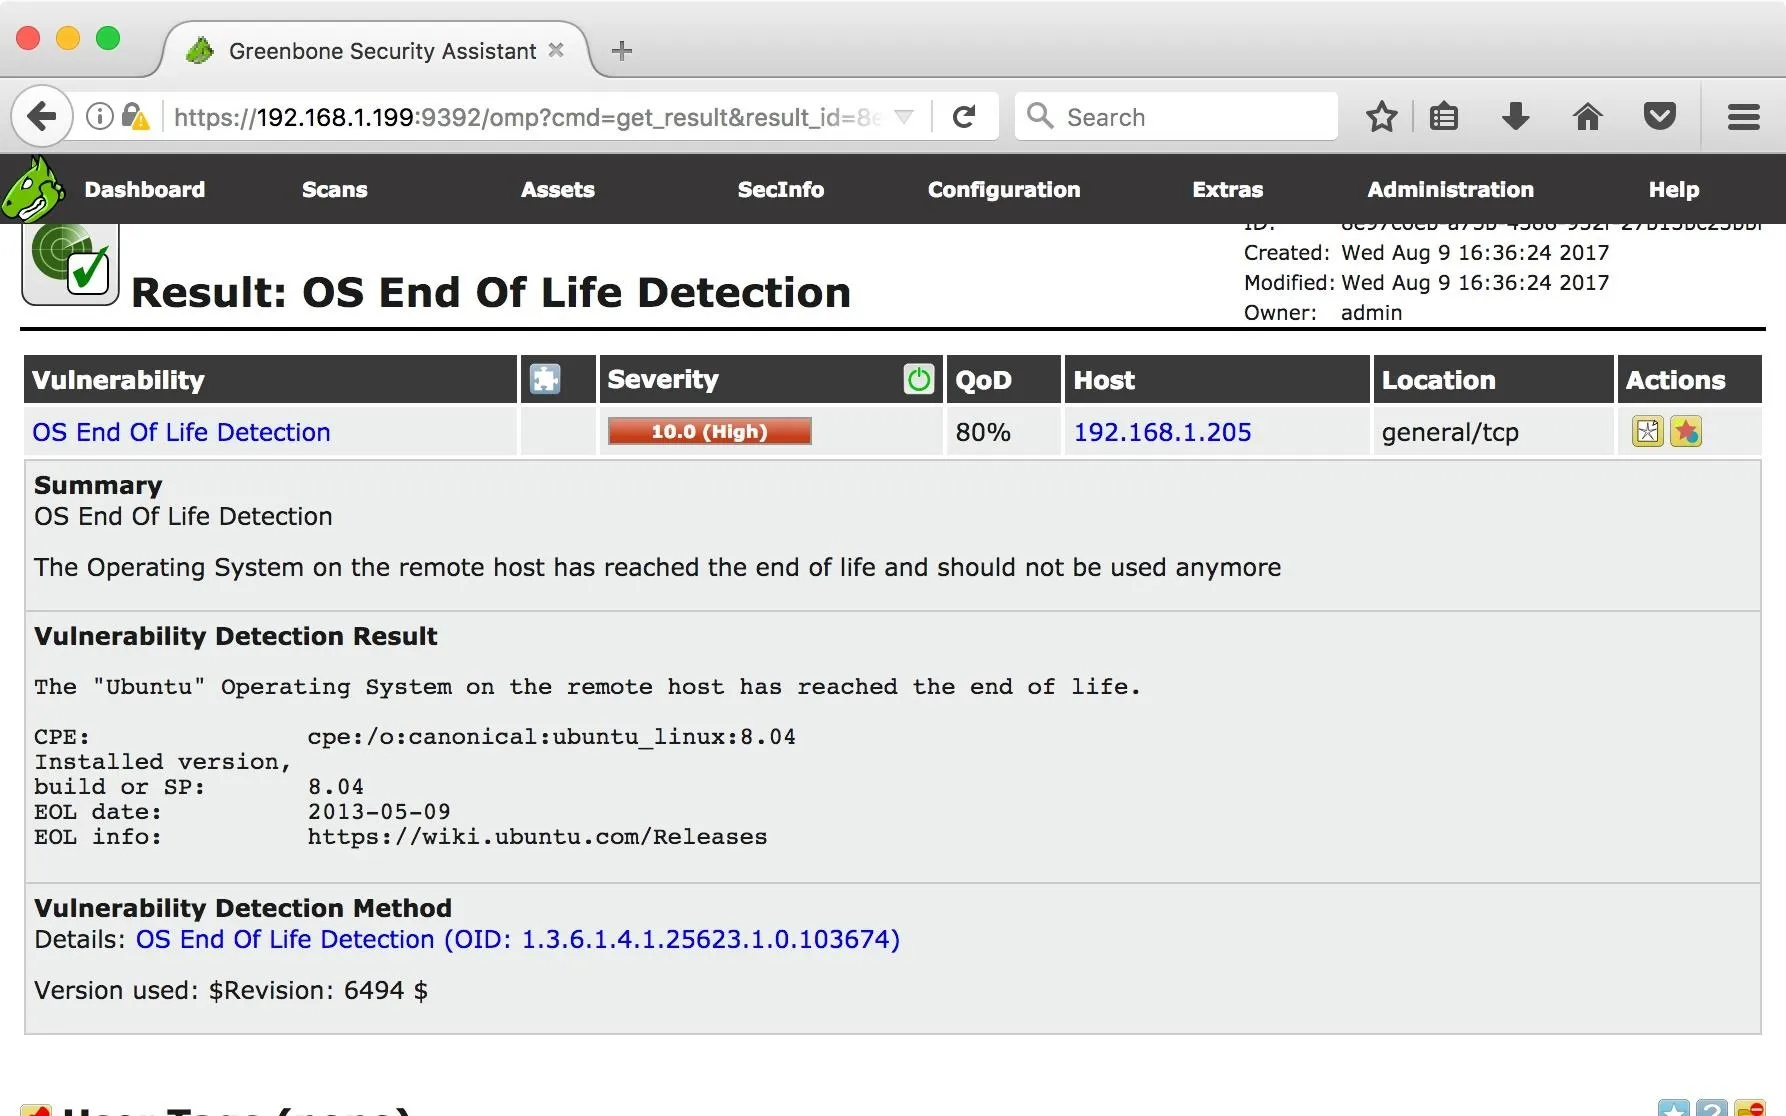
The Task Wizard isn't the only way to use the Greenbone Security Assistant. You can create custom scans, custom scan rules, and schedule scans to run while the machine is not in use. I like the wizard because it gives me a quick overview of potential vulnerabilities.
Scan for Vulnerabilities with Custom Tasks
Sometimes, the Task Wizard isn't what you're looking for. It's important to know how to create your own scanning task. To get started, hover over the "Scans" tab at the top of the page. Select the "Tasks Options." Hover over the star icon in the top left corner, then click the "New Task" option. You will be presented with a dialog that allows you to configure your new task.
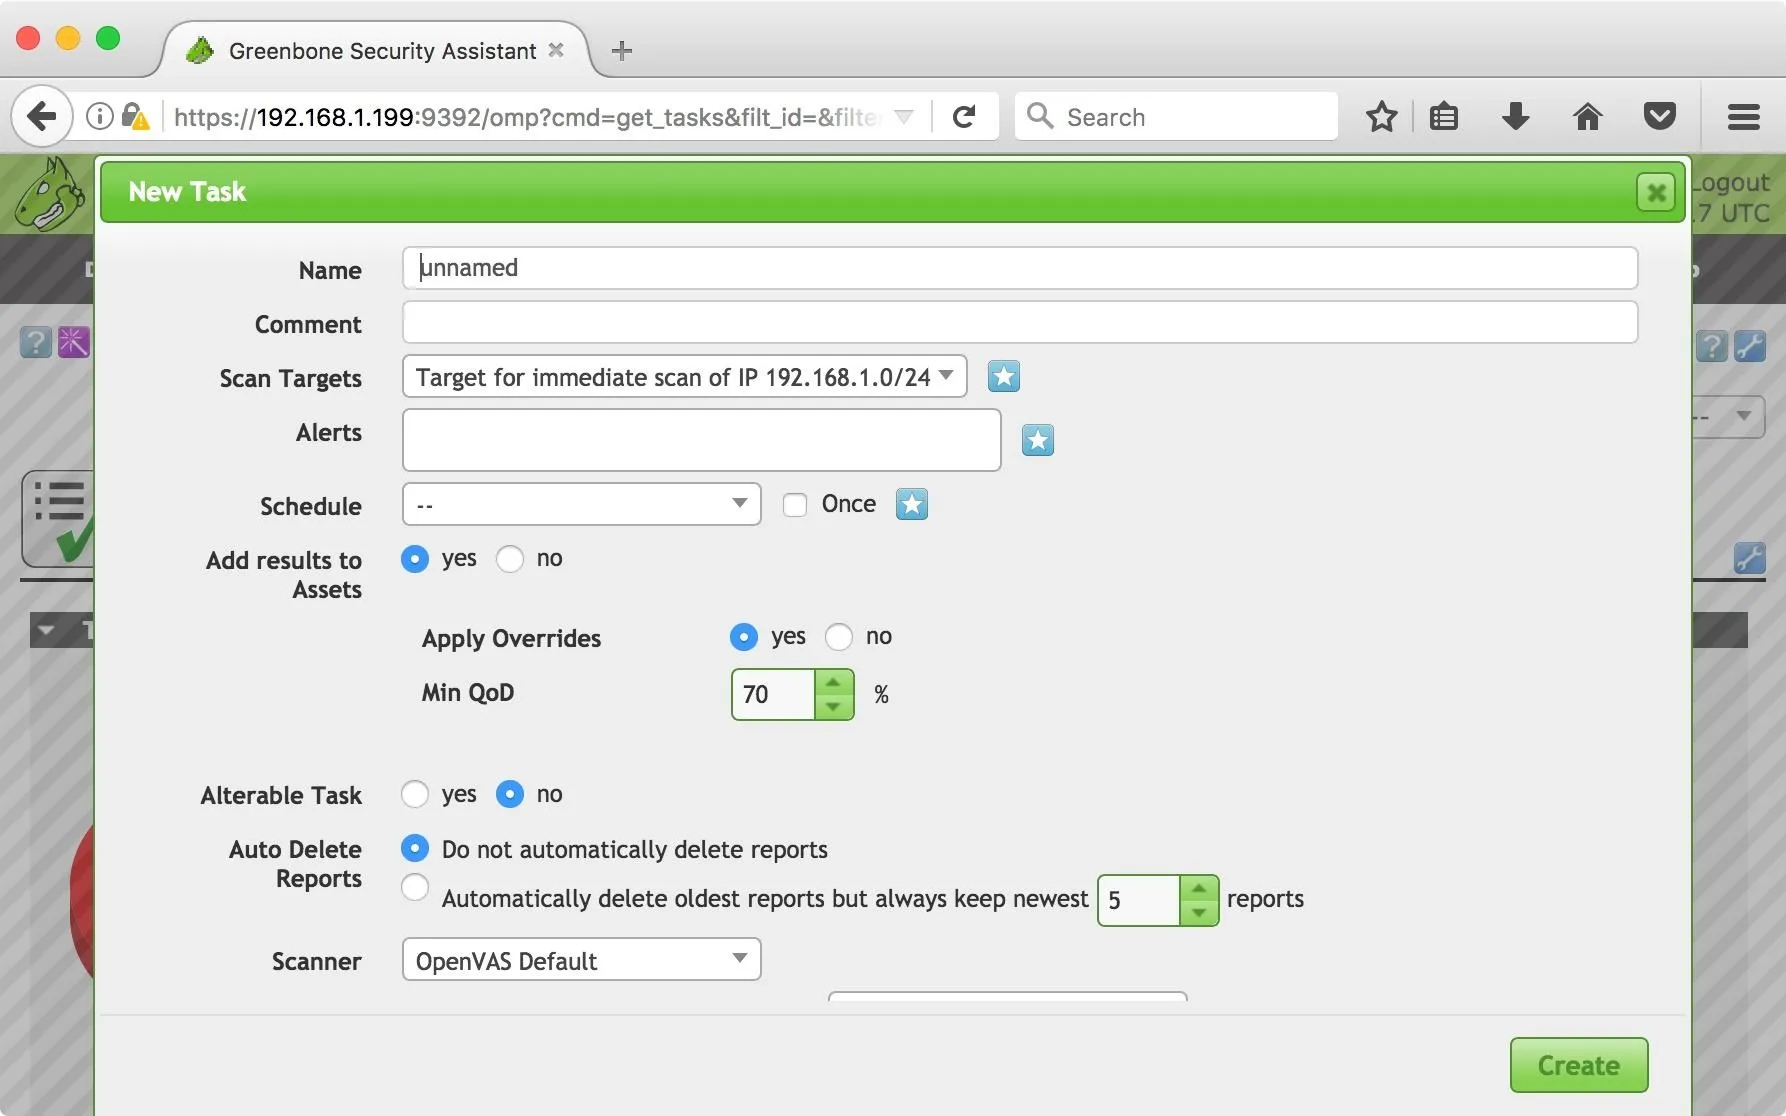
Let's talk about some of the less obvious options here. Scan Targets is a drop-down menu. At the moment, our scan target is the entire subnet. To add a target, you can click on the star icon to the right of the drop-down menu.
The Alerts option allows us to configure alerts. Click the star beside it for options like task status changes, severity levels, and matching results. Greenbone Security Assistant will email you if any of the criteria are met. "Overrides" allow you to override the reporting behavior of GSA, which can be helpful to sort results and reduce false positives.
The Min QoD is the quality of detection, which indicates how sure the scanner is that this vulnerability exists. As it is set at 70 percent, there will be some false positives. At 100 percent, the reports will only contain vulnerabilities that were exploited. This can help filter results.
Using OpenVAS & GSA in the Real World
OpenVAS with Greenbone Security Assistant is a great, open-source way to locate potential issues on a network. In the hacking world, using a loud active scanner like OpenVAS would almost certainly expose your presence to network admins. In a security audit, however, it's an excellent starting point to gain a "helicopter view" of potential targets. The reports are not 100 percent accurate, and they may miss things, but vulnerability scanners like OpenVAS are essential to providing high-level insight while assessing network issues.
- Follow Null Byte on Twitter and Google+
- Follow WonderHowTo on Facebook, Twitter, Pinterest, and Google+
Cover photo by hxdbzxy/123RF; Screenshots by Barrow/Null Byte


Comments
Be the first, drop a comment!